Thermador PRD304GHU User Manual
Thermador PRD304GHU Manual
 |
View all Thermador PRD304GHU manuals
Add to My Manuals
Save this manual to your list of manuals |
Thermador PRD304GHU manual content summary:
- Thermador PRD304GHU | User Manual - Page 1
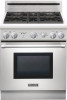
MANUAL For Thermador Professional® PRO-HARMONY™ Dual Fuel Ranges Models/ Modèles / Modelos: PRD30 PRD36 PRD48 Guide d'utilisation et d'entretien Pour cuisinière à combustion jumelée Professional® PRO-HARMONY™ de Thermador MANUAL DE USO Y CUIDADO Para Estufas de Todo Tipo de Gas Professional® PRO - Thermador PRD304GHU | User Manual - Page 2
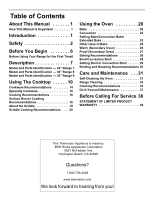
About This Manual 1 How This Manual Is Organized 1 Introduction 1 Safety 2 Before You Begin 6 Before Using Your Range for the First Time6 Description 7 Model and Parts Identification - 48" Range 7 Model and Parts Identification - 36" Range 8 Model and Parts Identification - 30" Range 9 Using - Thermador PRD304GHU | User Manual - Page 3
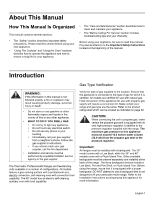
installer, service agency or the gas supplier. The Thermador Professional® Ranges are freestanding units available in a number of configurations. All models feature a gas cooking surface with a professional size, electric convection, self-cleaning oven with convection broil capability. The 48" model - Thermador PRD304GHU | User Manual - Page 4
manual. The charts on the following pages summarize the various range models and identify the features of each range Safety IMPORTANT SAFETY INSTRUCTIONS READ AND SAVE THESE INSTRUCTIONS Gas and Electrical Requirements and Grounding Instructions PLEASE READ CAREFULLY 30" Dual-Fuel Models: 240 - Thermador PRD304GHU | User Manual - Page 5
Electrical Code Part 1. It is the responsibility of the owner and the installer to determine if additional requirements and/or standards apply to specific installations. Safety Practices to Avoid Personal Injury When properly cared for, your new Thermador Professional® Range has been designed - Thermador PRD304GHU | User Manual - Page 6
of tip-over may exist if the appliance is not installed in accordance with these instructions. • If the range is pulled away from the wall for cleaning, service or any other reason, ensure that the Anti-Tip Device is properly reengaged when the range is pushed back against the wall. In the event of - Thermador PRD304GHU | User Manual - Page 7
small quantities of alcohol in foods, and open the oven door carefully. WARNING: To avoid possible burn or fire hazard, a backguard designed specifically for this range must be installed whenever the range is used. Important Safety Notice: The California Safe Drinking Water and Toxic Enforcement - Thermador PRD304GHU | User Manual - Page 8
Aluminum Griddle 1 Product Registration Card 1 1 1 Backguard 1 * * Installation Instructions 1 1 1 Use and Care Manual 1 1 1 * Backguard must be ordered and shipped separately. It is not included with the range. 48" with Griddle 3 2 2 6 3 9 1 1 * 1 1 Before You Begin Before - Thermador PRD304GHU | User Manual - Page 9
Rack Positions Please read "Care and Maintenance" on page 31 before cleaning the oven racks. Description Model and Parts Identification - 48" Range Key for 48" Models 1. 22" Pot-and-Pan Shelf, 9" Low Back, or Flush Island Trim (Pot-and-Pan Shelf and Low Back ordered separately) 2. Burner Grates - Thermador PRD304GHU | User Manual - Page 10
Interior Light 15. Broil Element 16. Oven Thermostat 17. Rack Guides 18. Gliding Oven Racks (3 included, not shown) 19. Bake Element (hidden) 20. Convection Fan Cover 15 15 14 16 18 17 20 Model and Parts Identification - 36" Range Key for 36" Models 1. 22" Pot-and-Pan Shelf, 9" Low Back or - Thermador PRD304GHU | User Manual - Page 11
Model and Parts Identification - 30" Range Key for 30" Model 1. 6" Low Back (Island Trim and Pot-and-Pan Shelf ordered separately) 2. Burner Grates & Burners 3. Center Grate 4. Control Knobs, ExtraLow® Burners (2) 5. Control Knobs, Standard Burners (2) 6. Oven Temperature Selector 7. Oven Mode - Thermador PRD304GHU | User Manual - Page 12
Cooktop Sealed Star® Burners Your new range has sealed Star® burners. There are no burner parts under the cooktop to clean, disassemble for easy cleaning. On all models, the two left burners have the exclusive ExtraLow feature, the remaining burners are standard. Each burner has its own control - Thermador PRD304GHU | User Manual - Page 13
BTU / HR. ExtraLow® Burners The controls for the two left burners, front and rear, have flame settings even lower than the standard SIM settings. Setting Indicator ExtraLow® Range Operation of the ExtraLow Burners • XLO, the very lowest setting, is achieved by cycling the flame ON for approximately - Thermador PRD304GHU | User Manual - Page 14
sparking. If a burner fails to ignite, refer to "Before Calling For Service" on page 38. Burner Base Burner Cap The burner caps must be properly If the burner cap is not properly placed, one or more of the following problems may occur. • Burner flames are too high. • Flames shoot out of burners. - Thermador PRD304GHU | User Manual - Page 15
. WARNING: In the event of a power failure, all knobs are to be turned to the OFF Position. Only the standard burners can be lit manually. Flame Height • The correct flame height depends on 1) size and material of pan being used; 2) food being cooked; and 3) amount of liquid in the pan. • - Thermador PRD304GHU | User Manual - Page 16
WARNING: The burning of gas cooking fuel can create small amounts of Carbon installer or agency to ensure proper combustion. Ensure proper ventilation with an open window or use a ventilation fan or hood when cooking with Gas. Always operate the unit according to the instructions in this manual - Thermador PRD304GHU | User Manual - Page 17
dry. This can damage your pan and the cooking surface. • Professional quality pans with metal handles are recommended because plastic handles can melt or Round-Bottom Wok In Support Ring • Woks - Either flat based or round bottom woks with the accessory ring can be used on models without a built-in - Thermador PRD304GHU | User Manual - Page 18
inch base (279 to 305 mm) and a 9 to 11 inch depth (229 to 279 mm). Standard Size Pressure Canner 8 to 22 quarts (7.6 to 20.9 liters), with an 8 to 11 inch base (203 to 279 mm) and a 6 1/2" to 12 inch depth chart on page 16 through page 19 as a guide. The settings you use will vary depending on the - Thermador PRD304GHU | User Manual - Page 19
water to the boiling point, add eggs SIM - finish cooking SIM to MED - finish cooking Same as for Standard Burners XLO - to hold for a short period* Same as for Standard Burners MEAT, FISH, POULTRY Bacon, Sausage Patties Braising: Swiss Steak, Pot Roast, Stew Meat Quick Frying: Breakfast Steaks - Thermador PRD304GHU | User Manual - Page 20
Base Start Setting HI - build up pressure HI - cover, bring water and rice to a boil. MED HI - cook meat/ vegetables, follow recipe Finish Setting Standard Burners SIM to MED - maintain pressure SIM to maintain Low Boil Cover and cook until water is absorbed. SIM to maintain simmer Finish Setting - Thermador PRD304GHU | User Manual - Page 21
(Available on some models) The built-in griddle is designed to replace the griddle plate. See the instructions that come with the grill plate accessory for more details Installation Manual for procedure to check and adjust griddle for proper tilt of griddle plate. During installation, the installer - Thermador PRD304GHU | User Manual - Page 22
Having a properly installed ventilation hood is Oven Racks Your Thermador range includes three extendable, gliding racks that can be pulled out and pushed back into the oven with minimum effort - even while supporting a large turkey or roast. If yours is a 48" model, the secondary oven of your range - Thermador PRD304GHU | User Manual - Page 23
3 2 1 Figure 24: Oven Rack Positions Figure 22: Gliding Oven Rack Rack Positions Important: When placing the gliding rack in the oven, make sure the front supports on the rack guides rest in the large slots at Convection Bake mode should be used. Figure 23: Rack Installation Detail English 21 - Thermador PRD304GHU | User Manual - Page 24
Oven (48" Models) • Baking on rack #3 will result in the best product. When additional height is needed, rack #2 may be used. The use of rack #2 with pies will result in a crisp bottom crust without over baking the top. • If two rack baking is desired in this small oven Extension Service, Colorado - Thermador PRD304GHU | User Manual - Page 25
professional oven. It can damage the oven and cause a fire hazard if heat is trapped under it. See page 4. Setting Bake/Convection Bake/Extended Bake Bake / Convection Bake These cooking modes are for baking, roasting or warming using one, two or three racks. Figure 25: Oven Controls for 36" Range - Thermador PRD304GHU | User Manual - Page 26
activates only after the oven reaches 425°F, while heating up to broiling temperature. DO NOT continue to use the oven if the cooling blower fails to activate while baking at temperature settings of 425°F or greater, or while broiling. Call a qualified service agency to repair the range. English 24 - Thermador PRD304GHU | User Manual - Page 27
ON Figure 26: Secondary Oven Controls for 48" Range To Set the Secondary Oven (48" Range) 1. Select BAKE mode using the Mode Selector Knob. 2. Set oven temperature using the Temperature Selector Knob. • The OVEN ON and PREHEATING lights turn on. • The oven is preheated to the set temperature when - Thermador PRD304GHU | User Manual - Page 28
° - 225°F (90 - 110°C) 200°F (90°C) 175°F (80°C) 175°F (80°C) 225°F (110°C) 175° - 200°F (80 - 90°C) 175° - 200°F (80 - 90°C) 175°F (80°C) Warm (Secondary Oven) Secondary Oven (Only on 48" Models) This feature maintains the warm environment needed for keeping cooked foods hot. To Set the Secondary - Thermador PRD304GHU | User Manual - Page 29
27: Secondary Oven Controls for 48" Range Proof (Secondary Oven) Secondary Oven (Only on 48" Models) The proof feature maintains the warm, non-drafty environment needed for proofing yeast leavened products. To Set the Secondary Oven for Proofing 1. Place dough in dish in the small oven. Close the - Thermador PRD304GHU | User Manual - Page 30
Use convection broil if steaks are over 1-1/2 inches thick. Convection broil available in large oven. • Turn foods over only once, inch or more in thickness. • #3 - Use this rack when broiling chicken quarters or halves. Utensils • The porcelain enamel two-piece broil pan is included with the range - Thermador PRD304GHU | User Manual - Page 31
Professional Range comes with a large twopiece broiler pan. The slotted grid allows drippings to flow into the lower pan, away from the intense heat of the broil element, minimizing spattering and smoking. • The 48" Models have a small two-piece broiler pan, for use in the secondary oven. The OVEN - Thermador PRD304GHU | User Manual - Page 32
meats are placed on the broiler pan included with the range. FOOD ITEM RACK NUMBER OVEN MODE BEEF Ground Beef Patties, 1/2" thick T-Bone Broil or Conv Broil Broil or Conv Broil 350° 325° APPROXIMATE COOKING TIME SPECIAL INSTRUCTIONS AND TIPS 15 to 20 minutes 12 to 20 minutes 12 to 20 minutes - Thermador PRD304GHU | User Manual - Page 33
up large spillovers and grease. • Be sure the light bulbs and glass covers are in place. • Turn on the ventilator hood above the range and leave it on until the oven has completed the selfclean cycle. Important: For the first Self-Cleaning cycle, remove small animals and birds from the kitchen and - Thermador PRD304GHU | User Manual - Page 34
lock cycles to its open position and the oven door can be opened. Range Cleaning When Cleaning This Range: 1. Use the mildest cleaning procedure that soap pads for cleaning and scouring, as recommended on the chart. 4. Any part of this appliance can be cleaned with hot sudsy water. When rinsing is - Thermador PRD304GHU | User Manual - Page 35
the local markets. It is imperative that all products be used in strict accordance with instructions on the package. The following chart gives directions for cleaning this range. Cleaning Recommendations PART/MATERIAL Brass Burner Base and Cast Iron Cap Burner Base Burner Cap SUGGESTED CLEANERS - Thermador PRD304GHU | User Manual - Page 36
Wipe griddle surface with warm soapy water then rinse with warm water. Wipe dry with a soft cloth. • Do not clean any part of the griddle in a selfcleaning oven. • If food particles stick to the grill or griddle plate, remove with a mild abrasive cleaner such as Soft Scrub®. Igniters / Ceramic - Thermador PRD304GHU | User Manual - Page 37
scratch the finish. Rinse thoroughly and wipe dry with a soft cloth. PART/MATERIAL Broil Pan Grid/Bottom Porcelain Enamel Cavity(s) Porcelain Enamel on Steel hairlike lines) This will not affect oven performance. SEE SELF-CLEANING INSTRUCTIONS, page 31 and page 32. See Exterior Finish/Back Guard, page 33 - Thermador PRD304GHU | User Manual - Page 38
steel wool pads: S.O.S®, Brillo®. • Dampen pad, rinse thoroughly, and dry. Harsh Cleaners: Easy Off® Oven Cleaner. Note: Some commercial oven cleaners cause darkening and discoloration. Test the cleaner on a small part of the rack and check for discoloration before cleaning the entire rack. • Apply - Thermador PRD304GHU | User Manual - Page 39
loose from the base, turn the power to the oven OFF at the circuit breaker Power Failure • In the event of a power failure, only the standard burners can be lighted manually. It is necessary to light each standard burner individually. • If the range's cooktop is being used when the power failure - Thermador PRD304GHU | User Manual - Page 40
circuit breaker tripped? • Is the manual shut-off valve closed, preventing the flow of gas? Data Rating Plate The data rating plate shows the model and serial number of your range. It is located under the front edge of the range's cooktop, and is visible when the oven door is open (See illustration - Thermador PRD304GHU | User Manual - Page 41
misuse, abuse, accidents, neglect, improper operation, failure to maintain, improper or negligent installation, tampering, failure to follow operating instructions, mishandling, unauthorized service (including selfperformed "fixing" or exploration of the appliance's internal workings). • Adjustment - Thermador PRD304GHU | User Manual - Page 42
parts; Products on which the serial numbers have been altered, defaced, or removed; service visits to teach you how to use the Product, or visits where there is nothing wrong with the Product; correction of installation problems BY THERMADOR, OR THIS WARRANTY GIVES YOU SPECIFIC LEGAL RIGHTS, AND YOU - Thermador PRD304GHU | User Manual - Page 43
- Thermador PRD304GHU | User Manual - Page 44
cuisinière 34 Conseils de nettoyage 35 Entretien à faire soi-même 40 Avant d'appeler le service technique 41 ÉNONCÉ DE GARANTIE LIMITÉE DU PRODUIT 42 Cet appareil électroménager de Thermador est fait par BSH Home Appliances Corporation 5551 McFadden Ave. Huntington Beach, CA 92649 Questions - Thermador PRD304GHU | User Manual - Page 45
les instructions de la compagnie. • Si vous n'arrivez pas à contacter la compagnie de gaz, appelez les pompiers. - L'installation et les réparations doivent être réalisées par un installateur qualifié, un centre de réparation agréé ou la compagnie de gaz. Les cuisinières Thermador Professional - Thermador PRD304GHU | User Manual - Page 46
instructions d'installation fournies avec l'appareil pour plus d'information. Le présent manuel contient d'importants renseignements sur l'utilisation et l'entretien de tous les modèles de cuisinières Thermador Professional chaque circuit. Modèles à combustion jumelée 48 po : 240/208 volts, 60 Hz, - Thermador PRD304GHU | User Manual - Page 47
s'appliquent à l'installation spécifique. Consignes de sécurité destinées à éviter les blessures Votre cuisinière Thermador Professional® a été con L'installation et l'entretien doivent être correctement effectués. Lisez les Instructions d'installation fournies avec ce produit. Faites installer la - Thermador PRD304GHU | User Manual - Page 48
es au sol, au mur ou à une armoire à l'aide du dispositif antibascule fourni. • L'appareil risque de basculer s'il n'est pas installé conformément à ces instructions. • En déplaçant la cuisinière pour nettoyage, réparation ou autre raison, assurez-vous que le dispositif antibascule est bien enclench - Thermador PRD304GHU | User Manual - Page 49
sale, remplacez-le pour assurer une bonne étanchéité. Protégez la fonction autonettoyante. Nettoyez seulement les pièces indiquées dans le guide. N'utilisez pas de nettoyants commerciaux pour four ou d'autres enduits protecteurs dans et autour du four autonettoyant. N'OBSTRUEZ PAS le débit d'air de - Thermador PRD304GHU | User Manual - Page 50
pas, n'utilisez pas le four. Appelez votre Centre de service agréé pour réparation. Pour éviter tout risque d' conçu spécifiquement pour la cuisinière doit être installé chaque fois que la cuisinière est utilisée. Avis l'appareil selon les instructions données dans ce guide et assurer une bonne - Thermador PRD304GHU | User Manual - Page 51
12 po 3 36 po avec 6 brûleurs 3 48 po avec plaque de 12 po 3 Grilles du second four 1 1 Instructions d'installation 1 1 1 1 Guide d'utilisation et des fins de contact avec le service à la clientèle. Notez-les en vente chez votre détaillant Thermador. 4. Placez correctement les grilles - Thermador PRD304GHU | User Manual - Page 52
Description Identification du modèle et des pièces - cuisinière de 48 po Légende pour modèle de 48 po 1. Plaque de protection à étagère à casseroles de 55,9 de commande, brûleurs ExtraLow® (2) 5. Boutons de commande, brûleurs standards (4) 6. Bouton de commande, plaque de cuisson (1) 7. Sélecteurs de - Thermador PRD304GHU | User Manual - Page 53
érieur du four 12 13 Figure 2 : modèle de 48 po AVERTISSEMENT Pour assurer une bonne ventilation de la cuisinière, four 15. Élément du grilloir 16. Capteur thermostat du four 17. Glissières des grilles ® (2) 4. Boutons de contrôle et brûleurs standards (4) 5. Sélecteur de température du four 6. Sé - Thermador PRD304GHU | User Manual - Page 54
séparément) 2. Brûleurs et grilles de brûleurs 3. Grille centrale 4. Boutons de contrôle, brûleurs ExtraLow® (2) 5. Boutons de contrôle et brûleurs standards (4) 6. Sélecteur de température du four 11 10 Figure 5 : modèle de 30 po AVERTISSEMENT Pour assurer une bonne ventilation de la cuisinière - Thermador PRD304GHU | User Manual - Page 55
de brûleurs. . Pour tous les modèles, les deux brûleurs gauches sont dotés de la fonction exclusive ExtraLow, les autres brûleurs sont standards. À chacun des brûleurs correspond un bouton de commande. Le symbole au-dessus de chaque bouton identifie soit la position du brûleur sur la - Thermador PRD304GHU | User Manual - Page 56
reste allumé jusqu'à ce que le brûleur adjacent soit éteint. BTU des brûleurs standard • HI est équivalent à 15 000 BTU/h (13 000 BTU/h avec gaz propane). réglage est également déterminé par le type de récipient choisi. Ses dimensions, sa forme, le matériau et l'utilisation ou non d'un couvercle sont - Thermador PRD304GHU | User Manual - Page 57
pas les brûleurs pendant que les allumeurs produisent des étincelles. Si un brûleur ne s'allume pas, consultez le chapitre « Avant d'appeler le service technique », à la page 41. AVERTISSEMENT : Pour éviter le flambage et la création de sousproduits dangereux, ne pas utiliser la surface de cuisson - Thermador PRD304GHU | User Manual - Page 58
re, tournez tous les boutons à la position OFF. • Les brûleurs standards peuvent être allumés en tenant une allumette près des ports et en ramenez tous les boutons à la position OFF. Seuls les brûleurs standards peuvent être allumés manuellement. Figure 12 : Emplacement incorrect du capuchon - Thermador PRD304GHU | User Manual - Page 59
doivent être réglés par un installateur certifié ou un centre de service qualifié en vue d'assurer une combustion appropriée. S'assurer d'une ventilation cuisson au gaz. Toujours actionner l'appareil selon les instructions données dans ce guide. Récipients recommandés AVERTISSEMENT: Pour éviter le - Thermador PRD304GHU | User Manual - Page 60
• Les aliments enveloppés de papier aluminium ne doivent pas être placés directement sur la grille du brûleur. L'aluminium peut fondre pendant la cuisson. • Ne pas laisser le plastique, papier ou chiffon entrer en contact avec la grille chaude du brûleur. Ils peuvent fondre ou prendre feu. • Ne - Thermador PRD304GHU | User Manual - Page 61
doit être utilisé avec les woks à fond rond. L'anneau de support de wok en fonte émaillée est vendu séparément. • Cocottes et marmites - Choisissez une base d'un maximum de 51 mm (2 po) de plus que le diamètre du foyer. Cocotte de dimensions standards 19,95 à 20,9 litres (42 à 44 pintes), avec une - Thermador PRD304GHU | User Manual - Page 62
- couvrir les œufs avec l'eau, couvrir, porter l'eau à ébullition SIM à MED - Finir la cuisson selon les instructions sur l'emballage. SIM à MED SIM SIM Identique aux brûleurs standards XLO - Pour maintenir la température, couvrir* XLO - Laisser fondre pendant 10 à 15 minutes. XLO - Pour maintenir - Thermador PRD304GHU | User Manual - Page 63
recette MED - Faire fondre la graisse, suivre la recette XLO Réglage final brûleurs standards MED à MED HI - Pour maintenir la température MED - Passer rapidement à la l'eau et les légumes SIM à MED - Faire cuire selon les instructions du paquet *Il est recommandé de tourner de temps en temps ces - Thermador PRD304GHU | User Manual - Page 64
standards Identique aux brûleurs standards Identique aux brûleurs standards Identique aux brûleurs standards pour remplacer la plaque chauffante. Consultez les instructions de la plaque de gril pour de plus guide d'installation pour vérifier et régler l'inclinaison appropriée. Pendant l'installation, - Thermador PRD304GHU | User Manual - Page 65
• Une fois refroidie, versez la graisse dans un contenant résistant pour vous en débarrasser. Remarques : Une hotte de ventilation dûment installée n'est pas considérée comme une source de circulation d'air excessive. Pour enlever le plateau, faites glisser et soulevez Recommandations de cuisson - Thermador PRD304GHU | User Manual - Page 66
(25 °F). Grilles de four coulissantes Cette cuisinière Thermador est dotée de 3 grilles coulissantes pouvant être un gros rôti. S'il s'agit d'un modèle 48 po, le second four est doté de 2 grilles des guides. Pousser la grille dans le four, soulevant les butées sur le devant des guides. Faire - Thermador PRD304GHU | User Manual - Page 67
les supports avant sur les guides reposent sur les grandes fentes aux coins avant de la grille. Ceci est nécessaire pour que la grille reste bloquée en position lorsqu'elle est tirée hors du four. Figure 23: Détail d'installation Four auxiliaire (modèle de 48 po) • Les meilleurs ré - Thermador PRD304GHU | User Manual - Page 68
ou de volaille est grosse, plus il y a économie de temps. Conversion de la cuisson conventionnelle à la cuisson par convection Pour convertir la plupart des peuvent changer. Pour plus d'information, écrivez à : Extension Service, Colorado State University, Fort Collins, Colorado 80521 USA. Les - Thermador PRD304GHU | User Manual - Page 69
Cuisson avec deux grilles • Les positions 2 et 4 sont les plus appropriées pour la cuisson par convection. Les plats ronds de gâteaux peuvent être superposés sur les grilles 2 et 4. Les plaques à biscuits et les plats de gâteaux rectangulaires de 9"x13" doivent être placées directement sur la grille - Thermador PRD304GHU | User Manual - Page 70
volaille. • Le ventilateur à convection se met en circuit 6 minutes après la mise en circuit du four si le mode CUISSON À CONVECTION est choisi. • The OVEN ON and PREHEATING lights turn on. • Les voyants FOUR EN CIRCUIT et PRÉCHAUFFAGE s'allument. • Le voyant de FOUR reste allumé pendant un mode de - Thermador PRD304GHU | User Manual - Page 71
de 425 °F ou plus ou pendant le gril. Communiquer avec un centre de service qualifié pour faire réparer la cuisinière. OVEN ON Figure 26: Contrôles de four secondaire pour cuisinière 48 po. Pour régler le four secondaire (cuisinière 48 po) 1. Sélectionner le mode CUISSON avec le sélecteur de mode - Thermador PRD304GHU | User Manual - Page 72
de service et pour réchauffer des assiettes. Les plats cuisinés chauds seront conservés à leur température de service. Réglez 90°C) 175°F (80°C) Chaud (Four auxiliaire) Four auxiliaire (modèle de 48 po seulement) Cette fonction permet de conserver la chaleur des aliments préalablement cuits. - Thermador PRD304GHU | User Manual - Page 73
OVEN ON Figure 27 : Contrôles de four secondaire pour cuisinière 48 po Apprêt (Four auxiliaire) Four auxiliaire (modèle de 48 po seulement) La fonction « Proof » (apprêt) fournit l'environnement de chaleur sans déplacement d'air nécessaire pour faire lever des produits contenant de la levure. Pour - Thermador PRD304GHU | User Manual - Page 74
fruits Pain à la levure, miches Petits pains Rouleaux cannelle Gâteau danois DIMENSIONS DU PLAT 30,5 x 38,1 cm (12"x15") 20,3 ou F (190 °C) 350° F (177° C) 350° (177° C) 325° (163° C) 325° (163° C) 425° ou instructions du paquet 350° F (177° C) 425° F (218 °C) 425° F (218 °C) 400° F (204 °C) 375° F - Thermador PRD304GHU | User Manual - Page 75
pendant tout le cycle du grilloir. • La cuisinière Professional est dotée d'une lèchefrite deux pièces. La grille claboussures et la fumée. • Les modèles de 48 po ont une petite casserole en deux pièces pendant le gril. Communiquer avec un centre de service qualifié pour faire réparer la cuisinière. - Thermador PRD304GHU | User Manual - Page 76
to 25 min/lb 20 to 25 min/lb 20 à 25 minutes 25 à 30 minutes 30 à 45 minutes 75 à 90 minutes 20 à 25 min/lb INSTRUCTIONS ET CONSEILS Faire griller jusqu'à disparition de la teinte rosée au centre. Durée dépendant de la cuisson du steak Médium à médium saignant Les petits rôtis - Thermador PRD304GHU | User Manual - Page 77
clairage et les couvercles en verre sont en place. • Allumez la hotte installée au-dessus de la cuisinière et laissez-la en marche pendant tout et le cycle de verrouillage automatique de la porte commence. Le thermostat commence à se déplacer vers la position CLEAN (nettoyage) cinq minutes - Thermador PRD304GHU | User Manual - Page 78
verrouillée. Figure 28: contrôles du four pour cuisinière 36 po À la fin de l'autonettoyage Le cycle de nettoyage prend environ 2 heures. Les voyants OVEN ON et CLEAN s'éteignent lorsque le cycle est terminé. Ne pas régler les boutons de contrôle du four en position ARRÊT tant que le - Thermador PRD304GHU | User Manual - Page 79
3. N'utilisez que des chiffons, éponges, serviettes en papier, brosses douces et propres; des tampons à récurer savonneux de plastique, non métalliques, pour nettoyer et gratter, comme recommandé dans le tableau. 4. Toutes les pièces de cet appareil peuvent être nettoyées avec de l'eau chaude - Thermador PRD304GHU | User Manual - Page 80
Pièce/matériau Finition externe/Plaque de protection/ Acier inoxydable Grilles/Porcelaine émaillée sur fonte Plateau à graisse de la plaque en aluminium avec revêtement antiadhésif Faire glisser et soulever Produits d'entretien suggérés Rappels importants • Produits d'entretien non abrasifs : • - Thermador PRD304GHU | User Manual - Page 81
endommagés, le brûleur ne s'allumera pas. Un nettoyant tel Soft Scrub® peut être utilisé. Appliquer avec une éponge ou un chiffon humide selon les instructions du fabricant. Bien rincer et assécher avec un chiffon doux. Si l'on utilise des produits tels Bar Keeper's Friend®, Bon-ami®, Comet® ou - Thermador PRD304GHU | User Manual - Page 82
la porcelaine au cours de l'usage suivant. Au bout d'un certain temps, la porcelaine risque de se fissurer (petites lignes fines comme des cheveux). VOIR INSTRUCTIONS D'AUTONETTOYAGE, page 33 à page 34. Voir Finition externe/Plaque de protection, page 36. Français 38 - Thermador PRD304GHU | User Manual - Page 83
PIÈCE/MATÉRIAU Grilles du four Nickelées Produits d'entretien/Indications Eau chaude savonneuse. • Lavez, rincez soigneusement et séchez. Produits d'entretien : Soft Scrub® • Appliquez avec une éponge ou un chiffon humide selon les indications du fabricant. Frottez légèrement. Rincez soigneusement - Thermador PRD304GHU | User Manual - Page 84
la position OFF. Approchez une allumette de l'orifice du brûleur standard et tournez le bouton de commande à la position . Attendez mal faite. • L'alimentation électrique est mal polarisée. • Consultez les Instructions d'installation. Appelez un électricien qualifié pour qu'il effectue une mise à - Thermador PRD304GHU | User Manual - Page 85
émas de câblage électrique et les dessins placés dans la zone de la base ne doivent pas être enlevés sauf par un technicien de service. Remettez en place après l'entretien. ATTENTION Avant d'ôter la plaque de base, débranchez l'alimentation électrique de la cuisinière. Réinstallez la plaque de base - Thermador PRD304GHU | User Manual - Page 86
raison que ce soit. Réparation ou remplacement du produit comme recours exclusif Pendant cette période de garantie, Thermador ou l'un de ses prestataires de services agréés réparera le produit sans frais de votre part (sous réserve de certaines limitations énoncées aux présentes) s'il s'avère que la - Thermador PRD304GHU | User Manual - Page 87
, installation inadéquate ou négligée, altération, manquement à observer les instructions de fonctionnement, manipulation sans précaution, service non DENT DES DOMMAGES DIRECTS QUI SONT MANIFESTEMENT CAUSÉS EXCLUSIVEMENT PAR THERMADOR OU AUTREMENT. CERTAINS ÉTATS NE PERMETTENT PAS L'EXCLUSION OU - Thermador PRD304GHU | User Manual - Page 88
manual . . . . . 1 Introducción 1 Seguridad 2 Instrucciones Importantes de Seguridad . 2 Antes de comenzar 7 Antes de usar su estufa por primera vez . 7 Descripción 8 Modelo e Identificación - Estufas de 48 DEL PRODUCTO 41 Este electrodomestico de Thermador es hecho por BSH Home Appliances - Thermador PRD304GHU | User Manual - Page 89
manual. Ponga especial atención a las Instrucciones de Seguridad al principio del manual. Introducción ADVERTENCIA: El no observar la información en este manual de Thermador son convección. El Modelo de 48" tiene un horno auxiliar gas propano se requiere un kit de conversión. Asegúrese - Thermador PRD304GHU | User Manual - Page 90
de 36" y 48" incluyen una moldura tipo isla. Se deben pedir por separado e instalar otras consolas traseras disponibles en la parte trasera de la ón. Este manual contiene información importante del uso y cuidado para todas las estufas profesionales de Thermador®. Cuando use este manual, es sumamente - Thermador PRD304GHU | User Manual - Page 91
Evitar Lesiones Con el cuidado adecuado, su nueva estufa profesional de Thermador ha sido diseñada para ser un aparato seguro y confiable. . No repare o reemplace ninguna parte del aparato a menos que haya sido recomendado específicamente en este manual. Para cualquier otro servicio, contrate - Thermador PRD304GHU | User Manual - Page 92
horno. Revestimientos con papel de aluminio podrían también retener el calor pudiendo ocasionar así un incendio. No use papel de aluminio para forrar ninguna parte del horno o de la estufa. De lo contrario podría causar una descarga eléctrica o un fuego, o se podría obstruir el flujo del aire de - Thermador PRD304GHU | User Manual - Page 93
ún tipo de detergente aerosol encima o alrededor de la parrilla. El químico que provoca la acción de rocío podría encenderse o causar la corrosión de partes metálicas en presencia de calor. Cuando se usa el horno: NO TOQUE EL ELEMENTO DEL ASADOR, LAS SUPERFICIES INTERNAS DEL HORNO O EL ÁREA EXTERIOR - Thermador PRD304GHU | User Manual - Page 94
30" con 4 Quemadores 36" con Plancha de 12" 36" con 6 Quemadores 48" con Plancha de 12" Rejillas del Horno Grande 3 3 3 3 Rejillas de Horno Consola de Protección 1 * * * Instrucciones de Instalación 1 1 1 1 Manual de Uso y Cuidado 1 1 1 1 *Se debe pedir por separado la - Thermador PRD304GHU | User Manual - Page 95
1. 2. Anote el número de modelo y de serie en la "Placa con información del aparato" en Accesorios opcionales. Bandeja de asar, Kit para perilla negra, Tabla para Thermador. Contacte al departamento de refacciones de Thermador las guías. b) Incline la parte delantera de la rejilla ligeramente hacia - Thermador PRD304GHU | User Manual - Page 96
10. Ventana 11. Horno secundario (2 rejillas deslizables incluidas) 12. Panel para los pies 13. Patas de estufa (4) 1 2 3 2 6 5 2 5 8 778 4 9 10 11 12 13 Figura 2: Modelo de 48" ADVERTENCIA NO quite las patas de la estufa para proporcionar una ventilación adecuada. Español 8 - Thermador PRD304GHU | User Manual - Page 97
Interior del horno eléctrico 14. Luz interior del horno 15. Elemento de asar 16. Termostato del horno 17. Guías para rejillas 18. Rejillas deslizantes del horno (3 incluidas, no oculto) 19. Elemento de hornear (oculto) 20. Tapa del ventilador de convección 15 15 14 16 18 17 20 Modelo e - Thermador PRD304GHU | User Manual - Page 98
Modelo e Identificación - Estufas de 30" Clave para Modelo de 30" 1. Consola baja de 6" (Se debe pedir el Tipo de isla y Estante para ollas y sartenes por separado) 2. Rejillas y quemadores 3. Perillas de control, quemadores ExtraLow® (2) 4. Parrilla central 5. Perillas de control, quemadores está - Thermador PRD304GHU | User Manual - Page 99
Su estufa nueva incluye quemadores sellados tipo estrella. No hay partes de los quemadores debajo de la estufa que se tienen que de control Las perillas de control para dos quemadores sellados de gas, uno en la parte delantera y uno en el fondo, se encuentran directamente en frente de y debajo del - Thermador PRD304GHU | User Manual - Page 100
Operación de los Quemadores • Oprima la perilla y gírela en sentido opuesto del reloj a la posición en la perilla. • El encendedor para el quemador seleccionado hace un chasquido y echa chispas. • Después de encender la llama, el chasquido del encendedor se detiene. • Gire la perilla a cualquier - Thermador PRD304GHU | User Manual - Page 101
quemador quedará asentada en forma plana sobre su base y cubrirá completamente la base del quemador en forma de estrella cuando se ve desde la parte superior como se muestra en la Ilustración 11: Colocación correcta de las tapas de quemadores. Figura 10: Componentes del quemador tipo de Star® Espa - Thermador PRD304GHU | User Manual - Page 102
Reencendido Automático Si se apagan las llamas de uno o más quemadores, el encendedor electrónico echa chispas automáticamente para volver a encender la llama. No toque los quemadores cuando los encendedores echan chispas. Importante: • Para una combustión adecuada no use la parrilla sin tener las - Thermador PRD304GHU | User Manual - Page 103
quemando las impurezas suspendidas en el gas y desaparece con el uso. gas. Siempre opere el aparato de acuerdo a las instrucciones en este manual. Recomendaciones para los utensilios de cocina ADVERTENCIA: Para evitar riesgo de lesión seria, el daño a la aplicación o el cookware, observa por favor - Thermador PRD304GHU | User Manual - Page 104
ollas que conducen el calor de un modo rápido y uniforme. Estos metales se encuentran a veces en la base o en el centro de la olla entre partes de acero inoxidable. temperatura lo cual tiende a deformar las ollas. No agregue agua fría a una olla caliente. Figura 17: Olla tapada • Una tapa bien - Thermador PRD304GHU | User Manual - Page 105
• Woks - Se pueden usar ya sea woks con base plana o redonda con el anillo de soporte en los modelos que no incluyen un quemador para wok. Para los woks de base redonda se debe usar el anillo de soporte. Se debe comprar por separado el anillo de soporte para wok de hierro fundido aporcelanado. • - Thermador PRD304GHU | User Manual - Page 106
Alimento CHOCOLATE Derretir POSTRES Caramelos Pudín y Relleno para Pay Pudín HUEVOS Cocidos en la cáscara Ajuste Inicial XLO - se puede revolver para acelerar el derretimiento SIM a MED - cocinar según receta SIM a MED SIM - cocinar según las indicaciones emp. SIM a MED SIM - hervir la leche MED HI - Thermador PRD304GHU | User Manual - Page 107
Alimento Verduras ARROZ SALSAS A base de tomate Blanca, Crema, Bernesa Holandesa SOPAS, CALDOS VERDURAS Frescas Congeladas Freir con mucho aceite Ajuste Inicial Ajuste Final Quemador Estándar Ajuste Final Quemador ExtraLow (XLO) HI - aumentar presión HI - cubra, caliente el agua y el arroz hasta - Thermador PRD304GHU | User Manual - Page 108
. 5. Añada el alimento y cuézalo. Preparar la plancha Se debe inclinar la plancha ligeramente hacia adelante para un óptimo desempeño. Vea el manual de instalación para el procedimiento de comprobar y ajustar la plancha para lograr una inclinación correcta de la bandeja. Durante la instalación, el - Thermador PRD304GHU | User Manual - Page 109
Recomendaciones para cocinar con la plancha ALIMENTO Huevos Tocino: Salchicha chica Sandwiches tostados Pechuga pollo sin hueso AJUSTES 325°F a 350°F (160°C a 180°C) 375°F a 400°F (190°C a 200°C) 350°F a 375°F (180°C a 190°C) 375°F a 400°F (190°C a 200°C) ALIMENTO Chuletas de puerco s/ hueso, - Thermador PRD304GHU | User Manual - Page 110
Thermador incluye tres rejillas extensibles, deslizables que se pueden jalar y volver a empujar al horno con un mínimo de esfuerzo - aún cuando soporta un pavo o asado grande. Si usted tiene el modelo de 48 rejilla hacia el frente del horno. Levante la parte frontal de la rejilla arriba de los topes - Thermador PRD304GHU | User Manual - Page 111
para asegurar que se hornea bien el fondo de la corteza sin dorar la parte superior demasiado. Cuando asa piezas grandes de carne o pollo, como un Prime Rib del horneado de convección. Colocación de moldes Horno Secundario (Modelos de 48") • "Cocinar en el estante #3 resultará en el mejor producto. - Thermador PRD304GHU | User Manual - Page 112
el modo de HORNEAR u HORNEAR DE CONVECCIÓN, pueden variar los tiempos de las recetas y del horneado. Para información más precisa, escriba a Extension Service, Colorado State University, Fort Collins, Colorado 80521. Los boletines pueden tener un costo. Especifique el tipo de información que desea - Thermador PRD304GHU | User Manual - Page 113
). • El horno es precalentado a la temperatura prefijada cuando se apaga la luz PREHEATING (Precalentar) por primera vez. • Se mantiene prendida la luz OVEN ON (Horno Prendido) durante cualquier modo de cocinar activo, y permanece prendida hasta que se gire cualquiera de las perillas de control del - Thermador PRD304GHU | User Manual - Page 114
altas o cuando está asando. Llame a una agencia de servicio calificada para reparar la estufa. OVEN ON Figura 26: Controles del horno secundario para estufas de 48" Para configurar el horno secundario (Estufa de 48") 1. Seleccione el modo de hornear (BAKE) usando la perilla del selector de modo - Thermador PRD304GHU | User Manual - Page 115
• Se mantiene prendida la luz OVEN ON (Horno Prendido) durante cualquier modo de cocinar activo, y permanece prendida hasta que se gire cualquiera de las perillas de control del horno a la posición - Thermador PRD304GHU | User Manual - Page 116
calentar no es lo suficientemente caliente para cocinar alimentos a temperaturas seguras. OVEN ON Figura 27: Controles del horno secundario para estufas de 48" Prueba (Horno Secundario) Horno Secundario (Sólo en Modelos de 48") La característica de prueba mantiene la temperatura y sin corrientes - Thermador PRD304GHU | User Manual - Page 117
Recomendaciones para hornear ALIMENTO Galletas Pasteles con relleno Pasteles con capas Pastel Bundt™ Brownies o galletas Panecillos Pan rápido Molletes Pays de fruta Pasteles de fruta Pan levadura, loaves Rollos y panecillos Rollos de canela Pastel levadura para café TAMAÑO DEL MOLDE CONTROLAR EL - Thermador PRD304GHU | User Manual - Page 118
de asar, minimizando de esta forma las salpicaduras y la formación de humo. • Los modelos 48" tienen una pequeña cacerola de dos piezas de la parrilla, para el uso en el horno secundario. La luz OVEN ON (Horno Prendido) permanece prendida durante cualquier modo de Asar (BROIL), y permanece prendida - Thermador PRD304GHU | User Manual - Page 119
Recomendaciones para asar y tostar Todas las carnes son colocadas en la bandeja de asar que se incluye con la estufa. ALIMENTO RES Hamb. de carne molida, 1/2" grueso Filete T-Bone Filete falda Corazón de asado redondo PUERCO Lomo asado AVES Pechugas de pollo sin hueso/pellejo Muslos de pollo Medio - Thermador PRD304GHU | User Manual - Page 120
Elimine cualquier suciedad que esté afuera del área del sello de la puerta. Este aparato está diseñado para limpiar el interior del horno y la parte de la puerta que está adentro del horno. Los bordes exteriores de la puerta y la cavidad del horno no están adentro de la zona de - Thermador PRD304GHU | User Manual - Page 121
• Se prende el ventilador de enfriamiento. • Se prenden las luces OVEN ON (Horno Prendido), PREHEATING (Precalentar) y CLEANING (Limpiar). • Cuando limpieza dura 2 horas para terminar. Cuando termina el ciclo se apagan la luz OVEN ON y la luz CLEANING. No gire ninguna de las perillas de control del - Thermador PRD304GHU | User Manual - Page 122
limpiar y frotar, como se recomienda en la tabla. 4. Se puede limpiar cualquier parte de este aparato con agua jabonosa caliente. Cuando se necesite enjuagar, hágalo a conciencia indicaciones para limpiar esta estufa. Recomendaciones de limpieza PARTE/ MATERIAL Base del quemador de bronce y tapa - Thermador PRD304GHU | User Manual - Page 123
PARTE/ MATERIAL DETERGENTES SUGERIDOS INDICACIONES IMPORTANTES Acabado exterior/Consola trasera de protección / Acero Inoxidable • Detergentes no abrasivos: Agua • El acero inoxidable resiste caliente y detergente, amoníaco, - Thermador PRD304GHU | User Manual - Page 124
PARTE/ MATERIAL Plancha / Aluminio con una cubierta antiadherente DETERGENTES SUGERIDOS INDICACIONES agua tibia. Secar con un trapo suave. • No se debe limpiar ninguna parte de la plancha en un horno de • Cuando partículas de alimentos auto-limpieza. están pegadas a la bandeja del asador o - Thermador PRD304GHU | User Manual - Page 125
PARTE/ MATERIAL Rejilla/fondo de la bandeja de asar Esmalte de Porcelana Cavidad(es) Esmalte de porcelana sobre acero Bastidor delantero Acero inoxidable DETERGENTES/ INDICACIONES No - Thermador PRD304GHU | User Manual - Page 126
esponjilla, enjuagar bien y secar. Detergentes abrasivos: Easy Off ®Oven Cleaner (Detergente para horno). Nota: Algunos detergentes comerciales para horno causan una decoloración y un oscurecimiento. Hacer pruebas en una parte pequeña de la rejilla y verificar si hay decoloración antes de limpiar - Thermador PRD304GHU | User Manual - Page 127
Mantenimiento hecho por usted mismo Reemplazar un foco de luz en el horno Reemplace solamente por un foco recomendado diseñado para el uso en hornos. NO USE un foco de luz estándar en ningún horno. Para reemplazar el foco de luz: 1. Asegúrese que el interruptor de la luz del horno esté en la posici - Thermador PRD304GHU | User Manual - Page 128
gas está cerrada, cerrando el paso de gas? Placa con información del aparato La placa con información del aparato muestra el número de modelo y de serie de su estufa. Se encuentra debajo del borde delantero de la parrilla de la estufa y está visible cuando se abre la puerta del horno (Vea - Thermador PRD304GHU | User Manual - Page 129
su factura para validar la garantía. Número de Modelo Número de Serie Fecha de compra Nombre del Distribuidor Teléfono del Distribuidor Nombre del Centro hacer efectiva la cobertura de la garantía, es la mejor manera para que Thermador le notifique en el caso poco probable de que se emita un aviso - Thermador PRD304GHU | User Manual - Page 130
de servicio técnico. Producto fuera de garantía Thermador no tiene obligación alguna, en virtud de éstico realizados por uno mismo) por parte de cualquier persona. • Ajuste, alteraci expuestas; productos en los cuales los números de serie hayan sido alterados, modificados o eliminados; visitas del - Thermador PRD304GHU | User Manual - Page 131
- Thermador PRD304GHU | User Manual - Page 132
5551 McFadden Avenue, Huntington Beach, CA 92649 • 800-735-4328 • www.thermador.com 9000465284 • 5U02H8 • Rev. A • 7/09 © BSH Home Appliances Corporation, 2009 • All rights reserved Litho in USA
-
 1
1 -
 2
2 -
 3
3 -
 4
4 -
 5
5 -
 6
6 -
 7
7 -
8
-
9
-
10
-
11
-
12
-
13
-
14
-
15
-
16
-
17
-
18
-
19
-
20
-
21
-
22
-
23
-
24
-
25
-
26
-
27
-
28
-
29
-
30
-
31
-
32
-
33
-
34
-
35
-
36
-
37
-
38
-
39
-
40
-
41
-
42
-
43
-
44
-
45
-
46
-
47
-
48
-
49
-
50
-
51
-
52
-
53
-
54
-
55
-
56
-
57
-
58
-
59
-
60
-
61
-
62
-
63
-
64
-
65
-
66
-
67
-
68
-
69
-
70
-
71
-
72
-
73
-
74
-
75
-
76
-
77
-
78
-
79
-
80
-
81
-
82
-
83
-
84
-
85
-
86
-
87
-
88
-
89
-
90
-
91
-
92
-
93
-
94
-
95
-
96
-
97
-
98
-
99
-
100
-
101
-
102
-
103
-
104
-
105
-
106
-
107
-
108
-
109
-
110
-
111
-
112
-
113
-
114
-
115
-
116
-
117
-
118
-
119
-
120
-
121
-
122
-
123
-
124
-
125
-
126
-
127
-
128
-
129
-
130
-
131
-
132
 |
 |

CARE AND USE MANUAL
For Thermador Professional
®
PRO-HARMONY™ Dual Fuel Ranges
Guide d'utilisation et
d'entretien
Pour cuisinière à combustion jumelée
Professional
®
PRO-HARMONY™ de
Thermador
MANUAL DE USO Y
CUIDADO
Para Estufas de Todo Tipo de Gas
Professional
®
PRO-HARMONY™ de
Thermador
Models/
Modèles /
Modelos:
PRD30
PRD36
PRD48