Toro 20334 Owner's Manual - Page 16
Charging, the Battery, Replacing, the Fuse - charger
 |
UPC - 021038203348
View all Toro 20334 manuals
Add to My Manuals
Save this manual to your list of manuals |
Page 16 highlights
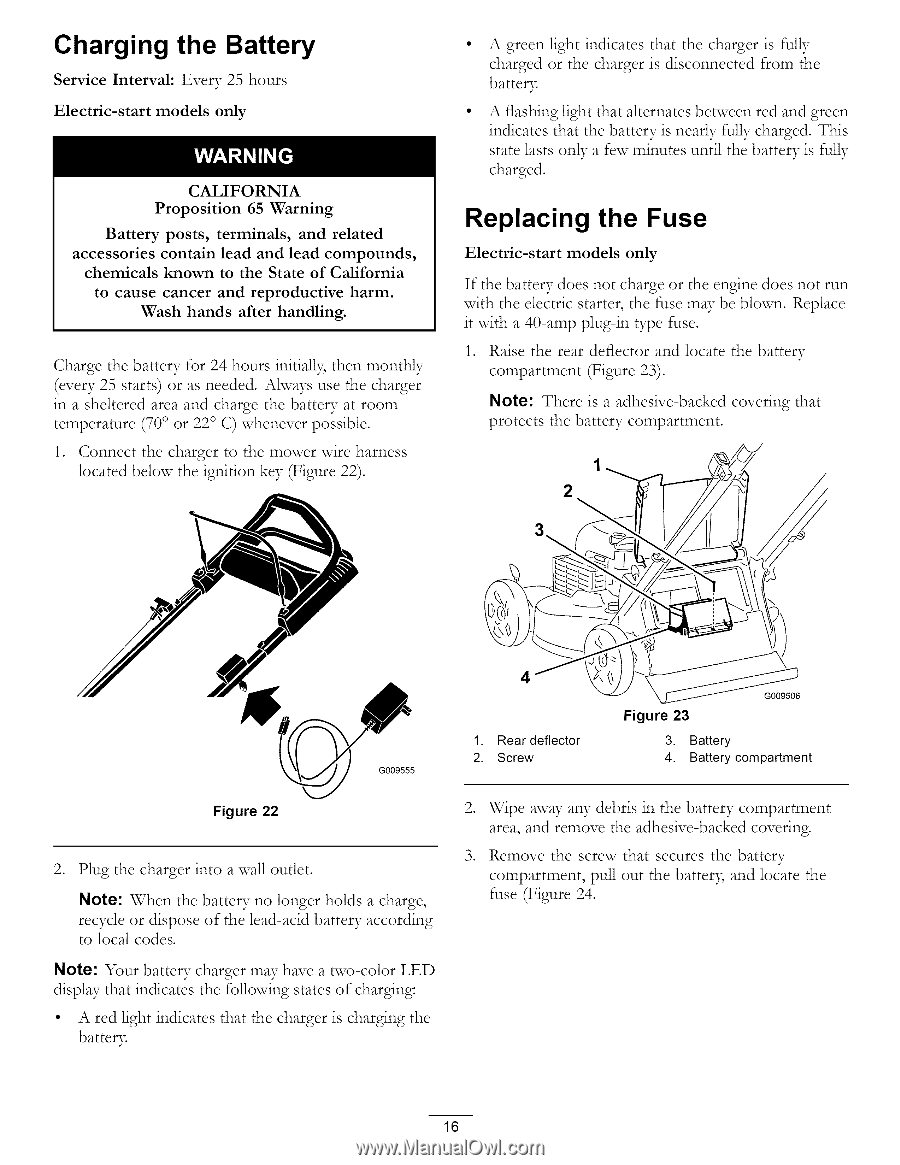
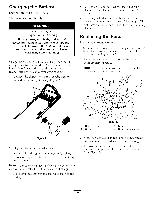
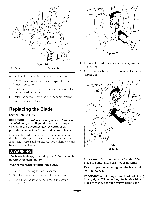
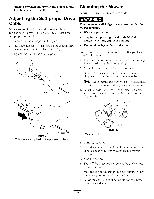
Charging the Battery Service Interval: Every 25 hours Electric-start models only CALIFORNIA Proposition 65 Warning Battery accessories chemicals posts, contain known terminals, and related lead and lead compounds, to the State of California to cause cancer and reproductive harm. Wash hands after handling. Charge the battery for 24 hours initial1); then monthly (every 25 starts) or as needed. Always use the charger in a sheltered area and charge the battery at room temperature (70° or 22° C) whenever possible. 1. Connect the charger to the mower wire harness located below the ignition key (Figure 22). A green light indicates that the charger is fully charged or the charger is disconnected from the batter> A flashing light that alternates between red and green indicates that the battery is nearly fully charged. This state lasts only a few minutes until the battery is fully charged. Replacing the Fuse Electric-start models only If the battery does not charge or the engine does not run with the electric starter, the fuse may be blown. Replace it with a 40-amp plug-in type fuse. 1. Raise the rear deflector and locate the battery compartment (Figure 23). Note: There is a adhesive-backed covering that protects the battery compartment. Figure 22 G009555 2. Plug the charger into a wall outlet. Note: When the battery no longer holds a charge, recycle or dispose of the lead-acid battery according to local codes. Note: Your battery charger may have a two-color LED display that indicates the following states of charging: • A red light indicates that the charger is charging the batter): 4 1. Rear deflector 2. Screw _6 Figure 23 3. Battery 4. Battery compartment , Wipe away aW debris in the battery compartment area, and remove the adhesive-backed covering. , Remove the screw that secures the battery compartment, pull out the batter); and locate the fuse (Figure 24. 16
-
 1
1 -
2
-
3
-
4
-
5
-
6
-
7
-
8
-
9
-
10
-
 11
11 -
 12
12 -
 13
13 -
 14
14 -
 15
15 -
 16
16 -
 17
17 -
 18
18 -
 19
19 -
 20
20
 |
 |