Toshiba 19SLV411U User Manual
Toshiba 19SLV411U Manual
 |
View all Toshiba 19SLV411U manuals
Add to My Manuals
Save this manual to your list of manuals |
Toshiba 19SLV411U manual content summary:
- Toshiba 19SLV411U | User Manual - Page 1
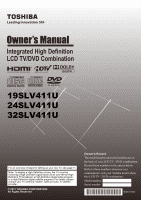
All Rights Reserved Owner's Record The model number and serial number are on the back of your LCD TV / DVD combination. Record these numbers in the spaces below. Refer to these numbers whenever you communicate with your Toshiba dealer about this LCD TV / DVD combination. Model number: Serial number - Toshiba 19SLV411U | User Manual - Page 2
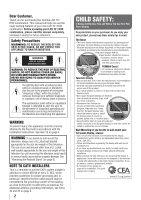
Toshiba LCD TV / DVD combination. This manual will help you use the many exciting features of your new LCD TV / DVD combination. Before operating your LCD TV / DVD combination, please read this manual USER-SERVICEABLE PARTS INSIDE. REFER SERVICING TO QUALIFIED SERVICE supported on the proper stands - Toshiba 19SLV411U | User Manual - Page 3
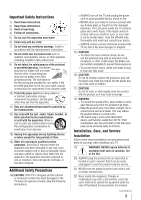
your outlet, consult an electrician for replacement of the obsolete outlet. 10) Protect . 12) Use only with the cart, stand, tripod, bracket, or table specified by LCD TV / DVD combination near the wall outlet so that the mains plug can be accessed easily at all times. Installation, Care, and Service - Toshiba 19SLV411U | User Manual - Page 4
source only. 32) Always make sure the antenna system is properly grounded to provide adequate protection against voltage surges and built-up static charges component connected to an antenna or phone system. Care For better performance and safer operation of your TOSHIBA LCD TV / DVD combination, - Toshiba 19SLV411U | User Manual - Page 5
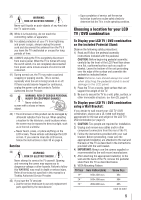
only replacement parts specified by the manufacturer. • Upon completion of service, ask the service technician to perform routine safety checks to determine that the TV is in safe operating condition. Choosing a location for your LCD TV / DVD combination To Display your LCD TV / DVD combination - Toshiba 19SLV411U | User Manual - Page 6
screws 32SLV411U VESA Mounting Pattern Four screws 6 Hook Sturdy strap (as short as possible) Never use the unit when moisture condensation may occur. Using the unit when moisture condensation exists may damage discs and internal parts. Connect the power cord of the unit to the wall outlet, turn - Toshiba 19SLV411U | User Manual - Page 7
LCD TV / DVD combination is 1. If region numbers, which stand for their playable area, are printed on your DVD and you do not find or , disc playback will not be allowed by the player. (In this case, the LCD TV / DVD of the functions described in this owner's manual may not work with some discs. 7 - Toshiba 19SLV411U | User Manual - Page 8
DVD or CD on this LCD TV / DVD combination, please contact Toshiba Customer Service. is a trademark of DVD Format / Logo Licensing Corporation. 8 FCC Declaration of Conformity Compliance Statement (Part 15): The Toshiba 19SLV411U, 24SLV411U and 32SLV411U LCD TV / DVD combinations comply with Part - Toshiba 19SLV411U | User Manual - Page 9
"gun" type of joystick at an onscreen target may not work with this TV. CLASS 1 LASER PRODUCT Location of the required Marking The rating sheet : - THIS LCD TV / DVD COMBINATION EMPLOYS A LASER SYSTEM. - TO ENSURE PROPER USE OF THIS PRODUCT, PLEASE READ THIS OWNER'S MANUAL CAREFULLY AND RETAIN - Toshiba 19SLV411U | User Manual - Page 10
11: Troubleshooting 72 General troubleshooting 72 LED Indication 73 Chapter 12: Appendix 74 Specifications 74 Acceptable signal formats for PC IN and HDMI terminals...........75 Limited United States Warranty LCD TV/DVD Combination ......76 Limited Canadian Warranty for Toshiba Brand Flat - Toshiba 19SLV411U | User Manual - Page 11
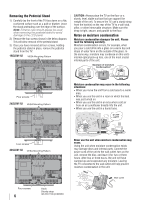
care, and service information. Keep this manual for future reference. 2 Observe the following when choosing a location for the TV: • Read " Important notes about your LCD TV / DVD combination " ( page 9). • Place the TV on the floor or a sturdy, level, stable surface that can support the weight of - Toshiba 19SLV411U | User Manual - Page 12
controls and connections 19SLV411U / 24SLV411U / 32SLV411U Left side panel 4 TV front 5 3 6 7 8 9 10 21 1無 Power On / Standby LED - Power LED (Green) = Power indicator Power LED (Red) = Power standby 2無 Remote sensor (embedded) - Point the remote control toward this remote sensor. Effective - Toshiba 19SLV411U | User Manual - Page 13
32SLV411U (Please use this illustration for 24SLV411U model.) 4 1 56 2 7 8 7 8 Power cord 3 4 56 1無 AUDIO/COLOR STREAM HD - ColorStream® high-definition component video inputs (with standard stereo audio inputs) for connecting devices with component video output, such as a Toshiba DVD player - Toshiba 19SLV411U | User Manual - Page 14
page 20). Note: An HDMI cable provides the best audio and picture performance. 14 AC cord Note: •• Never connect the AC cord plug to other than the specified voltage (120 V, 60 Hz). •• If you cause a static discharge when touching the LCD TV / DVD combination and it fails to function, simply unplug - Toshiba 19SLV411U | User Manual - Page 15
box output is set to). Use the Cable box controls to change channels. To view the VCR: Turn ON the VCR. Select the VIDEO video input source on the TV.* * To select the video input source, press INPUT on the remote control ( page 30). You will need: • standard A/V cables To view the camcorder - Toshiba 19SLV411U | User Manual - Page 16
on the TV. The COLOR STREAM HD terminal can be used to display Progressive (480p, 720p) and Interlaced (480i, 1080i). Please check the Owner's Manual of the DVD player in order to determine the best output signal available. −− If your DVD player does not have component video, connect a standard - Toshiba 19SLV411U | User Manual - Page 17
devices (such as a set-top box or DVD player with HDMI or DVI output). The HDMI input 720p (60 Hz), 1080i (60 Hz), and 1080p (24 Hz / 30 Hz / 60 Hz) signal formats. For detailed signal specifications, see page 75. Supported Audio format: Linear PCM, sampling rate 32/44.1/48 kHz. Note: To connect - Toshiba 19SLV411U | User Manual - Page 18
standard. • This feature is limited to models incorporating Toshiba's REGZA-LINK®. However, Toshiba is not liable for those operations. Refer to the individual instruction manuals for compatibility information. Note: This feature may not work properly depending on the devices that are connected. 18 - Toshiba 19SLV411U | User Manual - Page 19
Connecting your TV Connecting a digital audio system The TV's DIGITAL AUDIO OUT terminal outputs a Dolby® * Digital or 2-channel TV back panel To control the audio: 1無 Turn on the TV and the digital audio device. 2無 Press on the remote defaults, highlight Reset and then press not work properly - Toshiba 19SLV411U | User Manual - Page 20
resolution on the PC before connecting it to the TV models cannot be connected to this TV. •• An adapter is not needed for computers with a compatible mini D-sub15-pin terminal. •• Depending on the DVD's title and the specifications of the PC on which you are playing the DVD (HDMI), 720p, 1080i, or - Toshiba 19SLV411U | User Manual - Page 21
the remote control Preparing the remote control for use The remote control can operate your LCD TV / DVD combination and control the basic functions of connected audio/video devices if you connect a REGZA-LINK® compatible audio receiver or playback device ( page 50). Installing the remote control - Toshiba 19SLV411U | User Manual - Page 22
operating the LCD TV / DVD combination are described here. For the REGZALINK® remote control functions, see the section " Using REGZA-LINK® " ( page 50). Note: The error message "NOT AVAILABLE" may appear if you press a key for a function that is not available. 22 1無 POWER turns the TV on - Toshiba 19SLV411U | User Manual - Page 23
SKIP skips forward to locate later DVD chapters ( page 56). 32無 SKIP skips reverse to locate the beginning of current DVD chapter or locate previous chapter ( CD playback ( page 63); returns to previous directory from Media Player subfolder or sub-menu ( page 47). 41無 ZOOM zooms into the center of - Toshiba 19SLV411U | User Manual - Page 24
the remote control or MENU on the TV control panel. Icon Picture Sound Preferences Locks Setup Item Mode Picture Settings Noise Reduction Game Mode Theater Settings Digital Audio Selector Audio Settings Audio Setup CC Selector Base CC Mode Digital CC Settings Input Labeling Menu Language Channel - Toshiba 19SLV411U | User Manual - Page 25
menu (illustrated below), press on the remote control or MENU on the TV control panel, open the Setup menu, select Installation, and press . Icon Terrestrial System Status Item Input Configuration Channel Program Channel Options Channel Tuning Mode Time Zone Signal Meter System Information Option - Toshiba 19SLV411U | User Manual - Page 26
Chapter 5: Setting up your TV Initial Setup When you first turn on or reset the TV, the Initial Setup window will appear. 1無 In the Menu Language field, press t or u to select your preferred language. 2無 Press p or q to select Time Zone Setup and set your desired time zone with t or u and press . - Toshiba 19SLV411U | User Manual - Page 27
programming is finished, you should not have to repeat the programming process again unless your Cable TV service lineup changes significantly. To program channels automatically: 1無 Configure the antenna input source, if you have not already done so ( page 26). 2無 Press and open the Setup menu - Toshiba 19SLV411U | User Manual - Page 28
TV To manually add digital subchannels on a physical channel: Use the Channel Numbers and the Dash ( ) on the remote control to enter the channel number (for example, 56-1). If the channel is found, the number will be added to the list and the box will be unchecked. If the channel See "Connecting an - Toshiba 19SLV411U | User Manual - Page 29
the screen and return to the Installation menu: Highlight Done of Support Information or highlight No of Factory Defaults, and press . To return to normal viewing: Press . Reset Factory Defaults To reset all settings and channels to their factory default values: 1無 Press and open the Setup menu - Toshiba 19SLV411U | User Manual - Page 30
® device with HDMI switching capability (e.g. Audio Receiver) is connected to the HDMI input: Press INPUT on the remote or TV control panel repeatedly to highlight HDMI 1 or HDMI 2. If the connected CEC device has any connected devices, a separate device selection popup window will appear. Press - Toshiba 19SLV411U | User Manual - Page 31
TV the remote control. connected a VCR to ColorStream HD, a video recorder to HDMI 1, and a DVD player to HDMI 2. Input Selection 0 ANT/CABLE 1 Video 2 VCR 3 Video Recorder 4 DVD 5 PC 6 DVD channels as you highlight them in the Channel Browser™) or Select mode (to surf over channels in the Channel - Toshiba 19SLV411U | User Manual - Page 32
press . To return to factory defaults, highlight Reset and press . To open the Channel Browser™: • Press or on the remote control. • Press to surf backward through the previously tuned channels in the History list, the channels in the ANT/ CABLE channel list, the inputs in the Inputs list, the - Toshiba 19SLV411U | User Manual - Page 33
antenna input. • Turning off the TV will clear the History List. Setting the Channel Tuning Mode This channels can be tuned normally Auto (default) Digital channels will have priority when manually entering a channel number using the Channel Number (0-9) on the remote control, analog channels - Toshiba 19SLV411U | User Manual - Page 34
or on the remote control or TV control panel. Note: This feature will not work unless you program channels into the TV's channel memory ( page 26). Tuning to a specific channel (programmed or unprogrammed) Tuning analog channels: Press the Channel Number (0-9) on the remote control. For example - Toshiba 19SLV411U | User Manual - Page 35
Using the TV's features To to change the picture size (i.e., changing the height/ width ratio) for any purpose other than your private viewing may be supported only for HDMI (1080p,1080i, 720p, 480p, and 480i), ColorStream (1080i and 720p), and ANT/ CABLE (digital) inputs (1080p,1080i, and 720p). - Toshiba 19SLV411U | User Manual - Page 36
to the factory defaults, highlight Reset and press . Note: When receiving a signal at 480i resolution, the picture scroll function may have limited adjustment range. Using the auto aspect ratio feature When the auto aspect ratio feature is set to On, the TV will automatically select the picture - Toshiba 19SLV411U | User Manual - Page 37
turn off the auto aspect ratio feature: Select Off in step 3 above. Selecting the cinema mode When you view a DVD (3:2 pulldown processed) from a DVD player connected to the VIDEO, ColorStream HD (component video), or HDMI inputs on the TV (factory setting) Lower contrast for darkened room (factory - Toshiba 19SLV411U | User Manual - Page 38
the picture quality you want to adjust (Contrast, Backlight, DynaLight, Brightness, Color, Tint settings from, highlight Reset and press . The TV programs and videos that are closed captioned (usually marked "CC" in program guides Base CC Mode to Off. • To turn off the closed caption mode: Select Off - Toshiba 19SLV411U | User Manual - Page 39
highlight Reset and press channel. However, once you change to another analog channel service. 4無 Press . Note: You can also press to open CC Selector and follow from step 3. Adjusting the audio Muting the sound (For TV speakers) Press on the remote control to partially reduce (1/2 MUTE) or turn - Toshiba 19SLV411U | User Manual - Page 40
TV channel (depending on the item selected). 5無 To save the new settings, highlight Done and press . To reset the settings to the factory defaults, highlight Reset and press . Selecting the optical audio output format You can use this feature to select the optical audio output format when you connect - Toshiba 19SLV411U | User Manual - Page 41
the factory defaults, highlight Reset and press . Note: ••This feature is available when tuned to a digital RF channel with the Dolby Digital : PIN code cannot be set to "0000". Blocking TV programs and movies by rating (V-Chip) Some TV programs and movies include signals that classify the content of - Toshiba 19SLV411U | User Manual - Page 42
selection of blocking level is for U.S V-Chip system. For Canada rating, you can highlight the "Canada RS" then press , another "Canadian Rating Menu" screen controlled by the TV or Toshiba, nor is the availability of an additional rating system determined or controlled by Toshiba. Similarly, the - Toshiba 19SLV411U | User Manual - Page 43
TV-G General Audience (Most parents would find this program suitable for all ages.) TV-Y7, TV of the program you are watching, press on the remote control. If it is rated " None " the rating will appear in the INFO screen. Blocking TV programs by Canada rating : 1無 Press and highlight the Locks - Toshiba 19SLV411U | User Manual - Page 44
press . If the correct code is entered, the program lock mode is released and the normal picture appears. All locking will be enabled when the TV change channel. Using the input lock feature You can use the Input Lock feature to lock the video inputs (Video, ColorStream HD, HDMI 1, HDMI 2, and PC - Toshiba 19SLV411U | User Manual - Page 45
settings feature You can view an image from a PC on the TV screen. When a PC is connected to the TV's PC IN terminal, you can use the PC Settings feature the screen. The adjustment range is within ±10 from center.* Reset Highlight this item then press to get an optimum adjustment automatically. - Toshiba 19SLV411U | User Manual - Page 46
viewing Media Player. ••USB device: USB Mass Storage Class device (MSC) ••Connectivity is not guaranteed for all devices. ••Connect the USB device to the TV directly. ••Do not use a USB Hub. ••You must obtain any required permission from copyright owners to use copyright content. Toshiba cannot and - Toshiba 19SLV411U | User Manual - Page 47
the TV's shall be displayed. This view allows you to change the photo content manually. When moving from Multi View to the Single View, the currently the Photo Viewer 1無 Press . The television will return to the last viewed channel or external input. Playing music files You can listen to music from a - Toshiba 19SLV411U | User Manual - Page 48
Chapter 6: Using the TV's features During playback • Press to pause. • To normal playback, press or . Repeat, and press or to select Off, All or 1. 3無 Press . To close the Music Player 1無 Press . Viewing photo files with playing music files at the same time While viewing photo files, this - Toshiba 19SLV411U | User Manual - Page 49
). No Signal Power Down The TV will automatically turn itself off after 15 minutes when no signal is detected. You can change the setting to Off for the following purposes: • Low signal strength of analog channel (no signal detection) • Only Audio L/R is connected to external input to listen to - Toshiba 19SLV411U | User Manual - Page 50
allows you to control Toshiba REGZA-LINK® compatible devices from the TV remote via HDMI connection ( page 18). Player Control and press . REGZA-LINK® playback device (DVD player, etc.) control With your TV's remote control, or using the REGZALINK Player Control menu, you can control the connected - Toshiba 19SLV411U | User Manual - Page 51
TV's remote control, you can adjust or mute the sound volume of the Audio Receiver. • / adjust the volume level. • turns off the sound. Note: ••To use this function: −− Set Speaker Preference to Audio Receiver in the REGZA-LINK Setup menu. −− Confirm that a connected REGZA-LINK® device (such as DVD - Toshiba 19SLV411U | User Manual - Page 52
Digital or PCM) • Video resolution • Aspect ratio of incoming video signal (4:3 or 16:9) • V-Chip rating status • GameTimer (if set) To close the screen (except ANT/CABLE input): Press again. Understanding the auto power off feature The TV will automatically turn itself off after approximately 15 - Toshiba 19SLV411U | User Manual - Page 53
TV's advanced features Using the advanced picture settings features Using Dynamic Contrast Dynamic Contrast detects changes in picture quality that affect the appearance of your contrast settings and then automatically adjusts the video. To select Dynamic Contrast Reset settings are connected to the - Toshiba 19SLV411U | User Manual - Page 54
TV picture. This may be useful when receiving a broadcast with a weak signal (especially a Cable channel Reset highlight Reset turned on when any other video input, other than the above mentioned is selected. To turn turn off Game Mode: Select Off in step 2 above, change the video input, or turn the TV - Toshiba 19SLV411U | User Manual - Page 55
. Basic playback (DVD/VCD/CD)* 1無 Press POWER on the TV control panel or on the remote control. The Power LED on the front of the LCD TV / DVD combination changes to to page 8 for a list of supported disc formats and to page 73 for playback-related troubleshooting instructions. (continued) 55 - Toshiba 19SLV411U | User Manual - Page 56
be replaced by "Incorrect Disc". Eject the disc and load it again making sure the playback side is now facing forward. •• The playback resume function may not work on some discs. •• Some DVDs may have fixed playback operations designed by the DVD manufacturer. Your LCD TV / DVD combination follows - Toshiba 19SLV411U | User Manual - Page 57
options differ depending on the kind of disc. DVDs use the title, chapter or record time to navigation option. Title Chapter Time Jump 3無 Use the Channel Number buttons (0-9) to key in a value for the title. •• For PBC-enabled VCDs, turn off the PBC function first before using the Jump function ( - Toshiba 19SLV411U | User Manual - Page 58
The saved scene bookmarks are only accessible during the current session. Once you eject the disc or turn off the LCD TV / DVD combination, all bookmarks will be cleared. Bookmarking a scene (DVD/VCD/CD) 1無 During playback, press at the scene where you would like to place the bookmark. 2無 Press - Toshiba 19SLV411U | User Manual - Page 59
the current session. Once you eject the disc or turn off the LCD TV / DVD combination, these modes will be disabled. Programming the playback column. Press or to select the playback position, then use the Channel Number buttons (0-9) to input the track for that position. To program other tracks - Toshiba 19SLV411U | User Manual - Page 60
to change the track input for, then press . 3. Use the Channel Number buttons (0-9) to input the new track for the selected position. To instructions supplied with the DVD. DVD menu (DVD) Some DVDs have an encoded menu that allows users to select a specific disc content, enable a particular DVD - Toshiba 19SLV411U | User Manual - Page 61
DVD. During playback, press repeatedly until the preferred language track is selected. Selecting the audio channel (VCD) During playback, press repeatedly until the preferred audio channel DVD) When playing back a disc recorded with subtitles, you can select the subtitle language or turn Turning - Toshiba 19SLV411U | User Manual - Page 62
lower case), 0 through 9, and the underscore symbol (_). • Non-supported characters will be replaced with a hyphen (-). MP3/WMA/JPEG CD limitations • Depending on the recording conditions, some MP3/WMA/JPEG CDs cannot be played back in your LCD TV / DVD combination. • Only MP3, WMA, and JPEG files - Toshiba 19SLV411U | User Manual - Page 63
combination records the stop point. " " appears on-screen. Press to resume playback. If you press twice in quick succession or unload the disc, the LCD TV / DVD combination will clear the stop point. Note: •• If the current directory has more than eight files, press or to scroll the file list - Toshiba 19SLV411U | User Manual - Page 64
Off appears. 64 Viewing a slide show (CD) If there are multiple JPEG files in the selected directory, you can view them in a slide show. For instructions on how to enable the slide show feature and set the interval period between pictures, go to page 69. 1無 Open the file folder containing the - Toshiba 19SLV411U | User Manual - Page 65
to play files at random. Note: These playback modes are only applicable during the current session. Once you eject the disc or turn off the LCD TV / DVD combination, these modes will be disabled. Pressing or during playback will also cancel these modes. Enabling repeat playback (CD) 1無 During stop - Toshiba 19SLV411U | User Manual - Page 66
Chapter 9: Advanced disc playback Programming the playback sequence (CD) 1無 In the Option panel of the file browser, press or to select Edit Mode, then press . 5無 Press or to select Program View, then press . MP3-1 MP3-2 MP3-3 WMA-3 Edit Mode Browser View Clear Program Folder-1 Folder-2 - Toshiba 19SLV411U | User Manual - Page 67
Customizing disc playback You can customize the disc playback settings to suit your preferences. Configuring the disc playback settings (DVD/VCD/CD) 1無 In DVD mode, press during stop mode. MPDEea.RBnrCe.uLn.tal : :OEfnf glish SQTuVSboStiuctlnreedSenet Pass:w:O4oE:nr3ndglish AODuiudstpipoluaty - Toshiba 19SLV411U | User Manual - Page 68
audio connection. 70 Parental Set the restriction level for allowable disc content. 70 Password Change the access password for the parental control setting. 71 Note: These setup settings are retained in the LCD TV / DVD combination's memory. It remains active even if the power is turned off - Toshiba 19SLV411U | User Manual - Page 69
that signal in an appropriate method based on the current aspect ratio of the LCD TV / DVD combination. This option will normally suit most DVDs. Suitable for playback of DVDs recorded in a film format. Suitable for playback of DVDs recorded in a video format. Note: If picture appears cut off or - Toshiba 19SLV411U | User Manual - Page 70
connected to the optical DIGITAL AUDIO OUT jack. PCM Changes Dolby Digital output to PCM. Select this option when using a two-channel to select the content rating level allowed for playback in your LCD TV / DVD combination. You will be prompted to key in the system manually. (continued) 70 - Toshiba 19SLV411U | User Manual - Page 71
then press . 2) Use the Channel Number buttons (0-9) to input remote control, then press VOLUME- on the TV control panel. The "Initializing" message appears onscreen to indicate that the password has been reset to its default factory setting "0000". All DVD Setup related settings will also be reset - Toshiba 19SLV411U | User Manual - Page 72
. Other problems •• If your TV's problem is not addressed in this Troubleshooting section or the recommended solution has not worked, use the Reset Factory Defaults procedure ( page 29). TV will not turn on •• Make sure the power cord is plugged in, and then press . •• The remote control batteries - Toshiba 19SLV411U | User Manual - Page 73
of the device, turn off your TV and unplug the power cord, then plug and turn on again. •• If several devices are connected, REGZA-LINK® feature may not operate properly. •• Read the instruction manual furnished with the connected REGZA-LINK® device. HDMI problems For HDMI cables •• Make - Toshiba 19SLV411U | User Manual - Page 74
kg) 32SLV411U: 19.8 lbs (9.0 kg) Operating conditions Temperature: 32ºF - 95ºF (0ºC - 35ºC) Humidity: 20 - 80% (no moisture condensation) Supplied Accessories • Remote control with two size "AAA" batteries • Owner's manual (this book) • Four screws for holding the pedestal stand • Instruction manual - Toshiba 19SLV411U | User Manual - Page 75
connected PC, the following status may occur; incorrect display, false format detection, picture position failure, blur, or judder. But this is not a malfunction of your TV. Format VGA SVGA XGA WXGA SXGA Resolution 720p 1080i 1080p 1080p Resolution 640 × 480 800 this owner's manual are for - Toshiba 19SLV411U | User Manual - Page 76
. How to Obtain Warranty Service After following all of the operating instructions in the Owner's manual, review the section entitled "Concierge" located on our Customer Support Web site at support.toshiba.com. If you find that service is needed, follow the instructions provided on the web site - Toshiba 19SLV411U | User Manual - Page 77
Your Responsibility Read the owner's manual thoroughly before operating this LCD TV/DVD Combination. Complete and mail the enclosed product registration card or register your LCD TV/DVD Combination online at support. toshiba.ca/warranty/. Registration of your LCD TV/ DVD Combination will enable TCL - Toshiba 19SLV411U | User Manual - Page 78
the promotion or sale of, the Television, on the other hand, the provisions of this limited warranty shall prevail. How to Obtain Warranty Services If, after following all of the operating instructions in this manual, checked the "Troubleshooting" section, and have visited support.toshiba.com. for - Toshiba 19SLV411U | User Manual - Page 79
find that service is needed, please contact TCL Customer Support toll free at 1 800 2683404. A copy of the GPL source code in this product may be obtained by contacting Toshiba . By contrast, the its users. This not price. Our General that any problems introduced by contents constitute a work based on the - Toshiba 19SLV411U | User Manual - Page 80
that you provide a warranty) and that users may redistribute the program under these conditions, and telling the user how to view a copy of this when you distribute them as separate works. But when you distribute the same sections as part of a whole which is a work based on the Program, the - Toshiba 19SLV411U | User Manual - Page 81
in detail to address new problems or concerns. Each version is decision will be guided by the two goals THE COST OF ALL NECESSARY SERVICING, REPAIR OR CORRECTION. 12. IN to the public, the best way to achieve this is You should also get your employer (if you work as a programmer) or your school, if - Toshiba 19SLV411U | User Manual - Page 82
entire risk of satisfactory quality, performance, accuracy, and effort is with the user. libpng versions 0.97, January 1998, through 1.0.6, March 20, 2000, are , and encourage the use of this source code as a component to supporting the PNG file format in commercial products. If you use this source - Toshiba 19SLV411U | User Manual - Page 83
Note - Toshiba 19SLV411U | User Manual - Page 84
Service and Support Dept: 1420-B TOSHIBA DRIVE, LEBANON, TN 37087, U.S.A. . TOSHIBA OF CANADA LTD. HEAD OFFICE: 191 McNABB STREET, MARKHAM, ONTARIO, L3R 8H2, CANADA CableClear, ColorStream, GameTimer, and TheaterWide are registered trademarks of Toshiba America Information Systems, Inc. Channel
-
 1
1 -
 2
2 -
 3
3 -
 4
4 -
 5
5 -
 6
6 -
 7
7 -
8
-
9
-
10
-
11
-
12
-
13
-
14
-
15
-
16
-
17
-
18
-
19
-
20
-
21
-
22
-
23
-
24
-
25
-
26
-
27
-
28
-
29
-
30
-
31
-
32
-
33
-
34
-
35
-
36
-
37
-
38
-
39
-
40
-
41
-
42
-
43
-
44
-
45
-
46
-
47
-
48
-
49
-
50
-
51
-
52
-
53
-
54
-
55
-
56
-
57
-
58
-
59
-
60
-
61
-
62
-
63
-
64
-
65
-
66
-
67
-
68
-
69
-
70
-
71
-
72
-
73
-
74
-
75
-
76
-
77
-
78
-
79
-
80
-
81
-
82
-
83
-
84
 |
 |
19SLV411U
24SLV411U
32SLV411U
For an overview of steps for setting up your new TV, see page 11.
Note: To display a High Definition picture, the TV must be
receiving a High Definition signal (such as an over-the-air High
Definition TV broadcast, a High Definition digital cable program,
or a High Definition digital satellite program). For details, please
contact your TV antenna installer, cable provider, or satellite
provider.
© 2011 TOSHIBA CORPORATION
All Rights Reserved
Owner’s Record
The model number and serial number are on
the back of your LCD TV / DVD combination.
Record these numbers in the spaces below.
Refer to these numbers whenever you
communicate with your Toshiba dealer about
this LCD TV / DVD combination.
Model number:
Serial number:
HDA51L1900I