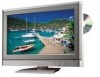
Toshiba 20HLV86 Owners Manual
Toshiba 20HLV86 - 20" LCD TV Manual
 |
UPC - 022265980873
View all Toshiba 20HLV86 manuals
Add to My Manuals
Save this manual to your list of manuals |
Toshiba 20HLV86 manual content summary:
- Toshiba 20HLV86 | Owners Manual - Page 1
Combination DIGITAL VIDEO Introduction Connecting your TV/DVD Setting up your TV/DVD Using the TV/DVD's Features DVD Playback 20HLV86 Appendix 5X20301A(E)Cover 1 13/3/06, 5:18 PM - Toshiba 20HLV86 | Owners Manual - Page 2
Toshiba television. You must carefully read and understand all of the safety instructions contained in this manual .) NO USER-SERVICEABLE PARTS INSIDE. REFER SERVICING TO QUALIFIED SERVICE PERSONNEL. The lightning furniture large enough to support the weight of your TV (and other electronic components - Toshiba 20HLV86 | Owners Manual - Page 3
Part 15 of the FCC rules. FCC Declaration of Conformity Compliance Statement (Part 15): The Toshiba 20HLV86, LCD TV/DVD Combination complies with Part READ THIS OWNER'S MANUAL CAREFULLY AND RETAIN FOR FUTURE REFERENCE. SHOULD THE UNIT REQUIRE MAINTENANCE, CONTACT AN AUTHORIZED SERVICE LOCATION. - Toshiba 20HLV86 | Owners Manual - Page 4
. Install in accordance with the manufacturer's instructions. 8) Do not install near any heat turn off the TV and unplug the power cord to avoid possible electric shock or fire. • To prevent personal injury, never handle the damaged television. • ALWAYS contact a service technician to inspect the TV - Toshiba 20HLV86 | Owners Manual - Page 5
voltage or other hazards. Refer all servicing to a Toshiba Authorized Service Center. 40) If you have the TV serviced: • Ask the service technician to use only replacement parts specified by the manufacturer. • Upon completion of service, ask the service technician to perform routine safety checks - Toshiba 20HLV86 | Owners Manual - Page 6
LCD TV The following symptoms are technical limitations of LCD Display technology and are not an indication of malfunction. Therefore, Toshiba exists may damage discs and internal parts. Remove the disc, connect the power cord of the unit to the wall outlet, turn on the unit, and leave it - Toshiba 20HLV86 | Owners Manual - Page 7
other intellectual property rights owned by Macrovision Corporation and other rights owners. Use of this copyright protection technology must be authorised by Macrovision or disassembly is prohibited. Using the TV/DVD's Features DVD Playback Appendix 5X20301A(E)P02-10 7 7 13/3/06, 5: - Toshiba 20HLV86 | Owners Manual - Page 8
protector, as this may cause trouble with the operation of the unit. Because of problems and errors that can occur during the creation of DVD and CD Software and/or the manufacture of DVD and CD discs, Toshiba cannot assure that the DVD player contained in this TV will successfully play every disc - Toshiba 20HLV86 | Owners Manual - Page 9
selection 51 DVD menu 51 Changing soundtrack language 52 Subtitles 52 Disc status 53 To turn off the DVD disc .......... 62 Appendix 63 Language code list 63 Troubleshooting 64 Specifications 66 Limited United States Warranty 67 Limited Canada Warranty 68 Using the TV/DVD's Features DVD - Toshiba 20HLV86 | Owners Manual - Page 10
. The side and back panels provide the terminals to connect other equipment to your TV/DVD. Top panel POWERMENU VOLUMCEH+AN/ -NETVL/MVID/ ?EO The STARTING SETUP feature appears the first time you turn on the TV/DVD. See PLAYSTOP SKIP /7 6EJECT 5 page 23 for details. The volume and channel - Toshiba 20HLV86 | Owners Manual - Page 11
stereo right channel, and the white audio cable is for the stereo left (or mono) channel. If you look at the rear panel of the TV/DVD, you will see that the terminals are color coded in the same manner as the cables. • S-video cables provide better picture performance than standard video - Toshiba 20HLV86 | Owners Manual - Page 12
company. Option 1: For Subscribers to Basic Cable TV Service For basic cable service not requiring a Converter/Descrambler box, connect the directly tune any nonscrambled channels on your TV/DVD. With the switch in the "A" position, tune your TV/DVD to the output of the Converter/Descrambler - Toshiba 20HLV86 | Owners Manual - Page 13
use a standard video cable instead of the S-video cable, but the picture quality will decrease. If you use an S-video cable between the TV/DVD and DVD player/satellite receiver, make the audio connections but remove the standard video cable. Do not connect both an S-video and a standard video cable - Toshiba 20HLV86 | Owners Manual - Page 14
record from one source while watching a program from another source. Your TV/DVD is capable of using ColorStream (component video). Connecting your TV/DVD to a component video compatible DVD player, such as a Toshiba DVD player with ColorStream®, can greatly enhance picture quality and performance - Toshiba 20HLV86 | Owners Manual - Page 15
(component video) and a VCR This connection allows you to watch DTV (digital TV), VCR, and TV programs, and record DTV and TV programs. Your TV/DVD has ColorStream® (component video) inputs. Connecting your TV/DVD to a DTV receiver with component video can greatly enhance picture quality and realism - Toshiba 20HLV86 | Owners Manual - Page 16
watch videos recorded on a camcorder. VHS Camcorder You will need: • one set of standard AV cables VIDEO AUDIO L R OUT TV/DVD back panel S-VIDEO VIDEO AUDIO L R OUT TV/DVD back panel S-VHS Camcorder You will need: • one S-video cable • one pair of standard audio cables Note: For better picture - Toshiba 20HLV86 | Owners Manual - Page 17
is recommended that you follow these procedures: • When turning on your electronic components, turn on the TV/DVD first, and then the HDMI or DVI device. • When turning off your electronic components, turn off the HDMI or DVI device first, and then the TV/DVD. To connect a DVI device, you will need - Toshiba 20HLV86 | Owners Manual - Page 18
. • Refer to the owner's manual of the connected equipment as well. • The output sound of the TV/DVD has a wide dynamic range. Be sure to adjust the receiver's volume to a moderate listening level. Otherwise, the speakers may be damaged by a sudden high volume sound. • Turn off the amplifier before - Toshiba 20HLV86 | Owners Manual - Page 19
• Refer to the owner's manual of the connected equipment as well. • The output sound of the TV/DVD has a wide dynamic range. Be sure to adjust the receiver's volume to a moderate listening level. Otherwise, the speakers may be damaged by a sudden high volume sound. • Turn off the amplifier's before - Toshiba 20HLV86 | Owners Manual - Page 20
Picture/Audio adjustments in the PC mode" on page 43). The TV/DVD can be used as a computer monitor. TV/DVD back panel Computer Audio output Audio cable You will need: • 60Hz 60Hz 60Hz 60Hz 60Hz Notes: • Some PC models cannot be connected to this TV. • An adapter is not needed for computers with - Toshiba 20HLV86 | Owners Manual - Page 21
snaps. Note: The TV/DVD remote control may not operate your VCR, DVD player, or cable TV converter. Refer to the owner's manual supplied with your other devices to see which features may be available. Additionally, the remote control for this TV/DVD may not support certain features available on - Toshiba 20HLV86 | Owners Manual - Page 22
the TV/DVD to turn off at a set time (page 37) MENU/SETUP MUTE turns off the sound (page 40) CLOSED CAPTION switch between TV/ DVD, VCD, CD Audio, forwards playback PLAY plays a DVD, VCD, CD Audio REV rewinds a DVD, VCD, CD Audio, reviews playback STOP stops a DVD, VCD, CD Audio PAUSE pauses a DVD - Toshiba 20HLV86 | Owners Manual - Page 23
CABLE setting, and program channels automatically. IMPORTANT: Make sure that the antenna or cable TV system is connected. 1. Press POWER to turn on the TV/DVD. The starting setup function begins and the language setup menu appears on the screen. Press ▲ or ▼ to select your desired language, then - Toshiba 20HLV86 | Owners Manual - Page 24
can automatically detect all active channels and store them in its memory. After the TV/DVD has stored the channels in its memory automatically, you can add or erase channels manually. To add channels automatically: 1. Press MENU, then press or to display the SETUP menu. 2. Press ▲ or ▼ until the - Toshiba 20HLV86 | Owners Manual - Page 25
second channel using the Channel Number buttons (0-9, 100). 3. Press CH RTN. The previous channel will be displayed. Each time you press CH RTN, the TV/DVD will switch back and forth between the two channels. Programming your favorite channels You can preset up to 12 of your favorite channels using - Toshiba 20HLV86 | Owners Manual - Page 26
for the U.S. V-Chip system only. The Canadian V-Chip Feature system is not supported. You can prevent others from viewing certain programs or channels by blocking them using within five seconds while the TV/ DVD is in password entering mode. This allows you to reset your password. Using the - Toshiba 20HLV86 | Owners Manual - Page 27
still be viewed if you press MUTE and then enter your password to temporarily bypass the block. Channel Numbers DISPLAY ENTER EXIT MENU Using the TV/DVD's Features DVD Playback Appendix 5X20301A(E)P26-30 27 27 13/3/06, 9:03 PM - Toshiba 20HLV86 | Owners Manual - Page 28
MENU Note: After programming CH LOCK, change channels before turning off the television. Channel Numbers INPUT ENTER EXIT MENU Note: After programming VIDEO LOCK, change channels or press the INPUT key before turning off the TV/DVD. Using the TV/DVD's Features 5X20301A(E)P26-30 28 13/3/06, 7:14 - Toshiba 20HLV86 | Owners Manual - Page 29
controls to prevent your settings from being changed accidentally (by children, for example). When the panel lock is in ON, all control buttons on the TV/DVD top panel (except POWER) do not operate. To lock the panel controls: 1. Press MENU, then press or to display the LOCKS menu. 2. Press ▲ or - Toshiba 20HLV86 | Owners Manual - Page 30
Labeling channels Channel labels appear above the channel number display each time you turn on the TV/DVD, select a channel, or press the DISPLAY button. You can choose any four characters to identify a channel. To create channel labels: 1. Select a channel you want to - Toshiba 20HLV86 | Owners Manual - Page 31
ANT, VIDEO-1, VIDEO2, ColorStream HD, HDMI or PC, depending on which input jacks you used to connect your devices (see "Connecting your TV/DVD" on page 11). SOURCE SELECTION 0. ANT 1. VIDEO1 2. VIDEO2 3. ColorStream HD 4. HDMI 5. PC [0-5] : SELECT Press INPUT on the remote control to display the - Toshiba 20HLV86 | Owners Manual - Page 32
every day at the same time to the same channel until you clear the ON TIMER. To set the on timer: (Example: Turning on the TV/DVD to channel 012 at 6:30 AM, DAILY) 1. Set the clock, if you have not already done so (see page 31). 2. Press MENU, then press or - Toshiba 20HLV86 | Owners Manual - Page 33
Introduction Connecting your TV/DVD Setting up your TV/DVD Viewing the wide-screen picture formats (480i and 480p signals only) You can , and may subject you to civil and criminal liability. Using the TV/DVD's Features DVD Playback Appendix 5X20301A(E)P33-40 33 33 13/3/06, 5:21 PM - Toshiba 20HLV86 | Owners Manual - Page 34
may be prohibited under the Copyright Laws of the United States and other countries, and may subject you to civil and criminal liability. Using the TV/DVD's Features 5X20301A(E)P33-40 34 34 13/3/06, 5:21 PM - Toshiba 20HLV86 | Owners Manual - Page 35
Introduction Connecting your TV/DVD Setting up your TV/DVD Scrolling the TheaterWide® picture (TheaterWide 2 and 3 only) 1. Press PIC SIZE to : Not adjustable Wide 2 : -10 to +20 Wide 3 : -10 to +20 Using the TV/DVD's Features DVD Playback Appendix 5X20301A(E)P33-40 35 35 13/3/06, 5:21 PM - Toshiba 20HLV86 | Owners Manual - Page 36
the ASPECT feature When the ASPECT feature is set to ON and the TV/DVD receives a 480i signal, the picture size is automatically selected (as described information, the picture size you selected on pages 33 is displayed. To turn on the ASPECT feature: 1. Press MENU, then press or until the SETUP - Toshiba 20HLV86 | Owners Manual - Page 37
on the remote control repeatedly to set the length of time until the TV/DVD turns off. The clock will count up 10 minutes for each press of the (if available in your viewing area). To view captions or text: 1. Tune the TV/DVD to the desired program. 2. Press MENU, then press or to display the SETUP - Toshiba 20HLV86 | Owners Manual - Page 38
quality to your personal preferences, including the brightness, contrast, color, tint, and sharpness. The qualities you choose will be stored automatically in your TV/DVD's memory so you can recall them at any time. To adjust the picture quality: 1. Press MENU, then press or to display the PICTURE - Toshiba 20HLV86 | Owners Manual - Page 39
your TV/DVD Setting up your TV/DVD Using the CableClear® feature CableClear® reduces visible interference in your TV/DVD picture. This is useful when receiving a broadcast with a weak signal (especially a Cable channel) or playing a video cassette or disc damaged by repeated use. To turn on - Toshiba 20HLV86 | Owners Manual - Page 40
other audio information. Note: The MTS feature is only available in ANT input source. When the TV/DVD receives a stereo or SAP broadcast, the "STEREO" or "SAP" displays on-screen every time you turn the TV/DVD on, change the channel, or press DISPLAY. To listen to stereo sound: 1. Press MENU, then - Toshiba 20HLV86 | Owners Manual - Page 41
sound feature expands the audio listening field wider and deeper to create exceptional sound quality from the TV's speakers. The feature uses stereo signals from a TV broadcast or video input. To turn on the surround sound feature: 1. Select the STEREO mode, if available (see "Selecting stereo/SAP - Toshiba 20HLV86 | Owners Manual - Page 42
TV/DVD has a limited life. When areas on the screen darken, flicker, or no longer light up, the lamp may be at the end of its life. Contact your nearest Toshiba Authorized Service are viewing the TV/DVD and the power is resupplied, the Power Return feature will turn the TV/ DVD on automatically. If - Toshiba 20HLV86 | Owners Manual - Page 43
. • The PC Monitor Menu settings are not effective for normal TV mode DVD mode or external input mode. PICTURE menu settings: BRIGHTNESS: To quality of PC mode. STABLE SOUND: To turn on or off the StableSound® feature in PC mode. SURROUND: To turn on or off the surround effect in PC mode - Toshiba 20HLV86 | Owners Manual - Page 44
turn on the unit. The Power indicator will light. • Every time you press POWER, the TV/DVD starts from TV mode. • When using an amplifier, switch on the amplifier. 2. Press TV/DVD on the remote control to select DVD mode. The DVD with the guides, and place it in position. 4. On the TV screen, " " - Toshiba 20HLV86 | Owners Manual - Page 45
To turn off the PBC, see page 53. • Some playback operations of DVDs may be intentionally fixed by software producers. Since this unit plays DVDs according to the disc contents the software producers designed, some playback features may not be available. Also refer to the instructions supplied with - Toshiba 20HLV86 | Owners Manual - Page 46
may appear at the upper right of the screen. This symbol means either the feature you tried is not available on the disc, or the TV/DVD cannot access the feature at this time. This does not indicate a problem with the TV/DVD. DVD Playback 5X20301A(E)P44-55 46 46 13/3/06, 5:23 PM - Toshiba 20HLV86 | Owners Manual - Page 47
a different part of the frame. You may move the frame from the center position to UP, DOWN, LEFT or RIGHT direction. 3. In the zoom mode, press ZOOM repeatedly to return to a 1:1 view ( Off). ZOOM Connecting your TV/DVD Setting up your TV/DVD Using the TV/DVD's Features DVD Playback Locating - Toshiba 20HLV86 | Owners Manual - Page 48
Marking desired scenes DVD VCD The unit stores the points that you want to watch again discs may not work with the marking operation. • The marking is canceled when you eject the disc or turn the power off. • Some subtitles recorded around the marker may fail to appear. • In case of Video CD - Toshiba 20HLV86 | Owners Manual - Page 49
are prohibited during playback. • Chapter/Track repeat function is canceled whenever SKIP 4 or ¢ is pressed. Setting up your TV/DVD Using the TV/DVD's Features DVD Playback 2. Press REPEAT A-B again. The end point is selected. Playback starts at the point that you selected. Playback stops - Toshiba 20HLV86 | Owners Manual - Page 50
normal playback, select Mode: "Off" in step 2. 50 Number buttons PLAY MODE ENTER CANCEL Notes: • The program is canceled when you eject the disc or turn the power off. • In playing back the Video CD with PBC, you cannot set Program playback. PLAY MODE ENTER PLAY Note: In case of Video - Toshiba 20HLV86 | Owners Manual - Page 51
the angles even if multi-angles are recorded on the DVD. ENTER PLAY Setting up your TV/DVD Using the TV/DVD's Features DVD Playback DVD menu Some DVDs allow you to select the disc contents using the menu. When you playback these DVDs, you can select the subtitle language and sound-track language - Toshiba 20HLV86 | Owners Manual - Page 52
DTS-encoded disc, no sound will be heard from the TV/ DVD's speakers. SUBTITLE DVD Playback 5X20301A(E)P44-55 52 Notes: • Depending on the DVD, you may not be able to change subtitles, or to turn subtitles on or off. • While playing a DVD, the subtitle may change when you loaded or eject the - Toshiba 20HLV86 | Owners Manual - Page 53
PBC Follow the above steps 1~2, then press ENTER repeatedly until "PBC" appear. Note: You can also turn off the PBC by pressing the number button 1 and ENTER in the stop mode. Setting up your TV/DVD Using the TV/DVD's Features DVD Playback Appendix 5X20301A(E)P44-55 53 53 13/3/06, 5:23 PM - Toshiba 20HLV86 | Owners Manual - Page 54
owner's manual are meant only as a guide. Use of CD-RW for MP3 files is not recommended. You must obtain any required permission from copyright owners to download or use copyrighted content. Toshiba registered trademark of Apple Computer, Inc. 54 DVD Playback 5X20301A(E)P44-55 54 13/3/06, 5:23 PM - Toshiba 20HLV86 | Owners Manual - Page 55
Introduction Connecting your TV/DVD Setting up your TV/DVD MP3/WMA CD and Audio CD playback CD 1. Load an Audio CD or a disc on be displayed in the file browser. 4. Press RETURN to save the setting. 55 Using the TV/DVD's Features DVD Playback Appendix 5X20301A(E)P44-55 55 13/3/06, 9:05 PM - Toshiba 20HLV86 | Owners Manual - Page 56
is automatically adjusted to the TV screen. (When the aspect ratio of a JPEG file is different from that of the TV screen, the black bars will 4. Press ENTER or PLAY. The selected picture appears on the screen. ENTER DVD MENU PLAY STOP ANGLE TOP MENU Rotating an image You can rotate an image - Toshiba 20HLV86 | Owners Manual - Page 57
Introduction Connecting your TV/DVD Divx® CD playback CD 1. Load a DivX® disc in the disc slot. 2. A file browser to register the unit with registration code. See page 61. Setting up your TV/DVD Using the TV/DVD's Features DVD Playback Appendix 5X20301A(E)P56-63 57 57 13/3/06, 7:22 PM - Toshiba 20HLV86 | Owners Manual - Page 58
To Program JPEG Preview Browser View 58 ENTER PLAY SKIP Notes: • The Repeat, Random and Program functions are canceled when you eject the disc or turn the power off. • In case of Audio CD, the function of A-B Repeat can be used. See "A-B Repeat playback" on page 49. • Track repeat function is - Toshiba 20HLV86 | Owners Manual - Page 59
the default settings of the DVD mode to customize performance to your preference. Setting procedure DVD VCD CD 1. Press SETUP one language are available on the disc. TV Screen To select a picture size according to the aspect ratio of your TV. Display To turn On or Off the operational 60 status - Toshiba 20HLV86 | Owners Manual - Page 60
Screen You have the following screen sizes to choose from: 4:3 (Letter box): Select this mode when connecting to a conventional TV. When playing back a wide screen-DVD disc, it displays the wide picture with black bands at the top and bottom of screen. 4:3 (Pan & scan): It displays the wide picture - Toshiba 20HLV86 | Owners Manual - Page 61
unit can always work under the same condition (especially with DVD discs). Each setup will be retained in the memory even if you turn the power off. Notes: • Depending on the discs number, press CANCEL. Using the TV/DVD's Features DVD Playback Appendix 5X20301A(E)P56-63 61 61 13/3/06, 5:24 PM - Toshiba 20HLV86 | Owners Manual - Page 62
parental level that you have set. It is up to you to decide whether to cancel the rating level or not. 1. Load a DVD disc. EJECT Number buttons 2. If the DVD disc has been designed to temporarily cancel the Rating level, the screen which follows the "Reading" screen will change, depending on which - Toshiba 20HLV86 | Owners Manual - Page 63
Introduction Connecting your TV/DVD Setting up your TV/DVD Appendix Language code list Enter the appropriate code number for the initial settings "Menu 3136 3219 3225 1335 3325 3418 2019 3525 3631 Using the TV/DVD's Features DVD Playback Appendix 5X20301A(E)P56-63 63 63 13/3/06, 5:24 PM - Toshiba 20HLV86 | Owners Manual - Page 64
Appendix Troubleshooting Before calling a service technician, please check the following table for a possible cause of the symptom and some solutions. Symptom TV will not turn on No picture, no sound No sound, picture OK Poor sound, picture OK Poor picture, sound OK Picture and sound are out of - Toshiba 20HLV86 | Owners Manual - Page 65
Introduction Connecting your TV/DVD Troubleshooting (continued) Symptom of DVD Playback doesn't start No picture No sound functions. • Set Display to On. • The setup does not match your stereo system. • Turn off the unit and unplug the AC power cord for several minutes, then replug it. • Check - Toshiba 20HLV86 | Owners Manual - Page 66
model may not be compatible with features and/or specifications that may be added in the future. Television LCD TFT LCD 1366 (Horizon) x 768 (Vertical) NTSC standard F-Synth VHF: 2 - 13 UHF: 14 - 69 Cable TV: 4A size "AAA" batteries Owner's Manual (This booklet) NTSC 1. DVD (12cm, 8cm) 2. - Toshiba 20HLV86 | Owners Manual - Page 67
Card Read this owner's manual thoroughly before operating this LCD TV/DVD Combination. Complete and mail the enclosed product registration card or register your LCD TV/DVD Combination on-line at http://www.tacp.toshiba.com/service as soon as possible. By registering your LCD TV/DVD Combination you - Toshiba 20HLV86 | Owners Manual - Page 68
Year Warranty on Parts and Labor* TCL warrants this LCD TV/DVD and its parts against defects in materials instructions in this manual and checking the "Troubleshooting" section, you find that service is needed: (1) To find the nearest TCL Authorized Service Depot, visit TCL's web site at www.toshiba - Toshiba 20HLV86 | Owners Manual - Page 69
Introduction Connecting your TV/DVD Setting up your TV/DVD MEMO ○ ○ ○ ○ ○ ○ ○ ○ ○ ○ ○ ○ ○ ○ ○ ○ ○ ○ ○ ○ ○ ○ ○ ○ ○ ○ ○ ○ ○ ○ ○ ○ ○ ○ ○ ○ ○ ○ ○ ○ ○ ○ ○ ○ ○ ○ ○ ○ ○ ○ ○ ○ ○ ○ ○ ○ ○ ○ ○ ○ ○ ○ ○ ○ ○ ○ ○ ○ ○ ○ ○ ○ ○ ○ ○ ○ ○ ○ - Toshiba 20HLV86 | Owners Manual - Page 70
MEMO ○ ○ ○ ○ ○ ○ ○ ○ ○ ○ ○ ○ ○ ○ ○ ○ ○ ○ ○ ○ ○ ○ ○ ○ ○ ○ ○ ○ ○ ○ ○ ○ ○ ○ ○ ○ ○ ○ ○ ○ ○ ○ ○ ○ ○ ○ ○ ○ ○ ○ ○ ○ ○ ○ ○ ○ ○ ○ ○ ○ ○ ○ ○ ○ ○ ○ ○ ○ ○ ○ ○ ○ ○ ○ ○ ○ ○ ○ ○ ○ ○ ○ ○ ○ ○ ○ ○ ○ ○ ○ ○ ○ ○ ○ ○ ○ ○ ○ - Toshiba 20HLV86 | Owners Manual - Page 71
Introduction Connecting your TV/DVD Setting up your TV/DVD MEMO ○ ○ ○ ○ ○ ○ ○ ○ ○ ○ ○ ○ ○ ○ ○ ○ ○ ○ ○ ○ ○ ○ ○ ○ ○ ○ ○ ○ ○ ○ ○ ○ ○ ○ ○ ○ ○ ○ ○ ○ ○ ○ ○ ○ ○ ○ ○ ○ ○ ○ ○ ○ ○ ○ ○ ○ ○ ○ ○ ○ ○ ○ ○ ○ ○ ○ ○ ○ ○ ○ ○ ○ ○ ○ ○ ○ ○ ○ - Toshiba 20HLV86 | Owners Manual - Page 72
National Service Division CableClear, ColorStream, TheaterWide and StableSound are registered trademarks of Toshiba America Consumer Products, L.L.C. and GameTimer are trademarks of Toshiba America Consumer Products, L.L.C. J5X20301A SH 06/03 N 5X20301A(E)P64-Back 72 13/3/06, 5:24 PM Printed in
-
 1
1 -
 2
2 -
 3
3 -
 4
4 -
 5
5 -
 6
6 -
 7
7 -
8
-
9
-
10
-
11
-
12
-
13
-
14
-
15
-
16
-
17
-
18
-
19
-
20
-
21
-
22
-
23
-
24
-
25
-
26
-
27
-
28
-
29
-
30
-
31
-
32
-
33
-
34
-
35
-
36
-
37
-
38
-
39
-
40
-
41
-
42
-
43
-
44
-
45
-
46
-
47
-
48
-
49
-
50
-
51
-
52
-
53
-
54
-
55
-
56
-
57
-
58
-
59
-
60
-
61
-
62
-
63
-
64
-
65
-
66
-
67
-
68
-
69
-
70
-
71
-
72
 |
 |
20HLV86
Combination
DIGITAL VIDEO
DVD Playback
Using the
TV/DVD’s Features
Setting up
your TV/DVD
Connecting
your TV/DVD
Introduction
Appendix
5X20301A(E)Cover
13/3/06, 5:18 PM
1