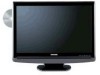
Toshiba 22LV505 Owner's Manual - English
Toshiba 22LV505 - 22" LCD TV Manual
 |
UPC - 022265001516
View all Toshiba 22LV505 manuals
Add to My Manuals
Save this manual to your list of manuals |
Toshiba 22LV505 manual content summary:
- Toshiba 22LV505 | Owner's Manual - English - Page 1
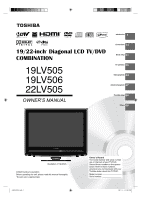
Introduction 4 Connections 14 19/22-inch* Diagonal LCD TV/DVD COMBINATION Basic setup 21 19LV505 19LV506 22LV505 OWNER'S MANUAL TV operation 26 Basic playback 44 Advanced playback 47 Function setup 60 Others 66 IIIustration of 19LV505 ©2008 Toshiba Corporation Before operating the unit, please - Toshiba 22LV505 | Owner's Manual - English - Page 2
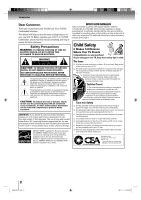
Dear Customer, Thank you for purchasing this Toshiba LCD TV or TV/DVD Combination television. This manual will help you use the many exciting features of your new LCD TV. Before operating your LCD TV or TV/DVD Combination, please read this manual completely, and keep it nearby for future - Toshiba 22LV505 | Owner's Manual - English - Page 3
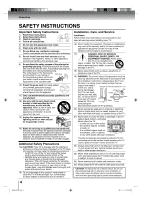
THIS POLARIZED PLUG WITH AN EXTENSION CORD, RECEPTACLE OR OTHER OUTLET UNLESS THE BLADES CAN BE FULLY INSERTED TO PREVENT BLADE EXPOSURE. FCC Declaration of Conformity Compliance Statement (Part 15): The Toshiba 19LV505, 19LV506, 22LV505, LCD TV/DVD Combination complies with Part 15 of the FCC rules - Toshiba 22LV505 | Owner's Manual - English - Page 4
at least 4 inches around the TV. 22) Always place the back of the television at least one (1) inch away from any vertical surface (such as a wall) to allow proper ventilation. 23) Never allow anything to rest on or roll over the power cord, and never place the TV where the power cord is subject to - Toshiba 22LV505 | Owner's Manual - English - Page 5
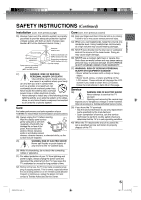
the LCD screen, follow the instructions in item 28 on this page. Service 38) WARNING: RISK OF ELECTRIC SHOCK! Never attempt to service the TV yourself. Opening and removing the covers may expose you to dangerous voltage or other hazards. Refer all servicing to a Toshiba Authorized Service - Toshiba 22LV505 | Owner's Manual - English - Page 6
down. Slide the lever to the left Back side of the pedestal stand NOTE: Do not operate the LCD TV while the pedestal stand is folded. ■ To Display your LCD TV using a Wall Bracket: If you decide to wall mount your LCD TV, always use a UL Listed wall bracket appropriate for the size and weight of the - Toshiba 22LV505 | Owner's Manual - English - Page 7
power cord of the unit to the wall outlet, turn on the unit, remove the disc, and leave it for two or three hours. After two or three hours, the unit will have warmed up and evaporated any moisture. Leaving the TV connected to the wall outlet will help prevent moisture condensation in the TV or DVD - Toshiba 22LV505 | Owner's Manual - English - Page 8
the menu displayed on the TV screen (Menu Playback). Some of the functions described in this ownerʼs manual may not work with some discs. 8 Playable discs This unit can play the following discs. Disc Mark DVD video discs Contents Audio + Video (moving pictures) Disc Maximum Size playback time - Toshiba 22LV505 | Owner's Manual - English - Page 9
picture preference 36 Picture settings 36 Viewing the wide-screen picture formats........ 37 Film Mode 38 DNR 38 Picture control adjustment in the PC mode .... 39 Sound control adjustment 40 Selecting Stereo/Second Audio Program (SAP) .... 40 Selecting the audio language 41 Selecting the HDMI - Toshiba 22LV505 | Owner's Manual - English - Page 10
26 PLAY button 44 CHANNEL 26 ■ STOP button 44 MENU button 22 60 INPUT/ENTER button 16 POWER button 21 You can adjust the angle of the TV-screen for 3° forward or for 10° backward from vertical angle. Hold the base of the TV while adjusting the angle. Illustration of 19LV505 08.1.9 4:44:52 PM - Toshiba 22LV505 | Owner's Manual - English - Page 11
Introduction Rear AC INLET 20 HEAD PHONE jack 27 COMPONENT VIDEO/AUDIO IN jacks 17 VIDEO/S-VIDEO/AUDIO IN jack 16 17 J50S0101A.indb 11 Antenna jack 14 15 COAXIAL DIGITAL AUDIO OUT jack 18 19 HDMI IN jack 19 PC AUDIO IN jack 20 PC MONITOR IN jack 20 Illustration of 19LV505 11 08.1.9 4:44:54 PM - Toshiba 22LV505 | Owner's Manual - English - Page 12
Introduction Identification of controls (Continued) Remote control The instructions in this manual describe the function on the remote control. See the page in for details. EJECT button 45 TV/DVD button 44 Direct channel selection buttons (0-9) 26 Numbered buttons (0-9) 30 DISPLAY button 27 53 CH / - Toshiba 22LV505 | Owner's Manual - English - Page 13
the polarity indicated in the battery compartment. 3 Replace the compartment cover. Operation • Aim the remote control at the remote sensor and press control buttons to operate. • Operate the remote control within 30° angle on either side of the remote sensor, up to a distance of approx. 5 meters - Toshiba 22LV505 | Owner's Manual - English - Page 14
the instructions below that correspond to your antenna system. If you are using a cable TV service (CABLE), see page 15 for Cable TV connections. (not supplied) Connect the 75 ohm cable from the combination VHF/UHF antenna to the antenna jack on the back of the TV/DVD. If your combination - Toshiba 22LV505 | Owner's Manual - English - Page 15
75 ohm coaxial cable directly to the Antenna jack on the back of the TV/DVD. For subscribers to scrambled cable TV service If you subscribe to a cable TV service which requires the use of a converter/descrambler box, connect the incoming 75 ohm coaxial cable to the converter/descrambler box. Using - Toshiba 22LV505 | Owner's Manual - English - Page 16
INPUT to view a signal from another device connected to your TV/DVD, such as a VCR player. You can select TV, Video, ColorStream HD, HDMI or PC depending on which input jacks you used to connect your devices. Press INPUT on the remote control to display the current signal source. To change the input - Toshiba 22LV505 | Owner's Manual - English - Page 17
signals. • Refer to the ownerʼs manual of the connected equipment as well. • When you connect the unit to other equipment, be sure to turn off the power and unplug all of the equipment from the wall outlet before making any connections. • If you place the unit near a tuner or radio, the radio - Toshiba 22LV505 | Owner's Manual - English - Page 18
to reproduce this realistic effect in the home. You can enjoy motion picture and live concert DVD video discs encoded via the Dolby Digital recording system with this dynamic realistic sound by connecting the TV/DVD to a 6 channel amplifier equipped with a Dolby Digital decoder or Dolby Digital - Toshiba 22LV505 | Owner's Manual - English - Page 19
the TV/DVDʼs power cord. If you leave the amplifierʼs power on, the speakers may be damaged. Connecting to an HDMI or a DVI device About HDMI HDMI (High Definition Multimedia Interface) supports both video and audio on a single digital connection for use with DVD players, DTV, set-top boxes - Toshiba 22LV505 | Owner's Manual - English - Page 20
Power source Connecting to a PC (Personal Computer) Before you connect this TV/DVD to your PC, change the adjustment of your PC's Resolution and Refresh rate (60 Hz). Connect one end of a (male to male) VGA cable to the video card of the computer and the other end to the VGA connector PC MONITOR - Toshiba 22LV505 | Owner's Manual - English - Page 21
sure that the antenna or cable TV system connection is made! Auto Setup POWER ENTER / / / EXIT/CANCEL 1 To turn on the TV/DVD, press POWER. • POWER indicator on the front of the unit changes green. It may take approx. 10 seconds for a picture to appear on screen. 2 Auto Setup menu appears on the - Toshiba 22LV505 | Owner's Manual - English - Page 22
Off On >> : Adjust 5 Press EXIT/CANCEL to return to the normal screen. Note: • If the unit does not operate properly, or No key operation (by the unit and/or the remote control): Static electricity, etc., may affect the TV/DVD's operation. In such case, disconnect the AC cord once, then connect it - Toshiba 22LV505 | Owner's Manual - English - Page 23
must be programmed into the TV/DVDʼs memory. To use this TV/DVD with an antenna, set the TV mode. The TV menu screen will appear. Press ▲ or ▼ to select "Channel", then press ▶ or ENTER. Main Menu Picture Audio Channel Lock Setup : Select ENTER:Set 1 Press MENU in the TV mode. The TV menu screen - Toshiba 22LV505 | Owner's Manual - English - Page 24
MENU in the TV mode. The TV menu screen will appear. Press ▲ or ▼ to select "Channel", then press ▶ or ENTER. Main Menu Picture Audio Channel Signal Analog Analog Digital Digital Analog Add Add Delete Add Delete : Select : Adjust 5 Press ◀ or ▶ to select "Add" or "Delete", whichever function - Toshiba 22LV505 | Owner's Manual - English - Page 25
/CANCEL MENU If you find a new channel unregistered, you can add the new channel into the channel memory. 1 Tune in the new channel. 2 Press MENU. The TV menu screen will appear. Press ▲ or ▼ to select "Channel", then press ▶ or ENTER. Main Menu Picture Audio Channel Lock Setup : Select ENTER - Toshiba 22LV505 | Owner's Manual - English - Page 26
TV operation TV operation POWER 0-9, - VOL +/- CH / TV operation 1 To turn on the TV/DVD, press POWER. (POWER indicator on the front of the unit changes green. It may take approx. 10 seconds for a picture to appear on screen.) 2 Adjust the volume level by pressing VOL + or - . The volume level - Toshiba 22LV505 | Owner's Manual - English - Page 27
DISPLAY to display the current information on the screen. When the TV/DVD receives a digital signal, the digital information will appear. • Channel number • Channel label (if preset) • V-Chip rating • Sleep timer • Program guide • Resolution 62-001 HDTV Moving Picture1 CH-1 Digital Cable Mar 01 - Toshiba 22LV505 | Owner's Manual - English - Page 28
in the TV mode. The TV menu screen will appear. Press then press ▲ or ▼ to select "Channel" menu, then press ▶ or ENTER. Main Menu Picture Audio Channel Channel Number Ch Label Label Clear 15-1 A >> : Select : Adjust ENTER:Set The characters rotation as follows: SPACE If the character - Toshiba 22LV505 | Owner's Manual - English - Page 29
HD SAT HDMI - : Select : Adjust - VCR DVD DTV SAT CBL HD : Uses the default label name : Video cassette recorder : DVD video : Digital TV set-top box : Satellite box : Cable box : HDMI (only for HDMI input) 5 Press EXIT/CANCEL to return to the normal screen. : Select : Adjust J50S0101A - Toshiba 22LV505 | Owner's Manual - English - Page 30
TV menu screen will appear. Press ▲ or ▼ to select "Lock", then press ▶ or ENTER. Main Menu Picture Audio Channel Lock Setup : Select ENTER:Set 2 Select and enter your password (4 digits) using Number buttons (0-9), then press ENTER. Lock New Password ---- 2 Press ▲ or ▼ to select "Change - Toshiba 22LV505 | Owner's Manual - English - Page 31
0-9 ENTER / / / MENU To set the V-Chip 1 Press MENU in the TV mode. The TV menu screen will appear. Press ▲ or ▼ to select "Lock", then press ▶ or ENTER. Main Menu Picture Audio Channel Lock Setup : Select ENTER:Set 2 Use Number buttons (0-9) to enter your password, then press ENTER. Then - Toshiba 22LV505 | Owner's Manual - English - Page 32
then press ENTER. 7 Press EXIT/CANCEL to return to the normal screen. To use the TV/DVD after it is protected. When a program is received that is blocked protection will be temporarily overridden. If the TV/ DVD is turned off or the channel is changed, the V-Chip restriction will be reactivated. - Toshiba 22LV505 | Owner's Manual - English - Page 33
in the TV mode. The TV menu screen will appear. Press ▲ or ▼ to select "Lock", then press ▶ or ENTER. Main Menu Picture Audio Channel Lock and system are not determined or controlled by the TV/DVD. • The standard V-Chip rating system is available whether your TV/DVD is receiving a digital signal - Toshiba 22LV505 | Owner's Manual - English - Page 34
: Select : Adjust Note: • You can also display the Closed Caption menu screen by pressing CLOSED CAPTION on the remote control. • Digital caption feature is not available for analog channel. Important Note: If text is not available in your viewing area, a black rectangle may appear on-screen. If - Toshiba 22LV505 | Owner's Manual - English - Page 35
method, you can adjust the various setting listed below as follows: This feature is designed to customize Digital Captions only. CC advanced ENTER / / / EXIT/CANCEL MENU 1 Press MENU in the TV mode. Press ▲ or ▼ to select "Setup", then press ▶ or ENTER. Main Menu Picture Audio Channel Lock - Toshiba 22LV505 | Owner's Manual - English - Page 36
preset but you can adjust them individually as follows: Adjusting the picture preference Picture settings ENTER / / / EXIT/CANCEL MENU 1 Press MENU in the TV mode. The TV menu screen will appear. Press ▲ or ▼ to select "Picture", then press ▶ or ENTER. Main Menu Picture Audio Channel Lock Setup - Toshiba 22LV505 | Owner's Manual - English - Page 37
to change the picture size. • 19LV505/19LV506: In COMPONENT/HDMI mode with a scanning rate of 720p or 1080i, only the Theater Wide2 and Full picture size features are available. • 22LV505: In COMPONENT/HDMI mode with a scanning rate of 720p or 1080i, picture size feature will not work. • In PC Mode - Toshiba 22LV505 | Owner's Manual - English - Page 38
"On" or "Off". Picture Picture Setting Picture Preference Picture Size Film Mode PC Setting DNR >> Sports >> On >> Off : Select : Adjust Note: • A smoother motion may be obtained by setting the Film Mode to "On" when you view a DVD from the DVD player connected with ColorStream (component video - Toshiba 22LV505 | Owner's Manual - English - Page 39
the performance of the TV/DVD in the PC mode. Picture control adjustment in the PC mode ENTER / / / EXIT/CANCEL MENU 1 Press INPUT, then press ▲/▼ or 4 to select the PC mode. 2 Press MENU. Then press ▲ or ▼ to select "Picture", then press ▶ or ENTER. Main Menu Picture Audio Channel Lock Setup - Toshiba 22LV505 | Owner's Manual - English - Page 40
control adjustment 1 Press MENU in the TV mode. The TV menu screen will appear. Press ▲ or ▼ to select "Audio" , then press ▶ or ENTER. Main Menu Picture Language HDMI Audio Stereo English HDMI : Select : Adjust Bass: Press ◀ or ▶ to adjust the bass sound. Treble: Press ◀ or ▶ to adjust the - Toshiba 22LV505 | Owner's Manual - English - Page 41
Audio Language HDMI Audio Stereo English HDMI : Select : Adjust HDMI: When you connect the HDMI device to the TV, select this setting. DVI: When you connect the DVI device to the TV with analog audio cords, select this setting. 3 Press EXIT/CANCEL to return to the normal screen. J50S0101A P36 - Toshiba 22LV505 | Owner's Manual - English - Page 42
Backlight feature adjusts the screen brightness for improved picture clarity. ENTER / / / EXIT/CANCEL MENU Using the aspect feature Adjusting the back lighting 1 Press MENU in the TV mode. The TV menu screen will appear. Press ▲ or ▼ to select "Setup" , then press ▶ or ENTER. Main Menu Picture - Toshiba 22LV505 | Owner's Manual - English - Page 43
Setup" , then press ▶ or ENTER. 1 Press MENU in the TV mode. The TV menu screen will appear. Press ▲ or ▼ to select "Setup" , then press ▶ or ENTER. Main Menu Picture Audio Channel Lock Setup : Select ENTER:Set Main Menu Picture Audio Channel Lock Setup : Select ENTER:Set 2 Press ▲ or ▼ to - Toshiba 22LV505 | Owner's Manual - English - Page 44
a picture to appear on screen. • Every time you press POWER, the TV/DVD starts from TV mode. • When using an amplifier, switch on the amplifier. 4 On the TV screen, " " changes to "Reading" and then playback commences. Reading 2 Press TV/DVD on the remote control to select DVD mode. The DVD startup - Toshiba 22LV505 | Owner's Manual - English - Page 45
noise may appear on the TV screen while playing a DVD video disc because the high resolution pictures on these discs include a lot of information. In such case, you may reduce the Sharpness with the Picture Setting menu (see page 36). About DVD VCD CD The DVD VCD CD icons on the heading bar show - Toshiba 22LV505 | Owner's Manual - English - Page 46
the playback speed changes. Note: • The TV/DVD mutes sound during reverse and forward scan of DVD/VCD/Audio CD screen. This symbol means either the feature you tried is not available on the disc, or the TV/DVD cannot access the feature at this time. This does not indicate a problem with the TV/DVD - Toshiba 22LV505 | Owner's Manual - English - Page 47
DVD VCD Zooming CD DVD VCD Locating desired scene CD 1 Press ZOOM during playback. The center part of the image will be zoomed in. Each press of ZOOM will change • In case of the Video-CD playback with PBC, the JUMP does not work. To turn off PBC, see page 53 . • Only Time search function - Toshiba 22LV505 | Owner's Manual - English - Page 48
playback from each scene. ENTER / EXIT/CANCEL DVD VCD Marking the scenes MARKER DVD VCD Returning to the scenes 1 Press MARKER during • Some discs may not work with the marking operation. • The marking is cancelled when you eject the disc or turn the power off. • Some subtitles recorded - Toshiba 22LV505 | Owner's Manual - English - Page 49
set the A-B Repeat for the scenes that include multiple angles. • A-B Repeat playback does not work when Repeat playback is activated. • You may not be able to set A-B Repeat during certain scenes of the DVD. • A-B Repeat does not work with an interactive DVD and MP3/WMA/JPEG CD. • In case of Video - Toshiba 22LV505 | Owner's Manual - English - Page 50
at random and playback them. These features work for Video CD. For Audio CD and number you want to change, then press EXIT/CANCEL. 2. Press Number buttons (0-9) to input the new track number. ■ cancelled when you eject the disc or turn the power off. VCCDD Random playback 1 Press PLAY MODE during - Toshiba 22LV505 | Owner's Manual - English - Page 51
Advanced playback Changing angles/Title selection/DVD menu DVD MENU / / / ENTER PLAY ANGLE TOP MENU Changing angles When playing back a disc recorded with multi-angle facility, you can change the angle that you are viewing the scene from. 1 Press ANGLE during playback. The current angle will - Toshiba 22LV505 | Owner's Manual - English - Page 52
on screen display will disappear after a few seconds. Note: • Depending on the DVD, you may not be able to change subtitles, or to turn subtitles on or off. • While playing a DVD, the subtitle may change when sound will be heard from the TV/DVDʼs speakers. 52 J50S0101A.indb 52 08.1.9 4:45:50 PM - Toshiba 22LV505 | Owner's Manual - English - Page 53
off the PBC (see page 7) 1 Press PLAY MODE in the stop mode. DVD DISC OPERATION ELAPSED TOTAL TIME TIME TITLE NO. DVD Title 1/3 1/1 Eng Dolby Digital 1/1 00:15:25 01:41:39 Chapter 2/24 1/2 Eng CHAPTER NO. ANGLE NO. SUBTITLE LANGUAGE AUDIO LANGUAGE A KIND OF AUDIO Video CD DISC OPERATION - Toshiba 22LV505 | Owner's Manual - English - Page 54
Windows-PC with ownerʼs manual are meant only as a guide. Use of CD-RW for MP3 files is not recommended. You must obtain any required permission from copyright owners to download or use copyrighted content. Toshiba on the screen. Long those above are replaced in hyphen. Notes 320kbps Resolution: Max - Toshiba 22LV505 | Owner's Manual - English - Page 55
TOP MENU 1 Load an Audio CD or a disc on which MP3 or WMA files have been recorded in the disc slot. 2 A file browser screen will appear on the screen -5 MP3-6 WMA-11 WMA-12 Picture-1 Picture-2 Movie-1 Movie-2 Select Files Repeat point. " " appears on the TV screen. Press PLAY to resume playback (from - Toshiba 22LV505 | Owner's Manual - English - Page 56
) ZOOM DVD MENU ENTER / / / PAUSE STOP PLAY SKIP ANGLE TOP MENU CD JPEG playback CD Slide show playback 1 Load a JPEG disc in the disc slot. 2 A file browser screen will appear on the screen. /Picture-01.JPG Picture-01 Picture-02 Picture-03 Picture-04 Picture-05 Picture-06 Picture-07 Picture-08 - Toshiba 22LV505 | Owner's Manual - English - Page 57
disc slot. 2 A file browser screen will appear on the TV screen. /Movie-01.DIVX Movie-01 Movie View DivX® VOD Rental This rental has 5 views left. Do you want to use one of your 5 views now? screen you first need to register the unit with registration code. See page 64 . • Depending on the recording - Toshiba 22LV505 | Owner's Manual - English - Page 58
start. To resume normal playback Select Repeat : "Off" in step 2. Note: • The repeat function is cancelled when you eject the disc or turn the power off. • Track repeat function is canceled whenever SKIP or is pressed. • The function of A-B Repeat can be used for DivX® CD. See "A-B Repeat playback - Toshiba 22LV505 | Owner's Manual - English - Page 59
"Program View", then press ENTER. Program View shows only Program View Edit Mode Browser View Clear Edit Mode Program View Add To Program View Folder-1 Folder-2 MP3-1 MP3-2 MP3-3 WMA-1 WMA-2 WMA-3 Edit Mode Program View Add To Program JPEG Preview 5 In the Program View to Program View. Select fi - Toshiba 22LV505 | Owner's Manual - English - Page 60
change the default settings of the DVD mode to customize performance to your preference. / / / ENTER SETUP DVD VCD Setting procedure CD 1 Press SETUP during stop mode. The following on-screen : EIOnnntegrlilsahce Picture MDoivdXe(R) :VAOuDto JPEG Interval : 5 Seconds Screen Saver : On - Toshiba 22LV505 | Owner's Manual - English - Page 61
than one language are available on the disc. 62 TV Screen Display To select a picture size according to the aspect ratio of your TV. 62 To turn On or Off the operational status display on the TV screen. Picture Mode To select a preferred picture mode from "Video", "Film" or "Auto". 63 JPEG - Toshiba 22LV505 | Owner's Manual - English - Page 62
"Language code list" change the OSD language, you can perform it by "Language" in the TV menu 22 . TV Screen You have the following screen sizes to choose from: 4:3 (Letter box): When playing back a wide screen-DVD disc, it displays the wide picture with black bands at the top and bottom of screen - Toshiba 22LV505 | Owner's Manual - English - Page 63
Picture MDiovdXe(R) V: AOuDto JPEG Interval : 5 Seconds Screen Saver : On ■ Night Mode Night Mode enables you to control is connected to a stereo. Note: • This function works only when the disc recorded with Dolby Digital is played back. • The level of Night Mode may differ depending on DVD video - Toshiba 22LV505 | Owner's Manual - English - Page 64
, the age restriction will not work. • The password is required every time when you change the parental level. • If you input a wrong number, press EXIT/CANCEL. ■ Set the new password 1) Press or to select "Password", then press ENTER. "Enter Current Password" screen will appear. 2) Press Number - Toshiba 22LV505 | Owner's Manual - English - Page 65
the disc is ejected, the original rating level will be set again automatically. 2 If the DVD disc has been designed to temporarily cancel the Rating level, the screen which follows the "Reading" screen will change, depending on which disc is played. If you select "YES" with the ENTER key, password - Toshiba 22LV505 | Owner's Manual - English - Page 66
the power cord from the wall outlet to prevent the TV/DVD from turning on in your absence. Troubleshooting Use the following check list for troubleshooting when you have problems with your unit. Consult your local dealer or service outlet if problems persist. Be sure all connections are properly - Toshiba 22LV505 | Owner's Manual - English - Page 67
, etc. No picture. • TV/DVD selector is not Angle cannot be changed. • Multi-angles are not recorded on the DVD disc. "✕" appears on the screen. • The function is prohibited with the unit or the disc. REMOTE CONTROL The remote control does not function. • Aim the remote control at the remote - Toshiba 22LV505 | Owner's Manual - English - Page 68
the TV/DVD is connected to a Cable TV system, the disturbance may be caused by the local Cable TV company broadcast. IGNITION Black spots or horizontal streaks may appear, the picture may flutter or drift. Usually caused by interference from automobile ignition systems, neon lamps or AC powered tools - Toshiba 22LV505 | Owner's Manual - English - Page 69
Swedish Tagalog Tajik Tamil Tatar Telugu Thai Tibetan Tigrinya Tonga Turkish Turkmen Twi Ukrainian Urdu Uzbek Vietnamese Volapük Welsh Wolof Xhosa Yiddish Yoruba Zulu Code 2919 2921 2922 2925 1529 2931 2933 2932 3022 3017 3011 3030 3015 3018 1225 3019 3025 3028 3021 3033 3121 3128 3136 3219 3225 - Toshiba 22LV505 | Owner's Manual - English - Page 70
sample PC input MONITOR: Mini-Dsub 15pin x 1, AUDIO: 3.5ø mm Stereo jack x 1 Digital audio output (Coaxial) 0.5 V (p-p), 75 Ω, pin jack x 1 Headphone ø3.5mm stereo mini jack x 1 Accessories Remote control (SE-R0305 1 Batteries (R03/AAA 2 AC cord 1 Cleaning cloth 1 Ownerʼs manual (this - Toshiba 22LV505 | Owner's Manual - English - Page 71
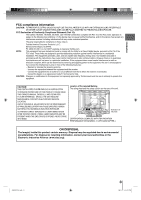
Card Read this ownerʼs manual thoroughly before operating this LCD TV/DVD Combination. Complete and mail the enclosed product registration card or register your LCD TV/DVD Combination online at www.tacp.toshiba.com/service as soon as possible. By registering your LCD TV/DVD Combination you will - Toshiba 22LV505 | Owner's Manual - English - Page 72
instructions in this manual and checking the section "Troubleshooting," you find that service is needed: (1) For instructions on how to obtain warranty service for your LCD TV/DVD LCD TV/DVD COMBINATION). No person, agent, distributor, dealer, or company is authorized to change YOU SPECIFIC LEGAL
-
 1
1 -
 2
2 -
 3
3 -
 4
4 -
 5
5 -
 6
6 -
 7
7 -
8
-
9
-
10
-
11
-
12
-
13
-
14
-
15
-
16
-
17
-
18
-
19
-
20
-
21
-
22
-
23
-
24
-
25
-
26
-
27
-
28
-
29
-
30
-
31
-
32
-
33
-
34
-
35
-
36
-
37
-
38
-
39
-
40
-
41
-
42
-
43
-
44
-
45
-
46
-
47
-
48
-
49
-
50
-
51
-
52
-
53
-
54
-
55
-
56
-
57
-
58
-
59
-
60
-
61
-
62
-
63
-
64
-
65
-
66
-
67
-
68
-
69
-
70
-
71
-
72
 |
 |
19LV505
19LV506
22LV505
OWNER’S MANUAL
4
14
21
44
47
60
Introduction
Connections
Basic setup
Basic playback
Advanced playback
Function setup
66
Others
26
TV operation
©2008 Toshiba Corporation
Before operating the unit, please read this manual thoroughly.
19/22-inch
*
Diagonal LCD TV/DVD
COMBINATION
*Screen size is approximate.
IIIustration of 19LV505
Owner
ʼ
s Record
The model number and serial number
are on the back of your TV/DVD.
Record these numbers in the spaces
below. Refer to these numbers
whenever you communicate with your
Toshiba dealer about this TV/DVD.
Model number:
Serial number:
J50S0101A.indb 1
J50S0101A.indb
1
08.1.9 4:44:32 PM
08.1.9
4:44:32 PM