Toshiba 22LV506 Owner's Manual - English
Toshiba 22LV506 - 21.9" LCD TV Manual
 |
UPC - 022265001820
View all Toshiba 22LV506 manuals
Add to My Manuals
Save this manual to your list of manuals |
Toshiba 22LV506 manual content summary:
- Toshiba 22LV506 | Owner's Manual - English - Page 1
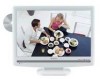
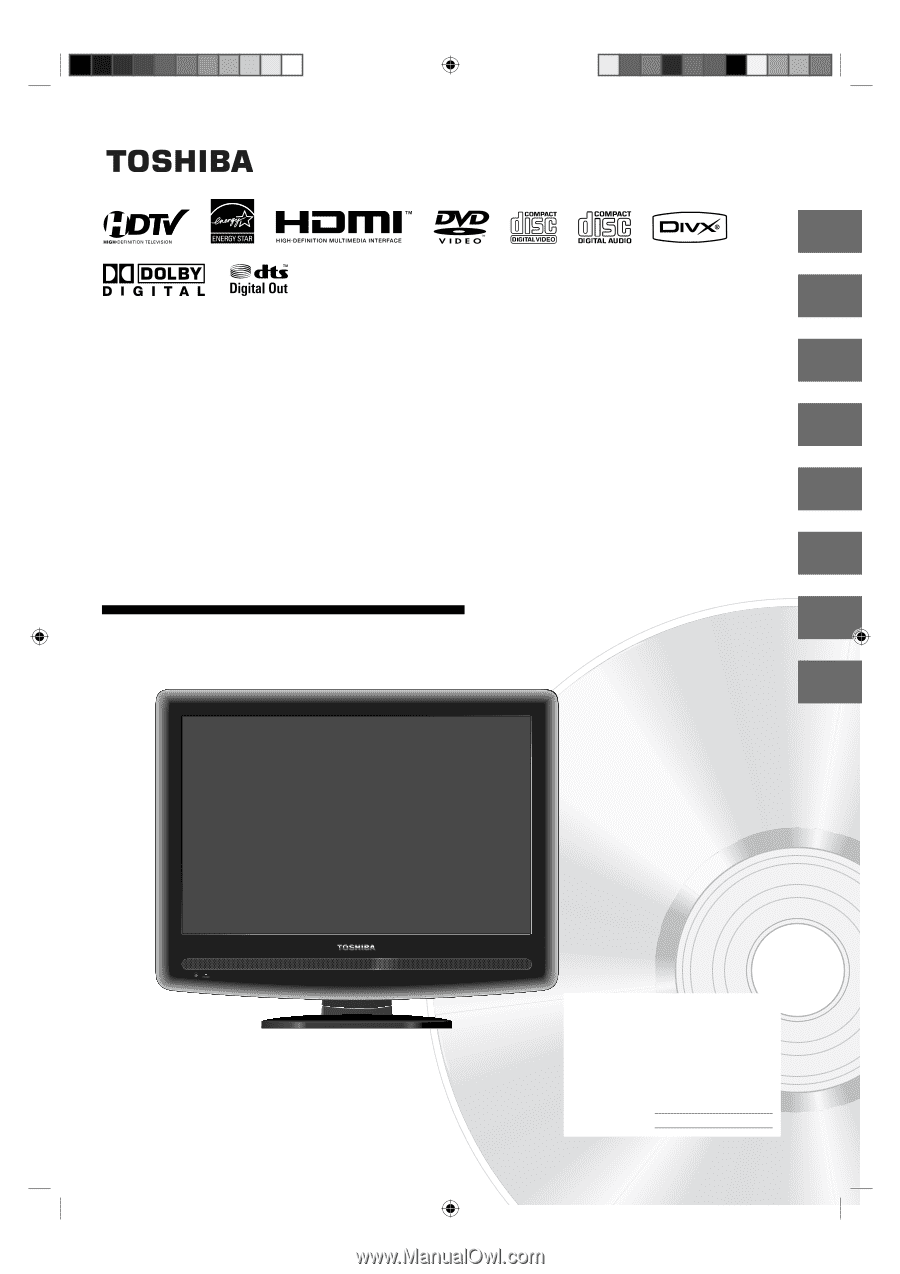
Introduction 4 Connections 14 19/22-inch* Diagonal LCD TV/DVD COMBINATION 19LV505 19LV506 22LV505 22LV506 OWNER'S MANUAL Basic setup 21 TV operation 26 Basic playback 44 Advanced playback 47 Function setup 60 Others 66 IIIustration of 19LV505 ©2008 Toshiba Corporation Before operating the unit, - Toshiba 22LV506 | Owner's Manual - English - Page 2
Toshiba LCD TV or TV/DVD Combination television. This manual will help you use the many exciting features of your new LCD TV. Before operating your LCD TV or TV/DVD Combination, please read this manual the user to the presence of important operating and maintenance (servicing) instructions in the - Toshiba 22LV506 | Owner's Manual - English - Page 3
BLADES CAN BE FULLY INSERTED TO PREVENT BLADE EXPOSURE. FCC Declaration of Conformity Compliance Statement (Part 15): The Toshiba 19LV505, 19LV506, 22LV505, 22LV506, LCD TV/DVD Combination complies with Part 15 of the FCC rules. Operation is subject to the following two conditions: (1) this device - Toshiba 22LV506 | Owner's Manual - English - Page 4
. Changes or modifications may void: a) the warranty, and b) the userʼs authority to operate this equipment under the rules of the Federal Communications Commission. 17) DANGER: RISK OF SERIOUS PERSONAL INJURY, DEATH, OR EQUIPMENT DAMAGE! Never place the TV on an unstable cart, stand, or - Toshiba 22LV506 | Owner's Manual - English - Page 5
, press, or place anything on the LCD screen. These actions will damage the LCD screen If you need to clean the LCD screen, follow the instructions in item 28 on this page. Service 38) WARNING: RISK OF ELECTRIC SHOCK! Never attempt to service the TV yourself. Opening and removing the covers - Toshiba 22LV506 | Owner's Manual - English - Page 6
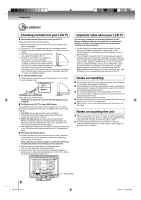
TV. Be sure to leave at least 4 inches between the TV stand from the TV by sliding the pedestal stand away from the TV. Important notes about your LCD TV The following symptoms are technical limitations of LCD Display technology and are not an indication of malfunction; therefore, Toshiba will leave - Toshiba 22LV506 | Owner's Manual - English - Page 7
Using the unit when moisture condensation exists may damage discs and internal parts. Connect the power cord of the unit to the wall outlet, turn will have warmed up and evaporated any moisture. Leaving the TV connected to the wall outlet will help prevent moisture condensation in the TV or DVD - Toshiba 22LV506 | Owner's Manual - English - Page 8
as this may cause trouble with the operation of the unit. Because of problems and errors that can occur during the creation of DVD and CD Software and/or the manufacture of DVD and CD discs, Toshiba cannot assure that the DVD player contained in this TV will successfully play every disc bearing the - Toshiba 22LV506 | Owner's Manual - English - Page 9
43 Basic playback Playing a disc 44 Advanced playback Zooming 47 Locating desired scene 47 Marking desired scenes 48 Repeat playback 49 A-B Repeat playback 49 Program playback 50 Random playback 50 Changing angles 51 Title selection 51 DVD menu 51 Changing soundtrack language 52 - Toshiba 22LV506 | Owner's Manual - English - Page 10
45 VOLUME (+/-) buttons 26 CHANNEL 26 PLAY button 44 CHANNEL 26 ■ STOP button 44 MENU button 22 60 INPUT/ENTER button 16 POWER button 21 You can adjust the angle of the TV-screen for 3° forward or for 10° backward from vertical angle. Hold the base of the TV while adjusting the angle. Illustration - Toshiba 22LV506 | Owner's Manual - English - Page 11
Introduction Rear AC INPUT 20 HEAD PHONE jack 27 COLORSTREAM HD IN jacks 17 VIDEO/GAME IN jack 16 17 J50S0101D.indb 11 Antenna jack 14 15 COAXIAL DIGITAL AUDIO OUT jack 18 19 HDMI IN jack 19 PC AUDIO IN jack 20 PC MONITOR IN jack 20 Illustration of 19LV505 11 6/9/08 11:24:38 AM - Toshiba 22LV506 | Owner's Manual - English - Page 12
The instructions in this manual describe the function on the remote control. See the page in for details. EJECT button 45 TV/DVD button 44 Direct channel selection buttons (0-9) 26 Numbered buttons (0-9) 30 DISPLAY button 27 53 CH / button 26 SUBTITLE button 52 INPUT button 16 ZOOM button 47 PLAY - Toshiba 22LV506 | Owner's Manual - English - Page 13
batteries in accordance with applicable laws and regulations. • If the remote control does not operate correctly, or if the operating range becomes batteries from remote control if they are dead or if the remote control is not to be used for an extended period of time. This will prevent battery - Toshiba 22LV506 | Owner's Manual - English - Page 14
follow the instructions below that correspond to your antenna system. If you are using a cable TV service (CABLE), see page 15 for Cable TV connections. the combination VHF/UHF antenna to the antenna jack on the back of the TV/DVD. If your combination VHF/UHF antenna has a 300 ohm twin-lead wire, - Toshiba 22LV506 | Owner's Manual - English - Page 15
75 ohm coaxial cable directly to the Antenna jack on the back of the TV/DVD. For subscribers to scrambled cable TV service If you subscribe to a cable TV service which requires the use of a converter/descrambler box, connect the incoming 75 ohm coaxial cable to the converter/descrambler box. Using - Toshiba 22LV506 | Owner's Manual - English - Page 16
white) Back side To Audio/Video OUT (red) To VIDEO/GAME IN Audio/Video cable (not supplied) Note: • You can also change the TV/DVD screen to the desired mode by pressing the CH / . • The TV/DVD ʼll need to consult each componentʼs Ownerʼs Manual for additional information. • Interactive video - Toshiba 22LV506 | Owner's Manual - English - Page 17
. VCR with S-Video To S-VIDEO IN (white) Back side (playback) To Audio (L/R) OUT TV/DVD is capable of using ColorStream® (component video). Connecting your TV/DVD to a component video compatible DVD player, such as a Toshiba DVD 480p, 720p progressive signals. • Refer to the ownerʼs manual of the - Toshiba 22LV506 | Owner's Manual - English - Page 18
via the Dolby Digital recording system with this dynamic realistic sound by connecting the TV/DVD to a 6 channel amplifier equipped with a Dolby Digital decoder or Dolby Digital processor. If you have a Dolby Surround Pro Logic decoder, you will obtain the full benefit of Pro Logic from the same - Toshiba 22LV506 | Owner's Manual - English - Page 19
TV/DVD. • Connect the COAXIAL DIGITAL AUDIO OUT jack of the TV/DVD to the "COAXIAL" input of a Receiver or Processor. • Refer to the ownerʼs manual of the connected equipment as well. • When you connect the TV/DVD to support standard, will only see the image with no sound. 19 J50S0101D.indb 19 6/9/08 - Toshiba 22LV506 | Owner's Manual - English - Page 20
connect this TV/DVD to your PC, change the adjustment of your PC's Resolution and will appear on the TV/DVD-screen. Power source To use AC power source 1. Connect the AC cord plug into this TV/DVD file or cut the blade. It is the user's responsibility to have an electrician replace the obsolete - Toshiba 22LV506 | Owner's Manual - English - Page 21
Channel Found : 0 EXIT : End • If you press EXIT/CANCEL, the Automatic Search stops and changes to the TV screen. • After the starting setup is completed, the TV channel appears on the screen. Note: • The Auto Setup function will work only when you press POWER for the first time. • The process of - Toshiba 22LV506 | Owner's Manual - English - Page 22
TV/DVD, press POWER. • POWER indicator on the front of the unit changes the remote control): Static electricity, etc., may affect the TV/DVD's will return to normal operation automatically. • The TV section has its own menu and the DVD section also has its own menu 60 . 22 J50S0101D.indb 22 - Toshiba 22LV506 | Owner's Manual - English - Page 23
"Automatic Search", then press ▶ or ENTER. Auto Ch Memory Signal Type Automatic Search Cable Stop Analog Channel Found : 0 Digital Channel Found : 0 : Select ENTER:Cancel 4 The TV/DVD will begin memorizing all the channels available in your area. J50S0101D.indb 23 23 6/9/08 11:24:54 AM - Toshiba 22LV506 | Owner's Manual - English - Page 24
To memorize channels (Continued) Add/Delete channel You can select the channel that you want to skip. 1 Press MENU in the TV mode. The TV menu screen will appear. Press ▲ or ▼ to select "Channel", then press ▶ or ENTER. Main Menu Picture Audio Channel Lock Setup : Select ENTER:Set 2 Press - Toshiba 22LV506 | Owner's Manual - English - Page 25
5 Press EXIT/CANCEL to return to the normal screen. All channels are deleted from the channel memory. 1 Press MENU in the TV mode. The TV menu screen will appear. Press ▲ or ▼ to select "Channel", then press ▶ or ENTER. Main Menu Picture Audio Channel Lock Setup : Select ENTER:Set 2 Press - Toshiba 22LV506 | Owner's Manual - English - Page 26
POWER 0-9, - VOL +/- CH / TV operation 1 To turn on the TV/DVD, press POWER. (POWER indicator on the front of the unit changes green. It may take approx. 10 seconds for a picture to appear on screen.) 2 Adjust the volume level by pressing VOL + or - . The volume level will be indicated on the - Toshiba 22LV506 | Owner's Manual - English - Page 27
TV/DVD receives a digital signal, the digital information will appear. • Channel number • Channel label (if preset) • V-Chip rating • Sleep timer • Program guide • Resolution TV/DVD to Sleep Timer 0h 10m turn off after a preset amount of time, press SLEEP on the remote control. The clock will - Toshiba 22LV506 | Owner's Manual - English - Page 28
number display each time you turn on the TV/DVD, select a channel, or press DISPLAY. You can choose any four characters to identify a channel. ENTER / / / EXIT/CANCEL MENU Labeling channels 1 Press MENU in the TV mode. The TV menu screen will appear. Press ▲ or ▼ to select "Channel" menu, then - Toshiba 22LV506 | Owner's Manual - English - Page 29
Labeling video inputs The Video Label feature allows you to label each input source for your TV/DVD. Labeling video inputs 1 Press MENU in the TV mode. The TV menu screen will appear. Press ▲ or ▼ to select "Setup", then press ▶ or ENTER. Main Menu Picture Audio Channel Lock Setup : Select - Toshiba 22LV506 | Owner's Manual - English - Page 30
ENTER / / MENU To register a password To change a password 1 Press MENU in the TV mode. The TV menu screen will appear. Press ▲ or ▼ to select " only for the U.S. V-Chip system. The Canadian V-Chip system is not supported. [0-9] : Select ENTER:Set 4 Enter the same password again to confirm, - Toshiba 22LV506 | Owner's Manual - English - Page 31
V-Chip Set >> V-Chip Set (DTV) >> Update >> Change Password >> : Select ENTER: Set 5 Press ▲ or ▼ to select which rating will be used, then press ▶ or ENTER. Each rating below will appear. V-Chip Set TV Rating >> Movie Rating >> TV operation [0-9] : Select ENTER:Set 3 Press ▲ or - Toshiba 22LV506 | Owner's Manual - English - Page 32
received that is blocked by the VChip, press MUTE, then enter your password. The protection will be temporarily overridden. If the TV/ DVD is turned off or the channel is changed, the V-Chip restriction will be reactivated. Note: • The V-Chip function is activated only on programs and input sources - Toshiba 22LV506 | Owner's Manual - English - Page 33
)", then press ▶ or ENTER. Lock V-Chip On V-Chip Set >> V-Chip Set (DTV) >> Update >> Change Password >> : Select : Adjust 4 If the TV/DVD is not storing the additional rating system, the TV/DVD will begin downloading it, which may take some time to be completed. 5 Set your preferred - Toshiba 22LV506 | Owner's Manual - English - Page 34
will translate and display text in another language. ENTER // / EXIT/CANCEL MENU CLOSED CAPTION Setting the closed captions 1 Press MENU in the TV display the Closed Caption menu screen by pressing CLOSED CAPTION on the remote control. • Digital caption feature is not available for analog channel - Toshiba 22LV506 | Owner's Manual - English - Page 35
/ EXIT/CANCEL MENU 1 Press MENU in the TV mode. Press ▲ or ▼ to select "Setup ▶ or ENTER. The CC Advanced menu will appear. Closed Caption CC Setting CC Priority item, then press ◀ or ▶ to change the setting. CC Advanced Text Size Text Text Color: Auto, Black, White, Red, Green, Blue, Yellow - Toshiba 22LV506 | Owner's Manual - English - Page 36
settings" at right). 4 After your desired setting, press EXIT/ CANCEL to return to the normal screen. 36 1 Press MENU in the TV mode. The TV menu screen will appear. Press ▲ or ▼ to select "Picture", then press ▶ or ENTER. 2 Press ▲ or ▼ to select "Picture Setting", then press ▶ or ENTER. The - Toshiba 22LV506 | Owner's Manual - English - Page 37
and/or Digital broadcasts may not allow you to change the picture size. • 19LV505/19LV506: In 720p or 1080i signal, only the Theater Wide2 and Full picture size features are available. • 22LV505/22LV506: In 720p or 1080i signal, picture size feature will not work. • In PC Mode, only the Natural and - Toshiba 22LV506 | Owner's Manual - English - Page 38
Mode to "On" when you view a DVD. DNR (Digital Noise Reduction) can reduce the roughness of the picture. (This function is available only for analog broadcast.) Film Mode DNR ENTER / / / EXIT/CANCEL MENU 1 Press MENU in the TV mode. The TV menu screen will appear. Press ▲ or ▼ to select "Picture - Toshiba 22LV506 | Owner's Manual - English - Page 39
operation Picture control adjustment in the PC mode You can adjust to optimize the performance of the TV/DVD in the PC mode. Picture control adjustment in the PC mode 4 INPUT ENTER / / / EXIT/CANCEL MENU 1 Press INPUT, then press ▲/▼ or 4 to select the PC - Toshiba 22LV506 | Owner's Manual - English - Page 40
program (SAP) containing a second language or other audio information. When the TV/DVD receives a stereo or SAP broadcast, the word "Stereo" or "SAP" / EXIT/CANCEL MENU Sound control adjustment 1 Press MENU in the TV mode. The TV menu screen will appear. Press ▲ or ▼ to select "Audio" , then press - Toshiba 22LV506 | Owner's Manual - English - Page 41
▶ or ENTER. Main Menu Picture Audio Channel Lock Setup : Select ENTER:Set Selecting the HDMI audio input source 1 Press MENU in the TV mode. The TV menu screen will appear. Press ▲ or ▼ to select "Audio" , then press ▶ or ENTER. Main Menu Picture Audio Channel Lock Setup : Select ENTER:Set - Toshiba 22LV506 | Owner's Manual - English - Page 42
Picture Audio Channel Lock Setup : Select ENTER:Set 1 Press MENU in the TV mode. The TV menu screen will appear. Press ▲ or ▼ to select "Setup" , then press ▶ or Automatic aspect size (When Aspect is On) Natural Full Theater Wide2 User-set mode 2 Press ▲ or ▼ to select "Backlight". Setup - Toshiba 22LV506 | Owner's Manual - English - Page 43
Auto Shut Off/ Resetting your settings If the Auto Shut Off feature is On, a station being viewed stops broadcasting and the TV is not operated, the TV will automatically shut itself off after 15 minutes. The Reset function returns your settings to the factory settings. ENTER / / / EXIT/CANCEL MENU - Toshiba 22LV506 | Owner's Manual - English - Page 44
switch on the amplifier. 4 On the TV screen, " " changes to "Reading" and then playback commences. Reading 2 Press TV/DVD on the remote control to select DVD mode. The DVD startup screen will appear on the TV screen. A menu screen will appear on the TV screen if the disc has a menu feature. Press - Toshiba 22LV506 | Owner's Manual - English - Page 45
Basic playback To obtain a higher quality picture Occasionally, some picture noise may appear on the TV screen while playing a DVD video disc because the high resolution pictures on these discs include a lot of information. In such case, you may reduce the Sharpness with the Picture Setting menu ( - Toshiba 22LV506 | Owner's Manual - English - Page 46
or FF during playback. To resume normal playback Press PLAY. REV: Fast reverse playback FF: Fast forward playback Each time you press REV or FF button, the playback speed changes. Note: • The TV/DVD mutes sound during reverse and forward scan of DVD/VCD/Audio CD discs. • The playback speed may - Toshiba 22LV506 | Owner's Manual - English - Page 47
press DISPLAY. 0-9 JUMP DISPLAY ZOOM / / / ENTER EXIT/CANCEL DVD VCD Zooming CD DVD VCD Locating desired scene CD 1 Press ZOOM during playback. The center part of the image will be zoomed in. Each press of ZOOM will change the ZOOM 1 (x 1.3), 2 (x 1.5) and 3 (x 2.0). 1 1 Press JUMP during - Toshiba 22LV506 | Owner's Manual - English - Page 48
the points that you want to watch again up to 3 points. You can resume playback from each scene. ENTER / EXIT/CANCEL DVD VCD Marking the scenes MARKER DVD VCD Returning to the scenes 1 Press MARKER during playback. 1 Press MARKER during playback or stop mode. 2 Select the blank Marker - Toshiba 22LV506 | Owner's Manual - English - Page 49
Advanced playback Repeat playback/A-B Repeat playback PLAY MODE ENTER PLAY SKIP / REPEAT A-B DVD VCD Repeat playback 1 Press PLAY MODE during playback or stop mode. DVD VCD A-B Repeat playback CD A-B repeat playback allows you to repeat a section between two selected points. 1 Press - Toshiba 22LV506 | Owner's Manual - English - Page 50
a wrong number, press EXIT/CANCEL. Mode Repeat Play Mode : Program : Off Program Playback 1 9 2 --- 3 --- ■ To change the program 1. Select Mode to "Program" (as VCCDD Random playback 1 Press PLAY MODE during playback or stop mode. 3 Press PLAY. The Random Playback will start. 2 Press / to - Toshiba 22LV506 | Owner's Manual - English - Page 51
playback Changing angles/Title selection/DVD menu DVD MENU / / / ENTER PLAY ANGLE TOP MENU Changing angles When playing back a disc recorded with multi-angle facility, you can change the angle that you are viewing the scene from. 1 Press ANGLE during playback. The current angle will appear - Toshiba 22LV506 | Owner's Manual - English - Page 52
time you press AUDIO SELECT. LR L R • The on screen display will disappear after a few seconds. Note: • Depending on the DVD, you may not be able to change subtitles, or to turn subtitles on or off. • While playing a DVD, the subtitle may change when you loaded or eject the disc. • In some cases - Toshiba 22LV506 | Owner's Manual - English - Page 53
To turn off the PBC DVD VCD Disc status With press of DISPLAY, the status of the disc will appear on the screen. To cancel the display, press DISPLAY again. DISPLAY PLAY MODE / ENTER VCD To turn off the PBC (see page 8) 1 Press PLAY MODE in the stop mode. DVD DISC OPERATION ELAPSED TOTAL TIME - Toshiba 22LV506 | Owner's Manual - English - Page 54
will produce optimal playback quality. The technical criteria set forth in this ownerʼs manual are meant only as a guide /WMA/JPEG/DivX® files, only audio tracks will be played. • It may take more than one minute for 44.1kHz, 48kHz Bit rate: 32kbps ~ 320kbps Resolution: Max 720 x 576 (at 25fps), Max - Toshiba 22LV506 | Owner's Manual - English - Page 55
file browser. 4. Press RETURN to save the setting. • The unit records the stopped point. " " appears on the TV screen. Press PLAY to resume playback (from the scene point). • If you press STOP again or unload the disc, the unit will clear the stopped point. 55 J50S0101D.indb 55 6/9/08 11:25:40 AM - Toshiba 22LV506 | Owner's Manual - English - Page 56
DVD MENU ENTER / / / PAUSE STOP PLAY SKIP ANGLE TOP MENU CD JPEG playback CD Slide show playback 1 Load a JPEG disc in the disc slot. 2 A file browser screen will , the slide show stops temporary. "❙❙" appears briefly on the TV screen. Press PLAY or SKIP again to resume the slide show. • If the - Toshiba 22LV506 | Owner's Manual - English - Page 57
• Depending on the recording conditions of DivX® file, you may not be able to use FF, REV or JUMP function. 4 Press ENTER or PLAY. The selected DivX® movie will be played back on the TV screen. Advanced playback 5 Press STOP to end playback. • The unit records the stopped point. " " appears on the - Toshiba 22LV506 | Owner's Manual - English - Page 58
starts repeat playback after finishing the current track. Folder-1 Folder-2 MP3-1 MP3-2 MP3-3 Select Files Repeat :Off Mode :Random 3 Press PLAY. The random playback will start. To resume normal playback Select Repeat : "Off" in step 2. Note: • The repeat function is cancelled when you eject the - Toshiba 22LV506 | Owner's Manual - English - Page 59
Advanced playback / / / ENTER PLAY CD Program playback (Audio CD/MP3/WMA/JPEG/DivX®) 1 In the file browser -1 WMA-2 WMA-3 Edit Mode Program View Add To Program JPEG Preview 5 In the Program View, press PLAY. The files start to playback in programed order that were added by you. To remove file from - Toshiba 22LV506 | Owner's Manual - English - Page 60
change the default settings of the DVD mode to customize performance to your preference. Press TV/DVD on the remote control to select DVD mode. DVD VCD Setting procedure CD TV/DVD or ENTER. The selectable settings will appear. PDMTVaRernCSeunctraelen : 4OE:nf3fglish QSDuiSsboptuliatnlyedSet - Toshiba 22LV506 | Owner's Manual - English - Page 61
. 62 TV Screen Display To select a picture size according to the aspect ratio of your TV. 62 To turn On or Off the operational status display on the TV screen. a preferred parental level for the parental setting. Password To change the password. 64 DivX(R) VOD To display your 8-character - Toshiba 22LV506 | Owner's Manual - English - Page 62
change the OSD language, you can perform it by "Language" in the TV menu 22 . TV Screen You have the following screen sizes to choose from: 4:3 (Letter box): When playing back a wide screen-DVD . Note: • If the DVD disc is not formatted in the Pan & scan style, it will display 4:3 style. Display On - Toshiba 22LV506 | Owner's Manual - English - Page 63
with Dolby Digital is played back. • The level of Night Mode may differ depending on DVD video disc. ■ Digital Out You can select the digital output sound format corresponding to your system connection. Off: There is no sound output from DIGITAL AUDIO OUT jack. PCM: Change Dolby Digital to PCM - Toshiba 22LV506 | Owner's Manual - English - Page 64
DVD software can be played back. • Level 1: DVD software for adults cannot be played back. 3) Press or to select from the level 1 to level 8. The limitation will you buy a DVD video will not work. • The password is required every time when you change holding 7 down on the remote control and then press - Toshiba 22LV506 | Owner's Manual - English - Page 65
. When the disc is ejected, the original rating level will be set again automatically. 2 If the DVD disc has been designed to temporarily cancel the Rating level, the screen which follows the "Reading" screen will change, depending on which disc is played. If you select "YES" with the ENTER key - Toshiba 22LV506 | Owner's Manual - English - Page 66
power cord from the wall outlet to prevent the TV/DVD from turning on in your absence. Troubleshooting Use the following check list for troubleshooting when you have problems with your unit. Consult your local dealer or service outlet if problems persist. Be sure all connections are properly made - Toshiba 22LV506 | Owner's Manual - English - Page 67
SUBTITLE. Angle cannot be changed. • Multi-angles are not recorded on the DVD disc. "✕" appears on the screen. • The function is prohibited with the unit or the disc. REMOTE CONTROL The remote control does not function. • Aim the remote control at the remote sensor. • Operate within approx - Toshiba 22LV506 | Owner's Manual - English - Page 68
best results. The most common types of television interference are shown below. If one of these symptoms appear when the TV/DVD is connected to a Cable TV objects. Changing the direction or position of the antenna may improve the reception. SNOW If the TV/DVD is located far from the TV station, - Toshiba 22LV506 | Owner's Manual - English - Page 69
Language code list Enter the appropriate code number for the initial settings "Menu", "Subtitle" and/or "Audio" 62 . Language Name Abkhazian Afar Afrikaans Albanian Amharic Arabic Armenian Assamese Aymara Azerbaijani Bashkir Basque Bengali; Bangla Bhutani Bihari Breton Bulgarian Burmese - Toshiba 22LV506 | Owner's Manual - English - Page 70
Remote control (19LV505/22LV505 : SE-R0305, 19LV506/22LV506 : SE-R0316 1 Batteries (R03/AAA) ...2 AC cord ...1 Cleaning cloth ...1 Ownerʼs manual (this booklet 1 Quick setup guide (Spanish 1 • This model complies with the above specifications. • Designs and specifications are subject to change - Toshiba 22LV506 | Owner's Manual - English - Page 71
Read this ownerʼs manual thoroughly before operating this LCD TV/DVD Combination. Complete and mail the enclosed product registration card or register your LCD TV/DVD Combination online at www.tacp.toshiba.com/service as soon as possible. By registering your LCD TV/DVD Combination you will enable - Toshiba 22LV506 | Owner's Manual - English - Page 72
manual and checking the section "Troubleshooting," you find that service is needed: (1) For instructions on how to obtain warranty service for your LCD TV/DVD Combination, contact TACPʼs Consumer Solution Center toll free at 1-800-631-3811. (2) You must include a copy or original bill of sale PARTS.
-
 1
1 -
 2
2 -
 3
3 -
 4
4 -
 5
5 -
 6
6 -
 7
7 -
8
-
9
-
10
-
11
-
12
-
13
-
14
-
15
-
16
-
17
-
18
-
19
-
20
-
21
-
22
-
23
-
24
-
25
-
26
-
27
-
28
-
29
-
30
-
31
-
32
-
33
-
34
-
35
-
36
-
37
-
38
-
39
-
40
-
41
-
42
-
43
-
44
-
45
-
46
-
47
-
48
-
49
-
50
-
51
-
52
-
53
-
54
-
55
-
56
-
57
-
58
-
59
-
60
-
61
-
62
-
63
-
64
-
65
-
66
-
67
-
68
-
69
-
70
-
71
-
72
 |
 |
19LV505
19LV506
22LV505
22LV506
OWNER’S MANUAL
4
14
21
44
47
60
Introduction
Connections
Basic setup
Basic playback
Advanced playback
Function setup
66
Others
26
TV operation
©2008 Toshiba Corporation
Before operating the unit, please read this manual thoroughly.
19/22-inch
*
Diagonal LCD TV/DVD
COMBINATION
*Screen size is approximate.
IIIustration of 19LV505
Owner
ʼ
s Record
The model number and serial number
are on the back of your TV/DVD.
Record these numbers in the spaces
below. Refer to these numbers
whenever you communicate with your
Toshiba dealer about this TV/DVD.
Model number:
Serial number:
J50S0101D.indb 1
J50S0101D.indb
1
6/9/08 11:24:15 AM
6/9/08
11:24:15 AM