Toshiba 47L6200U User Guide - Page 54
SETTINGS, SETUP, Quick Setup, Antenna, Cable, Initial setup
 |
View all Toshiba 47L6200U manuals
Add to My Manuals
Save this manual to your list of manuals |
Page 54 highlights
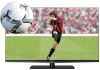
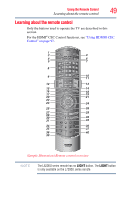
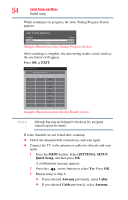
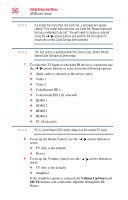
54 Initial Setup and Menu Initial setup While scanning is in progress, the Auto Tuning Progress Screen appears. Auto Tuning (Antenna) Progress Found 0% 5 Channel: 5 (Sample Illustration) Auto Tuning Progress Screen After scanning is complete, the auto tuning results screen (such as the one below) will appear. Press OK or EXIT. Auto Tuning (Antenna) Antenna Channels Found: 12 Ch. Type 2 ATV 3 ATV 4 ATV 5 ATV 6 ATV 7 ATV 8 ATV 9 ATV RF Ch. 2 3 4 5 6 7 8 9 (Sample Illustration) Auto Tuning Results screen NOTE Although they may be displayed in the above list, encrypted channels cannot be viewed. If some channels are not found after scanning: ❖ Check the antenna/cable connections, and scan again. ❖ Connect the TV to the antenna or cable box directly and scan again. 1 Press the MENU button. Select SETTINGS, SETUP, Quick Setup, and then press OK. A confirmation message appears. 2 Press the ( / arrow) buttons to select Yes. Press OK. 3 Repeat setup to Step 6. ❖ If you selected Antenna previously, select Cable. ❖ If you selected Cable previously, select Antenna.
-
 1
1 -
2
-
3
-
4
-
5
-
6
-
7
-
8
-
9
-
10
-
11
-
12
-
13
-
14
-
15
-
16
-
17
-
18
-
19
-
20
-
21
-
22
-
23
-
24
-
25
-
26
-
27
-
28
-
29
-
30
-
31
-
32
-
33
-
34
-
35
-
36
-
37
-
38
-
39
-
40
-
41
-
42
-
43
-
44
-
45
-
46
-
47
-
48
-
 49
49 -
 50
50 -
 51
51 -
 52
52 -
 53
53 -
 54
54 -
 55
55 -
 56
56 -
 57
57 -
 58
58 -
 59
59 -
60
-
61
-
62
-
63
-
64
-
65
-
66
-
67
-
68
-
69
-
70
-
71
-
72
-
73
-
74
-
75
-
76
-
77
-
78
-
79
-
80
-
81
-
82
-
83
-
84
-
85
-
86
-
87
-
88
-
89
-
90
-
91
-
92
-
93
-
94
-
95
-
96
-
97
-
98
-
99
-
100
-
101
-
102
-
103
-
104
-
105
-
106
-
107
-
108
-
109
-
110
-
111
-
112
-
113
-
114
-
115
-
116
-
117
-
118
-
119
-
120
-
121
-
122
-
123
-
124
-
125
-
126
-
127
-
128
-
129
-
130
-
131
-
132
-
133
-
134
-
135
-
136
-
137
-
138
-
139
-
140
-
141
-
142
-
143
-
144
-
145
-
146
-
147
-
148
-
149
-
150
-
151
-
152
-
153
-
154
-
155
-
156
-
157
-
158
-
159
-
160
-
161
-
162
-
163
-
164
-
165
-
166
-
167
-
168
-
169
-
170
-
171
-
172
-
173
-
174
-
175
-
176
-
177
-
178
-
179
-
180
-
181
-
182
-
183
-
184
-
185
-
186
-
187
-
188
-
189
-
190
-
191
-
192
-
193
-
194
-
195
-
196
-
197
-
198
-
199
-
200
-
201
-
202
-
203
-
204
-
205
-
206
 |
 |