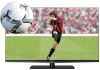
Toshiba 47L6200U User Guide - Page 67
Manual Tuning, SETTINGS, SETUP, Auto Tuning, CH Up/Down
 |
View all Toshiba 47L6200U manuals
Add to My Manuals
Save this manual to your list of manuals |
Page 67 highlights
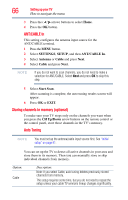
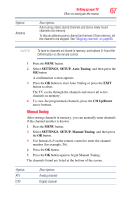
Option: Antenna Setting up your TV How to navigate the menu 67 Description: Auto tuning retains stored channels and stores newly found channels into memory. To skip an antenna source channel and remove it from memory, set the channel to be skipped. See "Skipping channels" on page 68. NOTE To tune to channels not stored in memory, use buttons 0-9 and the DASH button on the remote control. 1 Press the MENU button. 2 Select SETTINGS, SETUP, Auto Tuning, and then press the OK button. A confirmation screen appears. 3 Press the OK button to start Auto Tuning or press the EXIT button to abort. The TV cycles through the channels and stores all active channels in memory. 4 To view the programmed channels, press the CH Up/Down arrow buttons. Manual Tuning After storing channels in memory, you can manually enter channels if the channel number is known. 1 Press the MENU button. 2 Select SETTINGS, SETUP, Manual Tuning, and then press the OK button. 3 Use buttons 0-9 on the remote control to enter the channel number (for example, 56). 4 Press the OK button. 5 Press the OK button again to begin Manual Tuning. The channels found are listed at the bottom of the screen. Option: ATV DTV Description: Analog channel Digital channel
-
 1
1 -
2
-
3
-
4
-
5
-
6
-
7
-
8
-
9
-
10
-
11
-
12
-
13
-
14
-
15
-
16
-
17
-
18
-
19
-
20
-
21
-
22
-
23
-
24
-
25
-
26
-
27
-
28
-
29
-
30
-
31
-
32
-
33
-
34
-
35
-
36
-
37
-
38
-
39
-
40
-
41
-
42
-
43
-
44
-
45
-
46
-
47
-
48
-
49
-
50
-
51
-
52
-
53
-
54
-
55
-
56
-
57
-
58
-
59
-
60
-
61
-
 62
62 -
 63
63 -
 64
64 -
 65
65 -
 66
66 -
 67
67 -
 68
68 -
 69
69 -
 70
70 -
 71
71 -
 72
72 -
73
-
74
-
75
-
76
-
77
-
78
-
79
-
80
-
81
-
82
-
83
-
84
-
85
-
86
-
87
-
88
-
89
-
90
-
91
-
92
-
93
-
94
-
95
-
96
-
97
-
98
-
99
-
100
-
101
-
102
-
103
-
104
-
105
-
106
-
107
-
108
-
109
-
110
-
111
-
112
-
113
-
114
-
115
-
116
-
117
-
118
-
119
-
120
-
121
-
122
-
123
-
124
-
125
-
126
-
127
-
128
-
129
-
130
-
131
-
132
-
133
-
134
-
135
-
136
-
137
-
138
-
139
-
140
-
141
-
142
-
143
-
144
-
145
-
146
-
147
-
148
-
149
-
150
-
151
-
152
-
153
-
154
-
155
-
156
-
157
-
158
-
159
-
160
-
161
-
162
-
163
-
164
-
165
-
166
-
167
-
168
-
169
-
170
-
171
-
172
-
173
-
174
-
175
-
176
-
177
-
178
-
179
-
180
-
181
-
182
-
183
-
184
-
185
-
186
-
187
-
188
-
189
-
190
-
191
-
192
-
193
-
194
-
195
-
196
-
197
-
198
-
199
-
200
-
201
-
202
-
203
-
204
-
205
-
206
 |
 |