Toshiba 50L4300U User's Guide for Model Series L4300U and L7300U TV - Page 115
Assisted Setup, Manual Setup
 |
View all Toshiba 50L4300U manuals
Add to My Manuals
Save this manual to your list of manuals |
Page 115 highlights
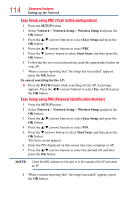
115 Advanced features Setting up the Network To cancel searching for the AP: ❖❖ Press the BACK button while searching for the AP. A message appears. Press the t/u (arrow) buttons to select Yes, and then press the OK button. Assisted Setup 1 Press the SETUP button. 2 Select Network > Network Setup > Wireless Setup and press the OK button. 3 Press the p/q (arrow) buttons to select Assisted Setup and press the OK button. 4 Press the p/q (arrow) buttons to select the desired AP, and then press the OK button. NOTE Check the MAC address on the label or in the manual of the AP and select an AP. 5 Select Security Key, and then press the OK button. The Software Keyboard appears. 6 Input the Security Key using the Software Keyboard. For more information, see "Using the software keyboard" on page 121. 7 To save your settings, press the GREEN button. NOTE The Security Key must adhere to the following conditions: ❖❖ TKIP/AES: 8-63 ASCII or 64 Hex characters ❖❖ WEP: 5 or 13 ASCII or 10 or 26 Hex characters 8 Select Done, and then press the OK button. NOTE Settings are not saved if the BACK button is pressed before Done is selected. Manual Setup 1 Press the SETUP button. 2 Select Network > Network Setup > Wireless Setup and press the OK button. 3 Press the p/q (arrow) buttons to select Manual Setup, and then press the OK button.
-
 1
1 -
2
-
3
-
4
-
5
-
6
-
7
-
8
-
9
-
10
-
11
-
12
-
13
-
14
-
15
-
16
-
17
-
18
-
19
-
20
-
21
-
22
-
23
-
24
-
25
-
26
-
27
-
28
-
29
-
30
-
31
-
32
-
33
-
34
-
35
-
36
-
37
-
38
-
39
-
40
-
41
-
42
-
43
-
44
-
45
-
46
-
47
-
48
-
49
-
50
-
51
-
52
-
53
-
54
-
55
-
56
-
57
-
58
-
59
-
60
-
61
-
62
-
63
-
64
-
65
-
66
-
67
-
68
-
69
-
70
-
71
-
72
-
73
-
74
-
75
-
76
-
77
-
78
-
79
-
80
-
81
-
82
-
83
-
84
-
85
-
86
-
87
-
88
-
89
-
90
-
91
-
92
-
93
-
94
-
95
-
96
-
97
-
98
-
99
-
100
-
101
-
102
-
103
-
104
-
105
-
106
-
107
-
108
-
109
-
 110
110 -
 111
111 -
 112
112 -
 113
113 -
 114
114 -
 115
115 -
 116
116 -
 117
117 -
 118
118 -
 119
119 -
 120
120 -
121
-
122
-
123
-
124
-
125
-
126
-
127
-
128
-
129
-
130
-
131
-
132
-
133
-
134
-
135
-
136
-
137
-
138
-
139
-
140
-
141
-
142
-
143
-
144
-
145
-
146
-
147
-
148
-
149
-
150
-
151
-
152
-
153
-
154
-
155
-
156
-
157
-
158
-
159
-
160
-
161
-
162
-
163
-
164
-
165
-
166
-
167
-
168
-
169
-
170
-
171
-
172
-
173
-
174
-
175
-
176
-
177
-
178
-
179
-
180
-
181
-
182
-
183
-
184
-
185
-
186
 |
 |