Toshiba 50L4300U User's Guide for Model Series L4300U and L7300U TV - Page 99
Edge Enhancer, Dynamic Contrast
 |
View all Toshiba 50L4300U manuals
Add to My Manuals
Save this manual to your list of manuals |
Page 99 highlights
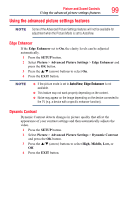
Picture and Sound Controls Using the advanced picture settings features 99 Using the advanced picture settings features NOTE Some of the Advanced Picture Settings features will not be available for adjustment when the Picture Mode is set to AutoView. Edge Enhancer If the Edge Enhancer set to On, the clarity levels can be adjusted automatically. 1 Press the SETUP button. 2 Select Picture > Advanced Picture Settings > Edge Enhancer and press the OK button. 3 Press the p/q (arrow) buttons to select On. 4 Press the EXIT button. NOTE v If the picture mode is set to AutoView, Edge Enhancer is not available. ❖❖ This feature may not work properly depending on the content. ❖❖ Noise may appear on the image depending on the device connected to the TV (e.g. a device with a specific enhancer function). Dynamic Contrast Dynamic Contrast detects changes in picture quality that affect the appearance of your contrast settings and then automatically adjusts the video. 1 Press the SETUP button. 2 Select Picture > Advanced Picture Settings > Dynamic Contrast and press the OK button. 3 Press the p/q (arrow) buttons to select High, Middle, Low, or Off. 4 Press the EXIT button.
-
 1
1 -
2
-
3
-
4
-
5
-
6
-
7
-
8
-
9
-
10
-
11
-
12
-
13
-
14
-
15
-
16
-
17
-
18
-
19
-
20
-
21
-
22
-
23
-
24
-
25
-
26
-
27
-
28
-
29
-
30
-
31
-
32
-
33
-
34
-
35
-
36
-
37
-
38
-
39
-
40
-
41
-
42
-
43
-
44
-
45
-
46
-
47
-
48
-
49
-
50
-
51
-
52
-
53
-
54
-
55
-
56
-
57
-
58
-
59
-
60
-
61
-
62
-
63
-
64
-
65
-
66
-
67
-
68
-
69
-
70
-
71
-
72
-
73
-
74
-
75
-
76
-
77
-
78
-
79
-
80
-
81
-
82
-
83
-
84
-
85
-
86
-
87
-
88
-
89
-
90
-
91
-
92
-
93
-
 94
94 -
 95
95 -
 96
96 -
 97
97 -
 98
98 -
 99
99 -
 100
100 -
 101
101 -
 102
102 -
 103
103 -
 104
104 -
105
-
106
-
107
-
108
-
109
-
110
-
111
-
112
-
113
-
114
-
115
-
116
-
117
-
118
-
119
-
120
-
121
-
122
-
123
-
124
-
125
-
126
-
127
-
128
-
129
-
130
-
131
-
132
-
133
-
134
-
135
-
136
-
137
-
138
-
139
-
140
-
141
-
142
-
143
-
144
-
145
-
146
-
147
-
148
-
149
-
150
-
151
-
152
-
153
-
154
-
155
-
156
-
157
-
158
-
159
-
160
-
161
-
162
-
163
-
164
-
165
-
166
-
167
-
168
-
169
-
170
-
171
-
172
-
173
-
174
-
175
-
176
-
177
-
178
-
179
-
180
-
181
-
182
-
183
-
184
-
185
-
186
 |
 |
