Toshiba 52HM84 Owner's Manual - English - Page 58
How to replace the lamp unit continued - replacement lamps
 |
UPC - 022265262122
View all Toshiba 52HM84 manuals
Add to My Manuals
Save this manual to your list of manuals |
Page 58 highlights
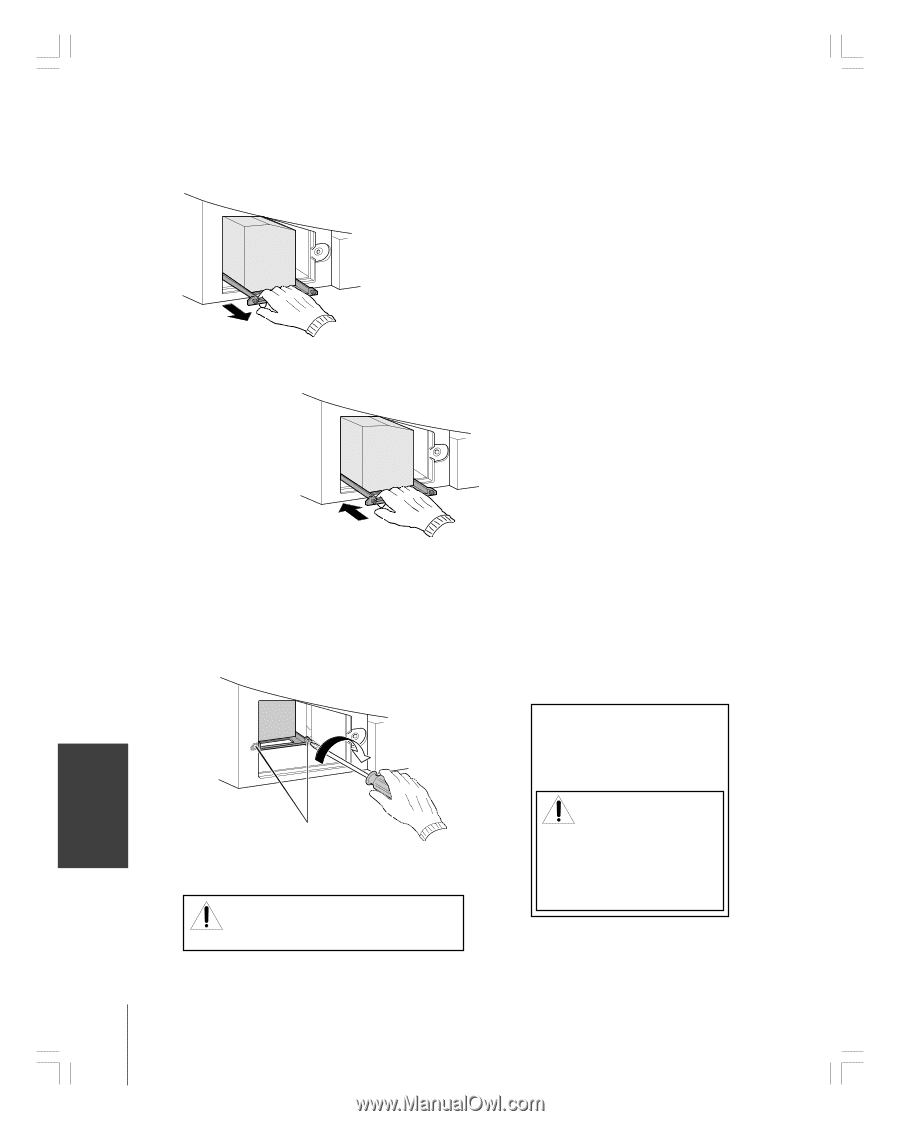
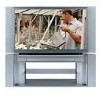
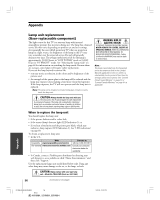
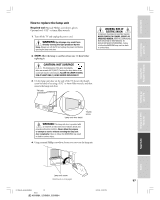
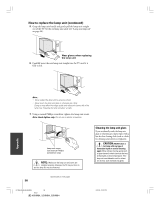
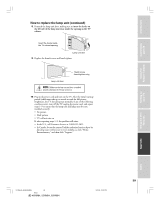
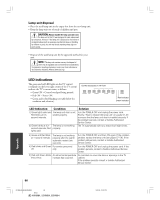
Introduction Connecting your TV How to replace the lamp unit (continued) 5. Grasp the lamp unit handle and gently pull the lamp unit straight out of the TV. Set the old lamp unit aside (see "Lamp unit disposal" on page 60). Wear gloves when replacing the lamp unit. 6. Carefully insert the new lamp unit straight into the TV until it is fully seated. Using the Remote Control Setting up your TV Note : • Never subject the lamp unit to excessive shock. • Never touch the lamp unit glass or otherwise get it dirty. Doing so may affect the image quality and reduce the service life of the lamp. See "Cleaning the lamp unit glass" at right. 7. Using a manual Phillips screwdriver, tighten two lamp unit screws. Note: Hand-tighten only. Do not use an electric screwdriver. Using the TV's Features Appendix Index Lamp unit screw (use manual Phillips screwdriver only) NOTE : Make sure the lamp unit and screw are installed securely; otherwise, the TV may not turn on and the lamp life may be shortened. (Continued on next page) 58 #01E56-60_46,52,62HM84 58 Black (E) 46HM84, 52HM84, 62HM84 Cleaning the lamp unit glass If you accidentally touch the lamp unit glass or otherwise get it dirty, wipe it with a lint-free lens cleaning cloth (such as a cloth for cleaning camera lenses or eyeglasses). CAUTION: NEVER clean a hot lamp with any type of flammable liquid or aerosol cleaning agent. Many ordinary cleaning agents (such as glass cleaners) contain chemicals that may be flammable at certain temperatures. If the lamp unit is not allowed to cool for at least one (1) hour, such chemicals may ignite. 5/31/04, 12:20 PM
-
 1
1 -
2
-
3
-
4
-
5
-
6
-
7
-
8
-
9
-
10
-
11
-
12
-
13
-
14
-
15
-
16
-
17
-
18
-
19
-
20
-
21
-
22
-
23
-
24
-
25
-
26
-
27
-
28
-
29
-
30
-
31
-
32
-
33
-
34
-
35
-
36
-
37
-
38
-
39
-
40
-
41
-
42
-
43
-
44
-
45
-
46
-
47
-
48
-
49
-
50
-
51
-
52
-
 53
53 -
 54
54 -
 55
55 -
 56
56 -
 57
57 -
 58
58 -
 59
59 -
 60
60 -
 61
61 -
 62
62 -
 63
63 -
64
-
65
-
66
-
67
-
68
 |
 |