Toshiba 55L6200U User Guide
Toshiba 55L6200U Manual
 |
View all Toshiba 55L6200U manuals
Add to My Manuals
Save this manual to your list of manuals |
Toshiba 55L6200U manual content summary:
- Toshiba 55L6200U | User Guide - Page 1
Integrated High Definition LED Television User's Guide: 42L6200U 47L6200U 55L6200U 47L7200U 55L7200U If you need assistance: Toshiba's Support Web site support.toshiba.com Toshiba Customer Support Center: Calling within the United States at (800) 631-3811 Calling from outside the United States at ( - Toshiba 55L6200U | User Guide - Page 2
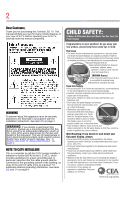
Toshiba LED TV. This manual will help you use the many exciting features of your new LED TV. Before operating your LED TV, carefully read this manual completely. WARNING To prevent injury, this apparatus must be securely attached to the floor/wall in accordance with the installation instructions - Toshiba 55L6200U | User Guide - Page 3
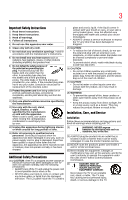
comes in contact with your mouth or eyes, or your skin is cut by broken glass, rinse the affected area thoroughly with water and contact your doctor immediately. • ALWAYS contact a service technician to inspect the TV any time it has been damaged or dropped. 15) CAUTION: • To reduce the risk of - Toshiba 55L6200U | User Guide - Page 4
weight of the TV). Failure to follow these instructions could result in serious injury and/or permanent damage to TV and TV pedestal. • Always unplug the TV before cleaning. Gently wipe the display panel surface (the TV screen) using a dry, soft cloth (cotton, flannel, etc.). A hard cloth may damage - Toshiba 55L6200U | User Guide - Page 5
service technician to perform routine safety checks to determine that the TV is in safe operating condition. Choosing a location for your LED TV To Display your LCD TV on the included Pedestal Stand: Observe the following safety precautions: 1) Read and follow the pedestal assembly instructions - Toshiba 55L6200U | User Guide - Page 6
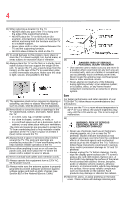
Such symptoms may occur when wearing 3D glasses for long periods of time. Cautions on watching the 3D images • Some viewers may experience a seizure or blackout when exposed to certain flashing images or lights contained in certain 3D television pictures or video games. Anyone who has had a seizure - Toshiba 55L6200U | User Guide - Page 7
the receiver is connected. • Consult the dealer or an experienced radio/TV technician for help. Caution: Changes or modifications to this equipment not expressly approved by Toshiba could void the user's authority to operate this equipment. Wireless Radio For product available in the USA/Canada - Toshiba 55L6200U | User Guide - Page 8
. To return to [Home] mode settings, select [AutoView] picture mode. [AutoView] mode is recommended for normal home use. ENERGY STAR® qualified TV. Products that earn the ENERGY STAR prevent green house gas emissions by meeting strict guidelines set by the U.S. Environmental Protection Agency - Toshiba 55L6200U | User Guide - Page 9
a registered trademark of Best Buy, Inc. • ENERGY STAR and the ENERGY STAR mark are registered U.S. marks. • Manufactured under license from Dolby Laboratories. Dolby and the double-D symbol are trademarks of Dolby Laboratories. powered • www.espial.com by • HDMI, the HDMI Logo, and High-Definition - Toshiba 55L6200U | User Guide - Page 10
guide cannot be reproduced in any form without the prior written permission of Toshiba. No patent liability is assumed, however, with respect to the use of the information contained herein. ©2012 by Toshiba BETWEEN THE PRODUCT AND THE MANUAL. IN NO EVENT SHALL TOSHIBA BE LIABLE FOR ANY INCIDENTAL, - Toshiba 55L6200U | User Guide - Page 11
, setup, and use 22 TV front and side panel controls & connections .....23 Front panel 23 Left side 23 TV back TV 27 Overview of cable types 27 Coaxial cable (F-type 27 Standard A/V cables (red/white/yellow 27 Component video cables (red/green/blue) ........28 HDMI® cable (with HDMI Logo - Toshiba 55L6200U | User Guide - Page 12
, satellite receiver, and cable TV box 30 Connecting DVD to ColorStream® or VCR to composite video 31 Connecting remote IR devices TV to a home network with an Internet connection - wired 43 Connecting the TV to a home network with an Internet connection - wireless 44 Chapter 3: Using the Remote - Toshiba 55L6200U | User Guide - Page 13
51 Performing the initial setup 52 IR Blaster Setup 55 Network Setup 58 MediaGuide Setup 59 Navigating the menu system 61 Main menu layout 62 Quick Menu 63 Chapter 5: Setting up your TV 64 How to navigate the menu 64 Changing initial settings 64 Individual settings 65 Storing channels in - Toshiba 55L6200U | User Guide - Page 14
91 Blocking TV programs and movies by rating (V-Chip 91 Downloading an additional rating system .........92 Displaying ratings 95 Unlocking programs 95 Locking specific channels 95 Locking video inputs 96 Setting a time limit for games 96 Locking the control panel 97 Using HDMI® CEC Control - Toshiba 55L6200U | User Guide - Page 15
the computer audio 103 Setting the timer to turn on the TV 104 Setting the sleep timer 105 Setting No Signal Power Down 106 Displaying TV status information 106 Viewing support information 107 Resetting to Factory Defaults 107 Power failure 108 Chapter 7: Picture and Sound Controls 109 - Toshiba 55L6200U | User Guide - Page 16
127 Using Audyssey EQ® for Wall Mounted or Table-top TVs 127 Using Audyssey Dynamic Volume 127 Audyssey ABX 128 Using the surround sound feature 128 Chapter 8: Advanced features 129 Using your home network 129 When using a Wireless network connection ...130 Setting up the Network 131 - Toshiba 55L6200U | User Guide - Page 17
Contents 17 Wireless Setup 131 Advanced Network Setup 136 DNS Setup 137 Network Connection Test 139 Using the software keyboard 139 Enter text using the keypad 139 Enter text using the full keyboard 139 Performing a Software Upgrade 140 Viewing the Software Licenses 141 Using the SmartTV - Toshiba 55L6200U | User Guide - Page 18
setup 173 Toshiba A/V Remote App 174 Toshiba Send & Play App 174 Toshiba MediaGuide 174 TV listings 175 Movies/TV portal screen 175 Search screen 175 Detailed information 175 Chapter 10: Troubleshooting 176 General troubleshooting 176 Picture problems 177 Sound problems 179 Remote - Toshiba 55L6200U | User Guide - Page 19
Wireless connection 188 Ethernet 189 USB 189 Dimensions with table stand 189 Mass (weight 189 Operating conditions 189 Supplied accessories 190 Acceptable signal formats for PC IN, HDMI®, and 3D 191 PC IN signal formats 191 HDMI® signal formats 192 3D Signal formats 193 Operating the TV - Toshiba 55L6200U | User Guide - Page 20
Chapter 1 Introduction Safety icons This manual contains safety instructions that must be observed to avoid potential been classified according to the seriousness of the risk, and icons highlight these instructions as follows: Indicates an imminently hazardous situation which, if not avoided, will - Toshiba 55L6200U | User Guide - Page 21
digital converter set-top box (in most cases). ❖ 1920 x 1080 output resolution. ❖ Four HDMI®-Digital, High-Definition Multimedia Interfaces with 1080p input support ❖ HDMI® capabilities ARC (Audio Return Channel)-Enables the audio signal of the TV to be sent to an AV amplifier via an HDMI® cable - Toshiba 55L6200U | User Guide - Page 22
. ❖ ENERGY STAR® qualified Overview of installation, setup, and use Follow these steps to set up your TV and begin using its many exciting features. 1 Carefully read the important safety, installation, care, and service information. Keep this manual for future reference. 2 To choose a location - Toshiba 55L6200U | User Guide - Page 23
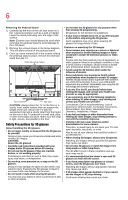
IR Blaster Out 1 Analog Audio port 3 HDMI® ports Brightness sensor Remote sensor Power LED (Sample Illustration) L6200U/L7200U Series front and side panel controls and connections Front panel 1 Power On/Standby LED-Power indicator light, (glows green when the TV power is On). 2 Brightness Sensor - Toshiba 55L6200U | User Guide - Page 24
Ports-High-Definition Multimedia Interface input receives digital audio and uncompressed digital video from an HDMI® device or uncompressed digital video from a DVI device. HDMI® connection is necessary to receive 1080p signals. TV back panel controls and connections For explanations of cable types - Toshiba 55L6200U | User Guide - Page 25
input receives digital audio and uncompressed digital video from an HDMI® device or uncompressed digital video from a DVI device. HDMI® connection is necessary to receive 1080p signals. 14 ARC HDMI® only port-Audio Return Channel (ARC) enables the audio signal of the TV to be sent to an AV amplifier - Toshiba 55L6200U | User Guide - Page 26
PCM (pulse-code modulation) format for connecting an external Dolby® Digital decoder, amplifier, A/V receiver, or home theater system with optical audio input. 17 IR Blaster OUT-Used to connect and control infrared remote controlled devices. 18 2 USB ports-To access video, music, or photo files with - Toshiba 55L6200U | User Guide - Page 27
(F-type) cable connects your antenna, cable TV service, and/or cable converter box to the ANT/CABLE input on your TV. Standard A/V cables (red/white/yellow) (Sample Illustration) Standard AV cables Standard A/V cables (composite video) usually come in sets of three, and connects to video devices - Toshiba 55L6200U | User Guide - Page 28
® is Toshiba's brand of component video.) These cables are typically color-coded red, green, and blue. Separate audio cables are required for a complete connection. NOTE Component video cables provide better picture quality than composite video cables. HDMI® cable (with HDMI Logo) (Sample - Toshiba 55L6200U | User Guide - Page 29
the dual-wand IR blaster cable to the IR blaster terminal to control infrared remote controlled devices from the TV. Optical audio cable (Sample Illustration) Optical audio cable Optical audio cable connects receivers with Dolby® Digital or PCM (pulse-code modulation) optical audio input to the - Toshiba 55L6200U | User Guide - Page 30
) L6200U/L7200U Series-Connecting to an antenna, satellite receiver, and cable TV box Items needed: ❖ Coaxial cables ❖ Standard AV cables ❖ Component video cables (red/green/blue) NOTE When you use a cable box, you may not be able to use the remote control to program or access certain features on - Toshiba 55L6200U | User Guide - Page 31
cables) from the DVD player or satellite receiver to the COLOR STREAM HD terminal in the TV. The COLOR STREAM HD terminal can be used to display Progressive (480p, 720p) and Interlaced (480i, 1080i) scan systems. Note that 1080p is not supported. Check the User's Guide of the DVD player in order to - Toshiba 55L6200U | User Guide - Page 32
32 Connecting Your TV Connecting remote IR devices ❖ If your DVD player or satellite receiver does not have component video, connect a standard A/V cable to the AUDIO/VIDEO terminal. If your DVD player has HDMI® video, see "Connecting an HDMI® or DVI device to the HDMI® input" on page 35. NOTE - Toshiba 55L6200U | User Guide - Page 33
required to connect the device(s) to the TV (see "Overview of cable types" on page 27) See the remote IR blaster setup section. To connect the IR blaster cable 34. 2 Align one of the IR blaster cable's wands approximately 1 inch away from the infrared sensor on the front of the device and attach - Toshiba 55L6200U | User Guide - Page 34
Blaster Setup" on page 55. (Sample Illustration) Controlling the device(s) - remote control NOTE The IR pass-through feature does not support all IR controlled devices. Satisfactory quality may not be attainable with certain devices. If you cannot locate the device's infrared sensor: 1 Turn off - Toshiba 55L6200U | User Guide - Page 35
is available in the following situations: ❖ When tuned to a digital RF channel ❖ When an HDMI input is used ❖ When Media Player/Renderer products are used Connecting an HDMI® or DVI device to the HDMI® input The HDMI® input on your TV receives digital audio and uncompressed digital video from an - Toshiba 55L6200U | User Guide - Page 36
set-top box or DVD player with HDMI® or DVI output). The HDMI® input can accept and display VGA, SVGA, XGA, WXGA, SXGA, 480i (60Hz), 480p (60Hz), 720p (60Hz), 1080i (60Hz), and 1080p (24Hz/60Hz) signal formats. For detailed signal specifications, see "HDMI® signal formats" on page 192. The supported - Toshiba 55L6200U | User Guide - Page 37
/video devices using the TV's remote control, connect an HDMI® CEC compatible audio receiver or playback device. The HDMI® CEC Control feature uses CEC technology as regulated by the HDMI® standard. TV back panel Audio receiver HDMI cable HDMI OUT HDMI IN Playback device (HDMI®-CEC DVD player - Toshiba 55L6200U | User Guide - Page 38
the HDMI® Logo ( ). Before controlling the devices: ❖ For an explanation of setup and operations, see "Other HDMI® CEC Control functions" on page 101. ❖ Configure the connected devices. See each device's operation manual. NOTE This feature is limited to models incorporating Toshiba's HDMI® CEC - Toshiba 55L6200U | User Guide - Page 39
need and HDMI® cable. TV back panel AV amplifier that supports ARC HDMI cable 39 (Sample Illustration) L6200U/L7200U Series- Connecting to HDMI® ARC HDMI®'s ARC (Audio Return Channel) feature This feature enables the audio signal of the TV to be sent to an AV amplifier via the HDMI® cable. It - Toshiba 55L6200U | User Guide - Page 40
RGB cable To use a computer, set the monitor output resolution on the computer before connecting it to the TV. The supported signal formats are VGA, SVGA, XGA, WXGA and SXGA. For detailed signal specifications, see "Acceptable signal formats for PC IN, HDMI®, and 3D" on page 191. Other formats or - Toshiba 55L6200U | User Guide - Page 41
a computer NOTE ❖ The PC audio input terminal on the TV is shared with the HDMI 4 and ColorStream® HD2 terminal. For configuration information, see "Setting the computer audio" on page 103. ❖ Some computer models cannot be connected to this TV. ❖ If the computer has a compatible mini D-sub15-pin - Toshiba 55L6200U | User Guide - Page 42
may be hidden. ❖ If receiving a 480i (HDMI), 480p (HDMI), 720p, 1080i, or 1080p signal program, Native mode scales the video to display the entire picture within the borders of the screen (i.e. no overscanning). Connecting to a home network The LAN port allows your Toshiba TV to connect to your - Toshiba 55L6200U | User Guide - Page 43
to a computer without an Internet connection You will need a Crossover LAN cable. TV back panel Computer (Sample Illustration) L6200U/L7200U Series-Connecting a computer without Internet connection Connecting the TV to a home network without an Internet connection Items needed: ❖ Standard LAN - Toshiba 55L6200U | User Guide - Page 44
) Router with a hub 1 2 Cable or phone jack Computer 2, 3 TV back panel 2 (Sample Illustration) L6200U/L7200U Series-Connecting with Internet connection - phone jack directly to the TV's LAN port. Connecting the TV to a home network with an Internet connection wireless Items needed: ❖ Coaxial or - Toshiba 55L6200U | User Guide - Page 45
LAN cable The transmission speed over the wireless LAN and the distance over which wireless LAN can reach may vary depending on surrounding electromagnetic environment, obstacles, access point design and configuration, and client design and software/hardware configurations. The actual transmission - Toshiba 55L6200U | User Guide - Page 46
Chapter 3 Using the Remote Control Controlling other devices The TV's remote control can operate other devices as described in the IR Blaster section on page 55. Installing batteries To install batteries: 1 Pull up to open the cover. (Sample Illustration) Removing the battery cover 2 Install two AA - Toshiba 55L6200U | User Guide - Page 47
operating range is reduced, replace the batteries. ❖ Always replace both batteries with new ones. Never mix battery types or use new and used batteries together. ❖ Always remove batteries from the remote if they are dead or if the remote control is not to be used for an extended period of time. This - Toshiba 55L6200U | User Guide - Page 48
Using the Remote Control Remote control effective range Remote control effective range 1 For optimum performance, aim the remote control directly at the TV and make sure there are no obstructions between the remote control and the TV. 42/47/55" 16.4 ft (5m) (Sample Illustration) Remote control - Toshiba 55L6200U | User Guide - Page 49
, see "Using HDMI® CEC Control" on page 97. 1 2 3 4 6 5 7 8 9 10 11 12 13 15 14 16 18 17 19 20 21 22 23 24 25 26 27 29 28 30 32 31 33 34 36 35 37 38 40 39 (Sample Illustration) Remote control overview NOTE The L6200U series remote has no LIGHT button. The - Toshiba 55L6200U | User Guide - Page 50
: Function: Item: Description: Function: 1 POWER button Turns the TV On and Off. When the TV is on, the power LED indicator on the TV front glows green. 2 3D button Accesses the 3D options. 3 Light button Illuminates the keypad for five (Model L7200U) seconds. 3 Sleep button Accesses the - Toshiba 55L6200U | User Guide - Page 51
on or reset the TV, the Initial Setup window appears. NOTE ❖ You can stop Initial Setup by pressing the EXIT button. However, if you do not finish Initial Setup, the Initial Setup screen will appear every time you turn on your TV. To finish Initial Setup, see "Changing initial settings" on page - Toshiba 55L6200U | User Guide - Page 52
Setup Menu Language Country English U.S. Language (Sample Illustration) Selecting Menu Language/Country 2 Time Zone Select a time zone. Local Time Setting Mode Select Store or Home. Press OK. Store/Home Mode To use the TV for displaying in a store showroom, please select [Store]. [Home] mode is - Toshiba 55L6200U | User Guide - Page 53
and Menu 53 Initial setup 5 ANT/CABLE To select Antenna, first select Antenna. Then then press OK to skip this step. 6 Start Scan Select Start Scan. Press OK. Auto Tuning Previous settings will be lost! Press EXIT for no change. Start Scan (Sample Illustration) Start Scan NOTE If you want - Toshiba 55L6200U | User Guide - Page 54
be viewed. If some channels are not found after scanning: ❖ Check the antenna/cable connections, and scan again. ❖ Connect the TV to the antenna or cable box directly and scan again. 1 Press the MENU button. Select SETTINGS, SETUP, Quick Setup, and then press OK. A confirmation message appears - Toshiba 55L6200U | User Guide - Page 55
the options in the second column that correspond to the IR device currently being setup. Some fields will have screens with selectable lists of items, while other fields may require using the keyboard to enter the information. 6 To select the Code Set, use the ( / arrow) buttons to select the codes - Toshiba 55L6200U | User Guide - Page 56
, Model Name/Code Set have all been setup. 7 To select the TV Input to which the IR device is connected, use the ( / arrow) buttons to select from the following options: ❖ (Only audio is selected as this device type) ❖ Video 1 ❖ Video 2 ❖ ColorStream HD 1 ❖ Colorstream HD 2 (If selected) ❖ HDMI - Toshiba 55L6200U | User Guide - Page 57
/ arrow) buttons to select the Test option from the IR Blaster Setup screen. The TV will then send the power on and power off command to the appear allowing you to set up the Interval Time for the device. NOTE The Timing Control is activated when the Guide Control is set for the TV. 2 Use the ( - Toshiba 55L6200U | User Guide - Page 58
the Cable Box, Satellite Box or Blu-ray ™ DVD Player, the following message will be displayed: "Are you sure you want to apply this device to MediaGuide?" You must select the Yes or No option using the ( / arrow) buttons. After this selection, the IR Blaster Setup main screen will appear. ❖ The HDMI - Toshiba 55L6200U | User Guide - Page 59
the type of Wireless setup option: Easy Setup (WPS), Assisted Setup, or Manual Setup. NOTE ❖ Easy Setup (WPS). If your Access Point (AP) supports WPS, this AP. You need to manually set the Security Key for this method. ❖ Manual Setup (to input all settings manually). 3 Once your wired or wireless - Toshiba 55L6200U | User Guide - Page 60
button. The TV will now establish connection with the information services it uses. Setting up the Network" on page 131. The Online Account Setup will appear. Please follow the on-screen instructions to register the guide. NOTE If you wish to select any other service subscription such as Netflix - Toshiba 55L6200U | User Guide - Page 61
system, press the MENU button on the remote control or TV control panel. SOUND PICTURE PREFERENCES SETUP 3D GET HELP SETTINGS NETWORK TIMERS (Sample Illustration) Main menu ❖ When a menu is open, press the ( / / / arrow) buttons on the remote control to move in the corresponding direction - Toshiba 55L6200U | User Guide - Page 62
on the remote control or TV control panel. 1st Layer GET HELP 3D SETTINGS NETWORK TIMERS 2nd Layer Software Licenses Software Upgrade System Information eMANUAL SOUND PICTURE PREFERENCES SETUP Media Player Setup Network Setup Network Device Setup Smart Apps Setup On Timer Sleep Timer Game Timer - Toshiba 55L6200U | User Guide - Page 63
select an option. NOTE Quick menu items differ depending on the current mode. Quick Menu Item Picture Mode 3D Settings HDMI® CEC Player Control Speakers Wireless Information Interval Time Repeat Device Information SOUND PICTURE Page page 79 page 78 page 99 page 165 page 135 page 165 page 161 page - Toshiba 55L6200U | User Guide - Page 64
OK or EXIT button. Format: MENU SETTINGS Main menu Submenu OK Description: Press the MENU button. Press the ( / arrow) buttons to select SETTINGS. Press the ( / arrow) buttons to select a menu icon (SOUND, PICTURE, PREFERENCES, SETUP, GET HELP, 3D, SETTINGS, NETWORK, TIMERS) Press the ( / arrow - Toshiba 55L6200U | User Guide - Page 65
allows you to specify the correct time zone for your region. 1 Press the MENU button. 2 Select SETTINGS, SETUP, TV Settings, and then press the OK button. 3 Press the ( / arrow) buttons to select Local Time. 4 Press the OK button. 5 Select an option: ❖ Time Zone ❖ Daylight Saving - Toshiba 55L6200U | User Guide - Page 66
, store those channels in the TV's memory. Auto Tuning NOTE You must set up the antenna/cable input source first. See "Initial setup" on page 51. You can set up the TV to detect all active channels in your area and store them in its memory. Then you can manually store or skip individual channels - Toshiba 55L6200U | User Guide - Page 67
Press the MENU button. 2 Select SETTINGS, SETUP, Manual Tuning, and then press the OK button. 3 Use buttons 0-9 on the remote control to enter the channel number (for example, 56). 4 Press the OK button. 5 Press the OK button again to begin Manual Tuning. The channels found are listed at the bottom - Toshiba 55L6200U | User Guide - Page 68
set it to be skipped. 1 Press the MENU button. 2 Select SETTINGS, SETUP, TV Settings skip. 5 Press the OK button. The box is selected. 6 To clear the selection, remote control. Skipping video inputs You can set video inputs to be skipped when selecting inputs in the Input selection window. To turn - Toshiba 55L6200U | User Guide - Page 69
turn on Skip. To turn off skip Press the RED button again to turn off Skip. Labeling analog TV channels 1 Press the MENU button. 2 Select SETTINGS, SETUP, TV Settings button. The Software Keyboard window appears. 6 Input a name using the Software Keyboard, see "Using the software keyboard" on page - Toshiba 55L6200U | User Guide - Page 70
. Press the ( / arrow) buttons to select Receiver, Cable, DVD, Game, PC, Recorder, Satellite, VCR or Bluray™. 5 Repeat Step 4 for other video inputs. Configuring shared inputs To set Shared AV Audio 1 Press the MENU button. 2 Select SETTINGS, PREFERENCES, AV Connection, and then press the OK button - Toshiba 55L6200U | User Guide - Page 71
HD1, HDMI 1, HDMI 2, HDMI 3, HDMI 4, PC ANT/CABLE, Video 1 Video 2 ColorStream HD1, HDMI 1, HDMI 2, HDMI 3, HDMI 4, PC NOTE The TV mode select button will be restricted to the ANT/CABLE input. To set Auto Input 1 Press the MENU button. 2 Select SETTINGS, PREFERENCES, Mode Select Key Setup, and - Toshiba 55L6200U | User Guide - Page 72
. ❖ 3D capable HDMI® cable. If you wish to obtain extra 3D glasses: Toshiba provides 3D glasses for this television as an option. To obtain them visit: US: http://ceaccessories.toshiba.com/ Canada: http://www.shoptoshiba.ca/ NOTE Use the type of 3D glasses that are compatible with to your TV. 72 - Toshiba 55L6200U | User Guide - Page 73
certain flashing images or lights contained in certain 3D television pictures or video games. 3D glasses. ❖ The 3D glasses are not subject to repair. If the glasses are broken or scratched, purchase a new pair of 3D glasses. ❖ The 3D glasses are not subject to repair, but can be replaced if a problem - Toshiba 55L6200U | User Guide - Page 74
NOTE Watching the TV: ❖ Proper 3D effects or 3D-to-2D conversion results may not be obtained depending on the received 3D content. ❖ 3D effect and image quality may vary depending upon content quality and display device capability/ functionality/settings. ❖ Wear the 3D glasses properly, otherwise - Toshiba 55L6200U | User Guide - Page 75
NOTE ❖ In order to switch to 3D, the TV must be receiving a 3D signal. ❖ If appropriate mode and format are not selected, 3D image is not correctly displayed. ❖ If the appropriate 3D mode and format are not selected, the 3D image will not display correctly. ❖ There are individual differences - Toshiba 55L6200U | User Guide - Page 76
3D format There are four TV viewing modes: Mode: 3D 2D 2D to 3D Native Description: Displays 3D images. Displays 2D images by changing 3D images to 2D. Displays 3D images by changing 2D images to 3D. Displays a received signal format as it is. 3D format cannot be selected manually. ❖ If the right - Toshiba 55L6200U | User Guide - Page 77
window. 77 NOTE When viewing 3D mode or 2D to 3D mode, pressing the 3D button changes the viewing mode to Native mode. The 3D mode may not be available with certain features. Switching to 3D mode 1 Set 3D Auto Start to 3D. 2 Press the 3D button and select 3D while viewing 2D mode or Native - Toshiba 55L6200U | User Guide - Page 78
78 Basic features Using 3D functions Selecting 3D format from the Quick menu in 3D mode 1 Press the QUICK button. Select 3D Settings, and then press the OK button. 2 Press the ( / arrow) buttons to select 3D Format Select, and then press the OK button. 3 Press the ( / arrow) buttons to select - Toshiba 55L6200U | User Guide - Page 79
Detect Information TAB 2D Format Signal * Correct 2D image. Selecting 2D format from the Quick menu in 2D mode 1 Press the QUICK button. Select 3D Settings, and then press the OK button. 2 Press the ( / arrow) buttons to select 2D Format Select, and then press the OK button. 3 Press the ( / arrow - Toshiba 55L6200U | User Guide - Page 80
Signal * Correct 2D image. NOTE Take off the 3D glasses in 2D mode Switching to Native mode Press the 3D button while viewing 3D mode. Press the 3D button while viewing 2D to 3D mode. NOTE When 3D format signal with 3D Auto Detect Information is received, it is not possible to switch to Native - Toshiba 55L6200U | User Guide - Page 81
automatically when 3D format signal with 3D Auto Detect Information is received. Displays a screen that allows you to select 3D or 2D when 3D format signal with 3D Auto Detect Information is received. Setting the 3D PIN code A 3D PIN code is necessary for using 3D Safety Settings. Enter a new PIN - Toshiba 55L6200U | User Guide - Page 82
4 times within 5 seconds. The code clears. 5 Enter a new PIN code. Setting the 3D start message When this feature is set to On, a message displays on the screen when a 3D signal is received. 1 Press the MENU button. 2 Use the ( / arrow) buttons to select 3D, and then press the OK button. 3 Press the - Toshiba 55L6200U | User Guide - Page 83
selected in the reminder dialogue box for Enable 3D Timer even if 3D Timer Lock is activated. Setting the Enable 3D Timer This feature allows you to set a reminder to not watch a 3D video for an extended period of time. Once a set period of time has passed, a dialogue box appear asking if you wish - Toshiba 55L6200U | User Guide - Page 84
, and then press the OK button. 3 Press the ( / arrow) buttons to select 3D Safety Settings, and then press the OK button. 4 Enter your 4-digit 3D PIN code. 5 Press the ( / arrow) buttons to select Enable 3D Timer. 6 Press the ( / arrow) buttons to select 30, 60, 90, or 120 minutes. 7 To cancel the - Toshiba 55L6200U | User Guide - Page 85
glasses can be swapped. If 3D images look blurry, switch the left and right sides of the 3D image. 1 Press the QUICK button to open the Quick menu. 2 Press the ( / arrow) buttons to select 3D Settings Each time you press the CH RTN button, the TV switches between the last two channels that were tuned - Toshiba 55L6200U | User Guide - Page 86
as Channel Return. Selecting the video input to view To select the video input to view: 1 Press the INPUT button on the remote control or TV control panel. 2 Change the input: ❖ Press 0-8. ❖ Repeatedly press the ( / arrow) buttons, and then press the OK button. ❖ Repeatedly press the INPUT button - Toshiba 55L6200U | User Guide - Page 87
that input appears. 3 If the input has multiple HDMI® CEC devices, use the ( / arrow) buttons to select a device. 4 Press the OK button. Using closed captions To turn on the closed caption mode: 1 Press the MENU button. Select SETTINGS, SETUP, TV Settings, and then press the OK button. 2 Press the - Toshiba 55L6200U | User Guide - Page 88
captioned (usually marked "CC" in program guides). Displays information not related to the current program, such as weather or stock data (when provided by individual stations). To view captions or text: 1 Press the MENU button. Select SETTINGS, SETUP, TV Settings, and then press the OK button - Toshiba 55L6200U | User Guide - Page 89
black rectangle may appear on the screen. You can remove this rectangle by setting Closed Captions Display to Off. NOTE A closed caption signal may not , White, Red, Green, Blue, Yellow, Magenta, Cyan Auto, Transparent, Translucent, Flashing, Solid Auto, Black, White, Red, Green, Blue, Yellow, - Toshiba 55L6200U | User Guide - Page 90
Flashing, Solid Caption text edge color Auto, Black, White, Red, Green, Blue, Yellow, Magenta, Cyan To customize the closed captions: 1 Press the MENU button. Select SETTINGS, SETUP, TV Settings the available caption options for that channel or service. Setting the PIN code A PIN code is necessary - Toshiba 55L6200U | User Guide - Page 91
Controls and Locks are reset. Forgotten PIN code 1 Press the MENU button. Select SETTINGS, PREFERENCES, Parental PIN, and then press the OK button. 2 Press the INFO button 4 times within 5 seconds. The code is cleared. 3 Enter a new PIN code. Using parental controls Blocking TV programs and movies - Toshiba 55L6200U | User Guide - Page 92
TV supports the U.S. V-Chip system only. 1 Press the MENU button. Select SETTINGS of blocking. A box with an "X" TV programs and movies. NOTE The currently tuned station must be receiving a digital signal before an additional rating system can be downloaded. 1 Press the MENU button. Select SETTINGS - Toshiba 55L6200U | User Guide - Page 93
of blocking. A box with an "X" indicates the rating that will be blocked. NOTE ❖ You can only download the additional rating system once. You cannot download updates if they become available. ❖ The additional rating system is not designed, transmitted, or controlled by the TV or Toshiba, nor is - Toshiba 55L6200U | User Guide - Page 94
more intense or more combative than other programs in this category are designated TV-Y7FV.) All Children (This program is designed to be appropriate for all ) No rating information is provided. NOTE If you place an "X" in the box next to "Rated "None"", programs rated "None" or "Not Rated" will - Toshiba 55L6200U | User Guide - Page 95
PIN code is entered first, see "Setting the PIN code" on page 90. 1 Press the MENU button. Select SETTINGS, SETUP, TV Settings, and then press the OK button. code has been set, a warning appears. See, "Setting the PIN code" on page 90. 5 The box is selected. To clear the selection, press the OK - Toshiba 55L6200U | User Guide - Page 96
2, HDMI 3, HDMI 4, PC, and channels 3 and 4. Select Video+ if you want to play video tapes via the ANT/CABLE input. Unlocks all video inputs and channels 3 and 4. Setting a time limit for games You can use the GameTimer® to set a time limit for playing a video game. When the time expires, the TV - Toshiba 55L6200U | User Guide - Page 97
4 above. Using HDMI® CEC Control This feature uses CEC technology and allows you to control Toshiba HDMI® CEC compatible devices from the TV remote control via HDMI® connection. When Enable HDMI® CEC Control in the HDMI® CEC Control Setup menu is set to On, the following HDMI® CEC Control functions - Toshiba 55L6200U | User Guide - Page 98
) buttons to select On. NOTE If you set Enable HDMI® CEC Control to Off, the other items under HDMI® CEC Control Setup will be grayed out. 4 Press the ( / arrow) buttons to select an item. Press the ( / arrow) buttons to select On or the desired mode: ❖ TV Auto Power: On/Off ❖ Auto Standby: On - Toshiba 55L6200U | User Guide - Page 99
functions 1 Press the QUICK button to open the Quick menu. 2 Select HDMI® CEC Player Control, and then press the OK button. 3 Press the ( / arrow) buttons to select the item you want to control, and then press the OK button. Item: Description: Power Turns the selected device On and Off Root - Toshiba 55L6200U | User Guide - Page 100
the amplifier's audio Using the TV's remote control, you can adjust or mute the sound volume of your amplifier. ❖ The VOL (+ -) buttons adjust the volume level. ❖ The MUTE button turns off the sound. 1 Press the MENU button. Select SETTINGS, PREFERENCES, HDMI® CEC Control Setup, and then press the - Toshiba 55L6200U | User Guide - Page 101
in the HDMI® CEC Control Setup menu are set to On, the following functions will be enabled: Item: Description: TV Auto Power If a HDMI® CEC device is turned on, the TV turns on automatically. Auto Standby If the TV is turned off, it will send a message to turn off all of the HDMI® CEC devices - Toshiba 55L6200U | User Guide - Page 102
of 1080p and/or your TV is capable of refresh rates greater than 60 Hz, you will need a High Speed HDMI® cable. Conventional HDMI®/ DVI cables may not work properly with this mode. Select the appropriate HDMI® input mode (HDMI 1, HDMI 2, HDMI 3, or HDMI 4): 1 Press the MENU button. Select SETTINGS - Toshiba 55L6200U | User Guide - Page 103
from your computer when connecting it to your TV, using the AUDIO IN terminal and PC audio cable. 1 Press the MENU button. Select SETTINGS, PREFERENCES, AV Connection, and the press the OK button. 2 Press the ( / arrow) buttons to select PC/HDMI 4 Audio. 3 Press the ( / arrow) buttons to select PC - Toshiba 55L6200U | User Guide - Page 104
104 Basic features Setting the timer to turn on the TV Setting the timer to turn on the TV You can set the on timer to turn on the TV to a preset channel or input at a preset time. To activate the timer: 1 Press the MENU button. Select TIMERS, On Timer, and then press the OK - Toshiba 55L6200U | User Guide - Page 105
❖ Press the ( / arrow) buttons to increase or decrease the time. NOTE If a power failure occurs, the sleep timer setting may be cleared. To display the time remaining until the TV turns off, press the SLEEP button. To cancel the sleep timer, press the SLEEP button repeatedly or press the ( / arrow - Toshiba 55L6200U | User Guide - Page 106
(if in ANT/CABLE mode) ❖ Input label (if set) ❖ Digital signal strength indicator (bar graph in lower right corner of box; for ATSC signals only) ❖ Stereo, Mono, or SAP audio status (when in HDMI® input mode, PCM) ❖ Video resolution ❖ Aspect ratio of incoming video signal (4:3 or 16:9) ❖ V-Chip - Toshiba 55L6200U | User Guide - Page 107
. 2 Press the OK button to display support information containing Web/Customer service numbers for US, Canada, and Mexico. Resetting to Factory Defaults You can reset all settings and channels. 1 Press the MENU button. Select SETTINGS, SETUP, Reset TV, and then press the OK button. 2 Enter - Toshiba 55L6200U | User Guide - Page 108
108 Basic features Power failure ❖ Press the ( / arrow) buttons to select No, and then press the OK button. Power failure If power is lost while you are watching the TV, the Last Mode Memory feature automatically turns on the TV when power is restored. - Toshiba 55L6200U | User Guide - Page 109
watching. Select the picture size that displays the current program in the way that looks best to you. You can save separate picture size preferences for each input on your TV. To select the picture size: 1 Press the PIC SIZE button. 2 While the Picture Size screen is open, repeatedly press the - Toshiba 55L6200U | User Guide - Page 110
). ❖ This is especially useful for external HD sources such as DVHS movies, Video Games, or computer graphics. ❖ None of the picture is hidden. NOTE ❖ This mode is supported only for HDMI® (1080i, 1080p, 720p, 480i, and 480p), ColorStream® (1080i and 720p), and ANT/CABLE (digital) inputs - Toshiba 55L6200U | User Guide - Page 111
480p) source programs only. (Sample Illustration) Picture size - Full 16:9 If receiving a squeezed 4:3 format program, the picture is stretched horizontally to fill the width of the screen but not stretched vertically. This setting is for viewing in the 1080i, 1080p, and 720p program source. (Sample - Toshiba 55L6200U | User Guide - Page 112
to fill the screen. TheaterWide 2 This setting is for viewing letter box programs. (Sample Illustration) Picture size - TheaterWide 2, letter box The picture's top and bottom edges may be hidden*. TheaterWide 3 This setting is for viewing letter box programs with subtitles. (Sample Illustration - Toshiba 55L6200U | User Guide - Page 113
display. Some input signal formats will display with sidebars and/or bars at the top and bottom. Dot by Dot This setting is for viewing SVGA, XGA, WXGA, and SXGA sources. (Sample Illustration) Picture size - Dot by Dot "Dot by Dot" is a non-scaling display. Depending on the input signal format, the - Toshiba 55L6200U | User Guide - Page 114
HD or Video input ❖ 480i, 480p, 720p, 1080i, 1080p, or VGA (60/72/75 Hz) signal from the HDMI® 1/2/3/4 input NOTE The auto aspect ratio feature is not applicable to the PC input. 1 Press the MENU button. Select SETTINGS, PREFERENCES, Display Settings, and then press the OK button. 2 Press the - Toshiba 55L6200U | User Guide - Page 115
modes described below. Mode: AutoView® Dynamic Standard Movie Game PC Description: Automatically adjusts picture settings based on ambient light conditions and input signal content Bright and dynamic picture Standard picture settings Lower contrast for a darkened room Designed for playing a video - Toshiba 55L6200U | User Guide - Page 116
set to On To adjust the picture quality: 1 Press the MENU button. Select SETTINGS, PICTURE, the setting you would like to adjust (Backlight, Contrast . To reset to the factory defaults: 1 Select the picture mode you want to reset. 2 Press the MENU button. Select SETTINGS, PICTURE, Reset, and - Toshiba 55L6200U | User Guide - Page 117
Picture Mode is set to Game or PC, Edge Enhancer is not available. ❖ This feature may not work properly depending on the content. ❖ Noise may appear on the image depending on the device connected to the TV (e.g. a device with a specific enhancer function). Dynamic Contrast Dynamic Contrast detects - Toshiba 55L6200U | User Guide - Page 118
to select ClearScan. 3 Press the ( / arrow) buttons to select Cinema, Smooth, Standard, or Off. Press the EXIT button. NOTE ClearScan® is for the L7200U model and Cinema Mode is for the L6200U model. If the picture mode is set to Game or PC mode, this feature is automatically not available. - Toshiba 55L6200U | User Guide - Page 119
to highlight MPEG NR. 4 Press the ( / arrow) buttons to select either Low, Middle, High, or Off. Press the EXIT button. NOTE If the Picture Mode is set to Game or PC, this feature is not available. DNR DNR allows you soften the screen representation of a weak signal to reduce the noise effect - Toshiba 55L6200U | User Guide - Page 120
set to Game or PC, this feature is not available. Auto Brightness Sensor When the Auto Brightness function of Auto Brightness Sensor is set to On, the TV optimizes the backlighting levels to suit ambient light conditions. 1 Press the MENU button. Select SETTINGS, PICTURE, Advanced Picture Settings - Toshiba 55L6200U | User Guide - Page 121
select Reset on the screen, and then press the OK button. NOTE If the Auto Brightness Sensor is set to Off, this feature will not be available. ColorMaster™ The ColorMaster™ feature allows you to adjust standard colors. 1 Press the MENU button. Select SETTINGS, PICTURE, Advanced Picture Settings - Toshiba 55L6200U | User Guide - Page 122
(warm) to 10 (cool). Press the EXIT button. NOTE When the Picture Mode is set to AutoView, the adjustment range is -5 to +5. Resetting to the factory default 1 Press the MENU button. Select SETTINGS, PICTURE, Advanced Picture Settings, and then press the OK button. 2 Press the ( / arrow) buttons - Toshiba 55L6200U | User Guide - Page 123
3 Press the ( / arrow) buttons to select On. 4 Adjust picture settings. NOTE When the TV is in 3D mode, this feature is not available. RGB Filter This feature individually enables or disables the red, green, and blue components of the picture to allow for more accurate adjustment of each color - Toshiba 55L6200U | User Guide - Page 124
the ( / arrow) buttons to select Red-Offset, GreenOffset, Blue-Offset, Red-Gain, Green-Gain, or Blue- Gain. 5 Press the ( / arrow) buttons to adjust. input will not be copied. 1 Press the MENU button. Select SETTINGS, PICTURE, Expert Picture Settings, and then press the OK button. 2 Press the ( / - Toshiba 55L6200U | User Guide - Page 125
signals on the ANT/CABLE input. When the TV receives a stereo or SAP (second audio program) broadcast, the icon STEREO or SAP appears on screen when the INFO button is pressed. To listen in stereo sound: 1 Press the MENU button. Select SETTINGS, SOUND, and then MTS. 2 Press the ( / arrow) buttons - Toshiba 55L6200U | User Guide - Page 126
when you connect a Dolby® Digital decoder or other digital audio systems to the TV's DIGITAL AUDIO OUT terminal. 1 Tune to a digital source on the ANT/CABLE input. 2 Press the MENU button. Select SETTINGS, PREFERENCES, AV Connection, and then press the OK button. 3 Press the ( / arrow) buttons to - Toshiba 55L6200U | User Guide - Page 127
Picture and Sound Controls Adjusting the audio 127 Audyssey Premium Television™ These televisions use a suite of technologies for better sound including: ❖ Audyssey EQ®-provides clear, accurate and natural sound right out of the box Select SETTINGS, SOUND, Audyssey Premium Television, TV Mounting. - Toshiba 55L6200U | User Guide - Page 128
. Audyssey EQ® and Audyssey Volume Extension® are default settings that are set to On. Using the surround sound feature Surround settings help to create a thrilling surround sound experience with deep, rich bass from stereo sound sources. Your TV's audio will sound fuller, richer, and wider. ❖ Press - Toshiba 55L6200U | User Guide - Page 129
will have to configure the network settings on your TV. If necessary, change the network settings, see "Setting up the Network" on page 131. If you use Internet services, see the following note before use. Third party Internet services are not provided by Toshiba, may change or be discontinued at - Toshiba 55L6200U | User Guide - Page 130
or services is perceived or identified as harmful. If you are uncertain of the policy that applies to the use of wireless devices in a specific organization or environment, you are encouraged to ask for authorization to use the Wireless LAN device prior to turning on the equipment. Using the TV in - Toshiba 55L6200U | User Guide - Page 131
wireless LAN equipment and the setup of network security features. ❖ Assisted Setup (setup using the AP's notification information) Network Name, Authentication, and Encryption are decided based on information from the AP. You need to manually set the Security Key. ❖ Manual Setup Requires manually - Toshiba 55L6200U | User Guide - Page 132
Wireless Setup, and then press the OK button. 3 Press the ( / arrow) buttons to select Easy Setup, manual of the AP and select an AP. 8 When a screen reporting that "the setup succeeded" appears, press the OK button. To cancel searching for the AP: ❖ Press the BACK button while searching for the AP - Toshiba 55L6200U | User Guide - Page 133
label or in the manual of the AP and select an AP. 5 Select Security Key, and then press the OK button. The Software Keyboard appears. 6 Input the Security Key using the Software Keyboard. For more information, see "Using the software keyboard" on page 139. 7 To save your settings, press the BLUE - Toshiba 55L6200U | User Guide - Page 134
5 Input the Network Name using the Software Keyboard. For more information, see "Using the software keyboard" on page 139. 6 To save your settings, press the BLUE button. 7 Press the ( / arrow) buttons to highlight Authentication. Press the ( / arrow) buttons to select Open/Shared, WPA-PSK, or WPA2 - Toshiba 55L6200U | User Guide - Page 135
Done is selected. Wireless Information The settings configured in Wireless Setup can be confirmed. 1 Press the QUICK button. Select Wireless Information, and then press the OK button. 2 Press the RED button to check the availability of surrounding APs. A Wireless Information screen appears when - Toshiba 55L6200U | User Guide - Page 136
AP for IEEE 802.11n is used when Encryption is set to WEP or TKIP, the Speed value might be low. We recommend that the Encryption setting are changed to AES (Under manual setup). Advanced Network Setup NOTE ❖ When the DHCP function of the router connected to this TV is On, you can set Auto Setup - Toshiba 55L6200U | User Guide - Page 137
will be reset to the previous TV is Off, set Auto Setup to Off, and manually set the DNS address(es). Your Internet Service Provider should have provided these to you. ❖ The settings in Auto Setup are linked to those selected in the IP Address Setup menu. If Auto Setup is set to On, then Auto Setup - Toshiba 55L6200U | User Guide - Page 138
to select On. NOTE Other items are grayed out when Auto Setup is set to On. Manual setup: 1 Press the MENU button. Select NETWORK > Network Setup, and then press the OK button. 2 Press the ( / arrow) buttons to select Advanced Network Setup, and then press the OK button. 3 Press the ( / arrow - Toshiba 55L6200U | User Guide - Page 139
1 Highlight the desired character on the on-screen software keyboard. 2 Repeat Step 1 and 2 until you have entered all desired text. 3 Press the BLUE button to save your settings and return to the previous screen. Enter text using the full keyboard 1 Highlight the desired character on the on-screen - Toshiba 55L6200U | User Guide - Page 140
letter, if applicable Saves changes and closes the Software Keyboard window Closes the Software Keyboard window without saving changes Performing a Software Upgrade TOSHIBA may offer upgrades for the TV's software in the future. The TV's software is upgraded via the Network. NOTE An Internet - Toshiba 55L6200U | User Guide - Page 141
141 NOTE ❖ You will not be able to use the TV set while performing the upgrade. ❖ Do not turn off the TV during the upgrade. ❖ By upgrading, the factory default values may be changed. 2 Press the MENU button. Select GET HELP, Software Upgrade, and then press the OK button. The Network Upgrade - Toshiba 55L6200U | User Guide - Page 142
, instructions that describe the TV features. ePORTAL page The ePORTAL is the "home page" that allows you to control the various elements of your Smart TV system. This includes traditional features such as Apps, Internet (web browser), and MediaShare (Media Player), as well as other unique Toshiba - Toshiba 55L6200U | User Guide - Page 143
remote control, press the SEARCH button while watching television programs. Or 2 From the ePORTAL, select the SearchAll bar at the top of the screen and press OK. 3 Type a keyword into the Search Bar using the on-screen keyboard or the wireless QWERTY keyboard or does not support a search function. - Toshiba 55L6200U | User Guide - Page 144
on the Apps icon. 3 A new page opens displaying the available Apps. 4 Select the desired App and press OK. Netflix® Watching movies with Netflix® 1 Press the NETFLIX button or press the APPS button on the remote control and select the Netflix icon. 2 Follow the on-screen instructions. After having - Toshiba 55L6200U | User Guide - Page 145
the Netflix® feature. ❖ Netflix® is supported in the U.S. and Canada, and may not be available in other countries or regions. To close Netflix®, press the EXIT button. To confirm the Netflix ESN (Electronic Serial Number): 1 Press the MENU button. Select NETWORK > Smart Apps Setup > Netflix Setup - Toshiba 55L6200U | User Guide - Page 146
MENU button. Select NETWORK > Smart Apps Setup > VUDU Deactivation, and then press the OK button. 2 Press the ( / arrow) buttons to select Yes, and then press the OK button. NOTE If the VUDU™ icons are not shown in the ePORTAL, you may need to update the TV firmware. You can access VUDU™ through - Toshiba 55L6200U | User Guide - Page 147
on content. ❖ This TV might take time during start-up and the playback of content. ❖ Content that the user may feel is improper or TV. CinemaNow® CinemaNow® is an on-demand service that offers high definition movies on the Web. 1 Press the APPS button on the remote control or select the Apps - Toshiba 55L6200U | User Guide - Page 148
support downloading of files or fonts. ❖ is a TV browser. It may work differently than PC browsers. ❖ does not support parental control or locks, and it is the responsibility of the user using the Wireless QWERTY keyboard. Press the BLUE button on the remote control or QWERTY keyboard when finished. - Toshiba 55L6200U | User Guide - Page 149
now browse websites on your TV using the ( / / / arrow) buttons on the remote control or by using the Wireless QWERTY keyboard. NOTE Select Mouse Emulation by pressing the GREEN button on the remote control to navigate with a generic USB wireless mouse (wireless mouse is not included). Browsing - Toshiba 55L6200U | User Guide - Page 150
website. Launch the Internet and access a specific web page 1 Press the INTERNET button on the remote or select the Internet icon on the ePORTAL page. 2 Use the on-screen keyboard or the wireless QWERTY keyboard to type the URL address into the address bar. 3 Launching the web page is dependent on - Toshiba 55L6200U | User Guide - Page 151
can create personal messages on your TV using the Messages feature. Launch the Messages feature 1 Select the Messages icon on the ePORTAL page. 2 Press the GREEN button on the remote to open a new message window. 3 Use the on-screen keyboard or the wireless QWERTY keyboard to type your message into - Toshiba 55L6200U | User Guide - Page 152
Favorites You can show, hide, and change the position of your favorite apps located on the bottom row of the ePORTAL page. 1 Select the gear Favorites menu. 2 Select the Show/Hide menu option. In the new window, move the focus to the desired app and press OK to add a check (show) or remove a - Toshiba 55L6200U | User Guide - Page 153
colors ❖ Edit favorite Apps by moving and selecting which favorites to show or hide ❖ Adjust your Event Notification flag setting To access the Preferences in the Rovi Guide system. MediaGuide setup When you access MediaGuide for the first time from the GUIDE button on the remote control, a step - Toshiba 55L6200U | User Guide - Page 154
Setup menu ❖ Reset MediaGuide Operating the MediaGuide 1 Press GUIDE on the remote control or select the MediaGuide from the ePORTAL from the Apps screen. 2 The MediaGuide screen will be displayed with the defaulted setting; the first menu is set to ALL, the secondary menu is set to TV Listings - Toshiba 55L6200U | User Guide - Page 155
the kind of broadcast. ❖ The MediaGuide can only be used when your TV is connected to the Internet. ❖ Starting and operation of this service may take several minutes. ❖ Software updates may be needed in order to use this service. ❖ During use of the MediaGuide, usage information will be notified to - Toshiba 55L6200U | User Guide - Page 156
network as well as the TV programming, use the SearchAll feature in the ePORTAL, see "ePORTAL SearchAll" on page 142. Reset MediaGuide To reset the MediaGuide, please follow these steps: 1 Press the MENU button on the remote control. 2 Select NETWORK>Smart Apps Setup>Reset MediaGuide. 3 Press the OK - Toshiba 55L6200U | User Guide - Page 157
and press the OK button. The TV will turn off automatically. You can also reset the MediaGuide from the MediaGuide from the setting menu. NOTE If the MediaGuide cannot launch or is not functioning correctly, reset the MediaGuide using the instructions above. ePORTAL MediaShare (Videos, Music, and - Toshiba 55L6200U | User Guide - Page 158
if you want to connect to a media server on the network), you must manually start the MediaShare (Media Player) from the ePORTAL. To change the Auto Start setting 1 Press the MENU button. Select NETWORK, Media Player, Setup, and then press the OK button. 2 Press the ( / arrow) buttons to highlight - Toshiba 55L6200U | User Guide - Page 159
Server You need to configure a home network before using this feature, see "Setting up the Network" on page 131. 1 Press the ePORTAL button. 2 EXIT button. The TV will return to the last-viewed channel or video input. To display the device information 1 Press the QUICK button to open the Quick menu - Toshiba 55L6200U | User Guide - Page 160
the STOP button to stop playback. 4 If playback finishes before STOP is pressed, the screen returns to the list. NOTE When the repeat mode is set to All, the next file will start playing automatically. To pause playback ❖ Press the PAUSE button during playback. You can move to the desired replay - Toshiba 55L6200U | User Guide - Page 161
appears. 2 Press the ( / arrow) buttons to select Off, All, or 1. 3 Press the BACK button. The setting is effective until the TV is turned off. Mode: Off All 1 Description: The content is played back only once All content in the same folder are repeatedly played back The same content - Toshiba 55L6200U | User Guide - Page 162
be possible to use certain playback or display some files. In some cases certain files and servers may not support playback features, such as pause. Playing music files Basic Playback: 1 Select a file, see "To select may not be operable depending on the content or media server. To set the repeat mode: - Toshiba 55L6200U | User Guide - Page 163
appears. 2 Press the ( / arrow) buttons to select Off, All, or 1. 3 Press the BACK button. The setting is effective until the TV is turned off. Mode: Off All 1 Description: The content is played back only once All content in the same folder are repeatedly played back The same content - Toshiba 55L6200U | User Guide - Page 164
display some files. In some cases certain files and servers may not support playback features, such as fast-forward. Viewing photo files Multi View This view mode allows you to search for photos in a grid format. These pictures are displayed using thumbnail data in each image file. 1 Press the ( / - Toshiba 55L6200U | User Guide - Page 165
. To return to Single View mode, press the OK button again. 2 Press the ( / arrow) buttons to view the next or previous file. Mode settings 1 Press the QUICK button to open the Quick menu while in Single View mode or Slideshow mode. 2 Press the ( / arrow) buttons to select the item (Interval Time or - Toshiba 55L6200U | User Guide - Page 166
166 Advanced features Search NOTE The information may not correctly display depending on the content or media server. Certain processes may take some time to complete. File specifications: USB use: ❖ Data compatibility: JPEG Exif ver 2.2 ❖ File format: JPEG ❖ Maximum viewable resolution: 8192 - Toshiba 55L6200U | User Guide - Page 167
control keypad, the software keypad, or the USB/QWERTY keyboard to enter in the user name and password. ❖ To use the remote control keypad, use the remote control up/down buttons to enter the name and password, and press the BLUE button. ❖ To use the software keyboard, press the GREEN button. Use - Toshiba 55L6200U | User Guide - Page 168
Advanced features Network Device Setup NOTE Only the 0-9, dash (-), and capital A-Z characters may be used for the user name and password. Setting up the Media Renderer feature The TV can be configured as a Media Renderer. When operating as a Media Renderer, the TV displays content provided by - Toshiba 55L6200U | User Guide - Page 169
Press the ( / arrow) buttons to select Device Name Setup, and then press the OK button. 3 Select the Device Name field. Press the OK button. The Software Keyboard screen appears. 4 Input the device name by using the Software Keyboard. To save your setting, press the BLUE button. 5 Select Done. Press - Toshiba 55L6200U | User Guide - Page 170
may be displayed in the list. ❖ Confirm the MAC address of Media Controller and select it. Maximum volume setup This feature allows you to set the maximum volume of the TV when it receives volume operation commands from a Media Controller. 1 Press the MENU button. Select NETWORK, Network Device - Toshiba 55L6200U | User Guide - Page 171
for tablets and smartphones: ❖ Toshiba A/V Remote App ❖ Toshiba Send & Play App ❖ Toshiba MediaGuide App These apps are available for compatible Toshiba equipment using compatible tablets and smartphones powered by Android™ or IOS. You can download these apps through the Google Play™ or the iTunes - Toshiba 55L6200U | User Guide - Page 172
your tablet or smartphone are connected to the Internet. ❖ The Toshiba MediaGuide App can only be used when your TV and your tablet or smartphone are connected to the Internet. ❖ Starting and operation of this service may take several minutes. ❖ Software updates may be needed in order to use this - Toshiba 55L6200U | User Guide - Page 173
5 Press the OK button to submit. Initial setup In order to use this application, your Android™ and/or IOScompatible tablets or smartphones and compatible Toshiba equipment must be connected to the wireless LAN in your home. After downloading the Toshiba A/V Remote App, follow these steps: 1 Read the - Toshiba 55L6200U | User Guide - Page 174
URL from your tablet or your smartphone to your Smart TV. NOTE ❖ Some web pages or URLs may not launch, depending on the TV status. ❖ Some web pages may not display correctly. Toshiba MediaGuide The Toshiba MediaGuide App is a channel guide application for tablets and smartphones. There are four - Toshiba 55L6200U | User Guide - Page 175
Apps Collaboration Toshiba MediaGuide 175 TV listings The TV listings are displayed in a grid format, which is easily controlled by swiping up, down, left, and right with your finger. Movies/TV portal screen You can select from the Movie or the TV program Hotlist, their Portals, or the Reminders - Toshiba 55L6200U | User Guide - Page 176
General troubleshooting Before calling a service technician, review this chapter or visit the Toshiba technical support Web site at support.toshiba.com for possible causes/solutions for the problem you are experiencing. Before you begin to troubleshoot any problem, first unplug the TV from - Toshiba 55L6200U | User Guide - Page 177
Troubleshooting Picture problems 177 Other problems. If your TV's problem is not addressed in this Troubleshooting chapter or the recommended solution has not worked, use the Reset Factory Defaults procedure, see "Resetting to Factory Defaults" on page 107. TV will not turn on. Ensure the power - Toshiba 55L6200U | User Guide - Page 178
Tint and/or Color, see "ColorMaster™" on page 121. Poor composite picture. If the TV is connected to an external A/V device (e.g. DVD player, video game system, set-top box, etc.) try using a ColorStream or HDMI™ video connection instead. Picture and sound are out of sync. As with all products that - Toshiba 55L6200U | User Guide - Page 179
Troubleshooting Sound problems 179 ❖ The settings of Side Shared Audio and Rear Shared Audio may be not correct. Check the connections, see "Connecting a digital audio system" on page 34. ❖ Turn off and unplug the TV from the AC wall outlet for a few seconds and plug it back in. Sound problems - Toshiba 55L6200U | User Guide - Page 180
available for Toshiba HDMI® CEC compatible devices. HDMI® cables. Ensure that HDMI® cables with the ( ) Logo are used. The HDMI® CEC operation is not working correctly. When the connected HDMI® CEC device does not work correctly after you have changed the device's settings, turn off the TV and - Toshiba 55L6200U | User Guide - Page 181
Troubleshooting HDMI® problems 181 If several devices are connected, the HDMI® CEC Control feature may not operate properly. Read the instruction manual of the connected HDMI® CEC device. HDMI® problems HDMI® cables. Ensure that HDMI® cables with the ( ) Logo are used, see "Connecting an HDMI - Toshiba 55L6200U | User Guide - Page 182
182 Troubleshooting Network problems Network Setup fails (Manual). Ensure that the TV IP address is not the same as any other device on the network. ❖ Example: IP address 192.168.0.100 and IP address 192.168.0.101 are different addresses on the same network. Make sure the TV IP address is on the - Toshiba 55L6200U | User Guide - Page 183
. The media server is not turned On. The "server" is not a media server device. Check the firewall and streaming settings on the media server. Wireless network problems Check that the router/AP (Access point) power is On. After starting wireless network setup, confirm that the network is configured - Toshiba 55L6200U | User Guide - Page 184
157. Depending on the media server, access may be limited by the MAC address. Set the server according to the media server's instruction manual. This TV's MAC Address can be confirmed in the Network Setup portion of the User Menu, see "MAC Address" on page 138. For Connected MediaShare (Media Player - Toshiba 55L6200U | User Guide - Page 185
cord in again and turn on the TV. If the problem persists after trying the solutions In the U.S., visit TAIS Consumer Solutions on the web at support.toshiba.com or call 800-631-3811. In Canada, locate the nearest Toshiba authorized service depot. Visit www.toshiba.ca; click "Home Entertainment - Toshiba 55L6200U | User Guide - Page 186
and specifications are subject to change without notice. ❖ This model may not be compatible with features and/or specifications that 8VSB 64 QAM, 256 QAM; in-the-clear, unencrypted Channel coverage VHF UHF Cable TV 2 through 13 14 through 69 Mid band (A-8 through A-1, A through I) Super band - Toshiba 55L6200U | User Guide - Page 187
W + 10 W 10 W + 10 W Speaker type 42L6200U 47L6200U 55L6200U 47L7200U 55L7200U Tweeter 8.2cm x 3.4cm (3 1/4 x 1 1/3 inch) x 2 pcs Woofer 3.9cm x 1.6cm (1/12 x 3/5 inch) x 2 pcs Tweeter 8.2cm x 3.4cm (3 1/4 x 1 1/3 inch) x 2 pcs Woofer 3.9cm x 1.6cm (1/12 x 3/5 inch) x 2 pcs Tweeter 8.2cm x 3.4cm - Toshiba 55L6200U | User Guide - Page 188
(-20dBFS) ColorStream® (component video) HD input Video Audio HDMI® input Y: 1V (p-p), 75 ohm PR: 0.7V HDMI® Audio Dolby® Digital and 2-channel Linear-PCM; 32/44.1/48 kHz sampling frequency; 16/20/24 bits per sample Digital audio output Optical type PC input 15-Pin D-sub Analog RGB Wireless - Toshiba 55L6200U | User Guide - Page 189
Ethernet IEEE 802.3. USB Universal Serial Bus Specification, Revison 1.1. Universal Serial Bus Specification, Revison 2.0. Dimensions with table stand 42L6200U 47L6200U 55L6200U 47L7200U 55L7200U Width Height Depth Width Height Depth Width Height Depth Width Height Depth Width Height Depth Mass - Toshiba 55L6200U | User Guide - Page 190
❖ Resource Guide ❖ Pedestal and hardware ❖ Warranty ❖ Wireless QWERTY keyboard (2x AAA batteries) ❖ Available with some models. Not available in Mexico. ❖ IR blaster cable ❖ AV adapter cables ❖ Component adapter cable ❖ Four pairs of 3D glasses NOTE The USB QWERTY keyboard supplied with this TV is - Toshiba 55L6200U | User Guide - Page 191
following problems may occur: incorrect display, false format detection, picture position failure, blur, or judder. In these cases, set the monitor this TV, it is recommended that you set the refresh rate of your computer to 60 Hz. ❖ The PC IN on this TV does not accept the Sync on Green, Composite - Toshiba 55L6200U | User Guide - Page 192
the resolution and frequency described in the table below, the following problems may occur: incorrect display, false format detection, picture position failure, blur, or judder. In these cases, set the monitor output format on your computer, HDMI®, or DVI device to conform to any of the signals in - Toshiba 55L6200U | User Guide - Page 193
formats for PC IN, HDMI®, and 3D 193 Format Resolution V. Frequency 1080p 1920x1080p 23.976/24 Hz 26.973/27.000 kHz 74.176/74.250 MHz TBD 59.940/60 Hz 67.433/67.500 kHz 148.352/ TBD 148.500 MHz 3D Signal formats* Resolution Aspect V. Frequency H. Frequency Pixel Clock ratio Frequency 3D - Toshiba 55L6200U | User Guide - Page 194
194 Specifications Operating the TV with combination buttons Resolution Aspect V. Frequency H. Frequency Pixel Clock ratio Frequency 3D Structure 1920 x 1080p 16:9 23.976/24 Hz 54/53.94 kHz 148.352/148.500 MHz Frame Packing 26.973 kHz Side by Side (half) 74.176/ - Toshiba 55L6200U | User Guide - Page 195
the TV with combination buttons 195 Button Color Combination Button 1 2 3 4 GREEN 5 6 7 8 MUTE 1 2 3 4 YELLOW 5 6 7 8 MUTE Behavior/Mode Native (picture size) 4:3 (picture size) TheaterWide 1 (picture size) TheaterWide 2 (picture size) TheaterWide 3 (picture size) Full (picture - Toshiba 55L6200U | User Guide - Page 196
to 2D mode 79 switching to 3D mode 77 viewing images 72 4/3 stretch using 114 A advanced picture settings Auto Brightness Sensor 120 Backlight Adjustment Pro 120 Base Color Adjustment 121 Color temperature 122 ColorMaster™ 121 DNR 119 DynaLight® 118 Dynamic Contrast 117 Edge Enhancer 117 MPEG NR - Toshiba 55L6200U | User Guide - Page 197
Internet connection) 43 to a home network (wireless Internet connection) 44 TV's HDMI® 41 VCR 31 VCR and antenna 30 control other devices HDMI®-CEC Control 37 control panel lock 97 controlling other devices TV remote 37 E ePORTAL 142 add favorites 152 Apps 144 create event 151 create messages 151 - Toshiba 55L6200U | User Guide - Page 198
using 97 HDMI® settings feature using 101 home network using 129 I icon safety 20 initial settings change 64 individual settings 65 navigate the menu 64 quick setup 64 initial setup 51 main menu layout 62 menu navigation 61 quick menu 63 IR Blaster Out terminal using 32 IR Blaster setup 55 M Media - Toshiba 55L6200U | User Guide - Page 199
setup ANT/CABLE IN 66 local time 65 location 65 menu language 65 R rating system 93 downloading additional 92 S safety icons 20 scrolling the picture 113 shared inputs configuring 70 SmartTV using 142 YouTube™ 146 SmartTV™ CinemaNow® 147 Netflix 144 VUDU™ 145 software keyboard using 139 software - Toshiba 55L6200U | User Guide - Page 200
/audio terminals 188 wireless connection 188 support information show 107 SurfLock™ using 85 T time limit set for games 96 timer sleep timer 105 turn on TV 104 Toshiba A/V Remote App Initial setup 173 Toshiba MediaGuide app movie/TV portal 175 search 175 TV listings 175 troubleshooting 176 channel
-
 1
1 -
 2
2 -
 3
3 -
 4
4 -
 5
5 -
 6
6 -
 7
7 -
8
-
9
-
10
-
11
-
12
-
13
-
14
-
15
-
16
-
17
-
18
-
19
-
20
-
21
-
22
-
23
-
24
-
25
-
26
-
27
-
28
-
29
-
30
-
31
-
32
-
33
-
34
-
35
-
36
-
37
-
38
-
39
-
40
-
41
-
42
-
43
-
44
-
45
-
46
-
47
-
48
-
49
-
50
-
51
-
52
-
53
-
54
-
55
-
56
-
57
-
58
-
59
-
60
-
61
-
62
-
63
-
64
-
65
-
66
-
67
-
68
-
69
-
70
-
71
-
72
-
73
-
74
-
75
-
76
-
77
-
78
-
79
-
80
-
81
-
82
-
83
-
84
-
85
-
86
-
87
-
88
-
89
-
90
-
91
-
92
-
93
-
94
-
95
-
96
-
97
-
98
-
99
-
100
-
101
-
102
-
103
-
104
-
105
-
106
-
107
-
108
-
109
-
110
-
111
-
112
-
113
-
114
-
115
-
116
-
117
-
118
-
119
-
120
-
121
-
122
-
123
-
124
-
125
-
126
-
127
-
128
-
129
-
130
-
131
-
132
-
133
-
134
-
135
-
136
-
137
-
138
-
139
-
140
-
141
-
142
-
143
-
144
-
145
-
146
-
147
-
148
-
149
-
150
-
151
-
152
-
153
-
154
-
155
-
156
-
157
-
158
-
159
-
160
-
161
-
162
-
163
-
164
-
165
-
166
-
167
-
168
-
169
-
170
-
171
-
172
-
173
-
174
-
175
-
176
-
177
-
178
-
179
-
180
-
181
-
182
-
183
-
184
-
185
-
186
-
187
-
188
-
189
-
190
-
191
-
192
-
193
-
194
-
195
-
196
-
197
-
198
-
199
-
200
 |
 |

GMA300007012
4/12
Note: To display a High Definition
picture, the TV must be receiving a
High Definition signal (such as an over-
the-air High Definition TV broadcast, a
High Definition digital cable program, or
a High Definition digital satellite
program). For details, contact your TV
antenna installer, cable provider, or
satellite provider
If you need assistance:
Toshiba's Support Web site
support.toshiba.com
Toshiba Customer Support Center:
Calling within the United States at (800) 631-3811
Calling from outside the United States at (949) 583-3050
For more information, see
“Troubleshooting” on page 176
in this guide.
Owner's Record
The model number and serial number are on the back and side of your television.
Record these numbers, whenever you communicate with your Toshiba dealer
about this Television.
Model name: ______________________________________________
Serial number: _______________________________________________
Register your Toshiba Television at register.toshiba.com
Integrated High Definition LED
Television User’s Guide:
42L6200U
47L6200U
55L6200U
47L7200U
55L7200U