Toshiba D-R410 Owner's Manual - English - Page 23
Setting The Clock
 |
UPC - 022265001356
View all Toshiba D-R410 manuals
Add to My Manuals
Save this manual to your list of manuals |
Page 23 highlights
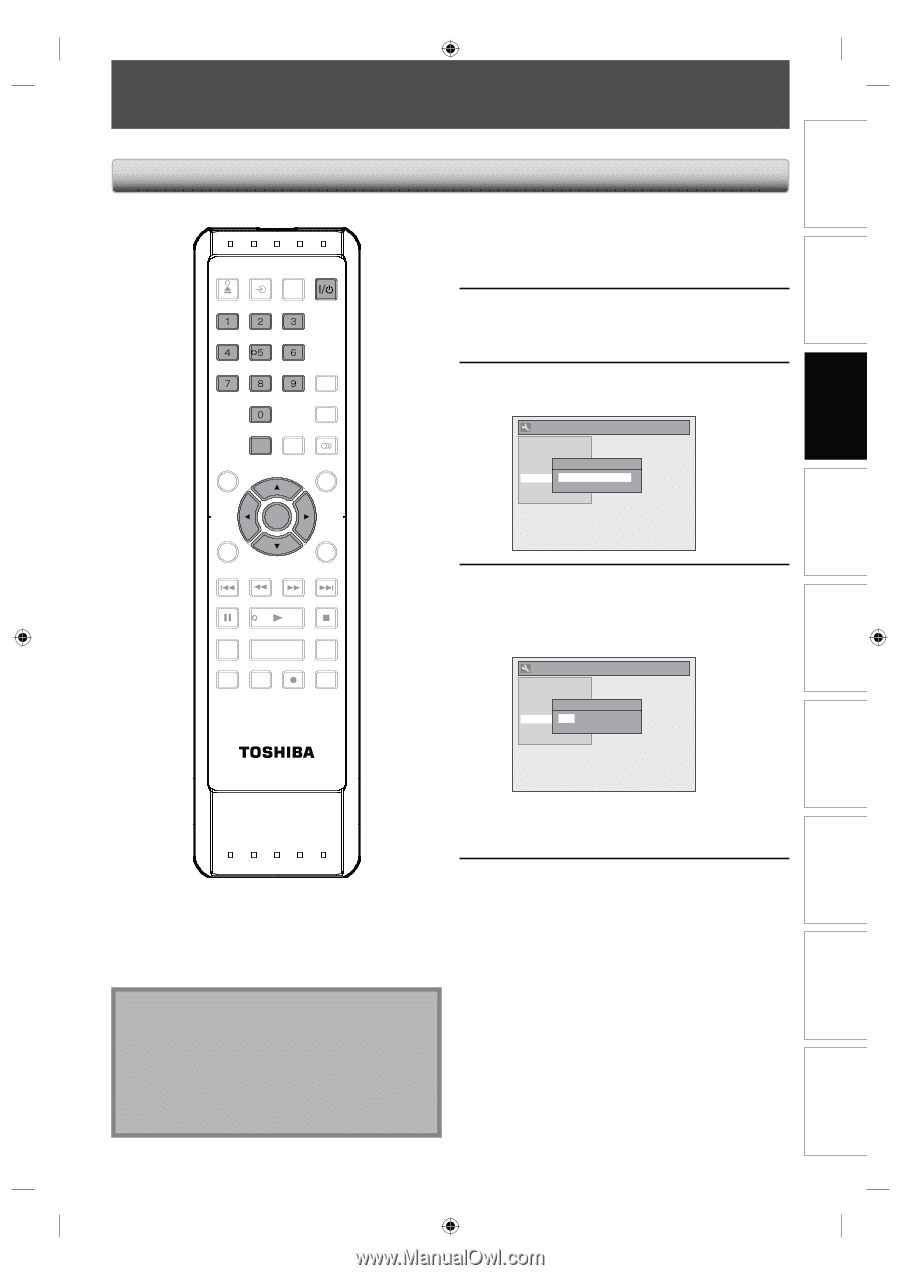
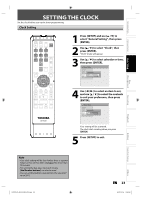
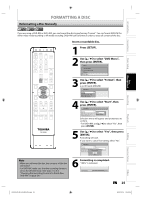
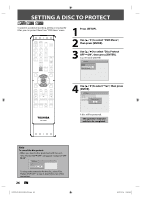
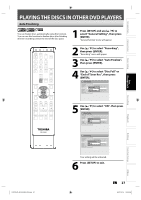
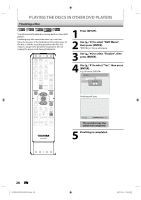
Introduction Connections Basic Setup Disc Management SETTING THE CLOCK Set the clock before you try the timer programming. Clock Setting OPEN/ INPUT CLOSE SELECT HDMI .@/: ABC DEF GHI JKL MNO PQRS TUV SATELLITE WXYZ LINK SPACE TIMER PROG. SETUP DISPLAY AUDIO TOP MENU MENU/LIST CLEAR ENTER RETURN SKIP REV FWD SKIP PAUSE PLAY STOP TIME SLIP 1.3x / 0.8x PLAY INSTANT SKIP REPEAT REC MODE REC ZOOM SE-R0265 1 Press [SETUP] and use [K / L] to select "General Setting", then press [ENTER]. 2 Use [K / L] to select "Clock", then press [ENTER]. "Clock" menu will appear. 3 Use [K / L] to select calendar or time, then press [ENTER]. General Setting Playback Display Video Clock Setting Recording Clock JAN / 01 / 2008 ( TUE ) HDMI 12 : 00 AM Reset All 4 Use [{ / B] to select an item to set, and use [K / L] to select the contents to suit your preference, then press [ENTER]. General Setting Playback Display Video Clock Setting Recording Clock JAN / 01 / 2008 ( TUE ) HDMI 12 : 00 AM Reset All Your setting will be activated. The clock start counting when you press [ENTER]. 5 Press [SETUP] to exit. Recording Playback Editing Function Setup Note • Your clock setting will be lost if either there is a power failure or this unit has been unplugged for more than 30 seconds. • For setting the day, year, hour and minute, [the Number buttons] can also be used. • You can set the built-in calendar from the year 2007 up to 2057. E7K7AUD_D-R410KU_EN.indd 23 EN 23 2007/12/14 15:02:51 Others
-
 1
1 -
2
-
3
-
4
-
5
-
6
-
7
-
8
-
9
-
10
-
11
-
12
-
13
-
14
-
15
-
16
-
17
-
 18
18 -
 19
19 -
 20
20 -
 21
21 -
 22
22 -
 23
23 -
 24
24 -
 25
25 -
 26
26 -
 27
27 -
 28
28 -
29
-
30
-
31
-
32
-
33
-
34
-
35
-
36
-
37
-
38
-
39
-
40
-
41
-
42
-
43
-
44
-
45
-
46
-
47
-
48
-
49
-
50
-
51
-
52
-
53
-
54
-
55
-
56
-
57
-
58
-
59
-
60
-
61
-
62
-
63
-
64
-
65
-
66
-
67
-
68
-
69
-
70
-
71
-
72
-
73
-
74
-
75
-
76
-
77
-
78
-
79
-
80
-
81
-
82
-
83
-
84
-
85
-
86
-
87
-
88
-
89
-
90
-
91
-
92
-
93
-
94
-
95
-
96
-
97
-
98
-
99
-
100
-
101
 |
 |