Toshiba D-VR4XSU Owners Manual - Page 25
TV/Cable Select, Auto CH Memory, CH Add/Delete channels, Clock
 |
View all Toshiba D-VR4XSU manuals
Add to My Manuals
Save this manual to your list of manuals |
Page 25 highlights
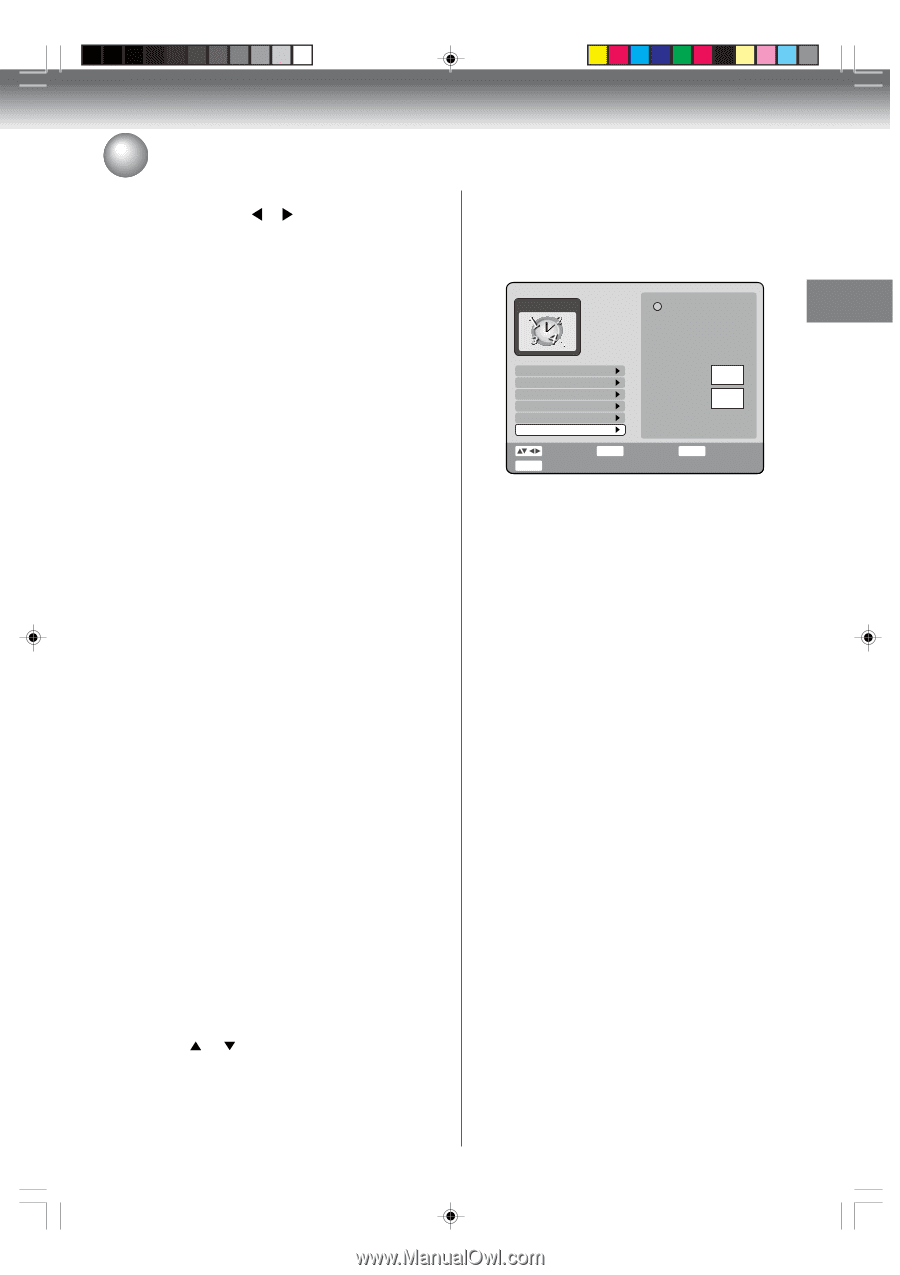
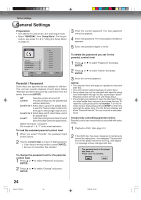
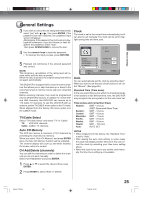
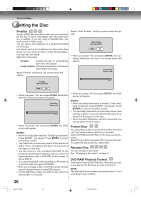
Various settings General Settings 3 If you wish to cancel the set rating level temporarily, select "yes" with or , then press ENTER. If the password has been selected, the password input screen will appear. Alternatively, if the password has not been set, playback will commence. If you don't know (or have forgotten) the password, select "stop". Then press OPEN/CLOSE to remove the disc. 4 Use the numeric keys to input the password. • To interrupt the input process, press RETURN. 5 Playback will commence if the entered password was correct. NOTE: This temporary cancellation of the rating level will remain active until the disc is ejected. When the disc is ejected, the original rating level will be set again automatically. This DVD/VCR is equipped with a channel memory feature that allows you to skip channels up or down to the next channel set in memory, hence skip over unwanted channels. Before selecting channels, they must be programmed into the DVD/VCR's memory. In addition to normal VHF and UHF channels, this DVD/VCR can receive up to 113 Cable TV channels. To use this DVD/VCR with an antenna, set the TV/CABLE menu option to the TV mode. When shipped from the factory, this menu option is in the CABLE mode. TV/Cable Select Select "TV/Cable Select" and select "TV" or "Cable". TV: VHF/UHF channels Cable: CABLE TV channels Auto CH Memory The VCR can receive a maximum of 181 channels by presetting the channels into memory. When you select "Auto CH Memory" and press ENTER twice, the Auto CH Memory function will be activated. The channel display will count up and when finished, the screen returns to normal. CH Add/Delete (channels) You can add the channels you want or delete the channels you do not want manually. Select "CH Add/Delete" and press ENTER. Clock The clock is set to the correct time automatically, but it can also be set manually. The clock can be set for daylight saving time and time zone. GENERAL Auto Manual Parental Password TV/Cable Select Auto CH Memory CH Add/Delete Clock SETUP Select End ENTER Standard Time Auto Daylight Saving Time Auto Enter RETURN Back Auto You can automatically set the clock by selecting "Auto". When you want to set the auto clock function to off, select "Manual". (See page 26.) Standard Time (Time zone) In the rare event that you live within the broadcast range of two stations in two different time zone, the DVD/VCR may recognize the wrong station for the auto clock set. Time zones and correction times Atlantic: GMT - 4 hours (GMT: Greenwich Mean Time) Eastern: GMT - 5 hours Central: GMT - 6 hours Mountain: GMT - 7 hours Pacific: GMT - 8 hours Alaska: GMT - 9 hours Hawaii: GMT - 10 hours Auto: AUTO SET NOTES • When shipped from the factory, the "Standard Time" is set to "Auto". • After making the auto clock setting, in some cases the clock may display another time zone.You can correct the clock by selecting your time zone setting above. • When the clock is not set or you set the clock manually, the time zone setting is not available. 1 Press or to select the channel then press ENTER. 2 Press ENTER to select "Add" or "Delete". 2H5-01 P22-30 25 7/25/05, 23:19 25
-
 1
1 -
2
-
3
-
4
-
5
-
6
-
7
-
8
-
9
-
10
-
11
-
12
-
13
-
14
-
15
-
16
-
17
-
18
-
19
-
 20
20 -
 21
21 -
 22
22 -
 23
23 -
 24
24 -
 25
25 -
 26
26 -
 27
27 -
 28
28 -
 29
29 -
 30
30 -
31
-
32
-
33
-
34
-
35
-
36
-
37
-
38
-
39
-
40
-
41
-
42
-
43
-
44
-
45
-
46
-
47
-
48
-
49
-
50
-
51
-
52
-
53
-
54
-
55
-
56
-
57
-
58
-
59
-
60
-
61
-
62
-
63
-
64
-
65
-
66
-
67
-
68
-
69
-
70
-
71
-
72
-
73
-
74
-
75
-
76
-
77
-
78
-
79
-
80
-
81
-
82
-
83
-
84
-
85
-
86
-
87
-
88
-
89
-
90
-
91
-
92
 |
 |