Toshiba D-VR600 Owner's Manual - English - Page 23
Setting the clock / Setting the disc - dvd video recorder manual
 |
UPC - 022265000748
View all Toshiba D-VR600 manuals
Add to My Manuals
Save this manual to your list of manuals |
Page 23 highlights
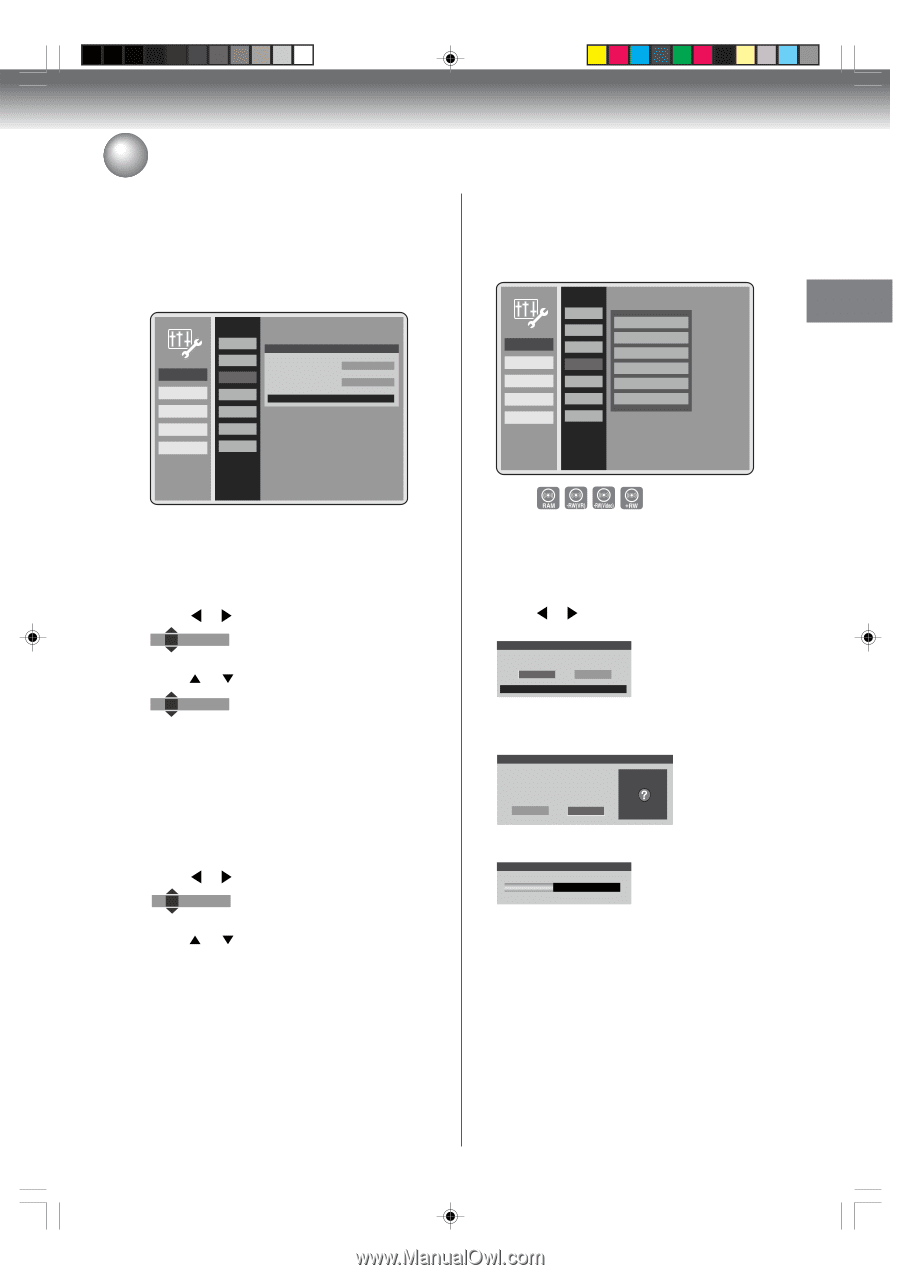
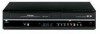
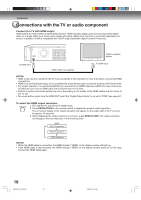
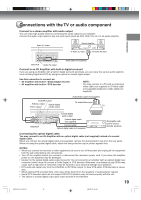
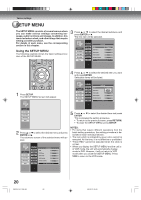
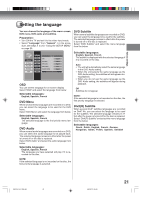
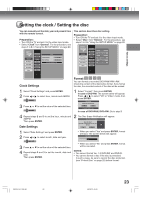
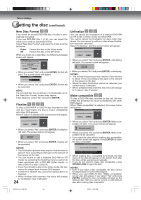
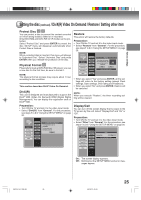
Various settings Setting the clock / Setting the disc You can manually set the date, year and present time with the remote control. Preparation: • Turn ON the TV and set it to the video input mode. • Select "Clock" from "General". For the procedure, see steps 1 to 3 in "Using the SETUP MENU" on page 20. General A/V Output Timer REC Recording Other Language Rating Clock Disc DivX(R) Restore Other Clock Clock Settings 12 : 00 AM Date Settings 01 / 01 / 07 Press RETURN to exit This section describes disc setting. Preparation: • Turn ON the TV and set it to the video input mode. • Select "Disc" from "General". For the procedure, see steps 1 to 3 in "Using the SETUP MENU" on page 20. General A/V Output Timer REC Recording Other Language Rating Clock Disc DivX(R) Restore Other Format New Disc Format Finalize Make compatible Protect Disc Physical Format Clock Settings Format You can format a recorded DVD-RAM/-RW/+RW. Check the content of the disc before format. If you format the disc, the recorded content of the disc will be erased. 1 Select "Clock Settings" and press ENTER. 2 Press or to select hour, minute and AM/PM. 12 : 00 AM 3 Press or 10 : 00 AM to set the value of the selected item. 1 Select "Format", then press ENTER. In case of DVD-RW: The screen below will appear. Press or to select "VR" or "Video" mode, then press ENTER. Disc Setup Select the format mode. VR Video Press RETURN to exit In case of DVD-RAM, DVD+RW: Go to step 2. 4 Repeat steps 2 and 3 to set the hour, minute and AM/PM. Then press ENTER. Date Settings 2 The Disc Erase Notification will appear. Disc Erase Notification Erase the disc? Warning: all Information on disc will be lost. Yes No 1 Select "Date Settings" and press ENTER. 2 Press or to select month, date and year. 01 / 01 / 07 3 Press or to set the value of the selected item. 4 Repeat steps 2 and 3 to set the month, date and year. Then press ENTER. • When you select "Yes" and press ENTER, format will start. The screen below will appear. Formatting 45% • When you select "No" and press ENTER, format will be canceled. NOTES: • You cannot format Ver. 1.0 DVD-RW and DVD-R. • You cannot format a disc if the disc is protected. In such a case, be sure to cancel the disc protection (see "Protect Disc" on page 25) before format. 2K70101A_E P20-28 23 08`02`07, 20:43 23
-
 1
1 -
2
-
3
-
4
-
5
-
6
-
7
-
8
-
9
-
10
-
11
-
12
-
13
-
14
-
15
-
16
-
17
-
 18
18 -
 19
19 -
 20
20 -
 21
21 -
 22
22 -
 23
23 -
 24
24 -
 25
25 -
 26
26 -
 27
27 -
 28
28 -
29
-
30
-
31
-
32
-
33
-
34
-
35
-
36
-
37
-
38
-
39
-
40
-
41
-
42
-
43
-
44
-
45
-
46
-
47
-
48
-
49
-
50
-
51
-
52
-
53
-
54
-
55
-
56
-
57
-
58
-
59
-
60
-
61
-
62
-
63
-
64
-
65
-
66
-
67
-
68
-
69
-
70
-
71
-
72
-
73
-
74
-
75
-
76
-
77
-
78
-
79
-
80
 |
 |