Toshiba DKT3210-SD User Guide
Toshiba DKT3210-SD - Digital Phone - Charcoal Manual
 |
View all Toshiba DKT3210-SD manuals
Add to My Manuals
Save this manual to your list of manuals |
Toshiba DKT3210-SD manual content summary:
- Toshiba DKT3210-SD | User Guide - Page 1
Telecommunication Systems Division ® Strata CIX and CTX IPT/DKT Telephone User Guide August 2007 - Toshiba DKT3210-SD | User Guide - Page 2
best possible customer experience. Dealer services include: network assessments, product recommendations, installations, and ongoing technical and sales support. Before making any changes or updates to their Toshiba Telecom product (hardware or software), Toshiba advises Businesses to contact their - Toshiba DKT3210-SD | User Guide - Page 3
ONLY TO END-USERS PURSUANT TO THIS set forth above. You will not remove or change any proprietary notices contained in or on the Software. The Software is protected under US patent, copyright, trade secret, and/or other proprietary laws, as well as international treaties. Any transfer Toshiba - Toshiba DKT3210-SD | User Guide - Page 4
User Limited Warranty Toshiba America Information Systems, Inc., ("TAIS") warrants that this telephone equipment manufactured by Toshiba time results in the customer being not entitled to warranty service. THERE ARE NO OTHER WARRANTIES FROM EITHER TOSHIBA AMERICA INFORMATION SYSTEMS, INC., OR TOSHIBA - Toshiba DKT3210-SD | User Guide - Page 5
prices, we offer both Toshiba-branded and third-party manufactured products that support our Toshiba Strata CIX product portfolio. Similar various models of the Toshiba Strata CIX. Toshiba does not endorse, warrant nor assume any liability in connection with such third party products or services. If - Toshiba DKT3210-SD | User Guide - Page 6
This page is intentionally left blank. - Toshiba DKT3210-SD | User Guide - Page 7
3200-series Telephones 8 Fixed Buttons...10 Flexible Buttons...11 Liquid Crystal Display...11 Chapter 2 - The Basics Important - Read First...13 What's My Line? ...13 Which Outgoing/Incoming Call Features Do I Have 14 Making a Call...15 Hot Dialing ...15 Strata CIX and CTX IPT/DKT Telephone 08/07 - Toshiba DKT3210-SD | User Guide - Page 8
Between Handset and Speakerphone 17 Message Waiting...18 Responding to a Lit Msg LED 18 Turning On/Off MW LED on Another Extension 19 Microphone ...19 Call Transfer ...20 Conference Calls ...22 Adding Voice Mail to a Conference 23 Connecting Two Outside Lines 23 Conference Add/Split/Join/Drop - Toshiba DKT3210-SD | User Guide - Page 9
Ringing ...53 Do Not Disturb...54 Setting DND for Another Extension 55 Door Lock(s) ...55 Door Phone(s) ...56 Echo Cancellation ...57 Emergency Call...57 Emergency Monitoring Station 57 Emergency Ringdown...58 Language Codes...58 Microphone Cut-Off ...58 Strata CIX and CTX IPT/DKT Telephone - Toshiba DKT3210-SD | User Guide - Page 10
...64 Speed Dial...65 Making a Call Using Speed Dial 65 Accessing System SD and Personal SD Directories 66 Storing a System/Station Speed Dial Number 66 Advanced Speed Dial Operation 67 Tone/Pulse Dialing...68 Uniform Call Distribution 69 Login/Logout ...70 Voice Mail - Direct Transfer 71 - Toshiba DKT3210-SD | User Guide - Page 11
...107 Chapter 6 - DKT3014/3214-SDL LCD Features Directory and Speed Dial Listings 114 Direct Station Selection 114 System Speed Dial and Personal Speed Dial 115 Internal Directory and External Directory 115 Storing Personal Speed Dial Names 116 Strata CIX and CTX IPT/DKT Telephone 08/07 v - Toshiba DKT3210-SD | User Guide - Page 12
...139 DSS Buttons...139 Calling a Station ...140 Transferring to an Idle Station 140 Call Transfer with Camp-on 141 Call Answering (Outside Line 141 Speed Dial...141 Paging ...142 Call Forward Override (DSS Override 142 Night Transfer Button 142 vi Strata CIX and CTX IPT/DKT Telephone 08/07 - Toshiba DKT3210-SD | User Guide - Page 13
Contents Appendix A - Centrex Application Appendix A - Centrex Application Flexible Directory Numbering 143 Centrex Feature Buttons 143 Ringing Repeat...143 Delayed Ringing ...144 Appendix B - Button Labels Index ...149 Strata CIX and CTX IPT/DKT Telephone 08/07 vii - Toshiba DKT3210-SD | User Guide - Page 14
This page is intentionally left blank. - Toshiba DKT3210-SD | User Guide - Page 15
user guide describes how to use the Toshiba Strata series telephone products with Strata CIX670, CIX200, CIX100, CIX100-S, and CIX40 telephone systems: • Strata IP telephone (IPT2010-SD, IPT2020-SD and IPT2008-SDL) • Strata DKT3000- and 2000-series digital telephones only on this telephone. • Chapter - Toshiba DKT3210-SD | User Guide - Page 16
telephone user information for FeatureFlex features. • Chapter 8 - User Programming explains how to program Flexible Button features, set One Touch buttons, change Personal Speed Dial numbers, as well as other user designations of the 3000series digital telephone models. • Appendix C - FeatureFlex - Toshiba DKT3210-SD | User Guide - Page 17
How to Use This Guide This guide provides in-depth instructions for the IPT1020-SD, IPT2000-series, DKT3000- and DKT2000-series telephones and their features. Most telephone users can use the "Strata CIX/CTX DKT/IPT Quick Reference Guide" instead of this guide. Conventions Conventions Description - Toshiba DKT3210-SD | User Guide - Page 18
page. Refer to the following for more information: • Strata DKT3001/2001 Digital Single Line Telephone User Guide • Strata DKT/IPT Telephone Quick Reference Guide • Strata CIX My Phone Manager User Guide • Strata CIX Application Software and CIX Documentation Library CD-ROM • Strata CIX eManager - Toshiba DKT3210-SD | User Guide - Page 19
the DADM. For user instructions, refer to "ADM" on page 138. The 2000-series IP telephones offer all the same features as the 3000/3200-series digital telephones, except the IPT2010-SD does not support Speaker Off-hook Call Announce (OCA). All the Toshiba IPT2000-series telephones have speakerphones - Toshiba DKT3210-SD | User Guide - Page 20
. Prompts guide you through specific tasks. They also provide Outside Line Identification, User Name/Number, Call Duration, Date/Time of Day displays, and the ability to display names and telephone numbers of outside, incoming callers. IPT2020-SD Telephone 2 Strata CIX and CTX IPT/DKT Telephone 08 - Toshiba DKT3210-SD | User Guide - Page 21
Voice Mail (envelope) Mircrophone Speaker LEDs 7508 Speed Dial (lightning buttons) Volume Control Redial (U-turn button) Hold (red button) Cnf/Trn - Conference/Transfer (3 people - 2 people) Note The IPT Fixed Buttons work the same way as the DKT telephones, however on the IPTs, fixed buttons have - Toshiba DKT3210-SD | User Guide - Page 22
onto a single button. • One Touch Buttons are used for storing Speed Dial numbers or feature access code sequences onto a single button. • Voice Mail Call Monitor lets you listen to a caller while the caller records a message in your voice mailbox. Note Flexible buttons (FB) are numbered bottom - Toshiba DKT3210-SD | User Guide - Page 23
Your LCD" on page 31 for more information. • SK1 is generally used as a Soft Key. • Pressing SK2 switches you from the Call Forward (CF) display to the User Name display. • Pressing SK3 advances you through information. • SK4 will be used in the future. Strata CIX and CTX IPT/DKT Telephone 08/07 5 - Toshiba DKT3210-SD | User Guide - Page 24
a IPT2010-SD and DKT3000/3200-series telephone, except background music. The main difference is that you use a mouse or stylus to select buttons. Live call progress display Soft Keys Directory Help Setup Select or click on dial pad buttons Flexible Buttons Voice Mail Fixed Buttons Speed Dial - Toshiba DKT3210-SD | User Guide - Page 25
user or find information on Setting Audio Properties, etc. Click Help to view all SoftIPT information. PDA You can also install the SoftIPT on a laptop, tablet or desktop PC and a Pocket PC at the same time, but each should have a unique station ID and license. The SoftIPT works with Toshiba Pocket - Toshiba DKT3210-SD | User Guide - Page 26
-used features. Prompts guide you through specific tasks. They also provide Outside Line Identification, User Name/Number, Call Duration, Date/Time of Day displays, and the ability to display names and telephone numbers of outside, incoming callers. An illustration of the DKT3020/3220-SD is shown on - Toshiba DKT3210-SD | User Guide - Page 27
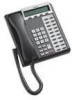
Handset Dial Pad The Grand Tour DKT3000/3200-series Telephones LCD Display LCD Control Buttons/ Soft Keys Flexible Buttons Fixed Buttons DKT3210-SD Telephone Strata CIX and CTX IPT/DKT Telephone 08/07 9 - Toshiba DKT3210-SD | User Guide - Page 28
The Grand Tour DKT3000/3200-series Telephones DKT3220-SD Telephone Fixed Buttons The fixed buttons on your telephone enable you to perform standard functions quickly and easily. These buttons are described in Chapter 2 - The Basics. 10 Strata CIX and CTX IPT/DKT Telephone 08/07 - Toshiba DKT3210-SD | User Guide - Page 29
that feature. See "Using Your LCD" on page 31 for more information. • SK1 is generally used as a Soft Key. • Pressing SK2 switches you from the Call Forward (CF) display to the User Name display. • Pressing SK3 advances you through information. Strata CIX and CTX IPT/DKT Telephone 08/07 11 - Toshiba DKT3210-SD | User Guide - Page 30
This page is intentionally left blank. - Toshiba DKT3210-SD | User Guide - Page 31
Group Line button Line out requiring an access code - where you enter an outside line or line group access code (for example, dialing 9 to get an outside line). Check mark which Line type you have, then use that selection when instructed to "select a Line." Strata CIX and CTX IPT/DKT Telephone 08 - Toshiba DKT3210-SD | User Guide - Page 32
your System Administrator to see if you are set with Tone First Signaling. If you do, you can press 2 to change to Voice First signaling. Voice First Signaling: Internal incoming call - your telephone does not ring; instead you hear a long tone, then the caller's voice. Talk in the direction of your - Toshiba DKT3210-SD | User Guide - Page 33
be automatically selected or you can manually choose a line. Your extension or Line button lights (depending on system programming). Dial tone plays through the speaker. The Speaker and Microphone LEDs light. 2. Dial the number. Digits display as they are dialed. Call progress tones (Ringback Tone - Toshiba DKT3210-SD | User Guide - Page 34
they have been programmed in the telephone system. All directory names are sorted alphabetically. 1. Press SK1 or Mode from your telephone (shown right). The Select Directory menu appears. Note The soft keys on the Select Directory are: My = Personal Speed Dial Names SELECT DIRECTORY MY EXTR - Toshiba DKT3210-SD | User Guide - Page 35
answer a call: Handset If your telephone is programmed for Ringing Line Preference, pick up the handset and the telephone automatically answers the ringing line. If not, press the button associated with the ringing line (flashing green LED). Speaker If your telephone is programmed for Ringing Line - Toshiba DKT3210-SD | User Guide - Page 36
see if these buttons have been programmed on your telephone. If so, substitute them when the Msg button/LED is mentioned in the following steps. Responding to a Lit Msg LED 1. On an LCD telephone, if you see a "+," press SK3 to display additional messages; otherwise, go to Step 2. The "+" indicates - Toshiba DKT3210-SD | User Guide - Page 37
is set in system programming. 1. Dial an internal extension. You hear busy tone or there's no answer. 2. Press Msg or 7. The Msg LED flashes red on the called telephone. At your telephone, the Msg LED lights steady red and the LCD shows the station number where you set a Message Waiting light - Toshiba DKT3210-SD | User Guide - Page 38
extension button or Cnf/Trn. • If you get voice mail, you can leave a message or hang up and let the transferred caller leave a message. • If you hear a long single tone, then announce the call over the called telephone's speaker. 3. Transfer with Camp On: If the station to which you want to - Toshiba DKT3210-SD | User Guide - Page 39
Dial the extension where you wish to transfer the call.The call rings the destination station and your telephone returns to the idle state. If your telephone does not go idle, the destination may be located in a remote node, so you need to hang up to return to idle state. Strata CIX and CTX IPT/DKT - Toshiba DKT3210-SD | User Guide - Page 40
call was placed on a Line that appears on your telephone, the LED also flashes green. 4. Repeat the above steps to add lines to the conference. Keep in mind the maximum number of allowed conference parties. Note When the "master" of the conference hangs up, the control is automatically transferred - Toshiba DKT3210-SD | User Guide - Page 41
or leave a voice mail message during one telephone call. To add Voice Mail to a conference call (performed by Conference Master) 1. Press Cnf/Trn to place the current call on Consultation Hold. 2. Dial the voice mail (VM) extension number, then enter the VM mailbox and security code. This adds the - Toshiba DKT3210-SD | User Guide - Page 42
/Conference on hold. 2. Answer the incoming ringing call. 3. While speaking to the incoming caller, press Cnf/Trn button. 4. Press the blinking DN where the first caller/Conference was placed on hold. 5. Press Cnf/Trn twice to join all parties together. 24 Strata CIX and CTX IPT/DKT Telephone - Toshiba DKT3210-SD | User Guide - Page 43
Split from a conference 1. While in a conference call on a DKT3000/ 3200-series phone, press the SPLT (Split) soft key or Split button. The Basics Conference Calls 200+202 EXIT CONF SPLT 8110 SK1 SK2 SK3 SK4 (Mode) (Page) (Scroll) (Feature) The telephone LCD shows first conference party member - Toshiba DKT3210-SD | User Guide - Page 44
LED flashes. You can also switch between calls without having to press Hold. Consultation Hold 1. While on a call, press Cnf/Trn. The call goes on hold. 2. Dial another line. 3. Transfer the call or return to the held call by pressing its Line button. 26 Strata CIX and CTX IPT/DKT Telephone 08/07 - Toshiba DKT3210-SD | User Guide - Page 45
Press an extension button - you hear dial tone. 3. Press the Vol to increase volume and Vol to decrease volume. This volume setting applies to all calls until changed. To adjust Ring Tone, Handsfree Answerback and Speaker Off-hook Call Announce Make sure the telephone is idle and the handset is on - Toshiba DKT3210-SD | User Guide - Page 46
any of the call buttons, such as Redial, Hold or Conf. Select or click on dial pad buttons to call. 3. Click Speaker to end the call. Note Do not use Click Speaker, BGM (#490) then dial on the SoftIPT. It conflicts with 7797 incoming calls. 28 Strata CIX and CTX IPT/DKT Telephone 08/07 - Toshiba DKT3210-SD | User Guide - Page 47
open. 4. Open the Soft Phone. 5. Click More Features twice, click Directory (Folder icon). The directory displays (see below). Click on a name, Strata CIX dials the number. Using the Directory to Call Click on the name. The SoftIPT calls the contact. Strata CIX and CTX IPT/DKT Telephone 08/07 29 - Toshiba DKT3210-SD | User Guide - Page 48
. To change the function, see "Programming Feature Buttons" on page 127. Note If the headset-use feature is enabled, Line 5 (PDA) and Line 9 (PC) is set as default and will automatically be labeled headset. To find out what features are assigned to the feature buttons 1. Dial #9876 to enter user - Toshiba DKT3210-SD | User Guide - Page 49
to display. Press SK3 to advance through the information. Press SK2 to switch from the Call Forward (CF) display to the User Name display. LCD Control Buttons/Soft Keys CF-ALL 202-203+ AUG 08 MON 03:56 8119 SK1 SK2 SK3 SK4 (Mode) (Page) (Scroll) (Feature) Strata CIX and CTX IPT/DKT Telephone 08 - Toshiba DKT3210-SD | User Guide - Page 50
Drop for further instruction. Adds a station to an existing call while in the Conference mode. The LCD prompts you to dial a station number after you press this key. Makes a voice announcement to a called station that is ringing. Initiates or completes a Transfer while on an outside call. Press once - Toshiba DKT3210-SD | User Guide - Page 51
Keys 2. If you select CONF (press SK2), the display changes as shown right. LINE = Add an outside line to the conference STA = Add another station RTRN = Return to the original caller without making a conference 3. You will be prompted to dial the desired station. The RTRN Soft Key (press SK3 - Toshiba DKT3210-SD | User Guide - Page 52
Characters Displayed OUT TO LUNCH IN A MEETING CALL BACK AT __________ RETURN ON________ Additional Digits Directory Number (e.g.,220) Time (e.g., 1030) Date (e.g., 10 20) To set an advisory message 1. Go off-hook or press your extension button or phantom directory number button to hear dial tone - Toshiba DKT3210-SD | User Guide - Page 53
the application, but in either case, the caller must enter a code before proceeding. To dial using Forced Account Codes 1. Place a call in the normal method. If the call requires an Account Code, a burst of tone (Success Tone) is heard after dialing the telephone number alerting you to enter the - Toshiba DKT3210-SD | User Guide - Page 54
system is set for Verified Account Codes, station users must enter a specific code when entering the Voluntary Account Code(s) or the code is not validated for the SMDR call report. This does not affect the call. There are two ways to dial using a Voluntary Account Code: To dial using the Account - Toshiba DKT3210-SD | User Guide - Page 55
When the Alarm Notification button displays Call your System Administrator or Dealer. This button stops displaying when the alarm clears or five to 20 times, every 30 to 180 seconds (depending on system programming). Your telephone receives ring tone when Automatic Busy Redial dials the number and - Toshiba DKT3210-SD | User Guide - Page 56
, it automatically rings the intended destination. The amount of time the system will wait for an idle destination is set in system programming. Automatic Callback is also known as "CO Line Queuing." To set Automatic Callback 1. If you hear busy tone after dialing an outside line access code or - Toshiba DKT3210-SD | User Guide - Page 57
Music You can set background music over your telephone speaker or over music source 1~15. To cancel background music on your telephone speaker Press BGM. LED turns off. ...or press an extension button + #491. To change the BGM source (1~15) assigned to the BGM and CTX IPT/DKT Telephone 08/07 39 - Toshiba DKT3210-SD | User Guide - Page 58
more details. Call Forward must be set prior to receiving the call. The following calls to your station can be forwarded: • Internal calls • Auto Attendant calls • Outside lines that ring only your station • Transferred internal or incoming line calls 40 Strata CIX and CTX IPT/DKT Telephone 08/07 - Toshiba DKT3210-SD | User Guide - Page 59
change your forwarding destination from outside the system using the DISA feature. See your System Administrator for DISA telephone numbers and security code access. Call Forward Settings • Call Forward All Calls - Forwards all calls immediately. • Call Forward Busy/Do Not Disturb - Forwards calls - Toshiba DKT3210-SD | User Guide - Page 60
your telephone should ring before forwarding the call. (This is the CF-No Answer timer.) • CF Pass Code - A four-digit Call Forward (CF) pass code established by system programming is required to allow one station to set CF for another station. This code is also used to allow DISA callers to set CF - Toshiba DKT3210-SD | User Guide - Page 61
-No Answer to an internal extension number Press your extension button + #6041 + 3000# + 10 #6041 = Call Forward Access Code sequence 3000# = Internal Extension Number 10 = Ring time in seconds before Call Forwards To set another telephone to CF Busy-No Answer to an outside destination number after - Toshiba DKT3210-SD | User Guide - Page 62
Enables you to set call forwarding for another telephone within your telephone system. You will need the other telephone's CF pass code in order to do this. CF Pass Codes are created in system programming. All Calls to an ext. Press ext. button + #6012 (tone) + dial the other telephone's ext. no - Toshiba DKT3210-SD | User Guide - Page 63
enter other telephone's CF pass code + # (tone) + outside line access code + dest. telephone no. + # (tone) + timer (08~60) (tone) Press ext. button + #6052 (tone) + dial the other telephone's ext. no. + enter other telephone's CF pass code + # (tone) Strata CIX and CTX IPT/DKT Telephone 08/07 45 - Toshiba DKT3210-SD | User Guide - Page 64
Change Call Forward Pass Code: Your telephone must be enabled in programming to have the ability to change pass codes. Change Pass Code Press ext. button + #670 (tone) + dial the dest. ext. no. (tone) + old pass code + # (tone) + new pass code (tone) + # 46 Strata CIX and CTX IPT/DKT Telephone - Toshiba DKT3210-SD | User Guide - Page 65
where the call is ringing. The call is placed in the list along with the number, name (if provided), time and date of the call, and status of the call (answered, abandoned, or redirected). You can access this list from an LCD telephone with a flexible Caller ID button. To view Call History When - Toshiba DKT3210-SD | User Guide - Page 66
as the orbit. 3. Hang up. The caller's extension or line number and the orbit number are shown. If the parked call is not retrieved within a specified time, the call rings back to your telephone. When a parked call recalls your telephone, the LCD shows the line or extension that is recalling and the - Toshiba DKT3210-SD | User Guide - Page 67
Ext. No. #5#5 + Primary Ext. No. A call ringing an extension in this Pickup Group. #5#32 + Group No. A call ringing this Ext. No. only. Other lines ringing on the same phone are unaffected. Any incoming outside line call. #5#22 + Ext. No. #5#9 Strata CIX and CTX IPT/DKT Telephone 08/07 49 - Toshiba DKT3210-SD | User Guide - Page 68
+ Ext. No. of another phone being paged. Press Ext. Button, then dial the access sequence below: #5#71 #5#72 + Primary Ext. No. #5#73 + Outside Line No. (001~128) #5#74 + Ext. No. Notes • The Primary extension number is the directory number by which the telephone set is defined. Other, non-primary - Toshiba DKT3210-SD | User Guide - Page 69
or Line. The existing call is placed on hold. The camped-on line rings your station (the Line LED flashes green - incoming call). This disconnects the current call and connects you to the transferred call. The extension or Line LED flashes green (in-use). Strata CIX and CTX IPT/DKT Telephone 08 - Toshiba DKT3210-SD | User Guide - Page 70
telephone number assigned to DISA. The call will be answered and you will hear system dial tone. If you do not dial within 10 seconds, the line disconnects. 2. When you hear dial tone, dial an extension or an outside line. 3. If you dial an outside destination, you may need to enter a security code - Toshiba DKT3210-SD | User Guide - Page 71
Ringing Distinctive Ringing To set distinctive ringing 1. Press #9876 to enter User Programming Mode. 2. Press a Line or extension button. The LED is steady green. 3. You can press Hold to switch between internal and external pitch. (Internal = station calls CIX and CTX IPT/DKT Telephone 08/07 53 - Toshiba DKT3210-SD | User Guide - Page 72
a short burst of interrupted dial tone followed by continuous dial tone. You can start dialing at any time during either tone. If you put your Primary extension into DND mode, all calls to that telephone are rejected. If your extension is set for Call Forward-Busy or Call Forward-Busy/No Answer, the - Toshiba DKT3210-SD | User Guide - Page 73
). This removes DND from the target telephone. To change your DND Pass Code Enter #670 (hear Entry Tone) + ext. no. (hear Entry Tone) + old pass code + # (hear Entry Tone) + new pass code + # (hear Success Tone). If you activate DND while a call is ringing, the ringing stops. The LED continues to - Toshiba DKT3210-SD | User Guide - Page 74
be used to call phones selected in system programming. When a door phone calls, you hear a distinctive ringing tone, one or five times (set in system programming). You can also call a door phone and monitor the surrounding area. LCD telephones display the door phone name ID when calls are made to - Toshiba DKT3210-SD | User Guide - Page 75
ringing tone-one or five times (set in system programming). 2. When answered, speak at a normal voice level in the direction of the door phone. Echo Cancellation If you hear echo on your IP telephone, tap either Vol the echo. or Vol once to cancel Emergency Call To make an emergency call, dial - Toshiba DKT3210-SD | User Guide - Page 76
and door phones are not permitted. Language Codes This feature enables you to change the language sent from the Attendant Console or from a PC. See your System Administrator to find out if your telephone is programmed with the ability to change languages. To change the Language Display Enter the - Toshiba DKT3210-SD | User Guide - Page 77
telephone must be programmed to accept an OCA. The announcement may be delivered over the handset or the speaker. Handset OCA Announce can operate on any digital telephone. Speaker OCA requires the addition of a special circuit board inside the DKT speakerphone. To make an OCA call Manual - Dial - Toshiba DKT3210-SD | User Guide - Page 78
(BOV) muted ring can be programmed for each station to be two muted rings only or continued muted rings until the call is answered. This option applies to the station receiving the muted ring. The muted ring can be sent to the telephone speaker or to the telephone handset/headset and speaker. To - Toshiba DKT3210-SD | User Guide - Page 79
pre-determined account code. To use Destination Restriction or Traveling Class Override 1. Press 471. Confirmation tone plays and the LCD shows "Enter OVR Code." 2. Enter the trunk access code or LCR access code. 3. Dial the external telephone number. Strata CIX and CTX IPT/DKT Telephone 08/07 61 - Toshiba DKT3210-SD | User Guide - Page 80
hear dial tone. For security reasons, the override codes are only available on a selected basis. See your System Administrator. 4. Dial a telephone number. Privacy Override This feature enables you to enter an established call on a line you share with another telephone. Up to two station users can - Toshiba DKT3210-SD | User Guide - Page 81
can make an All Call Page to telephones assigned to the "All Call Page Group." Stations are assigned to the "All Call Page Group" in system programming. To make an All Call Page 1. With the handset off-hook, press All Call Page ...or dial #30. This pages all telephones in the All Call Page Group but - Toshiba DKT3210-SD | User Guide - Page 82
on Line to set privacy. The LED lights steady red. Others are blocked from entering your outside line calls when they press a common Line ...or press Privacy on Line again to cancel the feature. The LED turns Off. Redial Use this button to redial the last number dialed from your telephone. To - Toshiba DKT3210-SD | User Guide - Page 83
change them from your own telephone.If you have a IPT3014 telephone, you can assign names to your station SD numbers to appear on the Personal SD Directory display (see your System Administrator or use the procedure for "Storing Personal Speed Dial Names" on page 116.) • System SD - All telephones - Toshiba DKT3210-SD | User Guide - Page 84
Stations must be assigned/enabled Speed Dial capabilities in system programming by an Administrator in Program 200-30 (System SD) and Program 200-35 (Station SD). 2. Refer to Table 7 on page 67 to see how to enter*and # into a speed dial phone number. 66 Strata CIX and CTX IPT/DKT Telephone 08/07 - Toshiba DKT3210-SD | User Guide - Page 85
Operation Storing a System/Station Speed Dial Number IPT2008-SDL Name Storage If you have a IPT2008-SDL phone, you can store names for Personal SD numbers (see "Storing Personal Speed Dial Names" on page 116). Advanced Speed Dial Operation Special Characters SD numbers may include 0~9, #, * and - Toshiba DKT3210-SD | User Guide - Page 86
. To change Tone Dialing 1. Access an outside line. 2. Dial a telephone number. 3. While on the call, press Tone Dial Select. Although the outside line is programmed for rotary dial pulses, access the outside line and dial the telephone number like any other call described in this user guide. The - Toshiba DKT3210-SD | User Guide - Page 87
, the call is queued to the UCD pilot group. The caller may hear the Music on Hold (MOH) or Ring Back Tone (RBT) depending on the configuration. If the call cannot be answered within the preconfigured time, the call is routed to an overflow destination. Strata CIX and CTX IPT/DKT Telephone 08/07 - Toshiba DKT3210-SD | User Guide - Page 88
phone (see Strata CIX Programming Manual Vol. 1 for details). The Log status is displayed on the Login key as shown below • Login - Key is On Steady • Logout - Key is Off The Login/Logout feature is applied to the call number of the agent station. 70 Strata CIX and CTX IPT/DKT Telephone 08/07 - Toshiba DKT3210-SD | User Guide - Page 89
Processing User Guide. Table 8 Stratagy ES Main Menu Soft Keys for Strata CIX Telephones IPT 2008 SDL DKT3014/3214 SDL PLAY MSGS SEND MANAGE MBX EXIT HANGUP DKT3007/3207-SD DKT3010/3210 SD DKT3020/3220 SD IP Telephones PLAY SEND MGMT QUIT Voice Mail Functions Play Messages Send Messages Manage - Toshiba DKT3210-SD | User Guide - Page 90
new destination Change notification digits Change Greeting Continuous Delete Continuous Play Message Date and Time Set Delay Time Delete the message/guest mailbox Delete a mailbox from the personal distribution list Delete message (Future Delivery Review) 72 Strata CIX and CTX IPT/DKT Telephone 08 - Toshiba DKT3210-SD | User Guide - Page 91
copy destination Directory plus name Change Do Not Disturb (On/Off) Enable/Disable: • Notification template (toggle) • Automatic copy Set copy End Time New/Saved message folder Forward the current message Set Future Delivery, Future Delivery Review Go forward (advance) Manage Guest Mailboxes - Toshiba DKT3210-SD | User Guide - Page 92
mailboxes Review current list Review Option Settings Save the message/recording/changes Save message (Future Delivery Review) Change Security Code Select name Send and Return to Main menu Set the Day (1~31) Set the Hour (1~12) Set the Minutes (0~59) 74 Strata CIX and CTX IPT/DKT Telephone 08/07 - Toshiba DKT3210-SD | User Guide - Page 93
Functions Set up Month (1~12) Set up Year (last two digits) Special Functions Send All Fax (in folder to fax dev) Send Current Fax (to fax device) Special Delivery Options Set copy Start Time End recording Copy Urgent Messages Change User Options Resume playback Strata CIX and CTX IPT/DKT Telephone - Toshiba DKT3210-SD | User Guide - Page 94
which method to use when recording a call. This feature requires the presence of a Record and a PS/RES (Pause/Resume) button on your telephone. Feature codes are not available. Important! Stratagy ES mailboxes have a definable time limit on the length of a message can be. If you plan on making - Toshiba DKT3210-SD | User Guide - Page 95
Features Another voice mail feature lets you to include a voice mailbox in a conference call. See "Adding Voice Mail to a Conference" on page 23. For instructions on the Stratagy Voice Mail features, refer to the Stratagy Voice Processing User Guide. Strata CIX and CTX IPT/DKT Telephone 08/07 77 - Toshiba DKT3210-SD | User Guide - Page 96
This page is intentionally left blank. - Toshiba DKT3210-SD | User Guide - Page 97
looks and functions similar to the IPT2010-SD telephone when connected to the Strata CIX. This phone fully supports all the CIX features and services of a regular IPT2010-SD telephone. However, this telephone can have a unique feature button called the Analog Central Office (ACO) button to connect - Toshiba DKT3210-SD | User Guide - Page 98
has been repositioned in programming. To make a call from your local ACO service 1. Press the ACO button to receive local dial tone. 2. Lift the handset and dial the telephone number. To answer an ACO call Press the ringing ACO button. To make a Call from your CIX Telephone System Line 1. Lift the - Toshiba DKT3210-SD | User Guide - Page 99
, and you do not use the ACO button for the 911 call, the CIX system will process the call as if you were in Los Angeles. • An operating local CO line cord must be connected to the "Line" jack on the bottom of your telephone. • The AC power adaptor (LADP2000-1A or 2A) must be plugged - Toshiba DKT3210-SD | User Guide - Page 100
headset volume Press the Vol to increase volume and Vol ACO call. to decrease volume during the To adjust the Speaker Receiver Volume Press ACO button in On-hook Mode, then press Volume Up/Down button to change the Speaker Receiver volume level. To adjust ACO Ringing CTX IPT/DKT Telephone 08/07 - Toshiba DKT3210-SD | User Guide - Page 101
ACO I-use Green blinking USING LOCAL LINE FLASH REL Notes • Default LCD display is User name, Extension, Month, Date, Day and Time • The Flash and Release (REL) soft keys display only when using the Local line. You can use the Flash soft key for call waiting answer and/or Centrex feature - Toshiba DKT3210-SD | User Guide - Page 102
ACO button When you are on a Conference call and you are the Conference member and you press ACO button. Your local CO line is not connected and you press ACO button. You are making an outgoing CIX call and you press the ACO button.2 While dialing to transfer a CIX call and you haven't completed the - Toshiba DKT3210-SD | User Guide - Page 103
characteristics when using the ACO service on the IPT2010-SDC telephone. • Your LCD will not display Caller ID name and number when receiving a call on your ACO button. • You do not get CIX tones or CIX LCD displays when you are on an ACO call or during ACO ringing. • The buttons available on an - Toshiba DKT3210-SD | User Guide - Page 104
To place your telephone in Programming Mode 1. Press 3+6+9+Hold simultaneously. The LCD displays "PROGRAM MODE" and "SELECT=" 2. Press 4, then press Hold. Note Your phone will not ring if it receives a call while in Programming Mode. Place the phone into programming mode then set the following: Note - Toshiba DKT3210-SD | User Guide - Page 105
for ACO. Select the display language then, press Hold. 1 = US English 3 = British English 2 = French 4 = Spanish 9. Press Hold again to save the changes. 10.Lift, then replace hand set to exit programming mode. FB09 ~ FB20 - Do not change. Strata CIX and CTX IPT/DKT Telephone 08/07 87 - Toshiba DKT3210-SD | User Guide - Page 106
settings). This will set all the IPT2010-SDC program options to factory default values. IPT2010-SDC Headset Transmit Level Adjustment The IPT2010-SDC headset transmit level for ACO and IPT operation are set by programming -7 dB 4. Press Hold again. 88 Strata CIX and CTX IPT/DKT Telephone 08/07 - Toshiba DKT3210-SD | User Guide - Page 107
A local CO line connection and power are required for ACO operation, including E911. Connect to IP Network LAN PC Connect to power adapter if not using POE. Connect to CO Line for local CO operation. HEAD SET LINE HAND SET IPT2010-SDC Connections Strata CIX and CTX IPT/DKT Telephone 08/07 89 - Toshiba DKT3210-SD | User Guide - Page 108
will be red. 2. Plug in the local CO Line connection. A functional line will cause the ACO indicator to go dark. 3. Lift the handset then, press the ACO button. Verify that the ACO indicator lights green and dial tone is heard. 4. Dial a local telephone number. Verify two-way speech. 5. Place the - Toshiba DKT3210-SD | User Guide - Page 109
how to use the IPT2008-SDL (shown below) large screen display. LCD Display SK1 SK4 SK2 SK3 Soft Keys Soft Keys (SK) Handset Dial Pad LCD Control Buttons/Soft Keys Navigation Buttons Flexible Buttons 7535 IPT2008-SDL Telephone Strata CIX and CTX IPT/DKT Telephone 08/07 Fixed Buttons 91 - Toshiba DKT3210-SD | User Guide - Page 110
, the W or X arrows to move left or right and the center button is the Enter button. Speed Dial (lightning buttons) Volume Control Redial (U-turn button) Hold (red button) Cnf/Trn - Conference/Transfer (3 people - 2 people) Up Left Right Enter Down 92 Strata CIX and CTX IPT/DKT Telephone 08/07 - Toshiba DKT3210-SD | User Guide - Page 111
the following (for a picture, see "Directory and Speed Dial Listings" on page 95): • User Name • PDN (maximum length is five digits) • Date and Time (Month, Date, Day) • Icon - The icon changes according to the Call status • Soft keys display (see "Soft Keys" on page 32) • Text information (example - Toshiba DKT3210-SD | User Guide - Page 112
and vice versa. The following screens display when you switch from one tab to the other or perform different functions. 7541 Going Off-hook/pressing Speaker 7539 Making an Out-going call 7538 7542 Phone Tab - Talk display Configuration display 94 Strata CIX and CTX IPT/DKT Telephone 08/07 - Toshiba DKT3210-SD | User Guide - Page 113
and Speed Dial Listings The directory menu (idle state) is shown below. Scrolling Directories Direct Station Selection System Speed Dial Personal Speed Dial Left Tab Soft Key External Directory Internal Directory Right Tab Soft Key 7545 Direct Station Selection This option displays all named - Toshiba DKT3210-SD | User Guide - Page 114
System Speed Dial Numbers alphabetically (typically, external destinations). Internal Directory enables you to search all of the internal name extensions alphabetically. This saves time since you do not have to step through the lists screen-by-screen. See Table 12 on page 100 for instructions on - Toshiba DKT3210-SD | User Guide - Page 115
Speed Dial numbers. To assign Station Speed Dial names 1. Enter User Programming Mode by dialing #9876 or, press Program. 2. Press Spdial. "SPEED DIAL MODE" displays on the LCD. 3. Enter a Speed Dial location number (100~199, depending on system programming). Strata CIX and CTX IPT/DKT Telephone - Toshiba DKT3210-SD | User Guide - Page 116
Spdial. The Speed Dial name is now programmed. 7. Go off hook. The IPT exits User Programming Mode. 8. Test the Personal SD entry by pressing the Personal SD Soft Key. Look for the name in the entry and press the Soft Key associated with that name. 98 Strata CIX and CTX IPT/DKT Telephone 08/07 - Toshiba DKT3210-SD | User Guide - Page 117
"Navigation Buttons" on page 92. The http: window on screen displays. The icons shown below are visible on this screen. 5. Press Pressing # lets you toggle between Alpha and Numeric modes. Refer to "Dial Pad Alphanumeric Characters" on page 100. Notes • "A" in the left DKT Telephone 08/07 99 - Toshiba DKT3210-SD | User Guide - Page 118
LCD Features Web Access Enter Address Back Forward IPT2008-SDL Web Application Icons 7582 Reload Stop Table 12 Dial Pad Alphanumeric Characters Dial Number of times to press the dial pad button Pad Buttons 1 2 3 4 5 . 9 goto p goto w ! ) [ 100 Strata CIX and CTX IPT/DKT Telephone 08/07 - Toshiba DKT3210-SD | User Guide - Page 119
in the Strata CIX Programming Manual, Volume 3 - Application and Implementation. To Login 1. Follow the steps "To access the web" on page 99. 2. After you enter the IP Address of the Web Server, the Login screen displays (shown right). 3. Enter a Directory Number in the User DN field. 4. Enter your - Toshiba DKT3210-SD | User Guide - Page 120
IPT2008-SDL LCD Features Info ManagerTM Stocks From the Options screen, press the Stocks soft key to view a list of stock quotes. Note To add or remove stock quotes, see "Adding and Removing Stock Quotes, Company News and Weather" on page 108. 102 Strata CIX and CTX IPT/DKT Telephone 08/07 - Toshiba DKT3210-SD | User Guide - Page 121
Select a city by using the corresponding softkeys. The weather for that city displays (shown below). IPT2008-SDL LCD Features Info ManagerTM Note To add or remove Weather, see "Adding and Removing Stock Quotes, Company News and Weather" on page 108. Strata CIX and CTX IPT/DKT Telephone 08/07 103 - Toshiba DKT3210-SD | User Guide - Page 122
either press the soft key next to "01-20: See's Candy Sale" or the soft key next to 01-20: Hawaii Trip." The corresponding story displays (shown below). 3. Press the next or back soft keys to view other news items. Note To add or remove News items, see "Adding and Removing - Toshiba DKT3210-SD | User Guide - Page 123
screen displays (shown right). 3. Enter your Microsoft Outlook Username and Password. Notes • Use the right softkeys corresponding to either the Username or Password. • Use the dial pad softkey on the right. Your meetings screen displays (shown below). Strata CIX and CTX IPT/DKT Telephone 08/07 105 - Toshiba DKT3210-SD | User Guide - Page 124
the Meetings screen. The Meeting Notification screen displays (shown right). 2. Use the corresponding right softkey to select the Notify time box. This is the time (in minutes) for the telephone to notify you before a meeting. 3. Use the dial pad to enter the time. For example: You will be notified - Toshiba DKT3210-SD | User Guide - Page 125
properties or to change the application content. • Properties - By pressing the Properties soft key, you can access the Auto cycle screen shown above. • Content - By pressing the Content soft key, you can access Stock Quotes, News and Weather. Strata CIX and CTX IPT/DKT Telephone 08/07 107 - Toshiba DKT3210-SD | User Guide - Page 126
and Weather 1. From Configure, select Content. The Add/Remove Stock Quote screen displays (shown right). Press the next soft key to Add/Remove Weather. 2. , the following screens display depending on the selection. 108 Add Stock Quote Remove Stock Quote Strata CIX and CTX IPT/DKT Telephone 08/07 - Toshiba DKT3210-SD | User Guide - Page 127
> Next. Select Add/Remove. Depending on your selection, one of the screens below displays. Add Company News Remove Company News To Change or enter a new date on the Add Company News screen 1. Press the Left T arrow button to select the day/year. Strata CIX and CTX IPT/DKT Telephone 08/07 109 - Toshiba DKT3210-SD | User Guide - Page 128
2. Press # to enter the Alpha mode. 3. Use the letters on the dial pad to enter the headline. Weather You must have administrative privileges to add or Remove Company News and Weather screen displays. 4. Press the corresponding Add or Remove softkey. 110 Strata CIX and CTX IPT/DKT Telephone 08/07 - Toshiba DKT3210-SD | User Guide - Page 129
the appropriate location. 4. Press the soft key next to the location. 5. Press the Find soft key. 6. Press the soft key next to the location that displays. 7. Select the city or location you wish to see by using the navigational buttons. 8. Press the Enter button on the selection. 9. Press the Add - Toshiba DKT3210-SD | User Guide - Page 130
or location by using the navigational buttons. 6. Press the Enter button on the selection. 7. Press the Remove soft key. 112 Strata CIX and CTX IPT/DKT Telephone 08/07 - Toshiba DKT3210-SD | User Guide - Page 131
shows how to use the DKT3214-SDL (shown below) large screen directory display and individual name searches. FRED S NO. 3371 FEB 19 MONDAY 12:00 DIRECT SS SYSTEM SD PERSONAL SD EXTERNAL DIR INTERNAL DIR 5908 DKT3214-SDL Telephone Q Z Msg Spdial Vol Mic Redial Spkr Cnf/Trn Hold Strata CIX and - Toshiba DKT3210-SD | User Guide - Page 132
Station Selection System Speed Dial Personal Speed Dial Direct Station Selection System Speed Dial FRED S NO. 3371 FEB 19 MONDAY 12:00 DIRECT SS SYSTEM SD PERSONAL SD EXTERNAL DIR INTERNAL DIR 5860 Soft Keys Direct Station Selection This option displays all named stations in alphabetical - Toshiba DKT3210-SD | User Guide - Page 133
System Speed Dial Numbers alphabetically (typically, external destinations). Internal Directory enables you to search all of the internal name extensions alphabetically. This saves time since you do not have to step through the lists screen-by-screen. See Table 13 on page 117 for instructions on - Toshiba DKT3210-SD | User Guide - Page 134
Dial numbers. To assign Station Speed Dial names 1. Enter User Programming Mode by dialing #9876 or, press Program. 2. Press Spdial. "SPEED DIAL MODE" displays on the LCD. 3. Enter a Speed Dial location number (100~199, depending on system programming). 116 Strata CIX and CTX IPT/DKT Telephone - Toshiba DKT3210-SD | User Guide - Page 135
and Speed Dial Listings 4. Enter the telephone number to be stored. If you normally a dial line access code (such as 9) and/or and area code, enter the codes before the telephone number. Example: Press the for "A." 5. Press Spkr, then input the name that will appear in the Personal SD directory - Toshiba DKT3210-SD | User Guide - Page 136
This page is intentionally left blank. - Toshiba DKT3210-SD | User Guide - Page 137
Strata CIX My Phone Manager User Guide to edit Alarm Clock, Call Monitor, Return Call and Call Screen using My Phone Manager software. • To see how these features interacts with other FeatureFlex features, refer to "FeatureFlex Interactions" on page 125. Strata CIX and CTX IPT/DKT Telephone 08/07 - Toshiba DKT3210-SD | User Guide - Page 138
set reminders/notifications on your telephone. At the time set your telephone LCD displays Alarm, the LED will blink Red and the telephone will ring clock. • The telephone will not ring at the alarm setting if the phone is not idle and it has been programmed to Call Forward. To set an alarm clock - Toshiba DKT3210-SD | User Guide - Page 139
is picked up the message recording stops. To enable and disable Call Monitor on your telephone 1. While on hook, press the idle Call Monitor button. You hear the voice prompt "Enter your security code." 2. Enter your voicemail password (maximum of 16 digits; numbers 0~9). LCD displays "Talk to xxx - Toshiba DKT3210-SD | User Guide - Page 140
Mailbox. 2. Press 1 to play your messages. If you decide to return the call, press 6 on your dial pad or the Reply soft key. 3. Then, press 1 to reply to a mailbox ...or press 2 to return the Call. The Voice Mail calls the caller and transfers you to the caller. Note When you press 2, the "Return - Toshiba DKT3210-SD | User Guide - Page 141
an announcement. For an incoming call 1. The voice mail prompts the caller to say his name. 2. The caller mentions his name. Voice mail then transfers the call to the extension. The caller is made to hold while voicemail tries the extension. 3. The telephone rings, voice mail announces: "You have - Toshiba DKT3210-SD | User Guide - Page 142
want to transfer the call and voice mail will transfer it to the destination. One Number Access This feature requires My Phone Manager, refer to the Strata CIX My Phone Manager User Guide for My Phone Manger user instructions. Hot Desk Hot Desk enables a user to use a shared office telephone with - Toshiba DKT3210-SD | User Guide - Page 143
Call Call Return Call Monitor One Number Access Hot Desk Phantom DN Conference/Transfer Multiple Appearances All Call Forwarding Busy Forwarding Auto Attendant Alarm Clock Screen Call Call Return Call Note 6. See Note 6. See Note 6. See Note 6. OK Strata CIX and CTX IPT/DKT Telephone 08/07 125 - Toshiba DKT3210-SD | User Guide - Page 144
feature will not turn on. 5. If a Hot Desk user does not login to a phone, all calls will be routed to user's mail box regardless of Call Forwarding setting. 6. If a call is transferred from Auto Attendant, FeatureFlex feature is not activated. 126 Strata CIX and CTX IPT/DKT Telephone 08/07 - Toshiba DKT3210-SD | User Guide - Page 145
8 User programming enables you to change your telephone's layout/registration and other settings. With user programming you can re-define Flexible Buttons to perform other functions. • Enter numbers in your personal Speed Dial list • Program One Touch and Flexible Buttons • Register Call Forward - Toshiba DKT3210-SD | User Guide - Page 146
set the Call Forward (CF) destination and CF-No Answer timer for the CF buttons. • One Touch - Users can set speed dial and custom feature access code sequences for One Touch buttons. • Background Music - Users can select Quiet Tone or the music source (up to 15) that will play on their telephone - Toshiba DKT3210-SD | User Guide - Page 147
590 Phantom Extension Message Waiting 560 Privacy 320 Privacy Release 330 Night Transfer 600 Record to VM 630 Pause/Resume recording 640 Release Button 270 Release/Answer 280 Split 860 Speed Dial 260 User Programming Mode 650 Strata CIX and CTX IPT/DKT Telephone 08/07 129 - Toshiba DKT3210-SD | User Guide - Page 148
User Programming One Touch Buttons One Touch Buttons One Touch buttons can be used for storing frequently used features or dialed numbers, such as Speed Dial numbers (use Speed Dial Codes to store additional numbers). Onetouch buttons can be preassigned to your telephone - your System Administrator - Toshiba DKT3210-SD | User Guide - Page 149
#30 - code for All Call Page which allows the user to page the location of the orbited call. To Use a One Touch Button Press the One Touch button. Setting/Changing a Personal Speed Dial Code See "Storing a System/Station Speed Dial Number" on page 66. Strata CIX and CTX IPT/DKT Telephone 08/07 - Toshiba DKT3210-SD | User Guide - Page 150
User Programming Feature Codes Feature Codes Feature Access Codes are entered as a sequence on your telephone to use a particular feature. For an example of Call Forward, see "Call Forward Examples" on page 43. Table 16 Feature Access Codes Feature Account Code (while on a call) Attendant - Toshiba DKT3210-SD | User Guide - Page 151
Way #494 Dialing Special Characters from a Rotary Phone * Simulate Dialing Simulate Dialing # Dial 441 Dial 440 DISA Security Code - Change Ext. button + #658 + old Security Code (1~15 digits) + # + new Security Code (1~15 digits) + # Distinctive Ringing - See "Distinctive Ringing" on page - Toshiba DKT3210-SD | User Guide - Page 152
User Programming Feature Codes Table 16 Feature Access Codes (continued) Feature Manually turn off MW LED Retrieve a received MW Activate MW at another Station without Ringing Cancel MW at another Station without Ringing Messaging - Advisory Advisory Message - Activation Advisory Message - - Toshiba DKT3210-SD | User Guide - Page 153
User Programming Feature Codes Table 16 Feature Access Codes (continued) Feature Feature Access Code Sequences1 Speed Dial (Storing an SD number) Station2 #66 + nnn + Phone No.3 + # nnn = 100~199 SD bin numbers System2 #66 + nnn + Phone No.3 + # nnn = 200~999 SD bin numbers Speed Dial ( - Toshiba DKT3210-SD | User Guide - Page 154
(outside line) Hold - Recall (when held call recalls your idle station) Hold - Exclusive Recall Internal Call (while station ringing) Busy Station Transfer (outside call transferred to your busy station from a designated station or AA) After disconnecting first call... Conference Your Station - Toshiba DKT3210-SD | User Guide - Page 155
• IP Direct Station Selection (IDSS) Console - operates alongside an IP telephone and has 60 line/feature buttons. Up to three consoles can operate with one IP telephone. Note The CIX can support up to two IADM2020, but it cannot support the IDSS2060. Strata CIX and CTX IPT/DKT Telephone 08/07 137 - Toshiba DKT3210-SD | User Guide - Page 156
features of the DADM3120/3220. Buttons and LEDs The DADM31 20/3220 provides 20 feature buttons to their respective telephones. These flexible feature buttons can be assigned as CO line, Directory Number, DSS, One Touch Speed Dial or any other flexible feature. Up to two DADMs can be attached to - Toshiba DKT3210-SD | User Guide - Page 157
telephones do not support a DSS console when connected to a Strata CTX running R2.22 or older software. The 60 flexible feature buttons can be assigned as CO line, extension, DSS, One Touch Speed Dial or any other flexible feature. The DDSS3060/3260 console uses dual red and green LEDs to show call - Toshiba DKT3210-SD | User Guide - Page 158
a extension button, it goes idle. When the called station answers the call, the DSS LED stays steady red, and the Line LED becomes steady red. 4. If the station does not answer before a period set in system programming, the call recalls your station. 140 Strata CIX and CTX IPT/DKT Telephone 08/07 - Toshiba DKT3210-SD | User Guide - Page 159
in the Do Not Disturb mode, the call will not transfer, but will recall your telephone immediately. If the call is not answered after a specified Recall time set in system programming, camp-on is cancelled and the transferred call rings back. Call Answering (Outside Line) If your DADM or DSS console - Toshiba DKT3210-SD | User Guide - Page 160
DSS console. SD (if programmed) on either the DSS console or the DADM can be used for page announcements. See "All Call Page" on page 63. Call Forward Override (DSS Override) Either the DSS buttons on your DSS console or the associated telephone can be set in system programming to ring stations that - Toshiba DKT3210-SD | User Guide - Page 161
a pre-programmed Flexible Button on your telephone, instead of dialing a Centrex access code. The Centrex access code, including the necessary flash and/or pause sequence, is activated when the button is pressed. See your Centrex or PBX operations manual for specific details. Ringing Repeat The - Toshiba DKT3210-SD | User Guide - Page 162
Centrex Application Delayed Ringing Delayed Ringing Outside line or Centrex line(s) can be programmed for a 12-second and/or 24-second ring delay at stations to permit alternate answering conditions. Answer the line when your telephone is ringing. 144 Strata CIX and CTX IPT/DKT Telephone 08/07 - Toshiba DKT3210-SD | User Guide - Page 163
Code anytime during a Central Office (outside) line call without interrupting the conversation. All Call Voice Page - Press to page all of the telephones in the All Call Page group. Automatic Busy Redial - Press to set up Automatic Busy Redial after receiving a busy tone on a dialed outside line - Toshiba DKT3210-SD | User Guide - Page 164
not answered after 8~60 seconds (set at your station). Call Frwd External Call Forward-External - Press to forward Private or DID line calls to an external or internal telephone number. Caller ID Caller ID - Press to view the Call History list (may include name/number, date, status). Directed - Toshiba DKT3210-SD | User Guide - Page 165
a telephone number or feature access codes. SD Customized buttons can be used as either System Speed Dial numbers or Station Speed Dial Button numbers. Spd Dial Lng Pause (Long) - Press to insert a 10-second pause when programming Speed Dial Pause numbers. Spd Dial Pause Pause - Press to set - Toshiba DKT3210-SD | User Guide - Page 166
This page is intentionally left blank. - Toshiba DKT3210-SD | User Guide - Page 167
, 26 line selection, 14 automatic hold, 26 B background music (BGM), 39, 129, 132 busy override, 60 button labels, 145 programming, 129 buttons 3200-series LCD, 5, 11 DSS on ADMs and DSS consoles, 139 extension, xi fixed, 3, 10 flexible, 4, 11 one touch, 130 C caller ID, 47 call forward access codes - Toshiba DKT3210-SD | User Guide - Page 168
52 DISA 150 security code, 133 distinctive ringing, 53 DKT3200-series telephones, 1 do not disturb, 54, 133 override, 60 door lock, 55 control, 133 door phone, 56 calling, 133 drop, 24 DSS, 52 buttons on ADMs and DSS consoles, 139 call answering, 141 call forward override, 142 calling, 140 console - Toshiba DKT3210-SD | User Guide - Page 169
, 13 ringing preference, 14 line button, 13, 20 M making a call, 15 message waiting, 18, 133 message waiting light on another telephone, 19 on phantom ext/MW, 19 messaging advisory, 134 Mic button, 19 microphone, 82 microphone cut-off, 58, 59, 129 Msg button/LED, 18 N names storing speed dial, 97 - Toshiba DKT3210-SD | User Guide - Page 170
personal speed dial, 66, 96, 115 pickup, 49 pick up group calls, 49 pooled line group, 13 privacy, 64 override, 62 private network access, 134 programming buttons, 129 R redial, 20 repeat last number dialed, 134 152 return call, 122 ringing distinctive settings, 53 line preference, 14 ringing line - Toshiba DKT3210-SD | User Guide - Page 171
system speed dial, 66, 96, 115 T tabs, 94 tone⁄pulse dialing, 68 tone signaling, 14 transfer, 20 travelling class override, 135 two (tandem) CO line connection, 23 U uniform call distribution (UCD), 69 user programming, 127, 129, 135 V voice first signaling, 14 voice mail access codes, 135 call
-
 1
1 -
 2
2 -
 3
3 -
 4
4 -
 5
5 -
 6
6 -
 7
7 -
8
-
9
-
10
-
11
-
12
-
13
-
14
-
15
-
16
-
17
-
18
-
19
-
20
-
21
-
22
-
23
-
24
-
25
-
26
-
27
-
28
-
29
-
30
-
31
-
32
-
33
-
34
-
35
-
36
-
37
-
38
-
39
-
40
-
41
-
42
-
43
-
44
-
45
-
46
-
47
-
48
-
49
-
50
-
51
-
52
-
53
-
54
-
55
-
56
-
57
-
58
-
59
-
60
-
61
-
62
-
63
-
64
-
65
-
66
-
67
-
68
-
69
-
70
-
71
-
72
-
73
-
74
-
75
-
76
-
77
-
78
-
79
-
80
-
81
-
82
-
83
-
84
-
85
-
86
-
87
-
88
-
89
-
90
-
91
-
92
-
93
-
94
-
95
-
96
-
97
-
98
-
99
-
100
-
101
-
102
-
103
-
104
-
105
-
106
-
107
-
108
-
109
-
110
-
111
-
112
-
113
-
114
-
115
-
116
-
117
-
118
-
119
-
120
-
121
-
122
-
123
-
124
-
125
-
126
-
127
-
128
-
129
-
130
-
131
-
132
-
133
-
134
-
135
-
136
-
137
-
138
-
139
-
140
-
141
-
142
-
143
-
144
-
145
-
146
-
147
-
148
-
149
-
150
-
151
-
152
-
153
-
154
-
155
-
156
-
157
-
158
-
159
-
160
-
161
-
162
-
163
-
164
-
165
-
166
-
167
-
168
-
169
-
170
-
171
 |
 |

Telecommunication Systems Division
August 2007
Strata CIX and CTX
IPT/DKT Telephone
User Guide
®