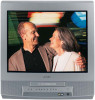
Toshiba MV20Q41 User Manual
Toshiba MV20Q41 Manual
 |
View all Toshiba MV20Q41 manuals
Add to My Manuals
Save this manual to your list of manuals |
Toshiba MV20Q41 manual content summary:
- Toshiba MV20Q41 | User Manual - Page 1
AND VIDEO CASSETTE RECORDER MV13Q41 MV20Q41 Introduction 2 Connections 11 Basic setup 13 TV operation 18 OWNER'S MANUAL Playback 27 Recording 32 Others 37 Illustration of MV13Q41 ©2005 Toshiba Corporation Before operating the unit, please read this manual thoroughly. 5S20101A [E]Cover 1 12 - Toshiba MV20Q41 | User Manual - Page 2
the user to the presence of important operating and maintenance (servicing) instructions in the literature accompanying the appliance. WARNING: TO PREVENT is connected. - Consult the dealer or an experienced radio/TV technician for help. CAUTION: Changes or modifications not expressly approved - Toshiba MV20Q41 | User Manual - Page 3
refer to the respective pages on this Own- er's Manual for their operating instructions. 11. GROUNDING OR POLARIZATION This unit is equipped with a , provides information with respect to proper grounding of the mast and supporting structure, grounding of the lead-in wire to an antenna discharge - Toshiba MV20Q41 | User Manual - Page 4
instructions. Adjust only those controls that are covered by the operating instructions, as an improper adjustment of other controls 20. SAFETY CHECK Upon completion of any service or repairs to this unit, ask the service CABLE TV SYSTEM INSTALLER This reminder is provided to call the Cable TV system - Toshiba MV20Q41 | User Manual - Page 5
Introduction Power source Wider Hole and Blade AC Outlet Polarized AC Cord Plug (One blade is wider than the other.) TO USE AC POWER SOURCE Use the AC polarized line cord provided for operation on AC. Insert the AC cord plug into a standard 120V 60Hz polarized AC outlet. Notes: • Never connect - Toshiba MV20Q41 | User Manual - Page 6
may be distorted. In this case, place the unit away from the TV, radio, or VCR. Moisture condensation damages the unit. Please read the you use a chemical saturated cloth to clean the unit, follow that product's instructions. To obtain a clear picture The unit is a high technology, precision device - Toshiba MV20Q41 | User Manual - Page 7
SAFEGUARDS 2 Power source 5 Precautions 6 Contents 7 Identification of controls 8 Others Reception disturbances 37 Troubleshooting 38 Video head cleaning 39 Specifications 40 Limited warranty 41 Connections Antenna connections 11 Cable TV connections 12 Basic setup Starting setup 13 - Toshiba MV20Q41 | User Manual - Page 8
Introduction Identification of controls See the page in for details. Front panel Illustration of MV13Q41 Power button Remote sensor 10 Cassette loading slot 27 TIMER REC indicator !" REC indicator 32 REC button 32 VOLUME ▲/▼ buttons 19 PHONE jack 19 LINE IN (VIDEO/AUDIO) - Toshiba MV20Q41 | User Manual - Page 9
Remote control The instructions in this manual describe the functions on the remote control. See the page in for details. EJECT button 27 TV D.TRACKING button 29 VOL +/- button 18 MUTE button 19 CLOSED CAPTION button 20 ENTER button 13 CANCEL button 22 STOP button 28 INDEX button 31 FF button - Toshiba MV20Q41 | User Manual - Page 10
on-screen menu system. • You can directly access specific channels using Direct channel selection buttons. Illustration of MV13Q41 Operation: • Aim the remote control at the remote sensor and press control buttons to operate. • Operate the remote control within 30° angle on either side of the - Toshiba MV20Q41 | User Manual - Page 11
Connections Antenna connections If you are using an indoor or outdoor antenna, follow the instructions below that correspond to your antenna system. If you are using a cable TV service (CABLE), see page 12 for Cable TV connections. Combination VHF/UHF antenna (Single 75 ohm cable or 300 ohm twin- - Toshiba MV20Q41 | User Manual - Page 12
cable directly to the Antenna jack on the back of the unit. 75 ohm coaxial cable For subscribers to scrambled cable TV service If you subscribe to a cable TV service which requires the use of a converter/descrambler box, connect the incoming 75 ohm coaxial cable to the converter/descrambler box - Toshiba MV20Q41 | User Manual - Page 13
: CANCEL 3 Press ▲ or ▼ to select "START", then press ENTER. If you select "CANCEL" and press ENTER, the STARTING SETUP stops and changes to the TV screen. AUTO SETUP START CANCEL Notes: • The starting setup function will work only when you press POWER for the first time. • In "AUTO CLOCK" setting - Toshiba MV20Q41 | User Manual - Page 14
is set to "OFF", the auto clock adjustment does not function. • Set the clock manually 16 . Notes: • If the unit does not operate properly, or No key operation (by the unit and/or the remote control): Static electricity, etc., may affect the player's operation. Disconnect the AC power cord once - Toshiba MV20Q41 | User Manual - Page 15
within broadcast range of two You can set the daylight saving time automatically or stations in two different time zones, the unit may recognize manually. the wrong station for the auto clock set. To correct the situation: 1 Press MENU, then press B or A to select option. 1 Press MENU, then press - Toshiba MV20Q41 | User Manual - Page 16
clock setting You must set the date and time manually for timer recordings, ON/OFF timer and daylight saving time if the auto clock process did not set them correctly. EXAMPLE: Setting the clock to "8: - Toshiba MV20Q41 | User Manual - Page 17
option. LANGUAGE/ IDIOMA/LANGUE PICTURE PICTURE PREFERENCE ▲/▼/B/ A ENTER MENU TV/VCR operation status Press DISPLAY to display the information on the screen. To cancel the display, press DISPLAY again. While watching TV Day of the week Clock 8 : 47AM MON CH 125 Channel / / - Toshiba MV20Q41 | User Manual - Page 18
. Example, to select channel 120, press "120". NOTE FOR CHANNELS 1-12: If only 1 or 2 buttons are pressed, the corresponding channel will be selected in 2 seconds. TV VHF 2-13 UHF 14-69 CABLE VHF 2-13 STD/HRC/IRC 14-36 (A) (W) 37-59 (AA) (WW) 60-85 (AAA) (ZZZ) 86-94 (86) (94 - Toshiba MV20Q41 | User Manual - Page 19
unit to turn off after a preset amount of time, press SLEEP on the remote control. The clock will count down 10 minutes for each press of SLEEP (120, the PHONE jack on the front panel. If you connect headphones, the sound from TV speakers is muted. ■ MUTE Press MUTE to switch off the sound. The unit - Toshiba MV20Q41 | User Manual - Page 20
TV closed captions, look in your TV guide for the closed captions symbol (CC). TO CAPTIONS Press CLOSED CAPTION to switch between normal TV and the two closed caption modes (captions signal. • If using an indoor antenna or if TV reception is very poor, the closed caption decoder may not - Toshiba MV20Q41 | User Manual - Page 21
desired channel to be added or deleted using Direct channel selection (0-9) or ▲ / ▼. 4 Press MENU repeatedly until the menu screen is cleared. Cable TV chart The chart below is typical of many cable system channel allocations. 3 Press B or A to select "ADD" or "DELETE", whichever function you - Toshiba MV20Q41 | User Manual - Page 22
operation Setting the V-Chip An age limitation can be set to forbid children to watch programs according to "TV RATING" and "MOVIE RATING" level set. To use the V-Chip function, you must register a password. Notes: • If you forget the password, you cannot set the V- - Toshiba MV20Q41 | User Manual - Page 23
NC-17 : 17 years old and above X : Adult only 5 Press ▲ or ▼ to select "V-CHIP". V-CHIP SET TV RATING MOVIE RATING TV-Y7 OFF / / / / ENTER/MENU When you select TV- Y7, TV-PG, TV-14 or TV-MA, press DISPLAY to show the contained rating. Press ▲/▼/B/ A to select the desired item you want. 3 Press - Toshiba MV20Q41 | User Manual - Page 24
channel. PROGRAM To set the on timer ENTER ▲/▼/B/ A MENU EXAMPLE: Turning on the TV to channel 12 at 7:00 AM, MONDAY-FRIDAY. 1 Press MENU. Press B or TIMER turns on if no OFF TIMER has been set. To continue watching the TV, press any button to cancel the one hour automatic shut off. • To cancel - Toshiba MV20Q41 | User Manual - Page 25
OFF TIMER once, the unit will automatically turn off at the same time everyday. PROGRAM To set the off timer ▲/▼/B/ A MENU EXAMPLE: Turning off the TV at 11:30 PM. 1 Press MENU. Press B or A to select option. You can also select ON/OFF TIMER by pressing PROGRAM twice. CLOCK SET ON - Toshiba MV20Q41 | User Manual - Page 26
TV operation Picture control adjustment/ Adjusting the picture preference Picture controls are factory preset but you , and Memory-as described in the following table: MENU ▲/▼/B/ A ENTER CANCEL Picture control adjustment Adjusting the picture preference 1 Press MENU, then press B or A to select - Toshiba MV20Q41 | User Manual - Page 27
tape without an erase prevention tab, playback will start automatically. Unloading 1 Press STOP/EJECT on the front panel or press EJECT on the remote control. 2 Remove the cassette tape. Automatic tape eject This unit will automatically rewind the tape when the tape has ended. And when the tape - Toshiba MV20Q41 | User Manual - Page 28
or recording with STOP. To rewind the tape: Press REW on the front panel or press REV on the remote. 4-9 2 To start playback: Press PLAY on the front panel or on the remote. Playback will start. " " will appear on the screen for about 4 seconds. PLAY To forward the tape: Press FF on - Toshiba MV20Q41 | User Manual - Page 29
PLAY FF REV TRK +/- Picture search Digital tracking controls Reverse picture search function Press REV once or twice (Standard Play) 3 X 5 X SLP (Super Long Play) 9 X 15 X MANUAL TRACK DIGITAL TRACK Still picture Press PAUSE/STILL during playback. To resume normal playback, press PLAY - Toshiba MV20Q41 | User Manual - Page 30
Playback Convenient function DISPLAY ▲/▼/B/ A MENU PLAY REC COUNTER RESET Repeat playback Using the real time tape counter The entire video tape will be played until its end. The tape The on-screen real time tape counter shows the tape will automatically rewind to the beginning and the - Toshiba MV20Q41 | User Manual - Page 31
or is displayed INDEX NO. (up to 9) 4 Press STOP. 9:00AM THU CH 012 00:20:00 SP Notes: • When you record an INDEX mark at the very beginning of the tape, CH 012 00:00:00 SP To monitor a TV program Press TV MONITOR while in the playback mode. The video tape will continue to play while - Toshiba MV20Q41 | User Manual - Page 32
will eject when REC is pressed for recording. Notes: • The unit channel cannot be changed during recording. • If power is switched off during recording, the TV goes off and the VCR continues to record. Press STOP to halt the recording and turn off the VCR. 32 5S20101A [E]p32-36 32 12 - Toshiba MV20Q41 | User Manual - Page 33
9 times 6:00 5 times 2:00 10 times NORMAL REC OTR 0 : 30 CH 110 00 : 00 : 00 SP 3 Set "TV" or "CABLE" option to the appropriate position 21 . TV - VHF/UHF channels CABLE - Cable TV channels To cancel OTR Press STOP. 4 Press Direct channel selection (0-9) or CH / to select the channel to be - Toshiba MV20Q41 | User Manual - Page 34
Timer recording can be programmed on-screen with the remote control. The built-in timer allows automatic unattended recording time and date are correct 16 . Example: Program a timer recording for 23rd day, channel 125 (Cable TV), 7:00 - 9:30 PM (Tape speed : SLP). 1 Press MENU, then press B or A to - Toshiba MV20Q41 | User Manual - Page 35
the day is Friday. Press PROGRAM once. The TV screen displays the timer program list. Press PROGRAM again. The TV screen displays the ON/OFF timer setting. Press time as shown in the diagram below. Program 1 Program 2 Program 3 Recording Control Settings 8 : 00 9 : 00 10 : 00 11 : 00 Prog.1 - Toshiba MV20Q41 | User Manual - Page 36
. To VIDEO IN Illustration of MV13Q41 To AUDIO IN Audio/Video cable (not supplied) For duplicating a previously recorded tape from a camcorder, follow the camcorder manufacturer's instructions. A typical camcorder dubbing hookup is shown above. 36 5S20101A [E]p32-36 36 12/16/04, 4:28 PM - Toshiba MV20Q41 | User Manual - Page 37
or other large objects. Changing the direction or position of the antenna may improve the reception. SNOW If the unit is located far from the TV station, in a fringe reception area where the signal is weak, small dots may appear in the picture. If the signal is extremely weak, the installation - Toshiba MV20Q41 | User Manual - Page 38
Troubleshooting Check the following guide for the possible cause of a problem before contacting service. SYMPTOMS CAUSE POWER No power. The AC power cord is not connected. Although the power is on, the Cassette is not inserted. unit does not operate. The TIMER REC button is depressed. TV - Toshiba MV20Q41 | User Manual - Page 39
TV recording Adjust tracking manually using the 29 TRK +/- buttons on the remote control. Clean the video heads. 39 Aim the remote control at the remote 10 sensor. is the case, have the unit checked by qualified service personnel. Good picture Snowy picture VIDEO HEAD CLEANING Video head - Toshiba MV20Q41 | User Manual - Page 40
2 x AAA batteries 300-75 ohm matching transformer Remote control Batteries (2 x AAA) 86 Watts Width: 19-3/4 inches (502 mm) Height: 20-3/16 inches (513 mm) Depth: 19-1/4 inches (489 mm) 48.5 Ibs. (22 kg) *Screen size is approximate. • Designs and specifications are subject to change without notice - Toshiba MV20Q41 | User Manual - Page 41
Toshiba Manual and Demographic Card You should read this owner's manual service charges for set installation, set up, adjustment of customer controls and installation or repair of antenna systems are not covered by this warranty. Reception problems use in violation of instructions furnished by us; or - Toshiba MV20Q41 | User Manual - Page 42
instructions in this manual and checking the section " Troubleshooting" and you still find that service is needed; ( 1 ) Call the TACP toll free number 1-800-631-3811 after you find a defective product or part to find the nearest Toshiba Authorized Service warranty gives you specific legal rights and - Toshiba MV20Q41 | User Manual - Page 43
Memo ... Others 5S20101A [E]p41-Back 43 12/16/04, 4:28 PM 43 - Toshiba MV20Q41 | User Manual - Page 44
05/01 K 5S20101A [E]p41-Back 44 Printed in Thailand 12/16/04, 4:28 PM
-
 1
1 -
 2
2 -
 3
3 -
 4
4 -
 5
5 -
 6
6 -
 7
7 -
8
-
9
-
10
-
11
-
12
-
13
-
14
-
15
-
16
-
17
-
18
-
19
-
20
-
21
-
22
-
23
-
24
-
25
-
26
-
27
-
28
-
29
-
30
-
31
-
32
-
33
-
34
-
35
-
36
-
37
-
38
-
39
-
40
-
41
-
42
-
43
-
44
 |
 |

COMBINATION COLOR
TELEVISION AND VIDEO CASSETTE
RECORDER
MV13Q41
MV20Q41
OWNER’S MANUAL
2
11
13
27
32
37
Introduction
Connections
Basic setup
Playback
Recording
Others
©2005 Toshiba Corporation
Before operating the unit, please read this manual thoroughly.
18
TV operation
Illustration of MV13Q41
5S20101A [E]Cover
12/16/04, 4:27 PM
1