Toshiba S9 Owners Manual
Toshiba S9 - TDP S9 - DLP Projector Manual
 |
UPC - 032017301931
View all Toshiba S9 manuals
Add to My Manuals
Save this manual to your list of manuals |
Toshiba S9 manual content summary:
- Toshiba S9 | Owners Manual - Page 1
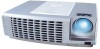
OWNER'S MANUAL DATA PROJECTOR TDP-S9 (SVGA) Others Maintenance Operations Preparations Before Using - Toshiba S9 | Owners Manual - Page 2
is intended to alert the user to the presence of important operating and maintenance (servicing) instructions in the literature accompanying the MODEL NAME: TDP-S9 USA only TRADE NAME: DATA PROJECTOR Tested To Comply With FCC Standards FOR HOME OR OFFICE USE MODEL NAME: TDP-S9 FCC NOTICE: - Toshiba S9 | Owners Manual - Page 3
: (949) 583-3000 WARNING: USA only Changes or modifications made to this equipment, not expressly approved by Toshiba, or parties authorized by Toshiba, could void the user's authority to operate the equipment. Notice: CANADA only This Class B digital apparatus complies with Canadian ICES-003 - Toshiba S9 | Owners Manual - Page 4
TO DANGEROUS VOLTAGE. REFER SERVICING TO QUALIFIED SERVICE PERSONNEL ONLY. 1. Read Owner's Manual 3. Source of Light After unpacking this product, read the owner's manual carefully, and follow all the operating and other instructions. Do not look into the lens while the lamp is on. The strong - Toshiba S9 | Owners Manual - Page 5
Before Using 5. Heat The product should be situated away from heat sources such as radiators, heat registers, stoves, or other products (including amplifiers) that produce heat. 8. Power-Cord Protection Power-supply cords should be routed so that they are not likely to be walked on or pinched by - Toshiba S9 | Owners Manual - Page 6
IMPORTANT SAFETY INSTRUCTIONS (Continued) 10. Lightning storms For added protection for this product during storm, or when it is left unattended and unused for long periods of time, - Toshiba S9 | Owners Manual - Page 7
by following the operating instructions. Adjust only those controls that are covered by the operating instructions as an improper adjustment of lamp rupturing, thoroughly clean the area around the projector and discard any edible items placed in that area. 18. Servicing Do not attempt to service - Toshiba S9 | Owners Manual - Page 8
IMPORTANT SAFETY INSTRUCTIONS (Continued) 19. Replacement Parts When replacement parts are required, be sure the service technician has used of the lamp only should be made by users.) 20. Safety Check Upon completion of any service or repairs to this product, ask the service technician to - Toshiba S9 | Owners Manual - Page 9
a TV or radio may cause interference to the images or audio sound. If this happens, move it away from the TV or radio. • Moving the projector from a low-temperature room to a high-temperature room may cause condensation on the lens or internal parts in the instrument. If you continue to use - Toshiba S9 | Owners Manual - Page 10
projector. Model No. Serial No. Retain this information for future reference. EXEMPTION CLAUSES • Toshiba Corporation or improper operation and other problems. • Toshiba Corporation bears no responsibility for incidental descriptions in this Instruction Manual. • Toshiba Corporation accepts no - Toshiba S9 | Owners Manual - Page 11
The lamp contains inorganic mercury. Please dispose of this product or used lamps in Systems Incorporated. Notational Conventions Used in This Manual • References to pages with related information the battery or leave a dead battery in the remote control. Using the battery improperly may cause it to - Toshiba S9 | Owners Manual - Page 12
SAFETY INSTRUCTIONS 4 POWER SUPPLY CORD SELECTION 9 IMPORTANT PRECAUTIONS 9 EXEMPTION CLAUSES 10 OTHER CAUTIONS AND INFORMATIONS 11 REMOTE the remote control 18 Connection ...20 Operations 21 Turning the power on and off 21 Basic operations ...23 Using handy features 25 Manually selects - Toshiba S9 | Owners Manual - Page 13
Maintenance 34 About lamp ...34 Lamp replacement ...34 Lens and main unit cleaning 36 Others 37 Status display ...37 Before calling service personnel 38 Specifications ...39 List of general specifications 39 List of supported signals (RGB signals 40 List of supported signals (HDTV signals - Toshiba S9 | Owners Manual - Page 14
Reader/English folder, and run ar500enu.exe. Follow the on-screen instructions. Macintosh: Run the CD-ROM, select the Reader/English folder, and run Reader Installer. Follow the on-screen instructions to install the software. ■ Viewing the manual Run the CD-ROM and double-click on Start.pdf. Acrobat - Toshiba S9 | Owners Manual - Page 15
: Remove to replace lamp. p.35 Tilt adjuster : Adjusts the projector's horizontal tilt. p.24 Foot adjuster : Adjusts the vertical projection angle. p.24 Foot adjuster release button : Press to stow the foot adjuster. p.24 Infrared remote sensor : Senses commands from the remote control. p.18 - Toshiba S9 | Owners Manual - Page 16
Names of each part on the control panel and remote control Control panel Remote Control Remote Control transmitter 1 3 3 2 5 4 8 6 7 2 1 9 4 10 13 5 . p.26 SOURCE/Source button : Manually selects an input source. p.25 LAMP indicator : Displays lamp mode. p.22 ON indicator : - Toshiba S9 | Owners Manual - Page 17
S-VIDEO terminal VIDEO terminal Antitheft lock hole Main power switch AC IN socket : Main Function : Senses commands from the remote control. p.18 : Terminal for service purpose. : Input audio signals from video equipment. : Input RGB signal from a computer or other source, or a component video - Toshiba S9 | Owners Manual - Page 18
control 1 Push and slide the battery compartment lid. ■ Operating the remote control Point the remote control toward the projector's infrared remote sensor, and press a button on the remote control. • Operating the projector from the front 1 2 2 Install a Lithium battery. Be sure to align the - Toshiba S9 | Owners Manual - Page 19
Preparations WARNING • Always obey the instructions listed in IMPORTANT SAFETY INSTRUCTIONS when placing the unit. Attempting to clean/replace the lamp at a high site by yourself may cause you to drop down, thus resulting in injury. • If you wish to mount the projector on the ceiling, be sure to - Toshiba S9 | Owners Manual - Page 20
Connection Before connection • Read the owner's manual of the device you are connecting to the projector. • Some types of computer cannot be used or connected to this projector. Check for an RGB output terminal, supported signal p.40 , etc. • Turn off the power of both devices before connecting. • - Toshiba S9 | Owners Manual - Page 21
1 Insert the power cord connector into the AC IN socket of the projector. 2 Insert the power cord plug into a wall or other power outlet following 2 green indicators light: ON and LAMP. After a moment, the start-up screen appears. Control panel Remote Control (Green) Flashing Start-up screen - Toshiba S9 | Owners Manual - Page 22
the LAMP indicator goes off, the cooling fan continues to operate for a short while, in order to expel excess internal heat. If you are in a hurry, there is no problem with unplugging the power cord or turning off the main power switch in this state. C In standby mode Note • The projector consumes - Toshiba S9 | Owners Manual - Page 23
following the instructions "Turning the power on" p.21 2 Select the language. 1 Press the control panel's MENU button or the remote control's Menu projected. Each time you press the control panel's SOURCE button or the remote control's Source button, it switches to the input of the connected - Toshiba S9 | Owners Manual - Page 24
remote control's Volume Volume buttons The speaker volume can be adjusted when an audio signal is being input. Notes • Note that a lamp turn off the LCD display, see the owner's manual of your computer. • If a signal not supported by the projector is input, the "For best image quality, lower - Toshiba S9 | Owners Manual - Page 25
SOURCE button or the remote control's Source button. The projector will detect your source. Remote Control Note • The image may not be projected or auto adjustment/setting may not be performed correctly for input signals other than those supported by the projector p.40 , p.41 . ■ Correcting the - Toshiba S9 | Owners Manual - Page 26
Image menu p.28 . ■ Cutting off the sound temporarily (Mute) Press the remote control's Mute button. The sound is cut off. (The Mute function is menu p.33 . ■ Cutting off the screen temporarily (Blank) Press the remote control's Blank button to cut off the screen temporarily. Press the Blank button - Toshiba S9 | Owners Manual - Page 27
16 on the control panel (main unit side) and remote control. ■ How to use the menus The menu shown below is for operation instructions purposes and might differ from the actual display. p. data will be saved except the lamp hours. The lamp hours will count up from the time when the power is lost. 27 - Toshiba S9 | Owners Manual - Page 28
image. Darker Brighter Adjusts image distortion caused by tilting the projector. Reduce the upper width Reduce the lower width Selects this color reproduction quality. Manually adjusts red. Less red More red Manually adjusts green. Less green More green Manually adjusts blue. Less - Toshiba S9 | Owners Manual - Page 29
■ Video menu Use this menu to adjust video-related items. When using a video source, the on-screen display allows changes to the "Video" menu. Item Saturation Tint Sharpness Description Adjusts a video image from black and white to fully saturated color. Weaker Stronger Adjust the tint of the - Toshiba S9 | Owners Manual - Page 30
■ Display menu Use this menu to adjust display-related items. When using a computer, the on-screen display allows changes to the "Display" menu. Item Phase Tracking H.Position V.Position Description Synchronizes the signal timing of the display with that of the graphic card. If you experience an - Toshiba S9 | Owners Manual - Page 31
for menu and message displayed. [ : Select "Language 1" or "Language 2" ] [ : Enter sub-menu] [ : Select language] [ Control panel's MENU/ Remote control's Enter: Apply] Language 1: English/Deutsch/ !/ !L /Français/Español/ Português/Italiano/ Language 2: Svenska/Polski/Türkçe/ 31 - Toshiba S9 | Owners Manual - Page 32
manually adjusted. Manually selects signal type. It is selectable for RGB input signal only. RGB YCbCr YPbPr Uses this fnction to automatically turn off the lamp if the projector and . Resets the projector to its factory default settings. [Control panel's MENU/ remote control's Enter: Enter - Toshiba S9 | Owners Manual - Page 33
■ Audio menu Use this menu to set audio-related items. Item Volume Mute Description Adjusts the volume. Softer Louder Cuts off the sound temporarily. ON OFF * Pressing repeatly will also change on and off. Operations 33 - Toshiba S9 | Owners Manual - Page 34
it is recommended to use your Toshiba dealership when the lamp has to be exchanged. • When replacing, always use lamp "TLPLS9" (sold separately). CAUTION • If you have been using the projector, the lamp will be very hot, and may cause burn injuries. Wait for the lamp to cool (for longer than 1 hour - Toshiba S9 | Owners Manual - Page 35
hour. 3 Remove the lamp cover. 3 1 1 Lamp cover Loosen the screws on the lamp cover and remove the lamp cover. 2 4 Pull out the lamp. Loosen the screws on the bottom of the lamp assembly. Grasp the lamp handle and pull the 4 1 lamp assembly directly out of the projector. 5 Mount the new - Toshiba S9 | Owners Manual - Page 36
with local regulations. Lens and main unit cleaning WARNING • Request cleaning and maintenance of a ceiling-mounted unit from your projector dealership. Attempting to clean/replace the lamp at a high site by yourself may cause you to drop down, thus resulting in injury. ■ Lens cleaning • Clean the - Toshiba S9 | Owners Manual - Page 37
(Green) Flashing (Amber) The projector system has some problems with its fan, so the projector cannot start up. The projector is in good condition on working. (Green) (Green) (Green) (Green) (Amber) (Green) (Green) Flashing (Green) (Amber) Flashing (Green) The lamp is in good condition - Toshiba S9 | Owners Manual - Page 38
lamp nearing the end of its service life? p.32 , p.37 • Is the remote control's battery drained? • Is the battery inserted into the remote control correctly? p.18 • Is the remote control being used within the effective range? p.18 • Are there any obstructions between the remote control and projector - Toshiba S9 | Owners Manual - Page 39
000 pixels (800 x 600) Lens Zoom lens F=2.5 f=20.2-24.2 mm Lamp High-pressure mercury lamp Projection screen size 27.5-275 inches Projection distance 1.2-10.00m Speaker 2W x usable. Note • Design, specifications, etc. subject to change without notice for improvements, etc. Connection terminal - Toshiba S9 | Owners Manual - Page 40
signals (RGB signals) This projector supports the following RGB signals. Note, however, that depending on the computer model, the screen may show flicker or streaking. Please adjust the projector if this happens. Preset signal 640 x 480 VGA mode 3 VGA VESA 72 Hz VGA VESA 75 Hz VGA VESA 85 Hz - Toshiba S9 | Owners Manual - Page 41
Specifications (Continued) ■ List of supported signals (HDTV signals) Signal format 480i 480p 576i 576p 720p 720p 1080i 1080i kHz) 60 Hz 60 Hz 50 Hz 50 Hz 60 Hz 50 Hz 60 Hz 50 Hz ■ List of supported signals (Video, S-Video signals) Video mode NTSC PAL SECAM PAL-M PAL-N PAL-60 NTSC4.43 fh(kHz) - Toshiba S9 | Owners Manual - Page 42
Pin No. Signal Name Description 1 GND (Y) GND (Y) 3 2 GND (C) GND (C) 1 3 Y Luminance and sync signal 4 C Crominance signal Luminance 0.714V (p-p) 75 Ω Crominance 0.286V (p-p) 75 Ω ■ Separately Sold Product Replacement Lamp Model TLPLS9 42 - Toshiba S9 | Owners Manual - Page 43
-
 1
1 -
 2
2 -
 3
3 -
 4
4 -
 5
5 -
 6
6 -
 7
7 -
8
-
9
-
10
-
11
-
12
-
13
-
14
-
15
-
16
-
17
-
18
-
19
-
20
-
21
-
22
-
23
-
24
-
25
-
26
-
27
-
28
-
29
-
30
-
31
-
32
-
33
-
34
-
35
-
36
-
37
-
38
-
39
-
40
-
41
-
42
-
43
 |
 |

Others
Maintenance
Operations
Preparations
Before Using
OWNER’S MANUAL
DATA PROJECTOR
TDP-S9
(SVGA)