Toshiba SD-V393 User Manual
Toshiba SD-V393 Manual
 |
View all Toshiba SD-V393 manuals
Add to My Manuals
Save this manual to your list of manuals |
Toshiba SD-V393 manual content summary:
- Toshiba SD-V393 | User Manual - Page 1
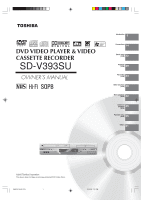
DVD VIDEO PLAYER & VIDEO CASSETTE RECORDER SD-V393SU OWNER'S MANUAL Introduction 2 Connections 14 Basic setup (VCR) 22 Playback (VCR) 29 Recording (VCR) 34 Other functions (VCR) 39 Basic playback (DVD) 42 Advanced playback 45 (DVD) Function setup (DVD) 55 Others 61 ©2005 Toshiba - Toshiba SD-V393 | User Manual - Page 2
. CAUTION: THIS DIGITAL VIDEO PLAYER EMPLOYS A LASER SYSTEM. TO ENSURE PROPER USE OF THIS PRODUCT, PLEASE READ THIS USER'S GUIDE CAREFULLY AND RETAIN FOR FUTURE REFERENCE. SHOULD THE UNIT REQUIRE MAINTENANCE, CONTACT AN AUTHORIZED SERVICE LOCATION. USE OF CONTROLS, ADJUSTMENTS OR THE PERFORMANCE - Toshiba SD-V393 | User Manual - Page 3
bookcase or rack unless proper ventilation is provided and/or the manufacturer's instructions have been adhered to. 10. POWER SOURCE This unit should be line plug (a plug having one blade wider than the other). This plug will fit into the power outlet only one way. This is a safety feature. - Toshiba SD-V393 | User Manual - Page 4
instructions, as an improper adjustment of other controls may result in damage and will often require extensive work by a qualified technician to restore the unit to its normal operation. e. If the unit has been dropped or the cabinet has been damaged. f . When the unit exhibits a distinct change - Toshiba SD-V393 | User Manual - Page 5
owner's manual of the other equipment carefully and follow the instructions when making any connections. 24. LASER BEAM Do not look into the opening of the disc non-polarized AC outlet, do not attempt to file or cut the blade. It is the user's responsibility to have an electrician replace the - Toshiba SD-V393 | User Manual - Page 6
. If you use the DVD/VCR in such a situation, it may damage discs and internal parts. Remove the disc or the video tape, connect the power cord of the DVD/ VCR to the wall outlet, turn on the DVD/VCR, and leave it for two or three hours. After two or three hours, the DVD/VCR will have warmed up and - Toshiba SD-V393 | User Manual - Page 7
not attach paper or tape to discs. Structure of disc contents Normally, DVD video discs are divided into titles, and the titles are sub-divided into chapters. VIDEO CDs and audio CDs are divided into tracks. DVD video disc DVD video disc Title 1 Title 2 Chapter 1 Chapter 2 Chapter 1 Chapter - Toshiba SD-V393 | User Manual - Page 8
and cannot play DVD video discs recorded in any other color system (PAL, SECAM, etc.). Because of problems and errors that can occur during the creation of DVD and Video CD software and/or the manufacture of DVD and Video CD discs, Toshiba cannot guarantee that this DVD/VCR will play every feature - Toshiba SD-V393 | User Manual - Page 9
settings 55 Temporary disabling of rating level by DVD disc 60 Others Language code list 61 Troubleshooting 62 Specifications 63 Limited warranty 64 Other functions (VCR) Stereo recording and playback 39 Second Audio Program (SAP 39 Duplicating a video tape 40 Recording a DVD/CD disc - Toshiba SD-V393 | User Manual - Page 10
Identification of controls See the page in for details. Front panel Cassette loading slot 29 ON/STANDBY button 22 DVD indicator 42 REC button 34 Remote sensor 13 OPEN/CLOSE button 42 REW button 30 Disc tray 42 EJECT button 29 VCR indicator 22 CHANNEL / buttons 34 VCR/DVD mode selector - Toshiba SD-V393 | User Manual - Page 11
Introduction Display window Play indicator VCR indicator (VCR) Still indicator Disc inserted indicator (DVD) Recording indicator (VCR) Track indicator (CD) Multifunctional indicator Tape loaded indicator (VCR) Progressive indicator Timer Recording indicator (VCR) Disc inserted indicator ( - Toshiba SD-V393 | User Manual - Page 12
) The instructions in this manual describe the functions on the remote control. See the page in for details. Remote control VCR DVD button EJECT button (VCR) ' CLOCK/COUNTER button !! VCR MENU button ! SETUP button ## CM SKIP button ! ZOOM button "# TOP MENU button "' Direction buttons SET - Toshiba SD-V393 | User Manual - Page 13
prevent battery acid from leaking into the battery compartment. Remote control basics • Press POWER to turn the DVD/VCR on or off. • Select your desired operating mode (DVD or VCR) using VCR DVD. (DVD or VCR indicator on the front panel will show you which mode is selected.) • Press CH + or CH - to - Toshiba SD-V393 | User Manual - Page 14
instructions. If you are a Cable TV subscriber, skip ahead to page 16 for the proper connections. Antenna to DVD/VCR connection The DVD/VCR picture will not be obtained by the DVD/VCR unless the antenna signal is good. Connect the antenna to the DVD/VCR properly. • For better quality recording, an - Toshiba SD-V393 | User Manual - Page 15
and UHF antenna inputs (numbers 2 and 3 below), use a splitter to connect the DVD/VCR to the TV for VHF and UHF reception. 75 ohm Coaxial Cable (supplied) TV VHF not supplied) TV UHF VHF Note: If a VHF or UHF antenna is used, set the TV/CABLE menu option to the "TV" mode. TV with 300 ohm UHF - Toshiba SD-V393 | User Manual - Page 16
companies offer services permitting reception of extra channels including pay or subscription channels. This DVD/VCR has an Recording scrambled channels. Note: If you are playing a tape or using the tuner built into the DVD/VCR, the converter must be set to the video channel output of the DVD/ VCR - Toshiba SD-V393 | User Manual - Page 17
Make sure the TV/CABLE menu option is set to the "CABLE" mode. This DVD/VCR cannot receive scrambled programs since it does not contain the converter while recording nonscrambled channels. * Using the programmable timer. Prevents: Recording scrambled channels. DVD/VCR 6 Converter/Descrambler - Toshiba SD-V393 | User Manual - Page 18
) TV or monitor with audio/video inputs Notes: • Refer to the owner's manual of the connected TV as well. • When you connect the DVD/VCR to your TV, be sure to turn off the power and unplug both units from the wall outlet before making any connections. • If your television set has one audio input - Toshiba SD-V393 | User Manual - Page 19
the interlace and progressive modes, see page 59. TV or monitor with ColorStream® component video inputs Audio system Notes: • Refer to the owner's manual of the connected equipment as well. • When you connect the DVD/VCR to other equipment, be sure to turn off the power and unplug all of the - Toshiba SD-V393 | User Manual - Page 20
DVD video discs encoded via the Dolby Digital recording system with this dynamic realistic sound by connecting the DVD/VCR to a 6 channel amplifier equipped with a Dolby Digital decoder or Dolby Digital processor. If you have a Dolby Pro Logic Surround decoder, you will 's owner's manual and set the - Toshiba SD-V393 | User Manual - Page 21
to the BITSTREAM/PCM AUDIO OUT jack of the DVD/VCR. Connecting to an amplifier equipped with an MPEG2 audio decoder MPEG2 sound You can enjoy motion picture and live concert DVD video discs encorded via the MPEG2 recording system with dynamic realistic sound by connecting an amplifier equipped - Toshiba SD-V393 | User Manual - Page 22
cannot be tuned on your TV, proceed as follows: set the VCR 3/4 channel selector and the TV to CH 3 or 4, play back a prerecorded tape and tune the TV to receive a sharp color picture from the video cassette recorder. Refer to your TV owner's manual for details. Note: If the unit does not operate - Toshiba SD-V393 | User Manual - Page 23
) for the on-screen displays. VCR DVD VCR MENU ENTER SET +/- Basic setup Setting the language Preparation: • Turn ON the TV and select to the corresponding video input. • Press VCR DVD selector to select the VCR mode. (The VCR indicator will light.) 4 Press VCR MENU until the MENU screen is - Toshiba SD-V393 | User Manual - Page 24
4 minutes for the clock to set itself automatically. POWER VCR DVD VCR MENU ENTER SET +/- CALL AUTO CLOCK setting Preparation: • Turn ON the TV and select the corresponding video input. • Press VCR DVD selector to select the VCR mode. (The VCR indicator will light.) 1 Connect the Antenna or - Toshiba SD-V393 | User Manual - Page 25
time zones, the DVD/VCR may recognize the wrong station for the AUTO CLOCK setting. To correct the situation: You can set the DAYLIGHT SAVING TIME automatically or manually. 1 Press VCR MENU. TSCSAIAYUHMMPSTESTOEREENTRMRUUEESPPCEETASUTEPT OONN OOFFFF 1 Press VCR MENU. Press SET + or - to select - Toshiba SD-V393 | User Manual - Page 26
the date and time correctly, you must set them manually for timer recording and DAYLIGHT SAVING TIME. VCR MENU SET +/- ENTER CANCEL Manual clock setting EXAMPLE: Setting the clock to "8:30 AM" March, 26 (SAT), 2005. 1 Press VCR MENU. 6 After setting the clock, date and time starts functioning - Toshiba SD-V393 | User Manual - Page 27
is in the CABLE mode. VCR DVD VCR MENU ENTER SET +/- TV/CABLE selection Setting channels automatically Preparation: • Turn ON the TV and select to the corresponding video input. • Press VCR DVD selector to select the VCR mode. (The VCR indicator will light.) 1 Press VCR MENU. Press SET + or - to - Toshiba SD-V393 | User Manual - Page 28
setting (continued) VCR MENU ENTER SET +/- 0-9 To ADD/DELETE channels Noise elimination 1 Repeat the step 1 on page 27. Then press SET + or - to select the "ADD/DELETE" and press ENTER. CH SETUP AUTTOVCHCMAEBMLEORY ADD/DELETE +/Ð/ENTER/MENU 2 To Add or Delete desired channels 1) Press Direct - Toshiba SD-V393 | User Manual - Page 29
EJECT on the front panel or on the remote. 2 Remove the cassette tape. or Automatic tape eject This DVD/VCR will automatically rewind the tape when the tape has ended. Once the tape is rewound to its beginning, the cassette tape will be ejected automatically. To prevent accidental erasure To - Toshiba SD-V393 | User Manual - Page 30
video input. • Press VCR DVD selector to select the VCR mode. (The VCR indicator will light). 1 Load a prerecorded tape (When loading a cassette tape without the erase prevention tab, playback will start automatically). Rewind or forward the tape Stop the playback or recording via STOP on remote - Toshiba SD-V393 | User Manual - Page 31
excessively, press SET +/- to stabilize the still picture. Frame by frame picture Press PAUSE/STEP during playback. Press SLOW repeatedly: The picture advances frame by frame. To return to playback, press PLAY or PAUSE/STEP. CM skip Press CM SKIP during playback. The DVD/VCR will search forward - Toshiba SD-V393 | User Manual - Page 32
) Convenience function CLOCK/COUNTER VCR MENU SET +/- ENTER STOP PLAY CALL ZERO RETURN COUNTER RESET Repeat playback The entire video tape will play until its end. The tape will automatically rewind to the beginning and the playback will be repeated. 1 Press VCR MENU. Press SET + or - to select - Toshiba SD-V393 | User Manual - Page 33
, the INDEX mark is not recorded on the tape. SQPB (S-VHS Quasi Playback) You can playback video cassette tapes recorded in the S-VHS system. However, the picture will not have the high resolution of S-VHS system. Note: You cannot record S-VHS video format with this VCR. 2H20101A (E)p32-37 33 - Toshiba SD-V393 | User Manual - Page 34
to the corresponding video input. • Press VCR DVD selector to select the VCR mode. (The VCR indicator will light.) 4 Press Number buttons or CH +/- to select the channel to be recorded. +0 1 Load a cassette tape with the erase prevention tab intact. The DVD/VCR will automatically turn on - Toshiba SD-V393 | User Manual - Page 35
be released after 5 minutes to prevent damage to the tape or the VCR. The VCR will change to the STOP mode. • You can select a recording channel in the recording pause mode. Recording one program while watching another While the VCR is recording, select your desired channel on the TV. When a TV is - Toshiba SD-V393 | User Manual - Page 36
the TV and select to the corresponding video input. • Press VCR DVD selector to select the VCR mode. (The VCR indicator will light.) Example: One-touch Timer Recording for 30 minutes. 1 Load a cassette tape with the erase prevention tab intact. The VCR will automatically turn on. 2 Press SP/SLP to - Toshiba SD-V393 | User Manual - Page 37
with the remote control. The built-in timer allows automatic unattended recording of up to 8 programs within 1 month. VCR DVD EJECT VCR MENU SET +/- ENTER CANCEL TIMER REC Recording (VCR) Timer recording Preparation: • Press VCR DVD selector to select the VCR mode. • Load a cassette tape with - Toshiba SD-V393 | User Manual - Page 38
of the conflicting programs will be lost. The first recording time has priority over the next recording time as shown in the diagram below. Program 1 8 : 00 9 : 00 10 : 00 11 : 00 Program 2 Program 3 Recording Control Settings Prog.1 Deleted Parts Non Recorded Portion Parts Prog.2 Prog - Toshiba SD-V393 | User Manual - Page 39
is the same as for normal recordings. STEREO Note: When using a Cable TV system, stereo TV programs may be transmitted over a mono cable channel. In this case "STEREO" will not appear and the sound will be in mono. Second Audio Program (SAP) Your DVD/VCR is fitted with a SAP broadcast system - Toshiba SD-V393 | User Manual - Page 40
• Turn ON the TV and select the corresponding video input. • Press VCR DVD selector to select the VCR mode. (The VCR indicator will light.) • Load a cassette tape with the erase prevention tab intact. • Load a previously recorded tape into the playback VCR or Camcorder. 1 Press SP/SLP to select the - Toshiba SD-V393 | User Manual - Page 41
DISC IS COPY PROTECTED 2 Press VCR DVD selector to select the DVD mode. The DVD indicator will light. 3 Press PLAY to start playback. 4 Press REC/OTR to start recording. The DVD/VCR will change to the VCR mode automatically and the playback picture or sound will be duplicated on the video cassette - Toshiba SD-V393 | User Manual - Page 42
the disc tray. If the disc is out of the guide, it may damage the disc and cause the DVD/VCR to malfunction. • Do not place a disc which is unplayable in this DVD/VCR. 8 Press STOP to end playback. • The unit records the stopped point, depending on the disc. " " appears on the screen. Press PLAY to - Toshiba SD-V393 | User Manual - Page 43
If a non-compatible disc is loaded, "Incorrect Disc", "Region Code Error" or "Parental Error" will appear on the TV screen according to the type of loaded disc. In this case, check your disc again 8 #' . • Some discs may take a minute or so to start playback. • When you set a single-faced disc label - Toshiba SD-V393 | User Manual - Page 44
Each time you press REW or FF, the playback speed changes. Notes: • The DVD/VCR mutes sound and subtitles during reverse and forward scan of DVD/VCD video discs. However, this unit plays sound during fast forward or fast reverse play of audio CDs. • The playback speed may differ depending on - Toshiba SD-V393 | User Manual - Page 45
VCD Locating desired scene CD Use the title, chapter and time recorded on the DVD disc to locate the desired point to play back. In the case of VCD/CD discs, time and track are used to locate the desired point to play back. To check the title, chapter and time, press DISPLAY. 1 Press SEARCH - Toshiba SD-V393 | User Manual - Page 46
procedure to set the other 2 scenes. MMMaaarrr/kkkEeeenrrrter/C213lear/M0ar0ker 27 54 3 Press MARKER to remove this display. MARKER DVD VCD • The marking is canceled when you open the disc tray or turn the power off. • Some subtitles recorded around the marker may fail to appear. To cancel - Toshiba SD-V393 | User Manual - Page 47
1 Press A-B RPT during playback. The start point is selected. 2 [DVD] Press B/A to select "Chapter" or "Title". A Repeat Off /Play Mode The unit automatically starts repeat playback after finishing the current title or chapter. [Audio CD, Video CD, MP3/WMA CD] Press D to select "Repeat". Press - Toshiba SD-V393 | User Manual - Page 48
back the Video CD with PBC, you cannot set Program playback. • The program is cancelled when you open the disc tray or turn the power off. VCD CD Random playback 1 Press PLAY MODE during playback or stop mode. 3 Press PLAY. The Random Playback will start. 2 Press C/D to select Play Mode, then - Toshiba SD-V393 | User Manual - Page 49
TOP MENU MENU C/D/B/A ENTER PLAY Advanced playback (DVD) ANGLE DVD Changing angles When playing back a disc recorded with multi-angle facility, you can change the angle that you are viewing the scene from. 1 Press ANGLE during playback. The current angle will appear. 2 Press ANGLE repeatedly - Toshiba SD-V393 | User Manual - Page 50
the language is not recorded on the disc. • Changing soundtrack language is cancelled when you open the disc tray. The initial default language or available language will be heard if the disc is played back again. DVD VCD Setting surround sound CD This DVD video player equipped with a "QSound - Toshiba SD-V393 | User Manual - Page 51
: Off Repeat : Off /Play Mode Off • The on screen display will disappear after a few seconds. Notes: • Depending on the DVD, you may not be able to change subtitles, or to turn subtitles on or off. • While playing a DVD, the subtitle may change when you open or close the disc tray. • In some cases - Toshiba SD-V393 | User Manual - Page 52
disc formats (including CD-R containing MP3/WMA files). Given the fact that technology in this area is still maturing, Toshiba cannot guarantee that all genre of recordable discs will produce optimal playback quality. The technical criteria set out in this owner's manual are meant as a guide - Toshiba SD-V393 | User Manual - Page 53
TOP MENU ▲/▼/ / ENTER PLAY STOP 0-9 CD MP3/WMA CD playback 1 Place a disc on which MP3 or WMA files have been recorded onto the disc tray. 5 Press STOP to end playback. 2 A file menu screen will appear on the screen. Press B/A or ENTER to select folder. CD -/72 --:-- Pops 1 Japan 8 flower - Toshiba SD-V393 | User Manual - Page 54
Advanced playback (DVD) MP3/WMA/JPEG operation (continued) TOP MENU MENU ▲/▼/ / ENTER PLAY STOP SKIP / PAUSE 0-9 ANGLE CD JPEG CD playback CD Slide show playback 1 Place a disc on which JPEG files have been recorded onto the tray. 2 A file menu screen will appear on the screen. Press B/A to - Toshiba SD-V393 | User Manual - Page 55
Function setup (DVD) Customizing the function settings You can change the default settings to customize performance to your preference. SETUP C/D/B/A ENTER RETURN DVD VCD Setting procedure CD 1 Press SETUP during stop mode. The following on-screen display appears. 5 To make SETUP screen - Toshiba SD-V393 | User Manual - Page 56
Range Control). 58 To select On or Off for QSound. 58 Input 4-digit password to set the parental level. To select a preferred parental level for the parental setting. To select a preferred file type for playing back a CD 59 containing a mixture of file types. To select a preferred video output - Toshiba SD-V393 | User Manual - Page 57
the "Language code list" $ ). Original: (Audio) The unit will select the first priority language of each disc. Off: (Subtitle) Subtitles do not appear. Notes: • If the selected language is not recorded on the disc, the first-priority language is selected. • If you want to change the OSD language - Toshiba SD-V393 | User Manual - Page 58
differ depending on DVD video disc. QSound This DVD video player equipped with a "QSound". It can produce the effect of being in a cinema or a concert hall. On: The QSound operates. Off: The QSound is disengaged. Note: The QSound setting can also be changed with AUDIO on the remote control # . 58 - Toshiba SD-V393 | User Manual - Page 59
STOP down on the front panel, press 7 on the remote control. "PASSWORD CLEAR" appears on the screen. 5. Enter a new password again. Select Files Parental control setting Some discs are specified not suitable for children. Such discs can be limited not to play back with the unit. 1) Press C or D to - Toshiba SD-V393 | User Manual - Page 60
change, depending on which disc is played. If you select "YES" with the ENTER key, "Your disc exceeds the parental control level#." screen will then appear. Reading Your disc exceeds the parental control level#. Parental Control Level Cancel Picture /Enter/Return 3 If you wish to cancel the set - Toshiba SD-V393 | User Manual - Page 61
Language code list Enter the appropriate code number for the initial settings "Menu", "Subtitle" and/or "Audio" #% . Language Name Code Abkhazian 1112 Afar 1111 Afrikaans 1116 Albanian 2927 Amharic 1123 Arabic 1128 Armenian 1835 Assamese 1129 Aymara 1135 Azerbaijani 1136 Bashkir - Toshiba SD-V393 | User Manual - Page 62
Others Troubleshooting Before calling a service technician, please check the following table for a possible cause of the symptoms and some solutions. Symptoms Solutions DVD/VCR DVD/VCR does not operate. No picture. No sound. The remote control does not function. • Make sure the power cord is - Toshiba SD-V393 | User Manual - Page 63
kΩ, pin jacks (L, R) x 1 Supplied accessories Audio/video cable 1 Remote control (SE-R0170 1 Batteries (R03/AAA 2 75 Ω coaxial cable 1 • This model complies with the above specifications. • Designs and specifications are subject to change without notice. • This model may not be compatible with - Toshiba SD-V393 | User Manual - Page 64
INBOUND TRANSPORTA- (4) Labor service charges for set installation, setup, TION AND INSURANCE CHARGES FOR THE DVD/ adjustment of customer controls and installation or VCR COMBINATION TO THE EXCHANGE CENTER. repair of antenna systems are not covered by this warranty. Reception problems caused by - Toshiba SD-V393 | User Manual - Page 65
"Troubleshooting," RIGHTS WHICH MAY VARY FROM STATE TO you fund that service is needed: STATE IN THE U.S.A. SOME STATES OF THE U.S.A. DO NOT ALLOW LIMITATIONS ON HOW (1) For instructions on how to obtain warranty service LONG AN IMPLIED WARRANTY LASTS, WHEN AN for exchange program DVD/VCR - Toshiba SD-V393 | User Manual - Page 66
Others Memo ... 66 2H20101A (E)p64-BACK 66 2/10/05, 7:35 PM - Toshiba SD-V393 | User Manual - Page 67
Memo ... Others 2H20101A (E)p64-BACK 67 2/10/05, 7:35 PM 67 - Toshiba SD-V393 | User Manual - Page 68
ColorStream and ColorStream Pro are registered trademarks of Toshiba America Consumer Products, L.L.C. 2H20101A (E)p64-BACK 68 Printed in Thailand 2/10/05, 7:35 PM
-
 1
1 -
 2
2 -
 3
3 -
 4
4 -
 5
5 -
 6
6 -
 7
7 -
8
-
9
-
10
-
11
-
12
-
13
-
14
-
15
-
16
-
17
-
18
-
19
-
20
-
21
-
22
-
23
-
24
-
25
-
26
-
27
-
28
-
29
-
30
-
31
-
32
-
33
-
34
-
35
-
36
-
37
-
38
-
39
-
40
-
41
-
42
-
43
-
44
-
45
-
46
-
47
-
48
-
49
-
50
-
51
-
52
-
53
-
54
-
55
-
56
-
57
-
58
-
59
-
60
-
61
-
62
-
63
-
64
-
65
-
66
-
67
-
68
 |
 |

2
14
22
29
34
39
Introduction
DIGITAL VIDEO
42
45
55
61
DVD VIDEO PLAYER & VIDEO
CASSETTE RECORDER
SD-V393SU
OWNER’S MANUAL
©2005 Toshiba Corporation
This device does not tape-record copy protected DVD Video Discs.
Connections
Basic setup
(VCR)
Playback
(VCR)
Recording
(VCR)
Other functions
(VCR)
Basic playback
(DVD)
Advanced
playback
(DVD)
Function setup
(DVD)
Others
2H20101A (E) COV
2/10/05, 7:31 PM
1