Toshiba SD-V394SU Owner's Manual - English
Toshiba SD-V394SU Manual
 |
View all Toshiba SD-V394SU manuals
Add to My Manuals
Save this manual to your list of manuals |
Toshiba SD-V394SU manual content summary:
- Toshiba SD-V394SU | Owner's Manual - English - Page 1
DVD VIDEO PLAYER & VIDEO CASSETTE RECORDER SD-V394SU OWNER'S MANUAL Introduction 2 Connections 14 Basic setup (VCR) 22 Playback (VCR) 29 Recording (VCR) 34 Other functions (VCR) 39 Basic playback (DVD) 42 Advanced playback 45 (DVD) Function setup (DVD) 58 Others 65 ©2006 Toshiba - Toshiba SD-V394SU | Owner's Manual - English - Page 2
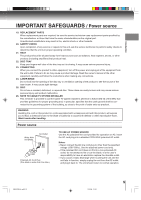
and maintenance (servicing) instructions in the literature VIDEO PLAYER EMPLOYS A LASER SYSTEM. TO ENSURE PROPER USE OF THIS PRODUCT, PLEASE READ THIS USER'S GUIDE CAREFULLY AND RETAIN FOR FUTURE REFERENCE. SHOULD THE UNIT REQUIRE MAINTENANCE, CONTACT AN AUTHORIZED SERVICE LOCATION. USE OF CONTROLS - Toshiba SD-V394SU | Owner's Manual - English - Page 3
. This unit should not be placed in a built-in installation such as a bookcase or rack unless proper ventilation is provided and/or the manufacturer's instructions have been adhered to. 10. POWER SOURCE This unit should be operated only from the type of power source indicated on the rating plate - Toshiba SD-V394SU | Owner's Manual - English - Page 4
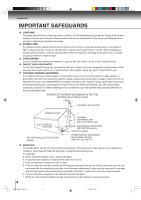
GROUND CLAMP ELECTRIC SERVICE EQUIPMENT NEC-NATIONAL ELECTRICAL CODE S2898A ANTENNA DISCHARGE UNIT (NEC SECTION 810-20) GROUNDING CONDUCTORS (NEC SECTION 810-21) GROUND CLAMPS POWER SERVICE GROUNDING ELECTRODE SYSTEM (NEC ART 250, PART H) 18. SERVICING Do not attempt to service this unit yourself - Toshiba SD-V394SU | Owner's Manual - English - Page 5
PARTS When replacement parts are required, be sure the service technician uses replacement parts specified by the manufacturer or those that have the same characteristics as the original part Read the owner's manual of the other equipment carefully and follow the instructions when making any - Toshiba SD-V394SU | Owner's Manual - English - Page 6
that product's instructions. Do not use the DVD/VCR when moisture condensation may occur. If you use the DVD/VCR in such a situation, it may damage discs and internal parts. Remove the disc or the video tape, connect the power cord of the DVD/ VCR to the wall outlet, turn on the DVD/VCR, and leave - Toshiba SD-V394SU | Owner's Manual - English - Page 7
of 525 progressive scan picture problems, it is recommended that the user switch the connection to the "STANDARD DEFINITION" output. If there are questions regarding our TV set compatibility with this model 525p DVD player, please contact our customer service center. 2I30101B-En_p02-13 7 7 1/12 - Toshiba SD-V394SU | Owner's Manual - English - Page 8
, and cannot play DVD video discs recorded in any other color system (PAL, SECAM, etc.). Because of problems and errors that can occur during the creation of DVD and Video CD software and/or the manufacture of DVD and Video CD discs, Toshiba cannot guarantee that this DVD/VCR will play every feature - Toshiba SD-V394SU | Owner's Manual - English - Page 9
disabling of rating level by DVD disc 64 Others Language code list 65 Troubleshooting 66 Specifications 67 Limited warranty 68 Other functions (VCR) Stereo recording and playback 39 Second Audio Program (SAP 39 Duplicating a video tape 40 Recording a DVD/CD disc 41 2I30101B-En_p02 - Toshiba SD-V394SU | Owner's Manual - English - Page 10
of controls See the page in for details. Front panel ON/STANDBY button 22 REC button 34 VCR/DVD mode selector button 22 OPEN/CLOSE button 42 DVD mode indicator 42 FWD button 30 Cassette loading slot 29 Remote sensor 13 Disc tray 42 EJECT button 29 CHANNEL / buttons 34 AUDIO (L/R)/VIDEO - Toshiba SD-V394SU | Owner's Manual - English - Page 11
Display window Play indicator VCR indicator (VCR) Still indicator DVD disc inserted indicator Recording indicator (VCR) CD inserted indicator Track indicator (CD) Multifunctional indicator Tape loaded indicator (VCR) Progressive indicator Timer Recording indicator (VCR) AM/PM indicator (AM - Toshiba SD-V394SU | Owner's Manual - English - Page 12
Introduction Identification of controls (Continued) The instructions in this manual describe the functions on the remote control. See the page in for details. Remote control VCR DVD button 22 EJECT button (VCR) 29 CLOCK/COUNTER button 33 VCR MENU button 23 SETUP button 58 CM SKIP button 31 ZOOM - Toshiba SD-V394SU | Owner's Manual - English - Page 13
time. This will prevent battery acid from leaking into the battery compartment. Remote control basics • Press POWER to turn the DVD/VCR on or off. • Select your desired operating mode (DVD or VCR) using VCR DVD. (DVD or VCR indicator on the front panel will show you which mode is selected.) • Press - Toshiba SD-V394SU | Owner's Manual - English - Page 14
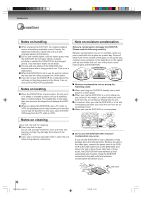
. Connect the antenna to the DVD/VCR properly. • For better quality recording, an indoor antenna or a telescopic antenna is not recommended. The use of an outdoor type antenna is required. 14 • If you are not sure about the connection, please refer to qualified service personnel. 2I30101B-En_p14-17 - Toshiba SD-V394SU | Owner's Manual - English - Page 15
75 ohm output for connection to a TV. If your TV has separate VHF and UHF antenna inputs (numbers 2 and 3 below), use a splitter to connect the DVD/VCR to the TV for VHF and UHF reception. 75 ohm Coaxial Cable (supplied) TV VHF/UHF IN Note: If a VHF or UHF antenna is used - Toshiba SD-V394SU | Owner's Manual - English - Page 16
companies offer services permitting reception of extra channels including pay or subscription channels. This DVD/VCR has an Recording scrambled channels. Note: If you are playing a tape or using the tuner built into the DVD/VCR, the converter must be set to the video channel output of the DVD/ VCR - Toshiba SD-V394SU | Owner's Manual - English - Page 17
the channel selected at the converter box. * Recording of all channels through the converter box. Prevents: * Watching scrambled channels while recording another channel. * Using the DVD/VCR tuner to select channels. 5 Splitter DVD/VCR Incoming Cable Converter/Descrambler A/B Switch A B TV VHF - Toshiba SD-V394SU | Owner's Manual - English - Page 18
yellow) (red) (white) To ANALOG AUDIO OUT Audio/video cable (supplied) To video input (yellow) To audio inputs (red) (white) TV or monitor with audio/video inputs Notes: • Refer to the owner's manual of the connected TV as well. • When you connect the DVD/VCR to your TV, be sure to turn off the - Toshiba SD-V394SU | Owner's Manual - English - Page 19
To audio inputs of the amplifier (red) (white) S-video cable (not supplied) To S-video input TV or monitor with component video inputs Audio system Notes: • Refer to the owner's manual of the connected equipment as well. • When you connect the DVD/VCR to other equipment, be sure to turn off - Toshiba SD-V394SU | Owner's Manual - English - Page 20
and live concert DVD video discs encoded via the Dolby Digital recording system with this dynamic realistic sound by connecting the DVD/VCR to a 6 equipped with a Dolby Digital decoder." Refer to that amplifier's owner's manual and set the amplifier so that you can enjoy Dolby Surround Pro Logic - Toshiba SD-V394SU | Owner's Manual - English - Page 21
connected to the COAXIAL DIGITAL AUDIO OUT jack of the DVD/VCR. Connecting to an amplifier equipped with an MPEG2 audio decoder MPEG2 sound You can enjoy motion picture and live concert DVD video discs encoded via the MPEG2 recording system with dynamic realistic sound by connecting an amplifier - Toshiba SD-V394SU | Owner's Manual - English - Page 22
receive a sharp color picture from the video cassette recorder. Refer to your TV owner's manual for details. Note: If the unit does not operate properly, or No key operation (by the unit and/or the remote control): Static electricity, etc., may affect the player's operation. Disconnect the AC power - Toshiba SD-V394SU | Owner's Manual - English - Page 23
the on-screen display. VCR DVD VCR MENU ENTER SET +/- Basic setup (VCR) Setting the language Preparation: • Turn ON the TV and select to the corresponding video input. • Press VCR DVD selector to select the VCR mode. (The VCR mode indicator will light.) 1 Press VCR MENU. The VCR menu screen will - Toshiba SD-V394SU | Owner's Manual - English - Page 24
VCR DVD VCR MENU ENTER SET +/- CALL AUTO CLOCK setting To set AUTO CLOCK to off Preparation: • Turn ON the TV and select the corresponding video input. • Press VCR DVD selector to select the VCR mode. (The VCR PM everyday when the DVD/VCR turned off. • If ENTER/MENU 5 Press VCR MENU repeatedly to - Toshiba SD-V394SU | Owner's Manual - English - Page 25
within broadcast range of two stations in two different time zones, the DVD/VCR may recognize the wrong station for the AUTO CLOCK setting. To correct the situation XDS in the signal) When you want to set the DAYLIGHT SAVING TIME manually, on the first Sunday in April you set to "ON", and on - Toshiba SD-V394SU | Owner's Manual - English - Page 26
did not set the date and time correctly, you must set them manually for timer recording and DAYLIGHT SAVING TIME. VCR MENU SET +/- ENTER CANCEL Manual clock setting EXAMPLE: Setting the clock to "8:30 AM" March, 25 (SAT), 2006. 1 Press VCR MENU. 6 After setting the clock, date and time starts - Toshiba SD-V394SU | Owner's Manual - English - Page 27
is in the CABLE mode. VCR DVD VCR MENU ENTER SET +/- TV/CABLE selection Setting channels automatically Preparation: • Turn ON the TV and select to the corresponding video input. • Press VCR DVD selector to select the VCR mode. (The VCR mode indicator will light.) 1 Press VCR MENU. Press SET + or - Toshiba SD-V394SU | Owner's Manual - English - Page 28
CLOCK SET LANGUAGE/IDIOMA/LANGUE NO NOISE BACKGROUND ON OFF AUTO CLOCK ON OFF STANDARD TIME DAYLIGHT SAVING TIME 〈+/-/ENTER/MENU 〉 3 Press VCR MENU until the menu screen is cleared. +/Ð/0Ð9/ENTER/MENU 3 Press VCR MENU until the menu screen is cleared. 28 2I30101B-En_p26-31 28 1/12/06, 17:05 - Toshiba SD-V394SU | Owner's Manual - English - Page 29
on the front panel or on the remote. 2 Remove the cassette tape. or Automatic tape eject This DVD/VCR will automatically rewind the tape when recording time Adhesive tape Tape Speed SP (Standard Play) SLP (Super Long Play) T-160 2-2/3 hours 8 hours T-120 2 hours 6 hours Video cassette tape - Toshiba SD-V394SU | Owner's Manual - English - Page 30
video input. • Press VCR DVD selector to select the VCR mode. (The VCR mode indicator will light). 1 Load a prerecorded tape (When loading a cassette tape without the erase prevention tab, playback will start automatically). Rewind or forward the tape Stop the playback via STOP on remote control - Toshiba SD-V394SU | Owner's Manual - English - Page 31
. Manual tracking DVD/VCR will search qualified service personnel. forward through approximately 30 seconds of the tape (e.g. Snowy Picture unwanted commercial time) for each press of CM SKIP (maxi- Notes: mum six presses) and then resume normal playback. • DO NOT ATTEMPT TO CLEAN THE VIDEO - Toshiba SD-V394SU | Owner's Manual - English - Page 32
video tape will play until its end. The tape will This function rewinds the tape to the "00:00" counter position automatically rewind to the beginning and the playback will be automatically. repeated. 1 Press VCR (e.g. the beginning of recording). +/Ð/ENTER/MENU 3 Press VCR MENU until the menu - Toshiba SD-V394SU | Owner's Manual - English - Page 33
, the INDEX mark is not recorded on the tape. SQPB (S-VHS Quasi Playback) You can playback video cassette tapes recorded in the S-VHS system. However, the picture will not have the high resolution of S-VHS system. Note: You cannot record S-VHS video format with this VCR. 2I30101B-En_p32-37 33 - Toshiba SD-V394SU | Owner's Manual - English - Page 34
to the corresponding video input. • Press VCR DVD selector to select the VCR mode. (The VCR mode indicator will light.) 4 Press Number buttons or CH +/- to select the channel to be recorded. +0 1 Load a cassette tape with the erase prevention tab intact. The DVD/VCR will automatically turn - Toshiba SD-V394SU | Owner's Manual - English - Page 35
function will be released after 5 minutes to prevent damage to the tape or the VCR. The VCR will change to the STOP mode. • You can select a recording channel in the recording pause mode. Auto Rewind feature This VCR will automatically rewind the tape when the tape has ended (except during OTR and - Toshiba SD-V394SU | Owner's Manual - English - Page 36
ON the TV and select to the corresponding video input. • Press VCR DVD selector to select the VCR mode. (The VCR mode indicator will light.) Example: One-touch Timer Recording for 30 minutes. 1 Load a cassette tape with the erase prevention tab intact. The VCR will automatically turn on. 2 Press SP - Toshiba SD-V394SU | Owner's Manual - English - Page 37
with the remote control. The built-in timer allows automatic unattended recording of up to 8 programs within 1 month. VCR DVD EJECT VCR MENU SET +/- ENTER CANCEL TIMER REC Recording (VCR) Timer recording Preparation: • Press VCR DVD selector to select the VCR mode. • Load a cassette tape with - Toshiba SD-V394SU | Owner's Manual - English - Page 38
Control Settings Prog.1 Deleted Parts Non Recorded Portion Parts Prog.2 Prog.3 3 To cancel Timer program: Press SET + or - to select the unwanted program, then press CANCEL to cancel the program. DATE START END CH 〈+/Ð/ENTER/CANCEL/MENU 〉 4 Press VCR MENU repeatedly until - Toshiba SD-V394SU | Owner's Manual - English - Page 39
procedure is the same as for normal recordings. STEREO Note: When using a Cable TV system, stereo TV programs may be transmitted over a mono cable channel. In this case "STEREO" will not appear and the sound will be in mono. Your DVD/VCR is fitted with a SAP broadcast system which enables - Toshiba SD-V394SU | Owner's Manual - English - Page 40
• Turn ON the TV and select the corresponding video input. • Press VCR DVD selector to select the VCR mode. (The VCR mode indicator will light.) • Load a cassette tape with the erase prevention tab intact. • Load a previously recorded tape into the playback VCR or Camcorder. 1 Press SP/SLP to select - Toshiba SD-V394SU | Owner's Manual - English - Page 41
REC/OTR to start recording. The DVD/VCR will change to the VCR mode automatically and the playback picture or sound will be duplicated on the video cassette tape. 5 Press STOP when you finish recording. If you wish to stop a DVD/CD disc, press VCR DVD selector to change the DVD mode, then press STOP - Toshiba SD-V394SU | Owner's Manual - English - Page 42
on the disc tray. If the disc is out of the guide, it may damage the disc and cause the DVD/VCR to malfunction. • Do not place a disc which is unplayable in this DVD/VCR. 8 Press STOP to end playback. • The unit records the stopped point, depending on the disc. " " appears on the screen. Press - Toshiba SD-V394SU | Owner's Manual - English - Page 43
VCR section is recording or standing by for timer recording 1) Start to record. Follow steps 1~5 on page 34 . • If the DVD/VCR is standing by for recording, turn on the DVD/VCR. 2) Press VCR DVD selector to select DVD Disc", "Region Code Error" or " instructions supplied with the DVDs remote control - Toshiba SD-V394SU | Owner's Manual - English - Page 44
means either the feature you tried is not available on the disc, or the DVD/VCR cannot access the feature at this time. This does not indicate a problem with the DVD/ VCR. • The unit is capable of holding a still video image or On screen display image on your television screen indefinitely. If you - Toshiba SD-V394SU | Owner's Manual - English - Page 45
and 3 (x 2.0). 2 Press C/D/B/A to view a different part of the frame. You may move the frame from the center DVD VCD Locating desired scene CD Use the title, chapter and time recorded on the DVD Audio CD and Video-CD, only Track and Time can be selected. • In case of the Video-CD playback - Toshiba SD-V394SU | Owner's Manual - English - Page 46
scene. C/D ENTER CLEAR DVD VCD Marking the scenes 1 Press MARKER during playback. Marker1 MMaarrkkeerr23 MARKER DVD VCD Returning to the when you open the disc tray or turn the power off. • Some subtitles recorded around the marker may fail to appear. To cancel the Marker Follow the above - Toshiba SD-V394SU | Owner's Manual - English - Page 47
unit automatically starts repeat playback after finishing the current title or chapter. [Video CD] Press D to select "Repeat". Press ENTER to select "Track" to set A-B Repeat, during certain scenes of the DVD. • A-B Repeat does not work with an interactive DVD, MP3/WMA/ JPEG/DivX® CD. • A-B Repeat - Toshiba SD-V394SU | Owner's Manual - English - Page 48
Advanced playback (DVD) Program playback/Random playback You can arrange the playback order of tracks or files on the disc. And the unit can also select tracks or files at random and playback them. These feature works for Video CD. For Audio CD and MP3/WMA CD, please see "Random playback (CD)" and - Toshiba SD-V394SU | Owner's Manual - English - Page 49
may not be able to change the angles even if multi-angles are recorded on the DVD. DVD Title selection Two or more titles are recorded on some discs. If the title menu is recorded on the disc, you can select the desired title. 1 Press TOP MENU during playback. Title menu appears on the screen - Toshiba SD-V394SU | Owner's Manual - English - Page 50
on screen display will disappear after a few seconds. DVD Setting surround sound This DVD video player equipped with a "QSound". It can produce the in the function setting 62 . • This function works only when the disc recorded with Dolby Digital is played back. • When this function works, the - Toshiba SD-V394SU | Owner's Manual - English - Page 51
Subtitles/To turn off the PBC C/D ENTER PLAY MODE SUBTITLE DVD Subtitles To turn off the PBC When playing back a disc recorded with subtitles, you can select the subtitle language or turn the subtitle off. 1 Press PLAY MODE in the stop mode. 1 Press SUBTITLE repeatedly during playback - Toshiba SD-V394SU | Owner's Manual - English - Page 52
(DVD) MP3/WMA/JPEG/DivX® and Audio CD operation This player can play back the MP3/WMA/JPEG/DivX®-data which has been recorded Toshiba cannot guarantee that all genre of recordable discs will produce optimal playback quality. The technical criteria set out in this owner's manual are meant as a guide - Toshiba SD-V394SU | Owner's Manual - English - Page 53
TOP MENU ▲/▼/ / ENTER RETURN PLAY STOP Advanced playback (DVD) CD MP3/WMA CD and Audio CD playback 1 Place an Audio CD or a disc on which MP3 or WMA files have been recorded onto the disc tray. About file browser 2 A file browser screen will appear on the screen. Folder-1 Folder-2 MP3-1 MP3-2 - Toshiba SD-V394SU | Owner's Manual - English - Page 54
playback (DVD) MP3/WMA/JPEG/DivX® and Audio CD operation (Continued) CD JPEG CD playback 1 Place a disc on which JPEG files have been recorded onto H: 1536 3 Press C/D to select the file. To display a thumbnail list, press DVD MENU. Press B/A or C/D to select the desired file. (To return to a file - Toshiba SD-V394SU | Owner's Manual - English - Page 55
DVD MENU ▲/▼ ENTER PLAY STOP SKIP / PAUSE/STEP CD DivX® CD playback 1 Place a disc on which DivX® files have been recorded player is not authorized to play this video." code. See page 63 . 4 Press ENTER or PLAY. The selected DivX® movie will be played back on the screen. Advanced playback (DVD - Toshiba SD-V394SU | Owner's Manual - English - Page 56
Advanced playback (DVD) Repeat and program playback using file browser CD Repeat playback (CD) CD Random playback (CD) 1 In the file browser, press B/A or C/D to select "Repeat" during - Toshiba SD-V394SU | Owner's Manual - English - Page 57
▲/▼/ / ENTER PLAY Advanced playback (DVD) CD Program playback (CD) 1 In the file browser, press B/A or C/D to select "Edit Mode", then press ENTER. 4 Press B/A or C/D to select "Program View", then press - Toshiba SD-V394SU | Owner's Manual - English - Page 58
the function settings You can change the default settings to customize performance to your preference. SETUP C/D/B/A ENTER RETURN DVD VCD Setting procedure CD 1 Press SETUP during stop mode. The following on-screen display appears. PDEMa.ReBrnCe.Lun.tal : OEnffglish QTSVuSboStuictnrledSenet - Toshiba SD-V394SU | Owner's Manual - English - Page 59
Screen Saver function. To select On or Off for DRC (Dynamic Range Control). 62 To select On or Off for QSound. To select a preferred parental a preferred video output signal from "Interlace" or "Progressive". 63 To display your 8 character registration code. Function setup (DVD) 2I30101B-En_p58 - Toshiba SD-V394SU | Owner's Manual - English - Page 60
" if more than one languages are recorded onto the disc. English, Francais, can be selected (see the "Language code list" 65 ). Original: (Audio) OSD language, you can perform it by VCR MENU ! . E.B.L. To select the TV. When playing back a wide screen-DVD disc, it displays the wide picture with - Toshiba SD-V394SU | Owner's Manual - English - Page 61
at 24 frames per second) and video content (video signals recorded at 30 frames per second). Make this selection according to the type of content being viewed. Auto: Select this position normally. The DVD player automatically detects source content, film or video, of playback source, and converts - Toshiba SD-V394SU | Owner's Manual - English - Page 62
DVD video player equipped with a "QSound". It can produce the effect of being in a cinema or a concert hall. Off: The QSound is disengaged. On: The QSound operates. Notes: • The QSound setting can also be changed with AUDIO on the remote control # . • This function works only when the disc recorded - Toshiba SD-V394SU | Owner's Manual - English - Page 63
7 down on the remote control and then press STOP on code is displayed. Make a note of the code as you will need it when you register with a DivX® VOD provider. Then press ENTER. You can select the video output signal of the DVD video player recording condition. • Once Progressive scan on, S-video - Toshiba SD-V394SU | Owner's Manual - English - Page 64
level will be kept until the disc is ejected. When the disc is ejected, the original rating level will be set again automatically. 2 If the DVD disc has been designed to temporarily cancel the Rating level, the screen which follows the "Reading" screen will change, depending on which disc is played - Toshiba SD-V394SU | Owner's Manual - English - Page 65
Russian 2831 Samoan 2923 Sanskrit 2911 Scots Gaelic 1714 Serbian 2928 Serbo-Croatian 2918 Shona 2924 Sindhi 2914 Language Name Code Singhalese 2919 Slovak 2921 Slovenian 2922 Somali 2925 Spanish 1529 Sundanese 2931 Swahili 2933 Swedish 2932 Tagalog 3022 Tajik 3017 - Toshiba SD-V394SU | Owner's Manual - English - Page 66
Others Troubleshooting Before calling a service technician, please check the following table for a possible cause of the symptoms and some solutions. Symptoms Solutions DVD/VCR DVD/VCR does not operate. No picture. No sound. The remote control does not function. • Make sure the power cord is - Toshiba SD-V394SU | Owner's Manual - English - Page 67
Input/Output DVD/VCR Video input Video output Audio input Audio output DVD S-video output Component video output Audio R) x 1 Supplied accessories Audio/video cable 1 Remote control (SE-R0220 1 Batteries (R03/AAA 2 75 Ω coaxial cable 1 • This model complies with the above specifications. - Toshiba SD-V394SU | Owner's Manual - English - Page 68
INBOUND TRANSPORTA- (4) Labor service charges for set installation, setup, TION AND INSURANCE CHARGES FOR THE DVD/ adjustment of customer controls and installation or VCR COMBINATION TO THE EXCHANGE CENTER. repair of antenna systems are not covered by this warranty. Reception problems caused by - Toshiba SD-V394SU | Owner's Manual - English - Page 69
"Troubleshooting," RIGHTS WHICH MAY VARY FROM STATE TO you fund that service is needed: STATE IN THE U.S.A. SOME STATES OF THE U.S.A. DO NOT ALLOW LIMITATIONS ON HOW (1) For instructions on how to obtain warranty service LONG AN IMPLIED WARRANTY LASTS, WHEN AN for exchange program DVD/VCR - Toshiba SD-V394SU | Owner's Manual - English - Page 70
Others Memo ... 70 2I30101B-En_p68-BACK 70 1/12/06, 17:07 - Toshiba SD-V394SU | Owner's Manual - English - Page 71
... Others 2I30101B-En_p68-BACK 71 1/12/06, 17:07 71 - Toshiba SD-V394SU | Owner's Manual - English - Page 72
ColorStream and ColorStream Pro are registered trademarks of Toshiba America Consumer Products, L.L.C. J2I30101B SH 06/02 N 2I30101B-En_p68-BACK 72 1/12/06, 17:07 Printed in Thailand
-
 1
1 -
 2
2 -
 3
3 -
 4
4 -
 5
5 -
 6
6 -
 7
7 -
8
-
9
-
10
-
11
-
12
-
13
-
14
-
15
-
16
-
17
-
18
-
19
-
20
-
21
-
22
-
23
-
24
-
25
-
26
-
27
-
28
-
29
-
30
-
31
-
32
-
33
-
34
-
35
-
36
-
37
-
38
-
39
-
40
-
41
-
42
-
43
-
44
-
45
-
46
-
47
-
48
-
49
-
50
-
51
-
52
-
53
-
54
-
55
-
56
-
57
-
58
-
59
-
60
-
61
-
62
-
63
-
64
-
65
-
66
-
67
-
68
-
69
-
70
-
71
-
72
 |
 |
2
14
22
29
34
39
Introduction
42
45
58
65
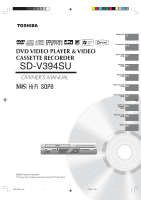
DVD VIDEO PLAYER & VIDEO
CASSETTE RECORDER
SD-V394SU
OWNER’S MANUAL
©2006 Toshiba Corporation
This device does not tape-record copy protected DVD Video Discs.
Connections
Basic setup
(VCR)
Playback
(VCR)
Recording
(VCR)
Other functions
(VCR)
Basic playback
(DVD)
Advanced
playback
(DVD)
Function setup
(DVD)
Others
2I30101B-En_cov
1/12/06, 17:04
1