Toshiba Satellite 1415-S173 User Manual - Page 204
Sample TOSHIBA HWSetup window, pressing the power button, then quickly pressing
 |
View all Toshiba Satellite 1415-S173 manuals
Add to My Manuals
Save this manual to your list of manuals |
Page 204 highlights
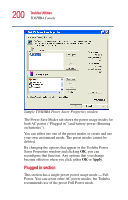
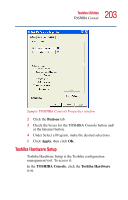
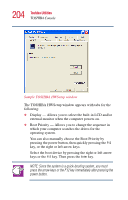
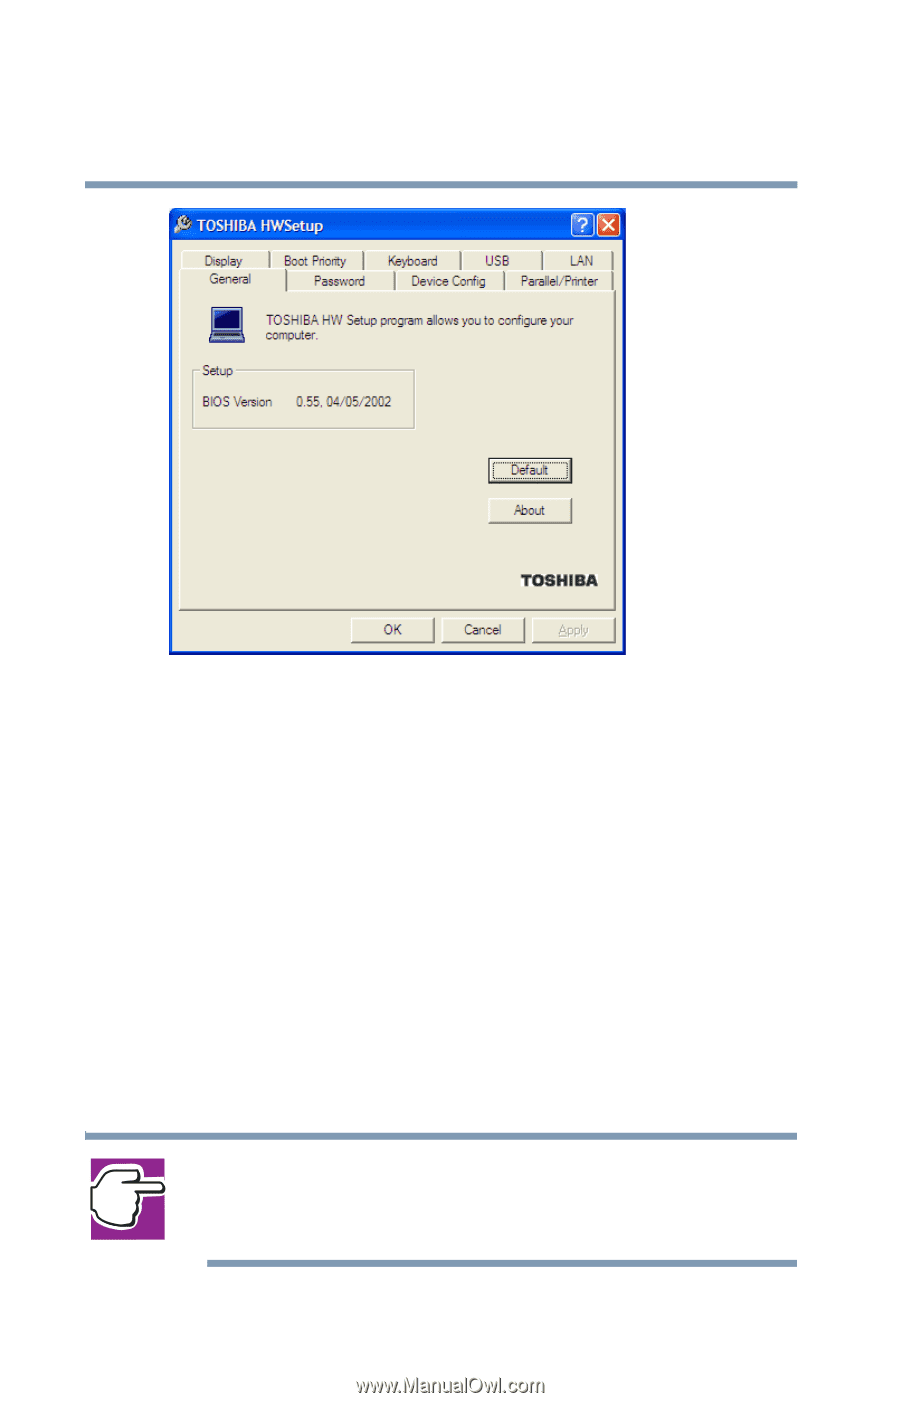
204 Toshiba Utilities TOSHIBA Console Sample TOSHIBA HWSetup window The TOSHIBA HWSetup window appears with tabs for the following: ❖ Display - Allows you to select the built-in LCD and/or external monitor when the computer powers on. ❖ Boot Priority - Allows you to change the sequence in which your computer searches the drives for the operating system. You can also manually choose the Boot Priority by pressing the power button, then quickly pressing the F12 key, or the right or left arrow keys. Select the boot device by pressing the right or left arrow keys or the F12 key. Then press the Enter key. NOTE: Since the system is a quick-booting system, you must press the arrow keys or the F12 key immediately after pressing the power button.
-
 1
1 -
2
-
3
-
4
-
5
-
6
-
7
-
8
-
9
-
10
-
11
-
12
-
13
-
14
-
15
-
16
-
17
-
18
-
19
-
20
-
21
-
22
-
23
-
24
-
25
-
26
-
27
-
28
-
29
-
30
-
31
-
32
-
33
-
34
-
35
-
36
-
37
-
38
-
39
-
40
-
41
-
42
-
43
-
44
-
45
-
46
-
47
-
48
-
49
-
50
-
51
-
52
-
53
-
54
-
55
-
56
-
57
-
58
-
59
-
60
-
61
-
62
-
63
-
64
-
65
-
66
-
67
-
68
-
69
-
70
-
71
-
72
-
73
-
74
-
75
-
76
-
77
-
78
-
79
-
80
-
81
-
82
-
83
-
84
-
85
-
86
-
87
-
88
-
89
-
90
-
91
-
92
-
93
-
94
-
95
-
96
-
97
-
98
-
99
-
100
-
101
-
102
-
103
-
104
-
105
-
106
-
107
-
108
-
109
-
110
-
111
-
112
-
113
-
114
-
115
-
116
-
117
-
118
-
119
-
120
-
121
-
122
-
123
-
124
-
125
-
126
-
127
-
128
-
129
-
130
-
131
-
132
-
133
-
134
-
135
-
136
-
137
-
138
-
139
-
140
-
141
-
142
-
143
-
144
-
145
-
146
-
147
-
148
-
149
-
150
-
151
-
152
-
153
-
154
-
155
-
156
-
157
-
158
-
159
-
160
-
161
-
162
-
163
-
164
-
165
-
166
-
167
-
168
-
169
-
170
-
171
-
172
-
173
-
174
-
175
-
176
-
177
-
178
-
179
-
180
-
181
-
182
-
183
-
184
-
185
-
186
-
187
-
188
-
189
-
190
-
191
-
192
-
193
-
194
-
195
-
196
-
197
-
198
-
 199
199 -
 200
200 -
 201
201 -
 202
202 -
 203
203 -
 204
204 -
 205
205 -
 206
206 -
 207
207 -
 208
208 -
 209
209 -
210
-
211
-
212
-
213
-
214
-
215
-
216
-
217
-
218
-
219
-
220
-
221
-
222
-
223
-
224
-
225
-
226
-
227
-
228
-
229
-
230
-
231
-
232
-
233
-
234
-
235
-
236
-
237
-
238
-
239
-
240
-
241
-
242
-
243
-
244
-
245
-
246
-
247
-
248
-
249
-
250
-
251
-
252
-
253
-
254
-
255
-
256
-
257
-
258
-
259
-
260
-
261
-
262
-
263
-
264
-
265
-
266
-
267
-
268
-
269
-
270
-
271
 |
 |
204
Toshiba Utilities
TOSHIBA Console
Sample TOSHIBA HWSetup window
The TOSHIBA HWSetup window appears with tabs for the
following:
❖
Display — Allows you to select the built-in LCD and/or
external monitor when the computer powers on.
❖
Boot Priority — Allows you to change the sequence in
which your computer searches the drives for the
operating system.
You can also manually choose the Boot Priority by
pressing the power button, then quickly pressing the
F12
key, or the right or left arrow keys.
Select the boot device by pressing the right or left arrow
keys or the
F12
key. Then press the
Enter
key.
NOTE: Since the system is a quick-booting system, you must
press the arrow keys or the F12 key immediately after pressing the
power button.