Toshiba Satellite C75D-A7102 User Guide
Toshiba Satellite C75D-A7102 Manual
 |
View all Toshiba Satellite C75D-A7102 manuals
Add to My Manuals
Save this manual to your list of manuals |
Toshiba Satellite C75D-A7102 manual content summary:
- Toshiba Satellite C75D-A7102 | User Guide - Page 1
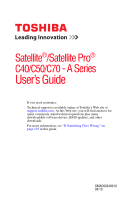
Satellite®/Satellite Pro® C40/C50/C70 - A Series User's Guide If you need assistance: Technical support is available online at Toshiba's Web site at support.toshiba.com. At this Web site, you will find answers for many commonly asked technical questions plus many downloadable software drivers, BIOS - Toshiba Satellite C75D-A7102 | User Guide - Page 2
the state of California only. Model: Satellite®/Satellite Pro® C40/C50/C70 set-up and usage instructions in the applicable user guides and/or manuals enclosed or provided TROUBLE, FAILURE OR MALFUNCTION OF THE HARD DISK DRIVE OR OTHER STORAGE DEVICES AND THE DATA CANNOT BE RECOVERED, TOSHIBA - Toshiba Satellite C75D-A7102 | User Guide - Page 3
"Critical applications" means life support systems, medical applications, injury to persons or loss of life or catastrophic property damage. ACCORDINGLY, TOSHIBA, ITS AFFILIATES AND SUPPLIERS DISCLAIM installed and used in accordance with the instructions, it may cause harmful interference to radio - Toshiba Satellite C75D-A7102 | User Guide - Page 4
. If you should experience any such problem, immediately turn off either one of your Bluetooth or Wireless LAN. Please contact Toshiba computer product support on Web site http://www.toshiba-europe.com/computers/tnt/ bluetooth.htm in Europe or support.toshiba.com in the United States for more - Toshiba Satellite C75D-A7102 | User Guide - Page 5
of scientists who continually review and interpret the extensive environment where the risk of interference to other devices or services is perceived or identified as harmful. If you are normal operation is minimized. Wireless Interoperability The TOSHIBA Wireless LAN Mini PCI Card products are - Toshiba Satellite C75D-A7102 | User Guide - Page 6
problem, immediately turn off your Bluetooth or Wireless LAN device. Please contact Toshiba computer product support on Web site http://www.toshiba-europe.com/computers/tnt/bluetooth.htm in Europe or support.toshiba interference to co-channel Mobile Satellite systems. Please note that high review - Toshiba Satellite C75D-A7102 | User Guide - Page 7
User's Guide carefully and keep it for your future reference. Never attempt to disassemble, adjust or repair an optical disc drive. You could damage the drive. You would also be exposed to laser light or other safety hazards, resulting in serious injury. Always contact an authorized Toshiba service - Toshiba Satellite C75D-A7102 | User Guide - Page 8
shielding. Equipment (or its transmit antenna) that is installed outdoors is subject to licensing. Pour empecher que cet appareil cause du brouillage au service faisant l'objet d'une licence, il doit etre utilize a l'interieur et devrait etre place loin des fenetres afin de Fournier un ecram de - Toshiba Satellite C75D-A7102 | User Guide - Page 9
25 GHz to reduce the potential for harmful interference to co-channel Mobile Satellite systems. Please note that high-power radars are allocated as primary users of product complies with the following: EU Declaration of Conformity TOSHIBA declares that this product conforms to the following Standards - Toshiba Satellite C75D-A7102 | User Guide - Page 10
(Cd) will appear below the crossed out wheeled bin symbol on the battery. Pb, Hg, Cd In the European Union, these symbols indicate that Toshiba is already working with design engineers, suppliers, and other partners to determine appropriate worldwide product life cycle planning and end-of-life - Toshiba Satellite C75D-A7102 | User Guide - Page 11
11 Deutschland: France: Italia: Nederland: Dans le cas d'une utilisation privée, à l'extérieur d'un bâtiment, audessus d'un espace public, aucun enregistrement n'est nécessaire pour une distance de moins de 300m. Pour une distance supérieure à 300m un enregistrement auprès de l'IBPT est requise. - Toshiba Satellite C75D-A7102 | User Guide - Page 12
cease operating the Wireless LAN at that location and consult the local technical support staff responsible for the wireless network. ❖ The 5 GHz Turbo mode operation. Taiwan Article 14 Article 17 Unless approved, for any model accredited low power radio frequency electric machinery, any company, - Toshiba Satellite C75D-A7102 | User Guide - Page 13
stations, promptly change the frequency being used, change the location of use, or turn off the source of emissions. 3. Contact TOSHIBA Direct PC if you have problems with interference caused by this product to Other Radio Stations. 2. Indication The indication shown below appears on this equipment - Toshiba Satellite C75D-A7102 | User Guide - Page 14
stipulated in the Radio Law and the Telecommunications Business Law of Japan. Copyright This guide is copyrighted by Toshiba America Information Systems, Inc. with all rights reserved. Under the copyright laws, this guide cannot be reproduced in any form without the prior written permission of - Toshiba Satellite C75D-A7102 | User Guide - Page 15
INDIRECTLY FROM ANY TECHNICAL OR TYPOGRAPHICAL ERRORS OR OMISSIONS CONTAINED HEREIN OR FOR DISCREPANCIES BETWEEN THE PRODUCT AND THE MANUAL. IN NO EVENT SHALL TOSHIBA BE LIABLE FOR ANY INCIDENTAL, CONSEQUENTIAL, SPECIAL, OR EXEMPLARY DAMAGES, WHETHER BASED ON TORT, CONTRACT OR OTHERWISE, ARISING OUT - Toshiba Satellite C75D-A7102 | User Guide - Page 16
16 Trademarks Satellite, Satellite Pro, and eco Utility are either registered trademarks or trademarks of Toshiba America Information Systems, Inc. and/or Toshiba Corporation. Adobe and Photoshop are either registered trademarks or trademarks of Adobe Systems Incorporated in the United States and/or - Toshiba Satellite C75D-A7102 | User Guide - Page 17
with recycling regulations in each state, country, and territory, Toshiba wants to make it easy for customers to recycle products at the end of the life cycle. To learn more about Toshiba's sustainability commitment, visit us.toshiba.com/green. Reuse, Donation, Recycling Functional computers can be - Toshiba Satellite C75D-A7102 | User Guide - Page 18
....28 Documentation 28 Service options 28 Chapter 1: Getting Started 29 Selecting a place to work 29 Setting up a work environment 29 Keeping yourself comfortable 30 Computer user comfort recommendations .......30 Good Working Posture 30 Using the notebook with an external keyboard, mouse or - Toshiba Satellite C75D-A7102 | User Guide - Page 19
the main battery 40 Using the computer for the first time 40 Initial setup 41 Setting up your software 41 Registering your computer with Toshiba 41 To Shut your PC (with user's data 57 Reset your PC 59 Installing drivers and applications 62 Using the touch pad 63 Adjusting touch pad - Toshiba Satellite C75D-A7102 | User Guide - Page 20
Computing tips 72 Using the keyboard 73 Function keys 74 Special Windows® keys 75 Touch screen 75 Touch screen navigation 75 Mouse properties 76 Toshiba's online resources 83 Chapter 3: Mobile Computing 84 Toshiba's energy-saver design 84 Running the computer on battery power 84 Battery - Toshiba Satellite C75D-A7102 | User Guide - Page 21
the computer .........94 Inserting a charged battery 95 Taking care of your battery 97 Safety precautions 97 Maintaining your battery 97 Disposing of used batteries 98 Traveling tips 99 Chapter 4: Exploring Your Computer's Features 100 Exploring the Start screen 100 Charms 101 Tiles 102 - Toshiba Satellite C75D-A7102 | User Guide - Page 22
131 The Windows® operating system can help you 131 Fixing a problem with Device Manager 132 Checking device properties 132 Memory problems 133 Power and the batteries 134 Keyboard problems 135 Display problems 135 Disk or storage drive problems 137 Error-checking 137 Optical disc drive - Toshiba Satellite C75D-A7102 | User Guide - Page 23
Wireless networking problems 142 DVD operating problems 143 Develop good computing habits 144 Data and system configuration backup in the Windows® operating system 145 If you need further assistance 149 Contacting Toshiba 150 Other Toshiba Internet Web sites 150 Toshiba's worldwide offices - Toshiba Satellite C75D-A7102 | User Guide - Page 24
stable operating environment and optimum system performance for both AC power and battery modes. To conserve energy, your computer ships with default power settings Mobile Computing" section of the Toshiba User's Guide for more information on using power management settings to conserve computer energy. - Toshiba Satellite C75D-A7102 | User Guide - Page 25
which restricts use of lead, cadmium, mercury, hexavalent chromium, PBB, and PBDE. Toshiba requires its computer component suppliers to meet RoHS requirements and verifies its suppliers' commitment from its retail version (if available), and may not include user manuals or all program functionality. - Toshiba Satellite C75D-A7102 | User Guide - Page 26
prices, system/component/options availability are all subject to change without notice. For the most up-to-date product information about your computer, or to stay current with the various computer software or hardware options, visit Toshiba's Web site at support.toshiba.com. This guide This guide - Toshiba Satellite C75D-A7102 | User Guide - Page 27
Safety icons 27 Safety icons This manual contains safety instructions that must be observed to avoid potential classified according to the seriousness of the risk, and icons highlight these instructions as follows: Indicates an imminently hazardous situation which, if not avoided, will - Toshiba Satellite C75D-A7102 | User Guide - Page 28
model guide. service upgrade terms and conditions are available at warranty.toshiba.com. To stay current on the most recent software and hardware options for your computer, and for other product information, be sure to regularly check the Toshiba Web site at support.toshiba.com. If you have a problem - Toshiba Satellite C75D-A7102 | User Guide - Page 29
information on the Quick Start document (that shipped with your computer) carefully and make sure you fully understand the instructions before you attempt to use your computer in order to avoid potential hazards that could cause bodily injury, property damage, or damage the computer. Selecting - Toshiba Satellite C75D-A7102 | User Guide - Page 30
supported support your arms, allowing your shoulders to relax. ❖ When using the keyboard, it should be centered in front of you. ❖ The keyboard and pointing device should be close to your elbow level. The keyboard should be flat so that your wrists are straight when typing. However, if the notebook - Toshiba Satellite C75D-A7102 | User Guide - Page 31
be more comfortable to dock the notebook and use an external keyboard, mouse and monitor. ❖ The keyboard and mouse (or trackball) should be close to your elbow level. ❖ The mouse should be next to the keyboard to avoid a reach. If you have to reach, the arm should be supported in the forearm area by - Toshiba Satellite C75D-A7102 | User Guide - Page 32
. ❖ Type with straight wrists. ❖ Type lightly. ❖ Learn the keyboard shortcuts for your applications. You will be more productive. ❖ Use the pointing device (e.g., touch pad, Accupoint®, or tablet pen whichever is available with your notebook computer, or other optional pointing devices like mouse or - Toshiba Satellite C75D-A7102 | User Guide - Page 33
evaluate ways to reduce the stress. Mobile computing tips ❖ When using the notebook at airports, on airplanes or trains, or at meetings, make sure room, use a rolled up blanket or pillows to provide back support, or to provide arm support. To position the computer at a good height, remember to - Toshiba Satellite C75D-A7102 | User Guide - Page 34
at elbow level? ❏ Are your shoulders relaxed when using the keyboard? ❏ Are your shoulders relaxed when using a mouse or other optional pointing device? ❏ Are your hands and wrists aligned in a comfortable, straight posture? ❏ Are your arms supported in the forearm area (not at the wrist)? ❏ Do you - Toshiba Satellite C75D-A7102 | User Guide - Page 35
socket and computer. 3. Remove the battery pack. Failure to follow these instructions could result in serious injury or permanent damage to the computer. Do not turn on the power again until you have taken the computer to an authorized service - Toshiba Satellite C75D-A7102 | User Guide - Page 36
36 Getting Started Selecting a place to work ❖ Keep the computer and disks away from objects that generate strong magnetic fields, such as large stereo speakers. Information on some disks is stored magnetically. Placing a magnet too close to a disk can erase important files. Handle discs - Toshiba Satellite C75D-A7102 | User Guide - Page 37
but are not limited to, a mouse, keyboard, and printer. Your computer contains a rechargeable main battery that needs to be charged before you computer's battery. Never pull on a power cord/cable to remove a plug from a socket. Always grasp the plug directly. Failure to follow this instruction may - Toshiba Satellite C75D-A7102 | User Guide - Page 38
other damage to the computer. Use of an incompatible AC adaptor could cause fire or damage to the computer possibly resulting in serious injury. TOSHIBA assumes no liability for any damage caused by use of an incompatible adaptor. AC adaptor Power cord/cable AC adaptor cord (Sample Illustration - Toshiba Satellite C75D-A7102 | User Guide - Page 39
with wet hands. Failure to follow this instruction could result in an electric shock, possibly resulting in serious injury. The computer's main battery light gives you an indication of the main battery's current charge: ❖ Glows amber while the main battery is being charged (AC adaptor connected - Toshiba Satellite C75D-A7102 | User Guide - Page 40
until the battery light glows white. After that, the battery will be completely charged and ready to power the computer. NOTE Battery life and pens or other objects from the keyboard area before closing the display panel. Small bright dots may appear on your screen display when you turn on your - Toshiba Satellite C75D-A7102 | User Guide - Page 41
first time you turn on your computer, the setup guides you through steps to set up your software. Follow the on-screen instructions. Registering your computer with Toshiba Product registration is strongly recommended, and allows Toshiba to send you periodic updates, announcements, and special offers - Toshiba Satellite C75D-A7102 | User Guide - Page 42
power while a disk/disc is being accessed, you may lose data or damage the disk/disc and/or drive. 3 In the lower right of the screen click or touch the Power ( ) icon. Shut down option Power (Sample Image) Shut down 4 Highlight Shut down while holding the Shift key, and then click - Toshiba Satellite C75D-A7102 | User Guide - Page 43
, click or touch the Settings ( ) charm. If you power down using the Sleep command and the battery discharges fully, your unsaved information will be lost. Be sure to save your work first. 3 In the lower right of the screen click or touch the Power ( ) icon. Sleep option Power (Sample Image) Sleep - Toshiba Satellite C75D-A7102 | User Guide - Page 44
, when you restart the computer, you can continue working from where you left off. Adding optional external devices NOTE Before adding external devices, Toshiba recommends setting up your software. See "Setting up your software" on page 41. After starting your computer for the first time you may - Toshiba Satellite C75D-A7102 | User Guide - Page 45
module(s) to cool to room temperature before replacing it. Avoid touching the cover, the mode, data will be lost. NOTE For this model, Slot A is the bottom slot. Slot B is 1 From the Start or Desktop screen, move your pointer to the upper-right corner of the screen or swipe in from the right - Toshiba Satellite C75D-A7102 | User Guide - Page 46
may lose data or damage the disk/disc and/or drive. 3 In the lower right of the screen click or touch the Power ( ) icon. Shut down option Power (Sample Image) Shut down . 7 Remove the main battery. For information on removing the battery, see "Removing the battery from the computer" on page 94. - Toshiba Satellite C75D-A7102 | User Guide - Page 47
built up. Avoid touching the connector on the memory module or on the computer. Grease or dust on the connector may cause memory access problems. 11 Carefully remove the new memory module from its antistatic packaging, without touching its connector. 12 Locate an empty memory module slot on the - Toshiba Satellite C75D-A7102 | User Guide - Page 48
the memory modules stacked on top of one another, you must remove the top module first before removing/installing the bottom module. NOTE For this model, Slot A is the bottom slot. Slot B is the top slot. If only one memory module is to be installed, it must be installed in Slot - Toshiba Satellite C75D-A7102 | User Guide - Page 49
Illustration) Inserting the memory module into the slot NOTE For this model, Slot A is the bottom slot. Slot B is the top Replace the memory module slot cover and secure it using the screw(s). 17 Re-insert the battery. For more information on inserting the battery, see "Inserting a charged battery - Toshiba Satellite C75D-A7102 | User Guide - Page 50
50 Getting Started Adding memory (optional) 18 Turn the computer right side up. Make sure to remove the soft cloth from the work surface before restarting the computer. Always make sure your computer and AC adaptor have adequate ventilation and are protected from overheating when the power is - Toshiba Satellite C75D-A7102 | User Guide - Page 51
computer Slot B Slot A (Sample Illustration) Removing the memory module 4 Replace the memory module slot cover and secure it using the screw(s). 5 Re-insert the battery. For more information on inserting the battery, see "Inserting a charged battery" on page 95. 6 Turn the computer right side up - Toshiba Satellite C75D-A7102 | User Guide - Page 52
that the computer has recognized the change. To do this: Press the ( ) + X keys, and then click System. The System window appears. Installed memory (RAM) is displayed below the System heading. If the computer does not recognize the memory configuration, turn off the computer and remove the memory - Toshiba Satellite C75D-A7102 | User Guide - Page 53
Getting Started 53 Recovering the Internal Storage Drive NOTE From time to time, Windows® will display a pop-up that says, "Do you want to allow the following program to make changes to this computer?" This is a security feature to prevent programs or people from doing things on your computer - Toshiba Satellite C75D-A7102 | User Guide - Page 54
the operating system files, applications, and drivers originally shipped with the computer are backed up storing the recovery files varies by computer model. Follow the procedure below to determine how To create recovery media: 1 From the Start screen begin typing Recovery Media Creator and click or - Toshiba Satellite C75D-A7102 | User Guide - Page 55
connect a USB flash drive of the required minimum capacity (as specified in the TOSHIBA Recovery Media Creator utility) to your computer. All information stored on your DVDs or in the TOSHIBA Recovery Media Creator utility dialog box. 6 Follow the on-screen prompts to complete the copy process. - Toshiba Satellite C75D-A7102 | User Guide - Page 56
system to a new internal storage drive from your recovery media. For instructions on creating recovery media, see "Creating recovery media" on page restore your system, only the operating system files, applications, and drivers originally shipped with the computer are restored. Any files that you - Toshiba Satellite C75D-A7102 | User Guide - Page 57
while pressing the F12 key on your keyboard. The Boot menu displays. 4 Using Yes to continue. 6 Follow the on-screen instructions to complete the recovery process. When the process factory default state and attempts to save your data. Toshiba does not guarantee successful data back-up. Please make - Toshiba Satellite C75D-A7102 | User Guide - Page 58
5 Scroll down to "Refresh your PC without affecting your files," and click or touch Get Started. The "Refresh your PC" screen appears. (Sample Image) Refresh your PC screen Toshiba does not guarantee successful data back up. Be sure to save your work to external media before executing the recovery - Toshiba Satellite C75D-A7102 | User Guide - Page 59
59 Recovering the Internal Storage Drive 6 Click or touch the Next button to begin. The "Ready to refresh your PC" screen appears. (Sample Image) Ready to refresh your PC screen You will be prompted to refresh your system. 7 Click or touch the Refresh button. 8 Your system will restart. The - Toshiba Satellite C75D-A7102 | User Guide - Page 60
60 Getting Started Recovering the Internal Storage Drive 3 Click or touch Change PC Settings. The PC settings window appears. (Sample Image) PC settings screen 4 Click or touch General. 5 Scroll down to "Remove everything and reinstall Windows," and click or touch Get Started. The "Reset your PC - Toshiba Satellite C75D-A7102 | User Guide - Page 61
7 Select one of the following options: ❖ Just remove my files ❖ Fully clean the drive The "Ready to reset your PC" screen appears. (Sample Image) Ready to reset your PC screen 8 Click or touch the Reset button. The "Resetting your PC" window appears. When the process is complete your system will - Toshiba Satellite C75D-A7102 | User Guide - Page 62
several hours. Installing drivers and applications The TOSHIBA Application Installer allows you to reinstall the drivers and applications that were originally bundled with your computer. To reinstall drivers and applications: 1 From the Start screen begin typing TOSHIBA Application Installer and - Toshiba Satellite C75D-A7102 | User Guide - Page 63
in this section are only supported in certain applications, and only on certain models. You can use the touch pad (the small, touch-sensitive area in front of the keyboard) and the adjacent control buttons to: ❖ Move the pointer on the screen ❖ Select an item on the screen ❖ Open or activate an - Toshiba Satellite C75D-A7102 | User Guide - Page 64
touch pad To: Do the following: Example: Move the on-screen Slide your finger across the touch pad in the pointer direction . This feature varies by program. Check your program documentation for specific instructions on right-clicking. (Sample Illustration) Click the secondary (right-hand) - Toshiba Satellite C75D-A7102 | User Guide - Page 65
screen. The on-screen pointer may also seem to automatically select text, click buttons, and activate other user interface elements. For help with these problems may select an item or text on the screen, and potentially the item or text may be replaced by the next character you type. ❖ Temporarily - Toshiba Satellite C75D-A7102 | User Guide - Page 66
and lighter finger pressure. NOTE Touch pad setting options vary by computer model. The touch pad settings are accessible through the Mouse Properties option of the Windows Control Panel. For more information, please visit support.toshiba.com. Disabling or enabling the touch pad The touch pad is - Toshiba Satellite C75D-A7102 | User Guide - Page 67
Out port* RGB (monitor) port* *Available on certain models (Sample Illustration) Video ports on right side of computer or display device. Refer to the manual that came with the television or display projector to your computer if you need a larger screen. To do this: 1 Read the directions that - Toshiba Satellite C75D-A7102 | User Guide - Page 68
display to change. This cycles through the settings in the following order (the last two options are available if an external monitor is connected): ❖ PC screen only ❖ Duplicate ❖ Extend ❖ Second screen only (Sample Image) Display options window - Toshiba Satellite C75D-A7102 | User Guide - Page 69
corner of the screen or swipe in from the right edge. When the Windows® charms appear, click or touch the Settings ( ) charm, and then click or touch Change PC Settings. Then choose a category you wish to change. Refer to your operating system documentation or Help and Support for details. You - Toshiba Satellite C75D-A7102 | User Guide - Page 70
Keep liquids, including cleaning fluid, out of the computer's keyboard, speaker, and other openings. Never spray cleaner directly onto lock cable. For more information on purchasing a cable lock, visit accessories.toshiba.com. (Sample Illustration) Computer lock cable To secure the computer: 1 - Toshiba Satellite C75D-A7102 | User Guide - Page 71
Getting Started 71 Caring for your computer 3 Insert the cable's locking end into the security lock slot on your computer, then engage the locking device. The computer is now securely locked. (Sample Illustration) Attaching security lock cable - Toshiba Satellite C75D-A7102 | User Guide - Page 72
save it to the internal storage drive. If the network you are using goes down and you must restart your computer to reconnect, or your battery runs out of charge while you are working, you will lose all work since you last saved. See "Saving your work" on page 78 for - Toshiba Satellite C75D-A7102 | User Guide - Page 73
down normally, details such as new icon positions may be lost. Using the keyboard NOTE Your computer may be equipped with a 10-key keyboard, depending on your model. Your computer's keyboard contains character keys, control keys, function keys, and special Windows® keys. (Sample Illustration - Toshiba Satellite C75D-A7102 | User Guide - Page 74
Using the keyboard (Sample Illustration) 10-key keyboard (Available on certain models) NOTE To capture a print screen of the entire screen, press the Fn + PRTSC key. (This only applies to models with a turns the touch pad ON/OFF. For more information, see "TOSHIBA Function Keys" on page 152. - Toshiba Satellite C75D-A7102 | User Guide - Page 75
Illustration) Special Windows® keys Your computer's keyboard has one key and one button that have special functions in Windows®: ❖ Windows® key-Toggles between the Desktop screen and the last app opened on the Start screen. For more information refer to Help & Support, or see "Exploring the Start - Toshiba Satellite C75D-A7102 | User Guide - Page 76
properties allow you to change your pointing device or mouse settings. To access Mouse properties: 1 Move your pointer to the upper-right corner of the screen or swipe in from the right edge. When the Windows® charms appear click or touch the Search ( ) charm, click or touch Settings and, in the - Toshiba Satellite C75D-A7102 | User Guide - Page 77
an app from the Desktop, move your pointer to the upperright corner of the screen or swipe in from the right edge. When the Windows® charms slide out to start an app: 1 Move your pointer to the upper-right corner of the screen or swipe in from the right edge. When the Windows® charms appear click or - Toshiba Satellite C75D-A7102 | User Guide - Page 78
video. Digital versatile discs (DVDs) provide a significant increase in data storage and support features that were not available on previous video platforms. These features include wide-screen movies, multiple language tracks, digital surround sound, multiple camera angles, and interactive menus - Toshiba Satellite C75D-A7102 | User Guide - Page 79
disc drive is located on the side of the computer. Your optical disc drive may look like this: Drive in-use indicator light Eject button Manual eject hole (Sample Illustration) Optical disc drive Drive in-use indicator light-Indicates when the drive is in use. Eject button-Press to release the - Toshiba Satellite C75D-A7102 | User Guide - Page 80
80 Learning the Basics Using the optical disc drive Media control buttons The media control buttons located above the keyboard allow you mute the sound and play audio CDs or DVD movies when the computer is on. Play/pause button Previous track button Next track - Toshiba Satellite C75D-A7102 | User Guide - Page 81
drive. If this happens, contact Toshiba support for assistance. Playing optical media If you insert an optical disc into the optical disc drive and the Auto-Run feature does not automatically start your disc, try launching the optical disc manually - Toshiba Satellite C75D-A7102 | User Guide - Page 82
on other computers or optical media players. These problems are not due to any defect in your Toshiba computer or optical disc drive. Please refer to object, such as a straightened paper clip, into the manual eject hole. The disc tray slides partially out of the drive. Never use a pencil to press - Toshiba Satellite C75D-A7102 | User Guide - Page 83
and place it in its protective cover. 3 Gently press the tray in to close it. Toshiba's online resources Toshiba maintains a number of online sites to which you can connect. These sites provide information about Toshiba products, give help with technical questions and keep you up to date with future - Toshiba Satellite C75D-A7102 | User Guide - Page 84
efficiency. Many of these energy-saving features have been preset by Toshiba. We recommend you leave these features active, allowing your computer to while traveling. Running the computer on battery power The computer contains a Lithium-Ion (Li-Ion) battery that provides power when you are away - Toshiba Satellite C75D-A7102 | User Guide - Page 85
. The battery life rating is only achieved on the select models and configurations tested by Toshiba under the replaced. This is normal for all batteries. To ensure that the battery maintains its maximum capacity, operate the computer on battery power at least once a month. The Lithium-Ion battery - Toshiba Satellite C75D-A7102 | User Guide - Page 86
with the power management component of the system should use the preset configuration. For assistance with setup changes, contact Toshiba's Customer Support Center. Charging batteries The battery needs to be charged before you can use it to power the computer. Always use the AC adaptor specified by - Toshiba Satellite C75D-A7102 | User Guide - Page 87
battery power until the battery discharges completely. Please make a complete back up of your data to external media before discharging the battery battery Your computer has an internal real-time clock (RTC) battery. The RTC battery powered off. The RTC battery may have become completely discharged - Toshiba Satellite C75D-A7102 | User Guide - Page 88
light gives you an indication of the main battery's current charge. ❖ Glows amber while the main battery is being charged (AC adaptor connected) ❖ Glows white when the main battery is fully charged NOTE Battery life and charge time may vary, depending upon power management settings, applications - Toshiba Satellite C75D-A7102 | User Guide - Page 89
power NOTE Wait a few moments after turning on the computer before trying to monitor the remaining battery power. The computer needs this time to check the battery's remaining capacity and perform its calculations. Move the pointer over the power icon in the notification area, see "Finding - Toshiba Satellite C75D-A7102 | User Guide - Page 90
runs low you can: ❖ Plug the computer into an external power source and recharge the main battery ❖ Place the computer into Hibernation mode and replace the battery with a charged spare (not included with your computer) ❖ Save your work and turn off the computer If you do not manage to do any - Toshiba Satellite C75D-A7102 | User Guide - Page 91
Power Options window appears. 5 Double-click or touch Battery to display the battery options. (Sample Image) Advanced settings tab of Power Options screen 6 Configure the alarm settings to suit your needs. Conserving battery power How long a fully charged battery pack lasts when you are using the - Toshiba Satellite C75D-A7102 | User Guide - Page 92
the computer is configured. By using them, you can increase the length of time you can use the computer before you need to recharge the battery. Microsoft® has combined these options into preset Power Plans. Using one of these power plans lets you choose between maximum power savings and peak system - Toshiba Satellite C75D-A7102 | User Guide - Page 93
. 5 Click or touch Change plan settings to choose the plan you want to edit. This screen allows you to change basic settings. 6 Click or touch Change advanced power settings to access settings for battery notification levels, internal storage drive power save time, etc. You can click or touch the - Toshiba Satellite C75D-A7102 | User Guide - Page 94
, save your files and then either completely shut down your computer or put it into Hibernation mode before changing the battery. Removing the battery from the computer To remove the battery: 1 Save your work. 2 Turn off the computer, see "To Shut down your computer" on page 42. 3 Unplug and remove - Toshiba Satellite C75D-A7102 | User Guide - Page 95
is leaking or its case is cracked, put on protective gloves to handle it, and discard it immediately. Always dispose of used battery packs in compliance with all applicable laws and regulations. Put insulating tape, such as cellophane tape, on the electrode during transportation to avoid a possible - Toshiba Satellite C75D-A7102 | User Guide - Page 96
lock to the unlocked position and try again. Do not force the battery into position. (Sample Illustration) Inserting the battery 3 Slide the battery release lock to the locked position. (Sample Illustration) Locking the battery release lock 4 Turn the computer right side up. 5 Reconnect any cables - Toshiba Satellite C75D-A7102 | User Guide - Page 97
tips on how to take care of your battery and prolong its life. Safety precautions Always immediately turn the power not expose the computer to fire. The battery could explode Do not turn on the computer's power again until an authorized Toshiba service provider has checked it for safety. Continued - Toshiba Satellite C75D-A7102 | User Guide - Page 98
batteries Disposing of used batteries The life of a battery pack depends on usage. When the battery pack needs replacing, the battery light flashes amber shortly after you have fully recharged the battery. You must discard a battery batteries or how to dispose of them properly. In addition, Toshiba - Toshiba Satellite C75D-A7102 | User Guide - Page 99
cases for the computer. They all provide plenty of extra space for manuals, power cords, and compact discs. Contact your authorized Toshiba representative for more information or visit Toshiba's Web site at accessories.toshiba.com. TECHNICAL NOTE: When traveling by air, you may be required to - Toshiba Satellite C75D-A7102 | User Guide - Page 100
You can also use the Windows® key ( ) on your keyboard or on the LCD screen to go to the Start screen. For detailed information, please refer to the Windows® Help and Support. By clicking on or touching the Desktop tile from the Start screen, you will find the Windows® settings and features you are - Toshiba Satellite C75D-A7102 | User Guide - Page 101
101 For detailed information on the new Windows 8 functionality, refer to the Windows® Help and Support. App tiles (Sample Image) Windows® Start screen Charms Use the Windows® charms to start apps, find documents, set up system components, and perform most other computing tasks. By moving your - Toshiba Satellite C75D-A7102 | User Guide - Page 102
, find documents, set up system components, and perform most other computing tasks. HINT: The illustrated examples in this guide may appear slightly different from the screens displayed by your system. The differences are not significant and do not indicate any change in the functionality of your - Toshiba Satellite C75D-A7102 | User Guide - Page 103
Exploring Your Computer's Features Exploring the desktop 103 You may see various icons displayed on your system desktop, for example: Recycle Bin-Holds files you have deleted. You may be able to retrieve these files until you empty the Recycle Bin. ❖ TECHNICAL NOTE: If you delete a large number - Toshiba Satellite C75D-A7102 | User Guide - Page 104
-A specialized type of tile notification (shown on the Start screen tile) using glyphs to indicate the number of applications that Internet you need: ❖ A browser or communications program ❖ An Internet Service Provider (ISP) or online service if you plan to use the Internet ❖ A way to connect - Toshiba Satellite C75D-A7102 | User Guide - Page 105
hardware or services. Availability of Move your pointer to the upper-right corner of the screen or swipe in from the right edge. When the the F12 key. For more information see "TOSHIBA Function Keys" on page 152. NOTE Wi-Fi® networking problems, see "Wireless networking problems" on page 142. - Toshiba Satellite C75D-A7102 | User Guide - Page 106
record sounds using the computer's internal microphones (available on certain models) or an optional external microphone. You can listen to sound you are in the Desktop, move your pointer to the upper-right corner of the screen or swipe in from the right edge. When the Windows® charms appear click or - Toshiba Satellite C75D-A7102 | User Guide - Page 107
video conference, you must be connected to the Internet. Depending on your computer model, the process of sending email, taking pictures or recording video messages may vary. To access the Web Camera, on the Start screen click or touch the Camera tile. The Web Camera indicator light glows when the - Toshiba Satellite C75D-A7102 | User Guide - Page 108
SD™ Card, an SD™ adapter is required. The Memory card reader may also support other types of media. NOTE Do not use the Copy Disk function for this please refer to your Quick Start document. The following instructions apply to all types of supported media devices. 1 Turn the media so that the - Toshiba Satellite C75D-A7102 | User Guide - Page 109
remove memory media when not in use. Removing memory media 1 If you are not currently on the Desktop, choose the Desktop tile on the Start screen, otherwise skip to step 2. 2 Prepare the card for removal by clicking on or touching the Show hidden icons button ( ), if necessary, in the notification - Toshiba Satellite C75D-A7102 | User Guide - Page 110
only if the related utility is available on your system. ❖ Desktop Assist ❖ eco Utility® ❖ Supervisor password ❖ User password ❖ System Settings ❖ Function Key ❖ Recovery Media Creator ❖ Service Station ❖ TOSHIBA Application Installer 110 - Toshiba Satellite C75D-A7102 | User Guide - Page 111
to computer functions and allows you to customize a range of computer settings. To access Desktop Assist from the Start screen begin typing Desktop Assist, or while in the Desktop screen double-click or touch the Desktop Assist icon. The Desktop Assist window appears. (Sample Image) Desktop Assist - Toshiba Satellite C75D-A7102 | User Guide - Page 112
112 Utilities Desktop Assist Media & Entertainment The features available in this category are: ❖ TOSHIBA Optical Disc Player ❖ Audio Enhancement (Sample Image) Desktop Assist window - Media & Entertainment tab - Toshiba Satellite C75D-A7102 | User Guide - Page 113
Utilities Desktop Assist Tools & Utilities The features that may be available in this category are: ❖ eco Utility® ❖ Password Utility ❖ System Settings ❖ Function Key 113 (Sample Image) Desktop Assist window - Tools & Utilities tab - Toshiba Satellite C75D-A7102 | User Guide - Page 114
114 Utilities Desktop Assist Support & Recovery The features that may be available in this category are: ❖ Recovery Media Creator ❖ Service Station ❖ TOSHIBA Application Installer ❖ User's Guide (Sample Image) Desktop Assist window - Support & Recovery tab - Toshiba Satellite C75D-A7102 | User Guide - Page 115
by tracking real-time power consumption and accumulated savings over time. To access the eco Utility®: 1 From the Start screen begin typing eco Utility, or while in the Desktop screen double-click or touch the Desktop Assist icon. 2 Click or touch Tools & Utilities. 3 Click or touch eco Utility. The - Toshiba Satellite C75D-A7102 | User Guide - Page 116
the password before you can work on your computer again. TOSHIBA supports different types of passwords on your computer: ❖ A supervisor : 1 To access Supervisor Password from the Start screen begin typing Password Utility, or while in the Desktop screen double-click or touch the Desktop Assist icon. - Toshiba Satellite C75D-A7102 | User Guide - Page 117
or touch Save. 10 Click or touch OK Deleting a supervisor password To delete a supervisor password: 1 To access Supervisor Password from the Start screen begin typing Password Utility, or while in the Desktop screen double-click or touch the Desktop Assist icon. 2 Click or touch Tools & Utilities. - Toshiba Satellite C75D-A7102 | User Guide - Page 118
touch Supervisor Password. 6 Click or touch Delete. An authority verification pop-up screen appears. 7 Click or touch Delete. 8 Enter the password, and then password If you choose to set a supervisor or user password, TOSHIBA strongly recommends that you save your password in a location where you - Toshiba Satellite C75D-A7102 | User Guide - Page 119
OK. Deleting a user password To cancel the power-on password function: 1 To access User Password from the Start screen begin typing Password Utility, or while in the Desktop screen double-click or touch the Desktop Assist icon. 2 Click or touch Tools & Utilities. 3 Click or touch Password Utility - Toshiba Satellite C75D-A7102 | User Guide - Page 120
Settings System Settings System Settings is the TOSHIBA configuration management tool available through the Windows® operating system. To access it: 1 To access System Settings from the Start screen begin typing System Settings, or while in the Desktop screen double-click or touch the Desktop - Toshiba Satellite C75D-A7102 | User Guide - Page 121
System Settings 121 ❖ General-Allows you to view the current BIOS version or change certain settings back to their default values ❖ Keyboard-Allows you to access the wake-on keyboard function, or to configure the function keys ❖ SATA-Allows you to set conditions for SATA ❖ USB-Allows you to enable - Toshiba Satellite C75D-A7102 | User Guide - Page 122
122 Utilities Function Key Function Key Turns notifications for the touch pad status ON/OFF. (Sample Image) Function Key NOTE The Function option is disabled by default. - Toshiba Satellite C75D-A7102 | User Guide - Page 123
box state, if necessary. For detailed information on using the utility to create recovery media, see "Creating recovery media" on page 54. Service Station The Service Station helps you keep your new computer running at its best by notifying you when updated software, firmware, documentation or other - Toshiba Satellite C75D-A7102 | User Guide - Page 124
bundled with your computer. To reinstall drivers and applications: 1 To access TOSHIBA Application Installer from the Start screen begin typing Application Installer, or while in the Desktop screen double-click or touch the Desktop Assist icon. 2 Click or touch Support & Recovery. 3 Click or touch - Toshiba Satellite C75D-A7102 | User Guide - Page 125
. This chapter aims to help you solve many problems by yourself. It covers the problems you are most likely to encounter. If all else fails, contact Toshiba. You will find information on Toshiba's support services at the end of this chapter. Problems that are easy to fix Your program or application - Toshiba Satellite C75D-A7102 | User Guide - Page 126
, power off your computer, and then restart it. Problems when you turn on the computer These problems may occur when you turn on the power. The Sleep mode and the battery has discharged. If you performed a shutdown before this message was displayed, a program or driver may have prevented Windows® - Toshiba Satellite C75D-A7102 | User Guide - Page 127
several hours, which will deliver a slow, steady "trickle-charge" to the battery. Once the battery has been trickle-charged, it may begin working correctly again. If the trickle-charging does not prove effective, you can connect to Support Online by going to Toshiba support at support.toshiba.com. - Toshiba Satellite C75D-A7102 | User Guide - Page 128
contact Toshiba. See "Contacting Toshiba" on screen does not look right. Unless a hardware device has failed, problems problems, use the options in the Startup menu to fix the problem. Using Startup options to fix problems If the operating system fails to start properly, you may need to troubleshoot - Toshiba Satellite C75D-A7102 | User Guide - Page 129
the lower right corner of your screen. 3 Click or touch the Restart option from the menu. 4 Click or touch Troubleshoot from the menu. You now have points are created: ❖ When new hardware or software is installed ❖ Manually by the user System Image Recovery Windows® will "Recover" the Operating - Toshiba Satellite C75D-A7102 | User Guide - Page 130
. ❖ Enable debugging mode Starts Windows® in an advanced troubleshooting mode ❖ Enable boot logging Creates a file that lists all the drivers that are installed during startup ❖ Enable Safe Mode Starts Windows® with a minimal set of drivers and services. If the computer starts and runs in Safe Mode - Toshiba Satellite C75D-A7102 | User Guide - Page 131
system has started properly but you still have a problem using your computer, the online Help can assist you in troubleshooting the problem. Getting to the online Help will differ depending on which interface you are in: ❖ Start screen-Type Help and Support NOTE As soon as you begin typing, the - Toshiba Satellite C75D-A7102 | User Guide - Page 132
not appear if the device is not using resources. ❖ The Driver tab, which displays the drivers being used by the device. This tab also provides options for updating the driver or rolling back the driver in case the new version is causing a problem. The tabs that appear in the dialog box vary from one - Toshiba Satellite C75D-A7102 | User Guide - Page 133
problems 133 Memory problems Incorrectly connected or faulty memory modules may cause errors that seem to be hardware or even software related. It is worthwhile checking for these first: 1 From the Start or Desktop screen the computer to work. NOTE For this model, Slot A is the bottom slot. Slot - Toshiba Satellite C75D-A7102 | User Guide - Page 134
/cable will neither power the computer nor recharge the batteries. Here are some typical problems and how to solve them: The AC power light battery, clean the contacts with a soft dry cloth (if necessary) and replace the battery. See "Removing the battery from the computer" on page 94. The battery - Toshiba Satellite C75D-A7102 | User Guide - Page 135
for your computer, and for other product information. For more information on maintaining battery power, see "Changing the main battery" on page 94. Keyboard problems NOTE To capture a print screen of the entire screen, press the Fn + PRTSC key. To capture only the active window displayed, press - Toshiba Satellite C75D-A7102 | User Guide - Page 136
by selecting an item from just below the Themes panel (Desktop Background, Color, Sounds, and Screen Saver). For more information, see the Windows® online Help. A message displays saying that there is a problem with your display settings and that the adapter type is incorrect or the current settings - Toshiba Satellite C75D-A7102 | User Guide - Page 137
is also an intrinsic characteristic of the screen technology. When the computer is operated on battery power, the screen will dim and you may not be able to increase the brightness of the screen while on battery power. Disk or storage drive problems Problems with the storage drive or with external - Toshiba Satellite C75D-A7102 | User Guide - Page 138
138 If Something Goes Wrong Disk or storage drive problems 2 Click or touch Computer from the list that appears. (Sample Image) Search results for "computer" 3 Right-click or touch the drive you wish to check. ( - Toshiba Satellite C75D-A7102 | User Guide - Page 139
problems 139 Your hard disk seems very slow. If you have been using your computer for a long time, your files may have become fragmented. Run Disk Defragmenter. To do this: 1 Move your pointer to the upper-right corner of the screen in water or a neutral cleaner. Replace the disc in the tray. Make - Toshiba Satellite C75D-A7102 | User Guide - Page 140
for your computer at support.toshiba.com. If the problem is with an optical data disc, refer to the software's documentation and check that the hardware configuration meets the program's needs. The disc will not come out of the drive when you click the eject button on the screen. Press the button on - Toshiba Satellite C75D-A7102 | User Guide - Page 141
check for any problem with the printer itself. Make sure you installed the proper printer drivers as shown in the instructions that came with problem, contact the printer's manufacturer. The printer will not print what you see on the screen. Many programs display information on the screen - Toshiba Satellite C75D-A7102 | User Guide - Page 142
142 If Something Goes Wrong Wireless networking problems Wireless networking problems NOTE This section provides general troubleshooting tips for networking problems, specifically wireless (Wi-Fi®) networking. The terms and concepts used assume a basic understanding of networks, and may be for - Toshiba Satellite C75D-A7102 | User Guide - Page 143
4 Clean the disc and try again. A dirty drive can also cause audio problems. If you have tried several discs and all fail, consider sending your drive to an authorized service provider to get it cleaned. 5 From the Start screen, type Computer. Click or touch Computer from the list that appears. The - Toshiba Satellite C75D-A7102 | User Guide - Page 144
If Something Goes Wrong Develop good computing habits 7 Check the Toshiba Web site for new information on optical disc drives and their operation. A blank screen appears while watching a DVD-ROM movie or title. Change the feature. Save your work! See "Computing tips" on page 72 for instructions. - Toshiba Satellite C75D-A7102 | User Guide - Page 145
you can follow every time you experience a problem with the computer. Your ability to solve problems will improve as you learn about how the computer self-help books you can use to supplement the information in the manuals. Data and system configuration backup in the Windows® operating system The - Toshiba Satellite C75D-A7102 | User Guide - Page 146
- and saves them for later recall. If you experience problems after installing some new hardware or software, you can easily steps to create a restore point using the System Restore utility: 1 From the Start screen, type Control. Click or touch Control Panel from the list that appears. 2 Click - Toshiba Satellite C75D-A7102 | User Guide - Page 147
the data you create and store on its internal storage drive. Since problems with either hardware or software can make the data inaccessible or even is required. Most of the optical disc drives built into recent Toshiba portable computer models can write to (or 'burn') as well as read from optical - Toshiba Satellite C75D-A7102 | User Guide - Page 148
the computer while running on battery power. Connect the AC adaptor before continuing. 1 From the Start screen, type Control. Click or screen instructions to back up your files. For additional Help, while in the Windows® Desktop screen, press the F1 key to launch the Windows® Help and Support screen - Toshiba Satellite C75D-A7102 | User Guide - Page 149
to investigate all sources. ❖ Review the troubleshooting information in your operating system documentation. ❖ If the problem occurs while you are running a program, consult the program's documentation for troubleshooting suggestions. Contact the software company's technical support group for their - Toshiba Satellite C75D-A7102 | User Guide - Page 150
information in the USA Canada Europe Japan Mexico and all of Latin America Toshiba USA Self-Service support web site Community discussion forums for Toshiba laptop users Toshiba's worldwide offices Australia Toshiba (Australia) Pty. Limited 84-92 Talavera Road North Ryde NSW 2113 Sydney Australia - Toshiba Satellite C75D-A7102 | User Guide - Page 151
America Information Systems, Inc. 9740 Irvine Boulevard Irvine, California 92618 United States Japan Toshiba Corporation, PCO-IO 1-1, Shibaura 1-Chome Minato-Ku, Tokyo, 105-8001 Japan Mexico Toshiba de México S.A. de C.V. Sierra Candela No.111, 6to. Piso Col. Lomas de Chapultepec. CP 11000 Mexico - Toshiba Satellite C75D-A7102 | User Guide - Page 152
Appendix A TOSHIBA Function Keys TOSHIBA Function keys provide a quick way to modify selected system functions and to launch applications. Functions TOSHIBA Function keys are used to set or modify the following system functions: ❖ Help file ❖ Brightness control ❖ Output (Display switch) ❖ Touch pad - Toshiba Satellite C75D-A7102 | User Guide - Page 153
Help file TOSHIBA Function Keys Functions 153 This TOSHIBA Function key displays the help file. Display brightness This TOSHIBA Function key decreases the screen brightness. This TOSHIBA Function key increases the screen brightness. - Toshiba Satellite C75D-A7102 | User Guide - Page 154
Output (Display switch) This TOSHIBA Function key cycles through the display options and highlights the available options. (Only the first option is available when you do not have an external monitor attached.) ❖ PC screen only ❖ Duplicate ❖ Extend ❖ Second screen only (Sample Image) Display - Toshiba Satellite C75D-A7102 | User Guide - Page 155
/disable the touch pad press F5. For more information on using the touch pad, see "Using the touch pad" on page 63. Media buttons This TOSHIBA Function key allows you to restart playing the current track or go to the previous track. This - Toshiba Satellite C75D-A7102 | User Guide - Page 156
mode is OFF). Keyboard Function keys Fn+ This TOSHIBA Function key allows you to zoom out. Fn+ This TOSHIBA Function key allows you to zoom in. Zoom (Display resolution) Fn+ [Space bar] This TOSHIBA Function key switches screen resolution. Cycle through the screen resolutions, and then - Toshiba Satellite C75D-A7102 | User Guide - Page 157
Appendix B Power Cord/Cable Connectors Your computer ships with the correct power supply for the country of purchase. This appendix shows the shapes of the typical AC power cord/cable connectors for various parts of the world. USA Canada UL approved United Kingdom BS approved Australia CSA - Toshiba Satellite C75D-A7102 | User Guide - Page 158
TECHNICAL NOTE: Some features defined in this glossary may not be available on your computer. Acronyms The following acronyms may appear in this User's Guide. AC Alternating Current BIOS Basic Input/Output System BD-ROM Blu-ray Disc Read-Only Memory bps bits per second CD Compact Disc CD - Toshiba Satellite C75D-A7102 | User Guide - Page 159
Electronics Engineers I/O Input/Output IRQ interrupt request ISP Internet Service Provider KB kilobyte LAN Local Area Network LCD Liquid Crystal Component Interconnect PCMCIA Personal Computer Memory Card International Association RAM Random Access Memory RGB Red, Green Blue light ( - Toshiba Satellite C75D-A7102 | User Guide - Page 160
World Wide Web Terms The following terms may appear in this User's Guide. A active-matrix display-A liquid crystal display (LCD) made from adapter receives information from the software and translates it into images on the screen. An adapter can take a number of forms, from a microprocessor to - Toshiba Satellite C75D-A7102 | User Guide - Page 161
to allow for more data storage and to enable recording and playback of high-definition video (HD). BIOS (Basic Input/Output System)-Basic instructions, stored in read-only memory (ROM), containing the information the computer needs to check hardware and load the operating system when you start - Toshiba Satellite C75D-A7102 | User Guide - Page 162
the computer. It takes information from outside sources, such as memory or keyboard input, processes the information, and sends the results to another device colors that establishes the colors that can be displayed on the screen at a particular time. compatibility-The extent to which computers, - Toshiba Satellite C75D-A7102 | User Guide - Page 163
-A program (called a "driver") that permits a computer to communicate with a device. dialog box-An on-screen window displayed by the operating system or a program giving a direction or requesting input from the user. Direct Current (DC)-The type of power usually supplied by batteries. DC flows in - Toshiba Satellite C75D-A7102 | User Guide - Page 164
system, this refers to the left mouse button, unless otherwise stated. driver-See device driver. DVD-An individual digital versatile (or video) disc. See also a computer option. See also disable. eSATA-An external device that supports hot swapping and fast data transfer. Very useful in storing and - Toshiba Satellite C75D-A7102 | User Guide - Page 165
organizing files saved to a disk. A folder is symbolized on screen by a graphical image (icon) of a file folder. A options or control system parameters, such as the battery save mode. (2) A key or combination of keys through F12, typically located on the keyboard. Their function is determined by the - Toshiba Satellite C75D-A7102 | User Guide - Page 166
Hibernation-A feature of many Toshiba computers that saves to screen image. Compare non-interlaced. internal device-See device. Internet-The decentralized, world-wide network of computers that provides electronic mail, the World Wide Web, and other services. See also World Wide Web. K keyboard - Toshiba Satellite C75D-A7102 | User Guide - Page 167
light-emitting diodes (LEDs) as the source of light, which offers long life and high efficiency output. Multiple diodes are used together, since the light created permanently, such as ROM. A computer's main memory is RAM. See also RAM, ROM. microprocessor-See Central Processing Unit (CPU). MIDI ( - Toshiba Satellite C75D-A7102 | User Guide - Page 168
electronic mail. non-interlaced-A method of refreshing a computer screen, in which each pixel of every line is refreshed as the electron beam scans across and down the screen. Compare interlaced. non-system disk-A disk for storing programs and data - Toshiba Satellite C75D-A7102 | User Guide - Page 169
that enables you to move the pointer on the screen. port-A socket on the computer where you plug Unit (CPU). program-A set of instructions that can be executed by a computer See also memory. Compare ROM. Random Access Memory-See RAM. Read-Only Memory-See ROM. reboot-See boot, restart - Toshiba Satellite C75D-A7102 | User Guide - Page 170
a screen. For a printer, resolution is expressed in dots per inch (dpi). For a screen, it is essential instructions the computer reads when you start it up. See also BIOS, memory. Compare RAM. S Secure perform some operation on it. shortcut-See keyboard shortcut. Sleep-A feature of some Windows® - Toshiba Satellite C75D-A7102 | User Guide - Page 171
icons on the Start screen representing applications that can be accessed by selecting them. U Universal Serial Bus (USB)-USB is a serial bus that supports data transfer. USB a narrowly focused operation or solve a specific problem. Utilities are often related to computer system management. - Toshiba Satellite C75D-A7102 | User Guide - Page 172
172 Glossary W Web-See World Wide Web. Wi-Fi®-A registered trademark term of the Wi-Fi Alliance that stands for Wireless Fidelity, and is another term for the communication protocol to permit an Ethernet connection using wireless communication components. World Wide Web (www)-The worldwide - Toshiba Satellite C75D-A7102 | User Guide - Page 173
65 app, starting 77 App, starting from Start screen 77 apps starting from Start screen 77 audio features 106 B backing up files 73, 78 battery battery life 85 Call2Recycle™ 98 care 97 changing 94 charge indicator light 39 charge time 86 charger 86 charging 40, 86 charging the real-time clock - Toshiba Satellite C75D-A7102 | User Guide - Page 174
buttons 80 C Call2Recycle™ battery 98 caring for your computer 69 changing battery 94 charging the battery 40 cleaning the computer 70 Support & Recovery tab 114 Tools & Utilities tab 113 Device Manager fixing a problem 132 directing display output 68 disabling touch pad 66 display troubleshooting - Toshiba Satellite C75D-A7102 | User Guide - Page 175
using your computer for the first time 41 installation memory module 45 installing a charged battery 95 memory modules 44 internal storage drive recovery 53 K keyboard function keys 74 special Windows® keys 75 troubleshooting 135 using 73 keys function keys 74 L LEDs system indicator lights 89 AC - Toshiba Satellite C75D-A7102 | User Guide - Page 176
microphone using 106 monitor connecting 67 monitor problems troubleshooting 136 monitoring battery power 88 mouse properties 76 moving the manual eject hole 79 playing optical media 81 recording optical media 81 removing a disc 82 troubleshooting 139 using 78, 79 optical discs troubleshooting - Toshiba Satellite C75D-A7102 | User Guide - Page 177
troubleshooting 141 problem solving contacting Toshiba 150 Startup options 128 projector connecting 67 R real-time clock (RTC) battery 85 recording sounds 106 recovery creating recovery media 54 installing drivers 92 video cables 67 Service Station 123 setting low battery notifications 90 setting up - Toshiba Satellite C75D-A7102 | User Guide - Page 178
drive is slow 139 high-pitched noise 141 installing hardware/software 148 keyboard 135 memory problems 133 missing files/trouble accessing a drive 137 on-screen eject button 140 optical disc drive 139 power and batteries 134 printer 141 restore points 146 screen does not look correct/ flickers 136 - Toshiba Satellite C75D-A7102 | User Guide - Page 179
131 sound system 140 trouble running discs 140 trouble running programs 139 URL optical disc drive 78 touch pad 63 Web Camera 107 using the keyboard 73 Utilities 110 V video projector adjusting display 69 W warranty standard limited troubleshooting 128 Windows® Store 104 wireless networking 105
-
 1
1 -
 2
2 -
 3
3 -
 4
4 -
 5
5 -
 6
6 -
 7
7 -
8
-
9
-
10
-
11
-
12
-
13
-
14
-
15
-
16
-
17
-
18
-
19
-
20
-
21
-
22
-
23
-
24
-
25
-
26
-
27
-
28
-
29
-
30
-
31
-
32
-
33
-
34
-
35
-
36
-
37
-
38
-
39
-
40
-
41
-
42
-
43
-
44
-
45
-
46
-
47
-
48
-
49
-
50
-
51
-
52
-
53
-
54
-
55
-
56
-
57
-
58
-
59
-
60
-
61
-
62
-
63
-
64
-
65
-
66
-
67
-
68
-
69
-
70
-
71
-
72
-
73
-
74
-
75
-
76
-
77
-
78
-
79
-
80
-
81
-
82
-
83
-
84
-
85
-
86
-
87
-
88
-
89
-
90
-
91
-
92
-
93
-
94
-
95
-
96
-
97
-
98
-
99
-
100
-
101
-
102
-
103
-
104
-
105
-
106
-
107
-
108
-
109
-
110
-
111
-
112
-
113
-
114
-
115
-
116
-
117
-
118
-
119
-
120
-
121
-
122
-
123
-
124
-
125
-
126
-
127
-
128
-
129
-
130
-
131
-
132
-
133
-
134
-
135
-
136
-
137
-
138
-
139
-
140
-
141
-
142
-
143
-
144
-
145
-
146
-
147
-
148
-
149
-
150
-
151
-
152
-
153
-
154
-
155
-
156
-
157
-
158
-
159
-
160
-
161
-
162
-
163
-
164
-
165
-
166
-
167
-
168
-
169
-
170
-
171
-
172
-
173
-
174
-
175
-
176
-
177
-
178
-
179
 |
 |
GMAD00349010
04/13
If you need assistance:
Technical support is available online at Toshiba’s Web site at
support.toshiba.com
. At this Web site, you will find answers for
many commonly asked technical questions plus many
downloadable software drivers, BIOS updates, and other
downloads.
For more information, see
“If Something Goes Wrong” on
page 125
in this guide.
Satellite
®
/Satellite Pro
®
C40/C50/C70
- A Series
User’s Guide