Toshiba TLP-X4500U User Manual
Toshiba TLP-X4500U Manual
 |
View all Toshiba TLP-X4500U manuals
Add to My Manuals
Save this manual to your list of manuals |
Toshiba TLP-X4500U manual content summary:
- Toshiba TLP-X4500U | User Manual - Page 1
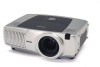
Projector TLP-X4500 User's Manual - Operating Guide Manuel d'utilisation-Guide d'utilisation Bedienungsanleitung-Benutzerhandbuch Manual de usuario-Guía de funcionamiento Manuale d'istruzioni - Guida operativa TECHNICAL FOCUS ZOOM KEYSTONE SEARCH RESET MENU M1-D INPUT TEMP LAMP INTER RGB - Toshiba TLP-X4500U | User Manual - Page 2
Projector User's Manual - Operating Guide Thank you for purchasing this projector. WARNING Before using, first read the "Before using" section of this manual. Them read other sections of this manual to ensure correct usage through understanding. After reading, store them in a safe place for future - Toshiba TLP-X4500U | User Manual - Page 3
presence of important operating and maintenance (servicing) instructions in the literature accompanying the appliance. and used in accordance with the instruction manual, may cause harmful interference to expressly approved USA only by Toshiba, or parties authorized by Toshiba, could void the user's - Toshiba TLP-X4500U | User Manual - Page 4
COVER, OR YOU MAY BE EXPOSED TO DANGEROUS VOLTAGE. REFER SERVICING TO QUALIFIED SERVICE PERSONNEL ONLY. 1. Read Owner's Manual After unpacking this product, read the owner's manual carefully, and follow all the operating and other instructions. 3. Source of Light Do not look into the lens while - Toshiba TLP-X4500U | User Manual - Page 5
Before Using (continued) IMPORTANT SAFETY INSTRUCTIONS (continued) 5. Heat The product should be situated away from heat sources such as radiators, heat registers, stoves, or other products (including amplifiers) that produce heat. 8. - Toshiba TLP-X4500U | User Manual - Page 6
, tripod, bracket, or table recommended by the manufacturer, or sold with the product. Any mounting of the product should follow the manufacturer's instructions, and should use a mounting accessory recommended by the manufacturer. A product and cart combination should be moved with care. Quick stops - Toshiba TLP-X4500U | User Manual - Page 7
normally by following the operating instructions. Adjust only those controls that are covered by the operating instructions as an improper adjustment of the area around the projector and discard any edible items placed in that area. 6 18.Servicing Do not attempt to service this product yourself as - Toshiba TLP-X4500U | User Manual - Page 8
Save Original Packing Materials The original shipping carton and packing materials will come in handy if you ever have to ship your LCD projector. For maximum protection, repack the set as it was originally packed at the factory. Moisture Condensation Never operate this unit immediately after - Toshiba TLP-X4500U | User Manual - Page 9
lamp. (Ask a dealer where the unit was purchased or your nearby service station about an air filter for replacement.) In the spaces provided below, record the Model and Serial No. located at the bottom of your LCD projector. Model No. Serial No. Retain this information for future reference. 8 - Toshiba TLP-X4500U | User Manual - Page 10
abnormal conditions including erroneous or improper operation and other problems. • Toshiba Corporation bears no responsibility for incidental damages (lost profit from not having followed the descriptions in this Instruction Manual. • Toshiba Corporation accepts no liability whatsoever for any - Toshiba TLP-X4500U | User Manual - Page 11
finely adjust the picture position, use the LENS SHIFT buttons. Preparation Please see the "Contents Of Package" of the "User's Manual - Quick Guide". Your projector should come with the items shown there. Contact your dealer anything is missing. NOTE • Keep the original packing material for future - Toshiba TLP-X4500U | User Manual - Page 12
INSTRUCTIONS 3 POWER SUPPLY CORD SELECTION 7 IMPORTANT PRECAUTIONS ʜ7 EXEMPTION CLAUSES ʜʜʜʜ9 OTHER CAAAUTIONS AND INFORMATIONS 9 Projector Features 10 Preparation 10 Part Names 12 Projector Projector 48 Caring For The Lens ʜʜʜʜʜ48 Caring For The Cabinet And Remote Control 48 Troubleshooting - Toshiba TLP-X4500U | User Manual - Page 13
NETWORK AUDIO IN2 RGB RGB OUT R/CR/PR G/Y B/CB/PB H V AUDIO OUT CR/PR Ca/Pa Y K BNC R-AUDIO IN-L VIDEO S-VIDEO C MI H J 9 0 Projector (Rear/Left) A RGB port B M1-D port C BNC port D AUDIO IN 1 port E AUDIO IN 2 port F CONTROL port G NETWORK port H AUDIO IN R/L port I VIDEO - Toshiba TLP-X4500U | User Manual - Page 14
ON LENS SHIFT BNG COMPONENT S-VIDEO VIDEO MENU INTER RESET FOCUS ZOOM RGB M1-D INPUT KEYSTONE SEARCH Control Panel on the Projector Remote Control 1 STANDBY/ON button 4 LENS SHIFT buttons 6 SEARCH button q ZOOM buttons w FOCUS buttons e KEYSTONE button r MENU button t RESET button y ENTER - Toshiba TLP-X4500U | User Manual - Page 15
power code is disconnected. • Do not set up and move the projector, while it is hot. • Install the projector in a suitable environment according to instructions of this manual. • The power outlet should be close to the projector and easily accessible. Refer to the illustrations and tables below to - Toshiba TLP-X4500U | User Manual - Page 16
elevator feet to make adjustments if the surface on which you need to set the projector is uneven or if you otherwise need to adjust the angle of projection. The ZOOM RGB M1-D INPUT KEYSTONE SEARCH 2 Raise or lower the projector to the desired height and then release the elevator buttons. When - Toshiba TLP-X4500U | User Manual - Page 17
to connect a laptop computer to the projector, be sure to activate the laptop's RGB external image output (set the laptop to CRT display or to simultaneous LCD and CRT display). For details on how this is done, please refer to the instruction manual of the corresponding laptop computer. NOTE - Toshiba TLP-X4500U | User Manual - Page 18
CR/PR Ca/Pa Y BNC R-AUDIO IN-L VIDEO S-VIDEO Computer RGB out RGB cable Audio out Stereo Mini cable RS-232C port RS-232C cable Projector A RGB E AUDIO IN 2 F CONTROL E AUDIO IN1 AUDIO IN2 A RGB REMOTE CONTROL FG CONTROL NETWORK RGB OUT AUDIO OUT CR/PR Ca/Pa Y R/CR/PR G/Y B/CB - Toshiba TLP-X4500U | User Manual - Page 19
Setting Up (continued) Examples of connection with a VCR/DVD Player VCR/DVD Player Projector Audio out (R) Audio out (L) Video out R-AUDIO IN-L VIDEO R-AUDIO IN AUDIO IN-L H VIDEO IN I I If using a s-video signal S-video out S-video cable J S -VIDEO Audio - Toshiba TLP-X4500U | User Manual - Page 20
/or electrical shock. Please adhere to the "Before using" section of this manual and the following. • Only plug the power cord into outlets rated for 's specified voltage range. • Only use the power cord that came with the projector. If it is damaged, contact your dealer to newly get correct one. - Toshiba TLP-X4500U | User Manual - Page 21
rod. Never look directly into the laser beam outlet or point the laser beam at other people. The laser beam can cause vision problems. CAUTION • Use of controls or adjustments or performance of procedures other than those specified herein may result in hazardous radiation exposure. AVOID EXPOSURE - Toshiba TLP-X4500U | User Manual - Page 22
it is difficult to send a remote signal to the sensor directly, please try. • Since the remote control uses infrared light to send signals to the projector (Class1 LED), be sure to use the remote control in an area free from obstacles that could block the remote control's output signal to the - Toshiba TLP-X4500U | User Manual - Page 23
/Keyboard Control Function CAUTION • Before connecting, read the manuals of the device you will connect. Mistaken use of the a simplified mouse or keyboard of the computer. Connect the M1-D port of the projector to the computer via the M1-D cable. Then functions illustrated below will be enabled. - Toshiba TLP-X4500U | User Manual - Page 24
/ON button / indicator 2 Set the power switch to [ | ] (ON). The STANDBY/ON indicator will light to solid orange. 3 Press the STANDBY/ON button. The projector lamp will light up and the STANDBY/ON indicator will begin blinking green. When the power is completely on, the indicator will stop blinking - Toshiba TLP-X4500U | User Manual - Page 25
VIDEO COMPONENT I Using SEARCH button Press the SEARCH button of the projector or the remote control. Pressing the button automatically cycles through input ports the picture of retrieved signal. memo If no signal is found or the projector is unstable to find an input signal at any of its ports, it - Toshiba TLP-X4500U | User Manual - Page 26
Operating (continued) Selecting The Aspect Ratio 1 Press the Aspect button to toggle between the modes for aspect ratio. I At a M1-D signal NORMAL 4:3 16:9 memo NORMAL keeps the original aspect ratio of the input signal. I At a RGB signal (not M1-D) 4:3 16:9 I At a video signal / no - Toshiba TLP-X4500U | User Manual - Page 27
Operating (continued) Adjusting The Picture Position memo This function is available only for RGB signals. 1 Press the POSITION button. As illustrated on the right, a dialog will appear on the screen to aid you in adjusting POSITION the position. 2 Use the cursor buttons / / / to adjust the position - Toshiba TLP-X4500U | User Manual - Page 28
Operating (continued) Adjusting The Volume 1 Press the VOLUME button. As illustrated on the right, a dialog will appear on the screen to aid you in adjusting the volume. VOLUME 2 Use the cursor buttons / to adjust the volume. 16 3 Press the VOLUME button again to close the dialog and complete - Toshiba TLP-X4500U | User Manual - Page 29
projecting the same image for a long time (i.e. you forget to exit FREEZE mode), the image might possibly remain as an afterimage. Do not leave the projector in FREEZE mode for too long. Using The Magnify Feature 1 Press the MAGNIFY ON button. As illustrated on the right, a dialog will appear on - Toshiba TLP-X4500U | User Manual - Page 30
Operating (continued) Displaying The Child Window memo This feature called "PinP (Picture in Picture)" is available only when a RGB signal is selected to main screen. 1 Press the PinP button. The child window with a picture of a video signal will appear. 2 Press the PinP button again to change - Toshiba TLP-X4500U | User Manual - Page 31
Multifunctional Settings Using The Menu Functions This projector has the following menus: MAIN, PICTURE -2 INPUT AUTO SCREEN OPTION NETWORK : SELECT VOLUME SPEAKER IR REMOTE IR REMOTE ID LAMP TIME FILTER TIME SERVICE RESET 16 TURN ON ALL 1234 h 4321 h 3 Use the cursor buttons / to select an item - Toshiba TLP-X4500U | User Manual - Page 32
MAIN Menu With the MAIN menu, the items shown in the table below can be performed. Perform each operation in accordance with the instructions in the table below. MENU MAIN PICTURE-1 PICTURE-2 INPUT AUTO SCREEN OPTION NETWORK : SELECT BRIGHT CONTRAST ASPECT WHISPER MIRROR LANGUAGE [Language] RESET - Toshiba TLP-X4500U | User Manual - Page 33
) PICTURE-1 Menu With the PICTURE-1 menu, the items shown in the table below can be performed. Perform each operation in accordance with the instructions in the table below. MENU MAIN PICTURE-1 PICTURE-2 INPUT AUTO SCREEN OPTION NETWORK : SELECT GAMMA COLOR BAL R COLOR BAL G COLOR BAL B SHARPNESS - Toshiba TLP-X4500U | User Manual - Page 34
buttons, and then press the (or the ENTER) button to perform the function.: LOAD1 LOAD2 LOAD3 LOAD4 MY MEMORY SAVE1 SAVE2 SAVE3 SAVE4 This projector has 4 numbered memories for adjustment data. Performing the SAVE1, SAVE2, SAVE3 or SAVE4 puts the current adjustment data on the memory whose number - Toshiba TLP-X4500U | User Manual - Page 35
the table below can INPUT AUTO H SIZE OVER SCAN 1344 95 be performed. Perform each operation in accordance with the SCREEN OPTION RESET instructions in the table below. NETWORK : SELECT memo This menu cannot be selected at a M1-D signal. Item V POSITION H POSITION H PHASE H SIZE OVER SCAN - Toshiba TLP-X4500U | User Manual - Page 36
) INPUT Menu With the INPUT menu, the items shown in the table below can be performed. Perform each operation in accordance with the instructions in the table below. MENU MAIN PICTURE-1 PICTURE-2 INPUT AUTO SCREEN OPTION NETWORK : SELECT COLOR SPACE AUTO COMPONENT COMPONENT VIDEO AUTO 3D-YCS - Toshiba TLP-X4500U | User Manual - Page 37
. : memo About the child window, please refer to the section "Displaying the Child Window". Select a signal input port to display just when the projector is turned on, using the / buttons. : LAST INPUT M1-D RGB BNC COMPONENT S-VIDEO VIDEO Selecting the LAST INPUT selects the port that was used - Toshiba TLP-X4500U | User Manual - Page 38
table below can be performed. Perform each operation in accordance with the instructions in the table below. MENU MAIN PICTURE-1 PICTURE-2 INPUT AUTO SCREEN ON TURN OFF When the TURN ON is selected, you can turn the projector on without pressing the STANDBY/ON button. Please refer to the section " - Toshiba TLP-X4500U | User Manual - Page 39
, pressing the RGB button selects the M1-D ports, and pressing the VIDEO button selects the COMPONENT port. memo If no signal is found or the projector is unstable to find an input signal at any of its ports, it will return to the state it was in prior to the search - Toshiba TLP-X4500U | User Manual - Page 40
SCREEN Menu With the SCREEN menu, the items shown in the table below can be performed. Perform each operation in accordance with the instructions in the table below. MENU MAIN PICTURE-1 PICTURE-2 INPUT AUTO SCREEN OPTION NETWORK : SELECT BLANK BLACK START UP ORIGINAL MyScreen MyScreen SIZE x1 - Toshiba TLP-X4500U | User Manual - Page 41
Multifunctional Settings (continued) SCREEN Menu (continued) Item MESSAGE RESET Description Select the TURN ON or the TURN OFF using the / buttons. : TURN ON TURN OFF When the TURN ON is selected, the following message function works. The message of the "AUTO IN PROGRESS" for the auto adjustment. - Toshiba TLP-X4500U | User Manual - Page 42
Perform each operation in accordance with the instructions in the table below. MENU MAIN REMOTE IR REMOTE ID LAMP TIME FILTER TIME SERVICE RESET 16 TURN ON 1: 2: 3: ALL remote control using the / buttons. : ALL 1 2 3 The projector is controlled by the remote control whose ID CHANGE switch is set - Toshiba TLP-X4500U | User Manual - Page 43
(or the ENTER) button to per form each function. : SERVICE FANSPEED AUTO ADJUST LENS TYPE LENS LOCK : SELECT FANSPEED AUTO ADJUST of fans, though. Please use this function in using a projector at highlands etc. memo Note that the projector is noisier when the HIGH is selected. AUTO ADJUST Select - Toshiba TLP-X4500U | User Manual - Page 44
disabled at the NETWORK menu. The IP Address is identification number of the projector on the Network. SETUP 1. Set the IP Address using the / buttons ON TURN OFF NETWORK DHCP TURN ON TURN OFF If your Network doesn't support the DHCP function, select the TURN OFF. INFORMATION Pressing the (or - Toshiba TLP-X4500U | User Manual - Page 45
When your Network doesn't support the DHCP function or When you use a fixed address even if your Network can support the DHCP function Please set computer connected to the Network. Input the same IP address as set to the projector onto the Web Browser on the computer connected to LAN. ex. Case of IP - Toshiba TLP-X4500U | User Manual - Page 46
the gas that comes out of plug from the power outlet the projector vents, or get it in your eyes or mouth. • Before problems elsewhere besides the lamp. If this happens, contact your local dealer or a service representative. • Handle with care: jolting or scratching could cause the lamp bulb - Toshiba TLP-X4500U | User Manual - Page 47
If the indicators or a message prompts you to replace the lamp, replace the lamp as soon as possible. 1 Turn off the projector, and unplug the power cord. Allow the lamp bulb to cool for at least 45 minutes. 2 Contact your dealer to prepare a new lamp. Tell the dealer your lamp type number - Toshiba TLP-X4500U | User Manual - Page 48
When you replace the lamp, please replace also the air filter. 1 Turn off the projector, and unplug the power cord. Allow the lamp bulb to cool for at least 45 minutes. 2 After making sure that the projector has cooled adequately, remove the filter cover and air filter. 3 Apply a vacuum cleaner to - Toshiba TLP-X4500U | User Manual - Page 49
Please carefully read the "Before using" section of this manual. • Before caring, make sure the power switch is or wipe with hard objects. Caring For The Inside Of The Projector In order to ensure the safe use of your projector, please have it cleaned and inspected by your local dealer about once - Toshiba TLP-X4500U | User Manual - Page 50
Troubleshooting other than the following appears, please contact your dealer or service company. memo Although these messages will be automatically disappeared around light up, or the lamp will break or burst, etc. This projector is equipped with an automatic shut-down function, such that the power - Toshiba TLP-X4500U | User Manual - Page 51
Troubleshooting (continued) Related Messages (continued) Message Description CLEAN THE AIR turn the power OFF, and allow the unit to cool down at least 20 minutes. After the projector has sufficiently cooled down, please make confirmation of the following items, and then turn the power on - Toshiba TLP-X4500U | User Manual - Page 52
Troubleshooting (continued) Regarding The Indicator Lamps Lighting and flashing of the STANDBY/ON indicator, the LAMP indicator, and the TEMP indicator have the meanings as described in the table below. Please respond in accordance with the instructions . After the projector has sufficiently cooled - Toshiba TLP-X4500U | User Manual - Page 53
Troubleshooting indication is displayed after the treatment, please contact your dealer or service company. Lighting in Red Turned off Blinking in Red The the unit to cool down at least 20 minutes. After the projector has sufficiently cooled down, please make confirmation of the following items, - Toshiba TLP-X4500U | User Manual - Page 54
Troubleshooting (continued) Phenomena That May Easily Be Mistaken For Machine Defects WARNING • Never use the projector odor has stopped, contact your dealer or service company. Before requesting repair, please check signal source device by referring to the manual - of the source device. The input - Toshiba TLP-X4500U | User Manual - Page 55
Troubleshooting (continued) Phenomena That May Easily Be Mistaken For Machine Defects (continued) Phenomenon Pictures are displayed, but no sounds are heard. Sounds are heard, but no - Toshiba TLP-X4500U | User Manual - Page 56
Troubleshooting" and run through the suggested checks. If this does not resolve the problem, please contact your dealer or service Specification TLP-X4500 Liquid crystal projector 2.5 cm figure of the section "TECHNICAL" of the end of this manual. 7.7 kg RGB input ports RGB M1-D BNC (R, G, - Toshiba TLP-X4500U | User Manual - Page 57
320 Projector User's Manual - Operating Guide TECHNICAL Dimensions [unit: mm] 210 420 73 85.5 (at the bottom of lens position) to 92.99 (at the top of lens position) 1 160 150 - Toshiba TLP-X4500U | User Manual - Page 58
check jack type, signal level, timing and resolution before connecting this projector to a computer. • Some computers may hove multiple display screen modes. Use be achieved if the resolutions of the input signal and projector panel are identical. • Automatically adjustment may not function - Toshiba TLP-X4500U | User Manual - Page 59
Initial Set Signals The following signals are used for the initial settings. The signal timing of some computer models may be different. In such case, adjust the items V POSITION and H POSITION in the PICTURE-2 menu. Back porch b Front porch d Display interval c DATA H. Sync. Sync. a Back - Toshiba TLP-X4500U | User Manual - Page 60
Connection To The Ports A RGB B D E AUDIO IN1 AUDIO IN2 M REMOTE CONTROL CONTROL NETWORK RGB ARGB OUT AUDIO OUT CR/PR Ca/Pa Y R/CR/PR G/Y B/CB/PB H V BNC C R-AUDIO IN-L VIDEO S-VIDEO H 54321 09876 ewq=- D-Sub 15 pin shrink jack • Video signal: RGB separate, Analog, 0.7 Vp-p, 75 Ω - Toshiba TLP-X4500U | User Manual - Page 61
- - 7 Ground Green = - 8 Ground Blue q H./Composite sync. 9 - w V. sync. 0 Ground e - N REMOTE CONTROL • 3.5 dia. Stereo mini jack • To be connected with the remote control that came with the projector. O DC OUT 5 - Toshiba TLP-X4500U | User Manual - Page 62
Connection To The Ports (continued) F G AUDIO IN1 AUDIO IN2 RGB REMOTE CONTROL CONTROL NETWORK RGB OUT AUDIO OUT CR/PR Ca/Pa Y R/CR/PR G/Y B/CB/PB H V BNC R-AUDIO IN-L VIDEO S-VIDEO F CONTROL Computer side CONTROL port 12345 6789 D-Sub 9 pin plug 54321 9876 D-Sub 9 pin jack - 1 RD 2 - Toshiba TLP-X4500U | User Manual - Page 63
computer power supply and after the computer has started up, turn on the projector power supply. Communications Setting 19200bps, 8N1 1. Protocol Consist of header (7 6 EXECUTE Content Change setting to desired value. Read projector internal setup value. Increment setup value by 1. Decrement - Toshiba TLP-X4500U | User Manual - Page 64
, the error code '1cH' + 'xxxxH' is sent back to the computer. When the data length is greater than indicated by the data length code, the projector ignore the excess data code. Conversely when the data length is shorter than indicated by the data length code, an error code will be returned - Toshiba TLP-X4500U | User Manual - Page 65
RS-232CCommunication (continued) Command Data Chart Names Operation type Keystone V Keystone V Reset Get Increment Decrement Execute Keystone H Get Increment Decrement Keystone H Reset Execute Get Brightness Increment Decrement Brightness Reset Execute Get Contrast Increment - Toshiba TLP-X4500U | User Manual - Page 66
RS-232CCommunication (continued) Command Data Chart (continued) Names Operation type Header ENGLISH BE EF 03 FRANÇAIS BE EF 03 DEUTSCH BE EF 03 ESPAÑOL BE EF 03 Language ITALIANO BE EF 03 NORSK BE EF 03 NEDERLANDS BE EF 03 Set PORTUGUÊS BE EF 03 BE EF 03 தจ BE EF 03 BE EF - Toshiba TLP-X4500U | User Manual - Page 67
RS-232CCommunication (continued) Command Data Chart (continued) Names Operation type Set Custom User B 50 60 70 80 90 100 Get Get Color Balance R Color Balance R Reset Increment Decrement Execute Get Color Balance G Increment Color Balance G Reset Color Balance B Color Balance B Reset - Toshiba TLP-X4500U | User Manual - Page 68
RS-232CCommunication (continued) Command Data Chart (continued) Names Operation type Get V Position Increment Decrement V Position Reset Execute Get H Position Increment Decrement H Position Reset Execute Get H Phase Increment Decrement Get H Size Increment Decrement H Size - Toshiba TLP-X4500U | User Manual - Page 69
RS-232CCommunication (continued) Command Data Chart (continued) Names Operation type Video NR S2-Aspect Auto Adjust Auto off Auto Search Blank Color Blank on/off Startup Menu Position V Menu Position V Reset Menu Position H Menu Position H Reset Message LOW Set MIDDLE HIGH Get TURN OFF Set - Toshiba TLP-X4500U | User Manual - Page 70
RS-232CCommunication (continued) Command Data Chart (continued) Names Operation type Get Volume Increment Decrement Mute TURN ON Set TURN OFF Get Lamp Time Get Lamp Time Reset Execute Filter Time Get Filter Time Reset Execute Get Magnify Increment Decrement Freeze Normal Set - Toshiba TLP-X4500U | User Manual - Page 71
RS-232CCommunication (continued) Command Data Chart (continued) Names PinP Size PinP Position PinP Audio Ch PinP Input Myscreen size Myscreen Lock IR Remote Front IR Remote Rear IR Remote Top Operation type Header Off BE EF 03 06 00 Set Large BE EF 03 06 00 Small BE EF 03 06 00 Get BE EF - Toshiba TLP-X4500U | User Manual - Page 72
RS-232CCommunication (continued) Command Data Chart (continued) Names Power Up Source Auto Adjust Enable Internal Speaker Lens Lock Remote ID Auto Power On Lens Operation type Last Ch M1-D RGB Set BNC Component S-Video Video Get DISABLE Set ENABLE Get TURN OFF Set TURN ON Get TURN - Toshiba TLP-X4500U | User Manual - Page 73
*QR61402 * Printed in Japan
-
 1
1 -
 2
2 -
 3
3 -
 4
4 -
 5
5 -
 6
6 -
 7
7 -
8
-
9
-
10
-
11
-
12
-
13
-
14
-
15
-
16
-
17
-
18
-
19
-
20
-
21
-
22
-
23
-
24
-
25
-
26
-
27
-
28
-
29
-
30
-
31
-
32
-
33
-
34
-
35
-
36
-
37
-
38
-
39
-
40
-
41
-
42
-
43
-
44
-
45
-
46
-
47
-
48
-
49
-
50
-
51
-
52
-
53
-
54
-
55
-
56
-
57
-
58
-
59
-
60
-
61
-
62
-
63
-
64
-
65
-
66
-
67
-
68
-
69
-
70
-
71
-
72
-
73
 |
 |

Projector
TLP-X4500
INTER
INPUT
M1-D
RGB
BNG
S-VIDEO
STANDBY/ON
TEMP
VIDEO
COMPONENT
LAMP
KEYSTONE
SEARCH
RESET
MENU
FOCUS
LENS SHIFT
ZOOM
User's Manual - Operating Guide
Manuel d'utilisation-Guide d'utilisation
Bedienungsanleitung-Benutzerhandbuch
Manual de usuario-Guía de funcionamiento
Manuale d'istruzioni - Guida operativa
TECHNICAL
TECHNICAL
TECHNICAL
ENGLISH