Toshiba TLP681U Owners Manual
Toshiba TLP681U - TLP 681 SXGA LCD Projector Manual
 |
UPC - 022265950869
View all Toshiba TLP681U manuals
Add to My Manuals
Save this manual to your list of manuals |
Toshiba TLP681U manual content summary:
- Toshiba TLP681U | Owners Manual - Page 1
Before use OWNER'S MANUAL 3LCD DATA PROJECTOR TLP680U TLP681U (WITH DOCUMENT IMAGING CAMERA) CONTENTS 1 - Toshiba TLP681U | Owners Manual - Page 2
by Toshiba, could void the user's authority to operate the equipment. Notice: This Class A digital apparatus complies with Canadian ICES-003. Cet appareil numérique de la classe A est conforme à la norme NMB-003 du Canada. CAUTION: Laser beam is emitted when the laser button of the remote control - Toshiba TLP681U | Owners Manual - Page 3
PRECAUTIONS Save Original Packing Materials The original shipping carton and packing materials will come in handy if you ever have to ship your LCD projector. For maximum protection, repack the set as it was originally packed at the factory. Avoid Volatile Liquid Do not use volatile liquids, such - Toshiba TLP681U | Owners Manual - Page 4
Read Owner's Manual After unpacking this product, read the owner's manual carefully, and follow all the operating and other instructions. 3. Source of , OR YOU MAY BE EXPOSED TO DANGEROUS VOLTAGE. REFER SERVICING TO QUALIFIED SERVICE PERSONNEL ONLY. 2. Power Sources This product should be operated - Toshiba TLP681U | Owners Manual - Page 5
Before use IMPORTANT SAFETY INSTRUCTIONS CONTENTS 5 5. Heat The product should be situated away from heat sources such as radiators, heat registers, stoves, or other products (including amplifiers) that produce heat. 7. - Toshiba TLP681U | Owners Manual - Page 6
not use the product in the upright position to project the pictures at the ceiling, or any other vertical positions. It may fall down and dangerous. 14 with the product. Any mounting of the product should follow the manufacturer's instructions, and should use a mounting accessory recommended by the - Toshiba TLP681U | Owners Manual - Page 7
instructions. Adjust only those controls that are covered by the operating instructions as an improper adjustment of other controls may users.) 19. Safety Check Upon completion of any service or repairs to this product, ask the service technician to perform safety checks to determine that the - Toshiba TLP681U | Owners Manual - Page 8
erect. Always store the arm back in position when moving the projector. Otherwise injury or damage may result. 25. If glass components, including lens and lamp, should break, contact your dealer for repair service. This product incorporates glass components, including a lens and a lamp. If such - Toshiba TLP681U | Owners Manual - Page 9
Before use Power supply cord selection If your line voltage is 220 to 240, use one of the following types of cable. Plug configuration Plug type Line voltage EURO 240V 10 - 15A 220 - 240V UK 240V 6A 200 - 240V Australian 240V 10A 200 - 240V North American 240V 15A 200 - 240V Switzerland - Toshiba TLP681U | Owners Manual - Page 10
2 IMPORTANT PRECAUTIONS 3 IMPORTANT SAFETY INSTRUCTIONS 4 Power supply cord selection 9 Part names and functions 11 Connections and installation Connections 16 Projector placement 18 Operations Picture projection 21 Operating the computer by the remote control 25 Adjustments Settings and - Toshiba TLP681U | Owners Manual - Page 11
Exhaust holes Control panel ON/STANDBY MENU SELECT/ADJUST ENTER INPUT ON LAMP TEMP 123 4 5 6 78 Zooming ring 21 Focusing ring 21 CONTENTS 11 1 ON/STANDBY button 21 To turn the projector on or Foot adjuster release button 20 Foot adjuster 20 Intake holes Infrared remote sensor (Continued) - Toshiba TLP681U | Owners Manual - Page 12
side Carrying handle Open to carry the projetor. Speaker Infrared remote sensor Intake holes VIDEO INPUT S-VIDEO VIDEO L - AUDIO -R Anti-theft lock 1 CONTROL connector 17 49 To connect a computer to control the projector. 2 MONITOR OUTPUT connectors (RGB output, AUDIO output) 17 To connect - Toshiba TLP681U | Owners Manual - Page 13
SUBCHAPTER J TOSHIBA AMERICA CONSUMER PRODUCTS, INC. 82 TOTOWA RD., WAYNE, NJ 07470, U.S.A REMOTE CONTROL MODEL CT remote control. POINTER: To operate a computer. (The supplied REMOTE MOUSE RECEIVER should be connected to the computer.) PJ: To operate the projector. 5 button 28 / Pointer control - Toshiba TLP681U | Owners Manual - Page 14
the menu. 7 RGB button 21 To select the RGB input. 8 RESIZE button 24 To change the picture size. 9 ON/STANDBY button 21 To turn the projector on or off. 10 LASER button To display the laser pointer by pointing the laser emission part toward the screen. 11 R-CLICK button* 26 / ENTER - Toshiba TLP681U | Owners Manual - Page 15
on the remote control or place wet objects on it. • Do not disassemble the remote control. • Under unusual circumstances the remote control may not operate well due to the location being used or the surroundings. At such times, change the direction of the remote control to the projector and retry - Toshiba TLP681U | Owners Manual - Page 16
supplied adapter for Macintosh computers. • Check that the power for the projector and computer is off before connecting the cables. Laptop computers Desktop computers or To monitor port Adapter for Macintosh computers (supplied) To audio output port RS-232C CONTROL RGB AUDIO MONITOR OUTPUT - Toshiba TLP681U | Owners Manual - Page 17
AUDIO RGB INPUT VIDEO INPUT S-VIDEO VIDEO L - AUDIO -R You can connect an extra monitor to view the picture. You can connect a computer to control the projector. 49 Audio cable (not supplied) To MONITOR OUTPUT (AUDIO) Ø3.5mm STEREO mini plug (Audio output level is constant.) To audio input - Toshiba TLP681U | Owners Manual - Page 18
from a ceiling installation. Ceiling-mounted rear projection (The document imaging camera model could not be mounted on the ceiling.) Viewing a picture projected through the back of the screen from a ceiling installation. Translucent screen Viewer Viewer • When installed the projector in the - Toshiba TLP681U | Owners Manual - Page 19
projection size by changing the distances as shown below. CONTENTS 19 3 Connect the power cord. • Insert one end in the AC IN socket on the projector. • Insert the other end in a wall outlet. Screen 90° Lens 90° b a Point the lens straight at the center of the screen as above. Side view - Toshiba TLP681U | Owners Manual - Page 20
the mirror to blur the projected pictures. In such a case, leave the projector for an adequate time (1 to 2 hours, depending on the room's so it adjusts to the ambient temperature. • If the screen is exposed to direct sunlight or other strong light, the projected picture becomes too faint to see. - Toshiba TLP681U | Owners Manual - Page 21
projector. Preparation • Install and connect the projector remote control) Press RGB or VIDEO. (On the control panel of the main unit) Press INPUT repeatedly. Each time the button is pressed, the source indication on the screen changes as follows: → → RGB: To project pictures from a computer - Toshiba TLP681U | Owners Manual - Page 22
RGB source is selected and no signal is sent from the computer for about 30 minutes, the projector turns to standby mode for power saving. It automatically turns on the projector. An instruction message appears. 2) Press ON/STANDBY again. The LAMP indicator turns off, and the projector turns to - Toshiba TLP681U | Owners Manual - Page 23
To close the display, press CALL again. Current input source Signal system of the input source Signal system automatically detected by the projector (Mode determination 45 ) Synchronizing polarity of input signal P=Positive N=Negative Version number of software Note If you press CALL while the menu - Toshiba TLP681U | Owners Manual - Page 24
Operations (Continued) AUTO SET ON/STANDBY KEYSTONE MARKER POINTER PJ LASER L-CLICK MENU R-CLICK ENTER RGB VIDEO CAMERA RESIZE RESET FREEZE MUTE CALL ,, , RESET RESIZE When the picture size is smaller than the projection area: : To move the picture upward : To move the picture down : To - Toshiba TLP681U | Owners Manual - Page 25
the projector and the computer by the remote control, place the REMOTE MOUSE RECEIVER close to the projector. • When connecting the REMOTE MOUSE RECEIVER to an IBM PC/DOS V computer, use the supplied PS/2 mouse adapter if you are using a PS/2 mouse, or connect the supplied IBM/MAC cable directly to - Toshiba TLP681U | Owners Manual - Page 26
Operations (Continued) Operating the computer by the remote control Use the supplied remote control pointing it at the connected REMOTE MOUSE RECEIVER. POINTER/PJ selector AUTO SET ON/STANDBY KEYSTONE MARKER POINTER PJ LASER Pointer control To drag and drop While holding down the center of - Toshiba TLP681U | Owners Manual - Page 27
of the sound output. Default 28 The followings are adjustments and settings on the menu. For details, see page in 29 . When using this projector for the first time, see "Default". 28 Keystone 30 Auto set : Adjust : To correct the keystone distortion automatically. To make the correction of - Toshiba TLP681U | Owners Manual - Page 28
28 Proj. mode Confirm your installation type on the chart on page 18 . Standard: Rear: Ceiling: R. ceil.: Floor-mounted front projection Floor-mounted rear projection Ceiling-mounted front projection Ceiling-mounted rear projection RGB input To set the signal type of RGB input. RGB: Y/Pb/Pr - Toshiba TLP681U | Owners Manual - Page 29
Adjustments (Continued) Scrn display On: Off: On-screen displays (indications of input selection, signal absent or mute mode, etc.) appear. On-screen displays do not appear. 5 Press MENU. The menu disappears. Notes • These settings are stored until you turn the power off. • To store the settings - Toshiba TLP681U | Owners Manual - Page 30
The menu disappears. CONTENTS 30 Notes • Pressing KEYSTONE on the remote control can also correct the keystone distortion automatically. 22 • These perform the following 0 degrees setting to correct the distortion. 1) Place the projector on a level surface. 2) On the menu, select "Auto set" in - Toshiba TLP681U | Owners Manual - Page 31
, use a bright and distinctly edged picture. • Pressing AUTO SET on the remote control can also adjust the image automatically. 23 • If you project an image from a computer with an LCD screen while monitoring the image on the computer, the image may not be projected properly, depending on the - Toshiba TLP681U | Owners Manual - Page 32
Adjustments Picture adjustments - Picture Preparation • Display the image as explained in "Picture Projection". 21 • Set the POINTER/PJ selector to "PJ". ON/STANDBY MENU SELECT/ADJUST ENTER INPUT ON LAMP TEMP 1,5 AUTO SET ON/STANDBY KEYSTONE MARKER POINTER PJ LASER 2-4 L-CLICK MENU R- - Toshiba TLP681U | Owners Manual - Page 33
Adjustments Sound adjustments - Audio Preparation • Display the image as explained in "Picture Projection". 21 • Set the POINTER/PJ selector to "PJ". ON/STANDBY MENU SELECT/ADJUST ENTER INPUT ON LAMP TEMP 1,5 AUTO SET ON/STANDBY KEYSTONE MARKER POINTER PJ LASER 2-4 L-CLICK MENU R-CLICK - Toshiba TLP681U | Owners Manual - Page 34
Adjustments Saving data - Save Preparation • Display the image as explained in "Picture Projection". 21 • Set the POINTER/PJ selector to "PJ". ON/STANDBY MENU SELECT/ADJUST ENTER INPUT ON LAMP TEMP 1,5 AUTO SET ON/STANDBY KEYSTONE MARKER POINTER PJ LASER 2,3 4 L-CLICK MENU R-CLICK - Toshiba TLP681U | Owners Manual - Page 35
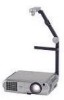
lens while operating the projector. On the document imaging camera model, you can project pictures using the document imaging camera. The document imaging camera can directly project any materials (documents, illustrations, etc.) without using an OHP film. Camera control panel 12 3 OVERLAY PHOTO - Toshiba TLP681U | Owners Manual - Page 36
Camera (Continued) 3) Turn the arm. Preparation of the document imaging camera 1) Raise up the arm. 2) Stretch the arm. 4) Open the camera head. 6) Pull up the light. CONTENTS 36 7) Turn the light. 5) Turn the camera head. Notes • Never give shocks or impacts to the camera or arm as this - Toshiba TLP681U | Owners Manual - Page 37
Place a document (text, illustration) onto or around the projector, and turn the camera head to direction of the document. LCD PROJECTOR LCD PROJECTOR CONTENTS 37 3 Press CAMERA to select the camera input mode. Pressing CAMERA on the camera control panel or INPUT on the main unit can also select - Toshiba TLP681U | Owners Manual - Page 38
is not malfunction. • If you put back the arm and raise it up while the white balance is locked (the LOCK indicator is lit), the projector releases the white balance but leaves the LOCK indicator on. In this case, press W.BALANCE to restore the indicator to the normal status. CONTENTS 38 - Toshiba TLP681U | Owners Manual - Page 39
Camera Overlaying projection With the RGB input or the video input selected, you can draw on the screen with the pen. Preparation • Select either of the RGB input or the video input. • Set the document imaging camera at the ready. 36 4 Write on the paper with a blue or red pen. The handwriting is - Toshiba TLP681U | Owners Manual - Page 40
Maintenance CONTENTS 40 Trouble indications ON LAMP TEMP Lit (red) Lit (red) - ON LAMP TEMP Lit (red) - Flashing (red) If there is some problem inside the projector, the indicators light up or flash. The lamp turns off or does not light up. → The lamp's end, or malfunction of the SELECT/ - Toshiba TLP681U | Owners Manual - Page 41
unit cleaning CAUTION If you use the projector mounted on the ceiling, ask the dealer to carry out the maintenance such as cleaning. Cleaning the air filter The filter under the air filter cover is the device to shut out dusts or dregs. Do not use the projector with the filter taken off. Give - Toshiba TLP681U | Owners Manual - Page 42
mounted on the ceiling, ask the dealer to carry out the maintenance such as cleaning or replacement of the lamp. • When replacing, always use lamp "TLPLF6" (sold separately). For detail, refer to the lamp instruction. • If you have been using the projector, the lamp will be very hot, and may - Toshiba TLP681U | Owners Manual - Page 43
support service. Refer also to "Trouble indications". 40 • The "Brightness" adjustment is at its darkest. → Make the "Brightness" adjustment. 32 • The source is not correctly connected to the projector the screen squarely. → Adjust the projecting direction so that the light hits the screen squarely - Toshiba TLP681U | Owners Manual - Page 44
the light is not on. → Turn on the light. 37 The remote control does not work. • The remote control is not facing the remote sensor. → Face the remote control transmitter toward the remote sensor on the projector. 15 • The remote control is too far. → Operate within about 5 meters. 15 • There is an - Toshiba TLP681U | Owners Manual - Page 45
SVGA85 SVGA 85Hz MAC16 MAC-16" XGA43i XGA 43Hz interlace : full compatible : simplified display : dot resizing display : high resolution serial transfer control Frequency Resolution (line) Horizontal (kHz) Vertical (Hz) Horizontal Vertical 15.734 15.625 15.750 31.500 47.500 33.750 24 - Toshiba TLP681U | Owners Manual - Page 46
display : dot resizing display : high resolution serial transfer control Mode XGA60 XGA70 XGA75 XGA85 MAC19 SXGA75-1 MAC21 SXGA60-1 may not be projected at all.) • Some computers may have output modes which are not compatible with this projector. Check the compatibility of the connectors, signal - Toshiba TLP681U | Owners Manual - Page 47
Others (Continued) Signal assignment 5 1 10 6 15 11 D-SUB 15 pin shrinking terminal Input Signal Video signal Analog 0.7V(p-p) 75Ω Horizontal synchronizing signal TTL level (positive/negative polarity) Vertical synchronizing signal TTL level (positive/negative polarity) Composite - Toshiba TLP681U | Owners Manual - Page 48
Others (Continued) CONTENTS 48 RGB signal defaults The following signals are factory set as defaults in each mode. However, some computers may have different timings than those in the chart. Make the necessary adjustments if the picture has flickers or is blurred. Video Hor Sync Video - Toshiba TLP681U | Owners Manual - Page 49
Others Adjustments with RS-232C Conditioning of the Projection Unit can also be done by a computer via the RS-232C, as well as by the remote control. 7 8 6 5 2 3 4 1 Mini DIN 8-pin (Main Unit) Pin No. 1 2 3 4 5 6 7 8 Signal RXD CTS DSR GND RTS N.C TXD N.C Meaning Receiving data Consent to - Toshiba TLP681U | Owners Manual - Page 50
value decrease Keystone automatic adjustment Keystone manual adjustment Panel automatic adjustment Vertical position setting Portuguese display setting Floor-mounted front projection Floor-mounted rear projection Ceiling-mounted front projection Ceiling-mounted rear projection RGB input mode - Toshiba TLP681U | Owners Manual - Page 51
pin Audio : 1V(p-p), less than 2.2kΩ, ø3.5mm stereo mini jack CONTROL terminal Mini DIN 8-pin (RS-232C) Cabinet Material ABS resin Liquid TLP681U : 786,432 pixels (1024 x 768 dots) x 3 Projection lens Lens Focusing Zooming Zooming lens F = 1.8 - 2.1 f = 36 - 47mm Manual operation Manual - Toshiba TLP681U | Owners Manual - Page 52
Others (Continued) Accessories Wireless remote control 1 AA size battery 2 Power cord 1 RGB cable 1 (3m) Adapter for Macintosh computers 1 PC audio cable 1 (3m) Audio/Video cable 1 (3m) Lens cover 1 REMOTE MOUSE RECEIVER 1 IBM/MAC mouse cable (for REMOTE MOUSE RECEIVER 1 PS/2 mouse adapter - Toshiba TLP681U | Owners Manual - Page 53
TOSHIBA TLP600 Series 3LCD Data Projector Toshiba service charges for installation and adjustment of customer controls instructions problem service To obtain warranty servicing, you should: 1. Read the owners manual thoroughly before operating. 2. Please contact your dealer for an immediate service - Toshiba TLP681U | Owners Manual - Page 54
Others (Continued) 6. The repaired product is returned freight prepaid to the purchaser after warranty servicing. 7. If you have any questions about service, please contact the following TACP Service Center. TACP is not obligated to provide purchasers with a substitute unit during the warranty
-
 1
1 -
 2
2 -
 3
3 -
 4
4 -
 5
5 -
 6
6 -
 7
7 -
8
-
9
-
10
-
11
-
12
-
13
-
14
-
15
-
16
-
17
-
18
-
19
-
20
-
21
-
22
-
23
-
24
-
25
-
26
-
27
-
28
-
29
-
30
-
31
-
32
-
33
-
34
-
35
-
36
-
37
-
38
-
39
-
40
-
41
-
42
-
43
-
44
-
45
-
46
-
47
-
48
-
49
-
50
-
51
-
52
-
53
-
54
 |
 |

CONTENTS
1
TLP680U
TLP681U
OWNER’S MANUAL
(
WITH DOCUMENT IMAGING CAMERA
)
3LCD DATA PROJECTOR