Tripp Lite SMX1500XLRT2U Owner's Manual for 230V 2U Rackmount UPS Systems 9331 - Page 13
Enable/Disable Alarm, LCD Brightness, Self-test, Scroll Control
 |
View all Tripp Lite SMX1500XLRT2U manuals
Add to My Manuals
Save this manual to your list of manuals |
Page 13 highlights
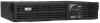
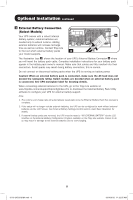
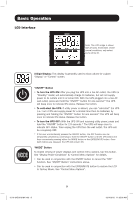
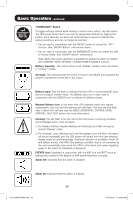
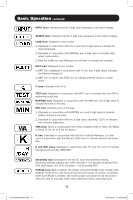
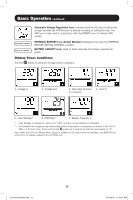
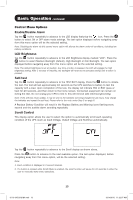
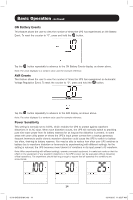
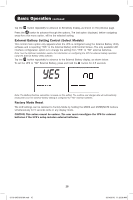
Basic Operation continued Control Menu Options Enable/Disable Alarm Tap the button repeatedly to advance to the LCD display featuring the icon. Press the button to select ON or OFF alarm mode settings. The last option displayed before navigating away from this menu option will be the selected setting. Note: Disabling the alarm via this control menu option will silence the alarm under all conditions, including low battery conditions. LCD Brightness Tap the button repeatedly to advance to the LCD Brightness display marked "LCD". Press the button to select Medium Backlight (default), High Backlight or Dim Backlight. The last option displayed before navigating away from this menu option will be the selected setting. Note: The default brightness is set at medium. Any time a button is pressed, the LCD will engage the high brightness setting. After 2 minutes of inactivity, the backlight will revert to the selected setting until a button is pressed. Self-test Tap the button repeatedly to advance to the TEST BATT display. Press the button to initiate the test. The test will last approximately 10 seconds as the UPS switches to battery to test the capacity with a load. Upon completion of the test, the display will indicate PAS or BAD (pass or bad) for 20 seconds, and then return to the home screen. Connected equipment can remain on during the test. Do not unplug your UPS to test it; this will remove safe electrical grounding. Note: If the self-test result is BAD, it may be due to the batteries not being charged for 24 hours. Fully charge the batteries and repeat the self-test. Please refer to the note under Step 3 on page 6. A Replace Battery Condition will result in the Replace Battery and Warning icons flashing every second and the audible alarm sounding repeatedly. Scroll Control This display option allows the user to select the option to automatically scroll each operating condition of the UPS (such as Input Voltage, Output Voltage and Runtime) automatically. Tap the button repeatedly to advance to the Scroll display as shown above. Press the button to advance to the next available option. The last option displayed, before navigating away from this menu option, will be the selected setting. Note: 1. Each condition is displayed in 2 second intervals. 2. If a button is pressed while Scroll Mode is enabled, the scroll function will pause for 10 seconds to allow the user to manually make menu selections. 13 12-10-345-93-3184.indb 13 12/14/2012 11:32:07 AM
-
 1
1 -
2
-
3
-
4
-
5
-
6
-
7
-
 8
8 -
 9
9 -
 10
10 -
 11
11 -
 12
12 -
 13
13 -
 14
14 -
 15
15 -
 16
16 -
 17
17 -
 18
18 -
19
-
20
-
21
-
22
-
23
-
24
-
25
-
26
-
27
-
28
-
29
-
30
-
31
-
32
-
33
-
34
-
35
-
36
-
37
-
38
-
39
-
40
-
41
-
42
-
43
-
44
-
45
-
46
-
47
-
48
-
49
-
50
-
51
-
52
-
53
-
54
-
55
-
56
-
57
-
58
-
59
-
60
-
61
-
62
-
63
-
64
-
65
-
66
-
67
-
68
-
69
-
70
-
71
-
72
 |
 |
