Uniden BC898T English Owners Manual - Page 44
Programming Trunked Systems - programming software
 |
UPC - 050633650370
View all Uniden BC898T manuals
Add to My Manuals
Save this manual to your list of manuals |
Page 44 highlights
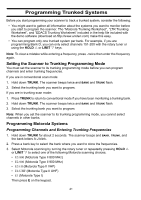
Programming Trunked Systems Programming Trunked Systems Before you start programming your scanner to track a trunked system, consider the following: • You might want to gather all information about the systems you want to monitor before you start to program the scanner. The "Motorola Trunking Worksheet", "LTR Trunking Worksheet", and "EDACS Trunking Worksheet" included in the help file included with the demo software (download at http://www.uniden.com) make this easy. • You can program only one trunked system per bank. For example, if you are programming Bank D, you can only select channels 151-200 with the rotary tuner or using the HOLD U or LIMIT V keys. Note: To clear a mistake while entering a frequency, press . twice then enter the frequency again. Setting the Scanner to Trunking Programming Mode You must set the scanner to its trunking programming mode before you can program channels and enter trunking frequencies. If you are in conventional scan mode: 1. Hold down TRUNK. The scanner beeps twice and BANK and TRUNK flash. 2. Select the trunking bank you want to program. If you are in trunking scan mode: 1. Press TRUNK to return to conventional mode if you have been monitoring a trunking bank. 2. Hold down TRUNK. The scanner beeps twice and BANK and TRUNK flash. 3. Select the trunking bank you want to program. Note: When you set the scanner to its trunking programming mode, you cannot select channels in other banks. Programming Motorola Systems Programming Channels and Entering Trunking Frequencies 1. Hold down TRUNK for about 2 seconds. The scanner beeps and BANK, TRUNK, and the bank letters A-J blink. 2. Press a bank key to select the bank where you want to store the frequencies. 3. Select Motorola scanning by turning the rotary tuner or repeatedly pressing HOLD U or LIMIT V to select one of the following Motorola scanning choices: • E2-800 (Motorola Type II 800 MHz) • E2-900 (Motorola Type II 900 MHz) • E2-HI (Motorola Type II VHF) • E2-UHF (Motorola Type II UHF) • E1 (Motorola Type I) Then press E on the keypad. 41
-
 1
1 -
2
-
3
-
4
-
5
-
6
-
7
-
8
-
9
-
10
-
11
-
12
-
13
-
14
-
15
-
16
-
17
-
18
-
19
-
20
-
21
-
22
-
23
-
24
-
25
-
26
-
27
-
28
-
29
-
30
-
31
-
32
-
33
-
34
-
35
-
36
-
37
-
38
-
 39
39 -
 40
40 -
 41
41 -
 42
42 -
 43
43 -
 44
44 -
 45
45 -
 46
46 -
 47
47 -
 48
48 -
 49
49 -
50
-
51
-
52
-
53
-
54
-
55
-
56
-
57
-
58
-
59
-
60
-
61
-
62
-
63
-
64
 |
 |