Uniden DFR3 Product Guide
Uniden DFR3 Manual
 |
View all Uniden DFR3 manuals
Add to My Manuals
Save this manual to your list of manuals |
Uniden DFR3 manual content summary:
- Uniden DFR3 | Product Guide - Page 1
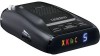
UNIDEN LONG RANGE RADAR/ DFR3 LASER DETECTOR HARDWARE DFR3 23 4 DIM MUTE 5 1 CITY 8 76 DISCLAIMER: Radar detectors are the unit is powered down/disconnected from power. WHAT'S IN THE BOX • DFR3 radar detector • Straight 12V DC Power Cord • Windshield Mounting Bracket • Hook and loop - Uniden DFR3 | Product Guide - Page 2
radar detector and be fined. The DFR3 is designed to be invisible to signals from the Spectre l, Spectre lV, and VG-2 RDDs. CARE AND MAINTENANCE Use common sense and your DFR3 will provide trouble-free service exterior. TROUBLESHOOTING IF supporter instructions in this Operating Guide Uniden America
-
 1
1 -
 2
2
 |
 |
UNIDEN LONG RANGE RADAR/
LASER DETECTOR
DFR3
DISCLAIMER: Radar detectors are illegal in some states.
Some states prohibit moun°ng any object on your
windshield. Check applicable law in your state and
any state in which you use the product to verify
that using and moun°ng a radar detector is legal.
Uniden radar detectors are not manufactured
and/or sold with the intent to be used for illegal
purposes.
Drive safely and exercise cau°on while
using this product.
Do not change se±ngs of the
product while driving. Uniden expects consumer’s
use of these products to be in compliance with
all local, state and federal law.
Uniden expressly
disclaims any liability arising out of or related to
your use of this
product.
FEATURES
• X, K, and Ka band alarms
• POP and Laser alert alarms
• Highway/City/City 1 modes
• Invisible to VG-2 and Spector I and IV radar detectors
• Mute alarm audio
• Memory feature saves user’s last settings (except MUTE)
when the unit is powered down/disconnected from
power.
WHAT’S IN THE BOX
• DFR3 radar detector
• Straight 12V DC Power Cord
• Windshield Mounting Bracket
• Hook and loop fastener tape
• Spare fuse for DC Power Cord
DFR3
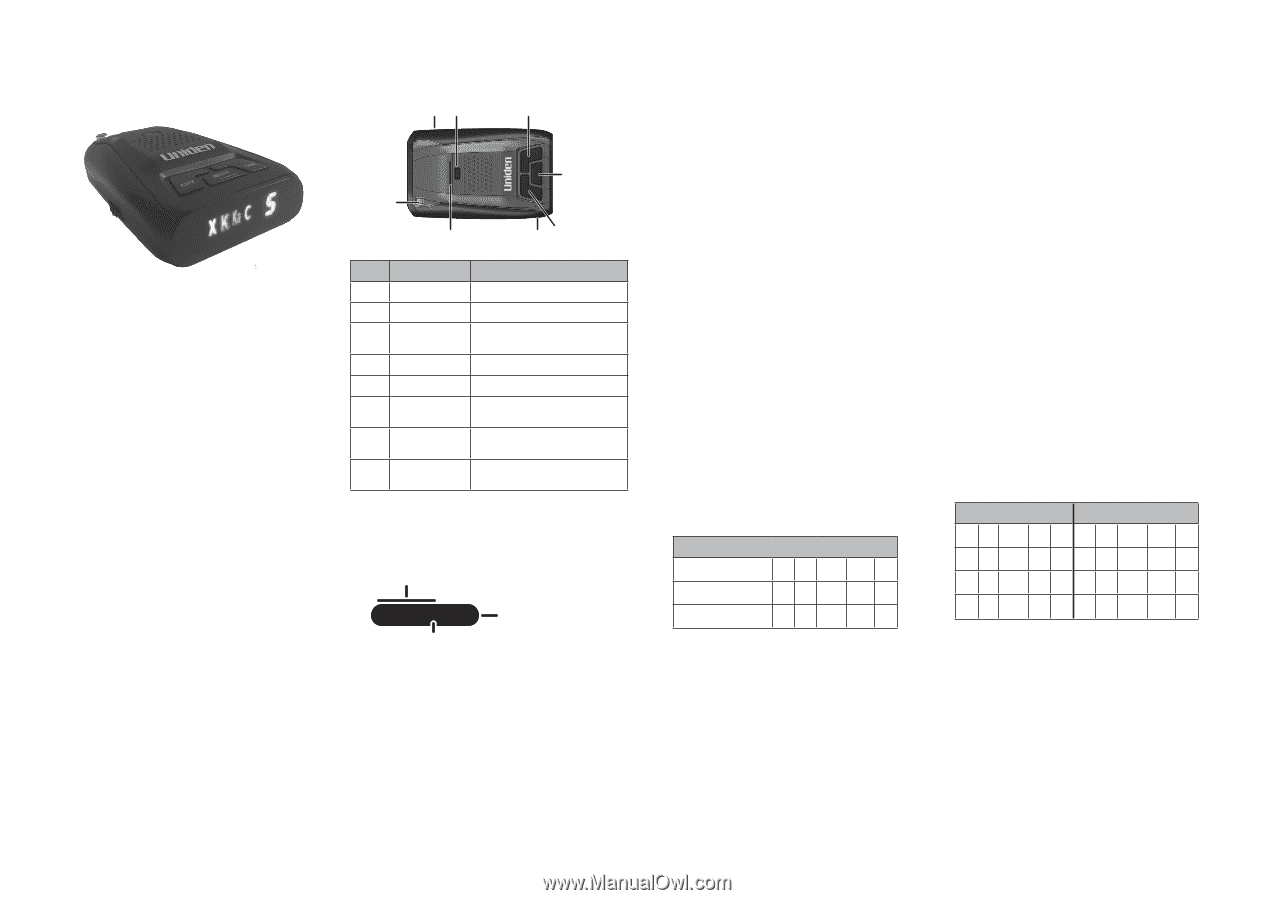
HARDWARE
NO.
NAME
WHAT IT DOES
1
Eagle Eye
360° Laser detection
2
Power Jack
Plugs into power source.
3
Eject
Releases DFR3 from mounting
hardware.
4
DIM
Dims the display brightness.
5
MUTE
Turns off the sound.
6
CITY
Sets the unit to CITY, CITY I, or
HIGHWAY mode.
7
Power/
Volume Dial
Turns unit on and adjusts
volume.
8
Mounting
Bracket Slot
The mounting bracket fits into
this slot.
LED DISPLAY
When a signal is detected, the display will show the band
type, City/Highway setting, and signal strength. If the DFR3
detects a laser, the display shows L.
INSTALLATION AND TURN UP
Install the DFR3 on the front windshield or on the
dashboard. For best performance, position the detector as
low as possible in the center of the front windshield. Be
sure the unit’s view of the road, either to the front or the
back, is clear.
INSTALLATION
WINDSHIELD
1. Clean the windshield and the rubber cups of the
mounting bracket. Attach the rubber cups to the
bracket.
2. Push the bracket firmly onto the windshield.
3. Slide the unit onto the bracket.
4. Gently adjust the bracket angle if needed.
Do not use the detector to adjust the bracket angle.
5. Plug the power cord into the detector.
6. Plug the cigarette lighter adapter into the vehicle’s
cigarette lighter.
You can remove the detector by pressing the
Eject
button.
Dashboard
1. Place the unit on the dashboard so that it has a clear,
level view of the road.
The unit cannot be readjusted aſter final installa°on.
2. Remove the backing from one side of the hook and loop
fastener tape.
3. Place that fastener tape on the dashboard where you
want the unit.
4. Attach the other piece of the fastener tape to the
bottom of the unit and attach the unit to the dashboard
fastener tape.
You can remove the unit as needed.
5. Plug the power cord into the detector.
6. Plug the cigarette lighter adapter into the vehicle’s
cigarette lighter.
TURN UP
Once the detector is installed and the car is turned on, turn
the volume dial away from you until it clicks. The unit is
now turned on.
The LED cycles through the display in this order: X - K - Ka -
Laser, then signal strength except for Laser (L).
Once the cycle is complete, the detector turns to standby
mode.
STANDBY MODE
Highway
X
K
Ka
C
H
City
X
K
Ka
C
City 1
X
K
Ka
C
I
DETECTION
The DFR3 detects emissions from radar guns and sounds an
audio alert for the driver. The detector determines which
band range the signal is from and displays that frequency
type on the display (X, K, Ka, or L). The frequency strength
(1 through 5) also displays as applicable. If there is a
specific alert code, that is also displayed.
False signals can come from other devices such as the
automa°c doors at a supermarket or even another
car’s cruise control; these devices operate in the
same frequency ranges as radar guns.
BANDS
The DFR3 recognizes:
• X Band: This band was the first frequency band assigned
to police radar. It operated on a lower frequency
(10.525GHz) with a higher power output.
• K Band: This band is the most common frequency used
in radar detectors (24.150). Its relatively small
wavelength gives it a clocking distance of about 1/4 mile
although, depending on the environment, it can detect
up to 2 miles. Turn on the K band filter (press and hold
CITY) to filter out weaker K band frequencies and reduce
false readings.
• Ka Band: Over the years, the Ka band incorporated the
Ka-Band, the Ka Wide-Band, and the Ka Super Wide-
Band. Most photo radars (also known as stop light
cameras) use this band.
POP™ is a single-pulse Doppler radar feature on some
K and Ka band radar guns. This type of radar gun is
a very sensi°ve receiver; limit POP detect mode to
highway and rural driving.
• Laser: Police use the laser’s narrower light pulses for
speed detection as it is more accurate and faster. Laser
beams are more detectable after they have bounced off
their target and begin to disperse on the return trip.
MODES
The DFR3 operates in three modes:
• Highway. Provides audio and visual alerts any time all
bands and laser are detected. Recommended for
highway or rural driving. (X, K, Ka, Laser)
• City. Provides audio and visual alerts any time all bands
and laser are detected. Provides a stronger signal for the
X band so it can pick up weaker signals. (X, K, Ka, Laser)
• City I. Similar to City mode, but no X band is detected.
(K, Ka, Laser)
HIGHWAY
CITY/CITY I
X
K
Ka
C
1
X
K
Ka
C
1
X
K
Ka
C
1
X
K
Ka
C
1
X
K
Ka
C
1
X
K
Ka
C
1
X
K
Ka
C
L
X
K
Ka
C
L
OPERATION
SETUP
After installing your radar detector, you can set it to your
own specifications.
• Mute/Auto Mute. When an audio alert sounds, pressing
MUTE
lets you turn off the audio alarm. Press and hold
MUTE
to set Auto Mute to ON to reduce the audio
alarm by 50% automatically after 3 seconds during an
alert.
• Dim. Change the brightness of the display. (Default -
Bright)
• Set City, City I, or Highway
–
City mode delays all X band audio alerts until the
signal is at level 3.
–
City I mode does not recognize X band
1
MUTE
CITY
DIM
3
4
5
6
2
7
8
Signal Strength ( I - 5)
City 1 (I)
Highway (H)
Various Alerts
X K Ka C
1
Band Type
City (C)