Via ARTIGO A2000 Installation Guide
Via ARTIGO A2000 - VIA ARTiGO Barebone Storage Server Manual
 |
View all Via ARTIGO A2000 manuals
Add to My Manuals
Save this manual to your list of manuals |
Via ARTIGO A2000 manual content summary:
- Via ARTIGO A2000 | Installation Guide - Page 1
VIA ARTiGO A2000 WiFi Kit Installation Guide 1) Mount: Locate the WiFi screw hole beside the motherboard and Setting: Check the BIOS setting and ensure the USB port is enabled. 5) Driver: Software driver is available at VIA support website at www.viaarena.com under Support > Drivers section. Please - Via ARTIGO A2000 | Installation Guide - Page 2
- Via ARTIGO A2000 | Installation Guide - Page 3
- Via ARTIGO A2000 | Installation Guide - Page 4
-
 1
1 -
 2
2 -
 3
3 -
 4
4
 |
 |
VIA ARTiGO A2000 WiFi Kit Installation Guide
1)
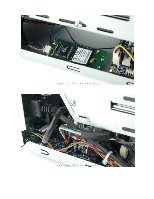
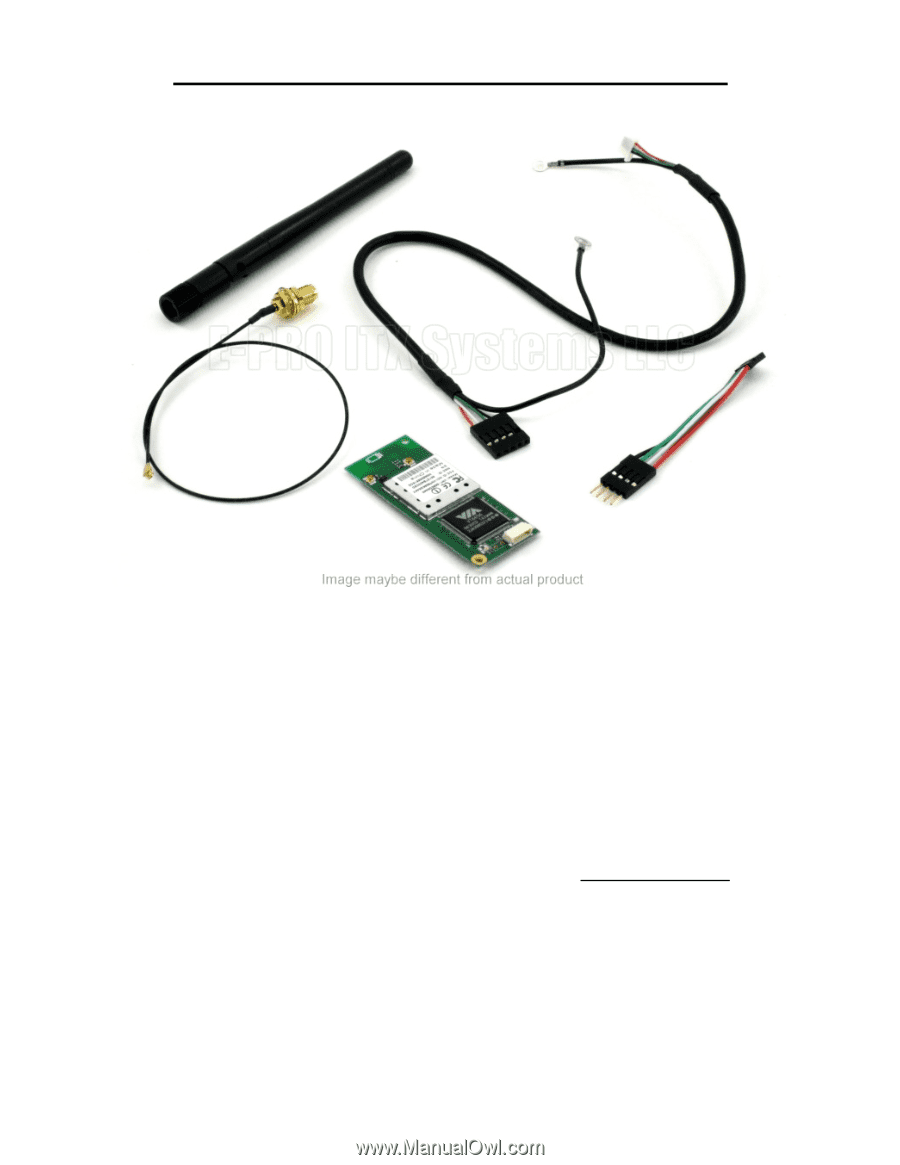
Mount: Locate the WiFi screw hole beside the motherboard and mount the WiFi module in
place.
2)
Connect the USB cable: the black end connects with the 2mm pitch adapter (narrow header),
and then connect it to the motherboard USB pin header. The white end connects to the WiFi
module. Next, connect both black ground wires to any mounting screw on the chassis (i.e..
Motherboard or hard drive screw hole).
3)
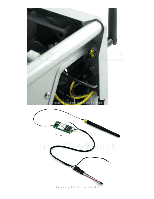
Connect the pigtail: connect the tiny gold connector to the center gold header on the WiFi
module. It is important to connect to the center gold header as it is the primary one, the gold
header at the side is secondary and only for dual antenna purposes. Next, route the end of the
pigtail to the back of the chassis and connects the antenna through the back antenna hole.
4)
Setting: Check the BIOS setting and ensure the USB port is enabled.
5)
Driver: Software driver is available at VIA support website at www.viaarena.com
under Support
> Drivers section. Please select your corresponding operating system, the WiFi module driver
is under Ethernet (Networking/LAN/WLAN). The software you need is for VIA VT6656 WLAN
controller. Install the driver and your WiFi feature is completed.