ViewSonic N1800TV User Guide
ViewSonic N1800TV - 18" LCD TV Manual
 |
UPC - 766907828719
View all ViewSonic N1800TV manuals
Add to My Manuals
Save this manual to your list of manuals |
ViewSonic N1800TV manual content summary:
- ViewSonic N1800TV | User Guide - Page 1
N1800TV LCDTV Display User Guide - ViewSonic N1800TV | User Guide - Page 2
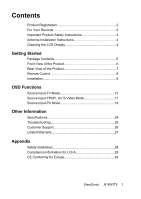
Registration 2 For Your Records 2 Important Product Safety Instructions 3 Antenna Installation Instructions 4 Cleaning the LCD Display 4 Getting Started Package Contents 5 Front View of the Product 6 Rear View of the Product 7 Remote Control 8 Installation 9 OSD Functions Source Input-TV - ViewSonic N1800TV | User Guide - Page 3
, 2003. All rights reserved. Macintosh and Power Macintosh are registered trademarks of Apple Computer, Inc. Microsoft, Windows, Windows NT, and the Windows logo are registered trademarks of Microsoft Corporation in the United States and other countries. ViewSonic, the three birds logo, OnView - ViewSonic N1800TV | User Guide - Page 4
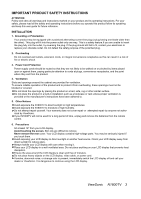
cover repair or attempted repair by anyone not authorized by ViewSonic. If your N1800TV will not be used for a long period of time, unplug and remove the batteries from the remote control. 6. Precautions Sit at least 18" from your LCD display. Avoid touching the screen. Skin oils are difficult to - ViewSonic N1800TV | User Guide - Page 5
the use of any ammonia or alcohol-based cleaners on the LCD display screen or case. Some chemical cleaners have been reported to damage the screen and/or case of the LCD display. ViewSonic will not be liable for damage resulting from use of any ammonia or alcohol-based cleaners. ViewSonic N1800TV 4 - ViewSonic N1800TV | User Guide - Page 6
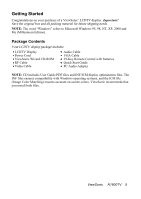
, NT, XP, 2000 and Me (Millennium Edition). Package Contents Your LCDTV display package includes: LCDTV Display Power Cord ViewSonic Wizard CD-ROM RF Cable Video Cable Audio Cable VGA Cable 29-Key Remote Control with batteries Quick Start Guide PC Audio Adapter NOTE: CD includes User Guide PDF - ViewSonic N1800TV | User Guide - Page 7
. 4 CH Down Channel up when source is at TV or select a control while in OSD menu. 5 CH UP Channel down when source is at TV or select a control while in OSD menu. 6 ENTER To highlight a control in OSD menu. 7 Power LED indicator 8 Power button 9 Remote control receiver ViewSonic N1800TV 6 - ViewSonic N1800TV | User Guide - Page 8
View of the Product A B C D E FGH I J A YPbPr signal input Connect the external video devices with component output to these jacks. B VGA signal input Using the 15-Pin VGA cable provided, connect one side to your PC and the other side to this port. C Power cable service. ViewSonic N1800TV 7 - ViewSonic N1800TV | User Guide - Page 9
, use ENTER to select a control, use / arrows to adjust the selected control Select between MONO,Stereo and SAP when available Display source and channel information Switch between offair or cable TV Channel UP/DOWN adjustment Volume UP/DOWN adjustment Recall previous channel ViewSonic N1800TV 8 - ViewSonic N1800TV | User Guide - Page 10
away from children and pets. When the remote control will not to be used for an supplied analog VGA cable from your PC VGA OUT port to the N1800TV VGA IN port. AUDIO CONNECTION Connect the supplied stereo mini cable from the PC's AUDIO OUT port to the AUDIO IN port on the N1800TV. ViewSonic N1800TV - ViewSonic N1800TV | User Guide - Page 11
connect the stereo mini cable from the monitor's AUDIO OUT port to the appropriate AUDIO IN port on a compatible amplifier as shown on the right. 3. Connect AV, S, YPbPr, Antenna to Video Devices Connect Video/Audio cables form compatible devices into the back panel of N1800TV. ViewSonic N1800TV 10 - ViewSonic N1800TV | User Guide - Page 12
OSD menu or Remote control 1) Insert the ViewSonic Wizard CD into the your computer CD drive, wait for the CD to auto-start and then follow the on-screen instruction. 2) For the best picture quality set your LCD display timing mode to VESA 1024 x 768 @ 60Hz, Refer to graphic card user guide, for - ViewSonic N1800TV | User Guide - Page 13
hue level. (right: more greenish tone, left: more reddish tone) Sharpness: To adjust the image sharpness of display. (right: soften, left: sharpen) Sound Menu Balance: To adjust the left and right audio balance. Bass: To adjust the audio bass. Treble: To adjust the audio treble. ViewSonic N1800TV 12 - ViewSonic N1800TV | User Guide - Page 14
TV /CATV channels. Channel (Add, Delete): Use to add or skip TV channel after Autoscan. V-CHIP Control: To turn V-Chip function on/off, set desired rating(s) and change password. V-Chip feature is designed to help parents monitor what their children watch an television. ViewSonic N1800TV 13 - ViewSonic N1800TV | User Guide - Page 15
the special password. Use remote control arrow keys to select V-CHIP Blocking to set parental guidelines on or off. Select MPAA Rating Guide to set rating grade. Use remote control arrow keys to move cursor as Restrlcted No one 17 and under admitted Adult audience only ViewSonic N1800TV 14 - ViewSonic N1800TV | User Guide - Page 16
Select TV Rating Guide to set rating grade. Use remote control arrow keys to move cursor to desire rating grade. When the as Violence Fantasy Violence To change the password, select NEW PIN-Code. Use remote control numbering keys to enter a 4 digit number, then press ENTER. ViewSonic N1800TV 15 - ViewSonic N1800TV | User Guide - Page 17
Use remote control numbering keys to confirm the number again, then press ENTER. ViewSonic N1800TV 16 - ViewSonic N1800TV | User Guide - Page 18
in YPbPr) Sound Menu Balance: To adjust the left and right audio balance. Bass: To adjust the audio bass. Treble: To adjust the audio treble. ViewSonic N1800TV 17 - ViewSonic N1800TV | User Guide - Page 19
Option Menu Source Select: To choose a desired input source between PC, YPbPr, S-Video, AV and TV/CATV. Memory Recall: Recall factory pre-sets. ViewSonic N1800TV 18 - ViewSonic N1800TV | User Guide - Page 20
Source Input: PC Main Menu: Auto Adjust: Auto adjust picture's horizontal position, vertical position, fine tune and H-Size. Contrast: To adjust the contrast ratio of the image. Brightness: To adjust the brightness level of the image. ViewSonic N1800TV 19 - ViewSonic N1800TV | User Guide - Page 21
Color Adjust: To choose the preset color temperature, or a user selected color setting. Information: Show current timing mode information. Image Adjust: Includes H. /V. Position, H. Size, Fine Tune and Sharpness. ViewSonic N1800TV 20 - ViewSonic N1800TV | User Guide - Page 22
reduce random horizontal noise in the image. H. Size: To adjust the delay time between horizontal synchronous signal and video. Sharpness: To adjust the picture sharpness. ViewSonic N1800TV 21 - ViewSonic N1800TV | User Guide - Page 23
Source Select: To select an input source between PC, YPbPr, S-Video, AV, and TV/CATV. Setup Menu: Includes OSD Position and OSD Timeout. OSD Position: To adjust horizontal and vertical positions of OSD. OSD Timeout: To set OSD display time. ViewSonic N1800TV 22 - ViewSonic N1800TV | User Guide - Page 24
PIP Menu: Includes PIP Source Select, PIP H. /V. Position and PIP On/Off the control turning. PIP Source Select: To select a PIP input source between PC, YPbPr, S-Video, (Middle), color temperature (preset color), OSD Position (Center), Sharpness (Min) and Volume (Middle). ViewSonic N1800TV 23 - ViewSonic N1800TV | User Guide - Page 25
Power saving modes On Active Off - ViewSonic N1800TV | User Guide - Page 26
Troubleshooting No power Make sure power button (or switch) is ON. Make sure A/C power cord is securely connected to the LCD display. Plug another electrical device (like a radio) into the power outlet to verify that he outlet is supplying proper voltage. Power is ON but no screen image Make sure - ViewSonic N1800TV | User Guide - Page 27
.com.sg T: 65 273 4018 F: 65 273 1566 service.sg@ viewsonic.com Other Asia/Pacific viewsonic.com.tw countries T: 886 2 2246 3456 service.ap@ F: 886 2 8242 3668 viewsonic.com South Africa viewsonic.com/asia T: 886 2 2246 3456 service.ap@ F: 886 2 8242 3668 viewsonic.com ViewSonic N1800TV 26 - ViewSonic N1800TV | User Guide - Page 28
electrical power fluctuations or failure. f. Use of supplies or parts not meeting ViewSonic's service on ViewSonic products sold outside of the U.S.A. and Canada, contact ViewSonic or your local ViewSonic dealer. ViewSonic LCD Warranty (V3.0) Release Date: 01- 29- 2002 ViewSonic N1800TV - ViewSonic N1800TV | User Guide - Page 29
power supply, part number: 12VDC LSE9901B1250, 12VDC UP06031120. CAUTION: The socket-outlet should be installed near the equipment and should be easily accessible. CAUTION: Use a power power cord to use, please consult with the dealer from whom you have purchased the product. ViewSonic N1800TV 28 - ViewSonic N1800TV | User Guide - Page 30
instruction manual. CE Conformity for Europe The device complies with the requirements of the EEC directive 89/336/EEC as amended by 92/31/EEC and 93/68/EEC Art.5 with regard to "Electromagnetic compatibility", and 73/23/EEC as amended by 93/68/EEC Art.13 with regard to "Safety." ViewSonic N1800TV
-
 1
1 -
 2
2 -
 3
3 -
 4
4 -
 5
5 -
 6
6 -
 7
7 -
8
-
9
-
10
-
11
-
12
-
13
-
14
-
15
-
16
-
17
-
18
-
19
-
20
-
21
-
22
-
23
-
24
-
25
-
26
-
27
-
28
-
29
-
30
 |
 |
N1800TV
LCDTV Display
User Guide