ViewSonic N3200W User Guide
ViewSonic N3200W - NextVision - 32" LCD TV Manual
 |
UPC - 060317766907
View all ViewSonic N3200W manuals
Add to My Manuals
Save this manual to your list of manuals |
ViewSonic N3200W manual content summary:
- ViewSonic N3200W | User Guide - Page 1
- ViewSonic N3200W | User Guide - Page 2
Rear View of the Product 8 Remote Control ...9 Notes on the Remote Control...11 Teletext...11 Installation ...12 OSD Functions Source Input: TV/AV/S-video 15 Appendix Specifications ...25 Troubleshooting...27 Customer Support ...28 Limited Warranty ...29 Safety Guidelines ...30 ViewSonic N3200w 1 - ViewSonic N3200W | User Guide - Page 3
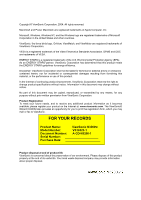
, ViewSonic Corporation reserves the right to change product specifications without notice. Information in this document may change without notice. No part of , which you may mail or fax to ViewSonic. FOR YOUR RECORDS Product Name: ViewSonic N3200w Model Number: VS10323-1 Document Number: A-CD - ViewSonic N3200W | User Guide - Page 4
Your warranty does not cover repairs or attempted repairs by anyone not authorized by ViewSonic. • If your N3200w will not be used for a long period of time, unplug and remove the batteries from the remote control. 6 Precautions Sit at least two metres from your LCD. Avoid touching the screen. Skin - ViewSonic N3200W | User Guide - Page 5
the National Electrical Code, ANS/NFPA 70, provides information with regard to proper grounding of the mast and supporting structure, grounding of then wipe the surface. Disclaimer ViewSonic does not recommend the use of any ammonia or alcohol-based cleaners on the LCD screen or case. Some chemical - ViewSonic N3200W | User Guide - Page 6
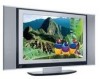
ViewSonic LCD TV display. Important! Save the original box and all packaging material for future shipping needs. Package Contents Please confirm that the following accessories are present when you unpack the box: • LCD TV • Remote Control (batteries included) • Power Cord • Quick Start Guide • User - ViewSonic N3200W | User Guide - Page 7
display input sources. 5. MENU Display menu screen. HEADPHONE MENU VOL CH POWER SOURCES CF 6. VOL +/- SD/MUMsCedSMforMcShanging the volume. 4 7. CH ▼ /▲ Changes the channel. 8. POWER 5 8 7 6 Turns the TV on and off. A green light indicates that TV is on and red that it is off. 1 ViewSonic N3200w 6 - ViewSonic N3200W | User Guide - Page 8
stored on the memory card (ie. JPEG files). The device supports all JPEG formats as created by digital cameras, but does not support other graphic formats. • You can insert CF, SD, MMC, SMC, and MS cards. Other cards are not supported. • Two cards can not be used at the same time. ViewSonic N3200w 7 - ViewSonic N3200W | User Guide - Page 9
your PC or portable computer. 4.PC AUDIO IN Supports DVI input and VGA input. 5. VGA IN Connects to a computer's VGA out jack, enabling you to use the TV as a computer monitor. 6.COMPONENT IN Connects to stereo system. 10.ANT Connect to an antenna or cable service. 2 3 8 ViewSonic N3200w 8 - ViewSonic N3200W | User Guide - Page 10
Remote Control 1. POWER Turns power on or to standby mode. 2. S-VIDEO Switches to S-Video input. 3. SLEEP Sets the time to turn off the unit. 4. CH▼/ ▲ . 7. TELETEXT HOT KEYS Select groups of pages in teletext mode. 8. INDEX Displays a list and information about the teletext pages. ViewSonic N3200w 9 - ViewSonic N3200W | User Guide - Page 11
the screen. 11. VIDEO MUTE Turns off the video display. The TV screen turns blank. 12. ARROW KEYS Press the up, down, left memory card automatically. Press again to stop playback. 24. ROTATE Rotates a picture from the flash memory card by 90º in a clockwise (right) mode. ViewSonic N3200w 10 - ViewSonic N3200W | User Guide - Page 12
may affect the remote controls effective range. • Avoid subjecting the remote control to shocks or vibrations. • Avoid placing the remote control in humid and hot environments such as direct sunlight. • Remove the batteries when not using the remote control for long periods. ViewSonic N3200w 11 - ViewSonic N3200W | User Guide - Page 13
for installation otherwise. 1 Slide part A upwards, then remove. 2 Remove the screws from part B and remove the part. 3 Attach part C using screws. Part C and the screws are in the accessory pack. Note the shape of the screws. 4 Replace part A by sliding A's tabs into the slots. ViewSonic N3200w 12 - ViewSonic N3200W | User Guide - Page 14
Follow the steps below to insert the batteries. 1 Open the remote control's rear battery compartment cover. 2 Insert two AAA batteries. Ensure batteries away from children and pets. • If the remote control will not be used for an extended period of time, remove the batteries. ViewSonic N3200w 13 - ViewSonic N3200W | User Guide - Page 15
power cable to a wall socket. 2 Connect the other end to the socket on the back of the LCD TV Turning the TV (Power) On 1 Press the power button. The power light will turn from red to green and the screen will appear after 5 seconds. 2 Press the power button again to turn it off. ViewSonic N3200w - ViewSonic N3200W | User Guide - Page 16
LCD TV are controlled either by the remote control or the control buttons on the front control panel at bottom of the TV. See "Front View of the Product" on page 6. Press the MENU button on the remote control or the front control menu item. Press the MENU button to exit the OSD. ViewSonic N3200w 15 - ViewSonic N3200W | User Guide - Page 17
Mode Explanation Brightness adjustment. Contrast adjustment. Color adjustment. Tint adjustment. Sharpness adjustment. Select TV image display: Preset: Factory default settings. Soft: Picture settings result in softer colors and less sharp images. User: User defined settings. ViewSonic N3200w 16 - ViewSonic N3200W | User Guide - Page 18
Bass Level. Adjust left and right speaker balance. Stores Audio settings. Soft: audio settings that result in softer audio. User: user defined settings. Preset: factory default settings Turns the speakers off (same as mute). Selects the audio mode from STEREO, DUAL 1/2, or MONO. ViewSonic N3200w 17 - ViewSonic N3200W | User Guide - Page 19
Settings Menu ViewSonic N3200w 18 - ViewSonic N3200W | User Guide - Page 20
mode and YPbPr/RGB/DVI mode for the main screen. Enables and disables POP (Picture-on-Picture) mode. Swaps the input sources between main and sub screens display. i.e. When in the POP mode, only the subtitles and audio input are swapped. Mode Enables you to select a screen mode. ViewSonic N3200w 19 - ViewSonic N3200W | User Guide - Page 21
TV settings Function Name Explanation Program Indicated the program/channel number when it scanned. Fine Tune Display the selected frequency and change the frequency for the channel. Manual setting. Tuner System To display the TV standard of local broadcasting system. ViewSonic N3200w 20 - ViewSonic N3200W | User Guide - Page 22
ViewSonic N3200w 21 - ViewSonic N3200W | User Guide - Page 23
Color settings Function Name Red Green Blue Color Temperature Explanation Adjusts the red color Adjusts the green color Adjusts the blue color Adjust the color temperature from Cool, Warm, Nature, and User. ViewSonic N3200w 22 - ViewSonic N3200W | User Guide - Page 24
image. Adjust the phase of screen to obtain the best output. Adjust screen's horizontal size. Automatically adjusts the screen according to the input signal source. ViewSonic N3200w 23 - ViewSonic N3200W | User Guide - Page 25
sharpness level of the screen. Adjust the screen's horizontal position. Adjust the screen's vertical position. Auto adjusts, the phase, clock, and position of the image. ViewSonic N3200w 24 - ViewSonic N3200W | User Guide - Page 26
(Orange LED) Preset Timing Mode (Pre-adjusted to VESA 1280 x 768 at 60 Hz) Warning: Do not set the graphics card in you computer to exceed these refresh rates. Doing so may result in permanent damage to the LCD. Note: Product specifications are subject to change without notice. ViewSonic N3200w 25 - ViewSonic N3200W | User Guide - Page 27
or not connected; please check all the CATV connections. • The cable TV service is interrupted; please contact your cable operator. Picture is cut off/with sidebar screen. • Is the image positioned correctly? • Are screen mode adjustments such as picture size set correctly? ViewSonic N3200w 26 - ViewSonic N3200W | User Guide - Page 28
ViewSonic N3200w 27 - ViewSonic N3200W | User Guide - Page 29
, at its sole option, repair or replace the product with a like product. Replacement product or parts may include remanufactured or refurbished parts or components. How long the warranty is effective: Viewsonic N3200w LCD TV is warranted for one (1) year for all parts including the light source and - ViewSonic N3200W | User Guide - Page 30
Canada ..........CSA Germany ........VDE Switzerland ....SEV Britain BASE/BS Japan Electric Appliance Control Act IMPORTANT NOTICE CONCERNING POWER CORD SELECTION The power assure continued FCC compliance, the user must use a grounded power supply cord and the provided shielded ViewSonic N3200w 29
-
 1
1 -
 2
2 -
 3
3 -
 4
4 -
 5
5 -
 6
6 -
 7
7 -
8
-
9
-
10
-
11
-
12
-
13
-
14
-
15
-
16
-
17
-
18
-
19
-
20
-
21
-
22
-
23
-
24
-
25
-
26
-
27
-
28
-
29
-
30
 |
 |