ViewSonic N4200W N4200w User Guide, English
ViewSonic N4200W - NextVision - 42" LCD Flat Panel Display Manual
 |
UPC - 766907170917
View all ViewSonic N4200W manuals
Add to My Manuals
Save this manual to your list of manuals |
ViewSonic N4200W manual content summary:
- ViewSonic N4200W | N4200w User Guide, English - Page 1
ViewSonic® N4200w LCD Display - User Guide - Guide de l'utilisateur - Guida dell'utente - Model No. : VS10945-1M - ViewSonic N4200W | N4200w User Guide, English - Page 2
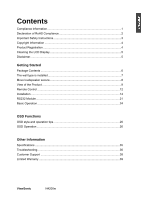
8 View of the Product 9 Remote Control ...12 Installation ...14 RS232 Module...21 Basic Operation ...24 OSD Functions OSD style and operation tips 26 OSD Operation ...26 Other Information Specifications ...35 Troubleshooting ...36 Customer Support 38 Limited Warranty ...39 ViewSonic N4200w - ViewSonic N4200W | N4200w User Guide, English - Page 3
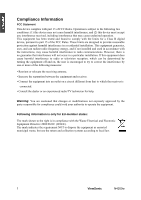
Class B digital device, pursuant to part 15 of the FCC Rules. in accordance with the instructions, may cause harmful interference turning the equipment off and on, the user is encouraged to try to correct the the dealer or an experienced radio/TV technician for help. Warning: You ViewSonic N4200w - ViewSonic N4200W | N4200w User Guide, English - Page 4
exceeding 5 mg per lamp and in other lamps not specifically mentioned in the Annex of RoHS Directive. 2. Lead in ray tubes, electronic components, fluorescent tubes, and electronic ceramic parts (e.g. piezoelectronic devices). 3. Lead in high temperature type solders by weight. ViewSonic N4200w 2 - ViewSonic N4200W | N4200w User Guide, English - Page 5
when the unit has been damaged in any way, such as: if the power-supply cord or plug is damaged, if liquid is spilled onto or objects fall into the unit, if the unit is exposed to rain or moisture, or if the unit does not operate normally or has been dropped. 3 ViewSonic N4200w - ViewSonic N4200W | N4200w User Guide, English - Page 6
or use of this product. In the interest of continuing product improvement, ViewSonic Corporation reserves the right to change product specifications without notice. Information in this document may change without notice. No part of this document may be copied, reproduced, or transmitted by any means - ViewSonic N4200W | N4200w User Guide, English - Page 7
use of any ammonia or alcohol-based cleaners on the LCD display screen or case. Some chemical cleaners have been reported to damage the screen and/or case of the LCD display. ViewSonic will not be liable for damage resulting from use of any ammonia or alcohol-based cleaners. 5 ViewSonic N4200w - ViewSonic N4200W | N4200w User Guide, English - Page 8
® LCD display. Important! Save the original box and all packing material for future shipping needs. Package Contents Your LCD display package includes: y LCD Display y VGA Cable y Quick Start Guide y Power Cable y Universal Remote Control with batteries y ViewSonic User Guide ViewSonic N4200w 6 - ViewSonic N4200W | N4200w User Guide, English - Page 9
off the power. 2. Set the LCD display on a table or work surface, screen-down with a towel or woolen blanket between the screen and the surface to protect the display. 3. Disassemble 6 screws in the base. 4. According to the wall type instruction, fix LCD display to the wall. 7 ViewSonic N4200w - ViewSonic N4200W | N4200w User Guide, English - Page 10
Move loudspeaker secure To detach the loudspeakers from the LCD display, please read the following guidelines: 1. Cut off the power. 2. Disassemble 6 screws of the back loudspeaker(3 screws on each side). 3. Exert oneself outward, remove the loudspeaker ViewSonic N4200w 8 - ViewSonic N4200W | N4200w User Guide, English - Page 11
POWER Select input sources Turn OSD menu ON/OFF Decrease volume or adjust a highlighted control decreasingly while in OSD menu Increase volume or adjust a highlighted control increasingly while in OSD menu Channel down/ Scroll down Channel up/ Scroll up Turn the power ON/OFF 9 ViewSonic N4200w - ViewSonic N4200W | N4200w User Guide, English - Page 12
one HDMI cable terminals of your DVD player. D HDMI(2) Have one HDMI cable terminals of your DVD player. E VGA Connect the VGA cable output of PC to the VGA terminal input. F PC STEREO Connect the Audio in cable from audio output of your PC to the audio input terminal. ViewSonic N4200w 10 - ViewSonic N4200W | N4200w User Guide, English - Page 13
jack. Connect the external video device into this jack. Connect the external video device into this jack. Connect the external video device into this jack. ViewSonic N4200w - ViewSonic N4200W | N4200w User Guide, English - Page 14
Remote Control A S B C R D Q E F P I N G H O J M K L Remote control button function as follow A Source button Select Input Source B 0~100+ number button No functions C Volume Adjust Volume D CC button Close Caption ViewSonic N4200w 12 - ViewSonic N4200W | N4200w User Guide, English - Page 15
Display J PIP/POP (Guide) Activate PIP feature (Activate Guide) K PIP/SOUR Press Main and Sub picture N SRS Enable/Disable Surround Sound O WIDE Change Aspect Ratio P Menu Display menu or exit OSD menu Q MTS No function R Channel No function S POWER Power ON/OFF 13 ViewSonic N4200w - ViewSonic N4200W | N4200w User Guide, English - Page 16
Installation 1. Insert Remote Control Batteries 1 Remove the battery cover by pulling then lifting the knob on the cover. and regulations. y Keep the battery away from children and pets. y When the remote control will not be used for an extended period, remove the batteries. ViewSonic N4200w 14 - ViewSonic N4200W | N4200w User Guide, English - Page 17
AV, S-Video, YCbCr, YPbPr, HDMI to Video Devices Connect Video/Audio cables from compatible devices into the back panel of N4200W. AV model: RCA A/V Cable (Cable not supplied) VCR S-Video model: S-Video Cable (Cable not supplied) Audio in Cable (Cable not supplied) VCR 15 ViewSonic N4200w - ViewSonic N4200W | N4200w User Guide, English - Page 18
YCbCr model: YPbPr model: ViewSonic N4200w YCbCr Cable (Cable not supplied) Audio in Cable (Cable not supplied) DVD Player or VCR YCbCr Cable (Cable not supplied) Audio in Cable (Cable not supplied) DVD Player or VCR 16 - ViewSonic N4200W | N4200w User Guide, English - Page 19
your DVD player to the HDMI terminal input of N4200W. HDMI cable DVD Player (Cable not supplied) HDMI Cable (Cable not supplied) Note: To receive the sound from DVD, please turn on Sound Menu of OSD for selecting HDMI audio to HDMI. However, the input source should be in HDMI. 17 ViewSonic N4200w - ViewSonic N4200W | N4200w User Guide, English - Page 20
input of N4200W. PC up to 1280 x 1024 , or 1360 x 768 is the preferred resolution. PC VGA 15 Pin Cable PC Audio in: Connect the Audio In cable (green) from audio output of your PC to the audio input terminal (green) of N4200W. PC ViewSonic N4200w PC Audio in Cable (Cable not supplied) 18 - ViewSonic N4200W | N4200w User Guide, English - Page 21
from DVI output of PC to the HDMI terminal input of N4200W. PC HDMI Cable (Cable not supplied) 4. Connect power cable Connect the power cord to the N4200W then to a properly grounded AC outlet. Turn on the AC Switch on the back of N4200W AC Switch Switch to ON AC wall socket 19 ViewSonic N4200w - ViewSonic N4200W | N4200w User Guide, English - Page 22
5. Turn Power ON Press the Power button under the LCD Display, or press the Power On (red) button on the Remote Control. Turn Video source power ON. ViewSonic N4200w 20 - ViewSonic N4200W | N4200w User Guide, English - Page 23
RS232 module. RS232 Operation Note: The RS232 user should be familiar with PC and general PC operations. System Environment Proper operations of RS232 module for the control of LCD DISPLAY functions are carried out through hyper terminal function in Windows operation system. 21 ViewSonic N4200w - ViewSonic N4200W | N4200w User Guide, English - Page 24
field of the ASCII Code Setting window. Click OK buttons and exit. Then, the new hyper terminal is created, and you can input commands properly to conduct easy control of the system for certain functions with RS232 module's correct connection with N4200w and the PC. ViewSonic N4200w 22 - ViewSonic N4200W | N4200w User Guide, English - Page 25
Operation To realize certain function of the system, you need to input the corresponding commands properly in the hyper terminal window. Note: As for the detailed commands for the functions, please refer to the command list attached additionally. 23 ViewSonic N4200w - ViewSonic N4200W | N4200w User Guide, English - Page 26
on the Main AC Power Switch, located on the rear of the cabinet. (If the LCD Display will not be used for a long period of time, please turn it off) Power On/Off To turn the LCD Display on/off : Press the POWER button under the LCD Display or press the Power button on your remote control to turn - ViewSonic N4200W | N4200w User Guide, English - Page 27
Source menu Select the source you want. Select VGA, then PC mode appears. Select others, then AV mode appears. 25 ViewSonic N4200w - ViewSonic N4200W | N4200w User Guide, English - Page 28
or ► to adjust it or execute the function. Press the "Menu" button on your remote control or right side of the LCD Display again to close the OSD Main Menu. (For PC mode) The 4 icons at the top of the OSD Main menu stand for the 4 sub menus (Picture, Adjust, Audio, Setup). (For AV mode) The 4 icons - ViewSonic N4200W | N4200w User Guide, English - Page 29
temp set is Color Temp here. Options: STD , Warm, Cold ►or ◄ to select color temp. and user User You can adjust Red, Green, Blue ► to increase the color temp. to change color temp. ◄ to or Text. ►or◄ to select Single, PBP, PIP. (HDMI input is not supported in sub picture) 27 ViewSonic N4200w - ViewSonic N4200W | N4200w User Guide, English - Page 30
the delay time ◄ to decrease the delay time. Adjust the horizontal position of ► to move toward the right. the main and sub picture in PIP. ◄ to move toward the left. Adjust the vertical position of the main and sub picture in PIP. ► to move upward. ◄ to move downward. ViewSonic N4200w 28 - ViewSonic N4200W | N4200w User Guide, English - Page 31
sound. Treble Balance Adjust the treble. ► to increase higher-pitched sound. ◄ to decrease higher-pitched sound. Adjust the left and right ► to emphasize the right speaker. audio balance. ◄ to emphasize the left speaker. 29 ViewSonic N4200w - ViewSonic N4200W | N4200w User Guide, English - Page 32
level. OSD Timer Adjust OSD show time. Out Operation ►or◄ to select Normal/Wide Press► for setup. ►or◄ to select OSD language. ►or◄ to select five kinds of OSD position on the Display. ► to increase the transparency ◄ to decrease the transparency. ►or◄ to select show time. ViewSonic N4200w 30 - ViewSonic N4200W | N4200w User Guide, English - Page 33
set is here. Options: STD, Warm ►or ◄ to select color and Cold PIP Select OFF or Multi-picture functions ►or◄ to select OFF, PBP, PIP. (HDMI input is not supported in sub picture) 31 ViewSonic N4200w - ViewSonic N4200W | N4200w User Guide, English - Page 34
OFF ► to increase lower-pitched sound. ◄ to decrease lower-pitched sound. ► to increase higher-pitched sound. ◄ to decrease higher-pitched sound. ► to emphasize the right speaker. ◄ to emphasize the left speaker. ViewSonic N4200w 32 - ViewSonic N4200W | N4200w User Guide, English - Page 35
OSD position on ►or◄ to select five kinds of OSD Position the Display OSD position on the Display. Adjust OSD's transparency Transparency level. ► to increase the transparency ◄ to decrease the transparency. OSD Timer Out Adjust OSD show time. ►or◄ to select show time. 33 ViewSonic N4200w - ViewSonic N4200W | N4200w User Guide, English - Page 36
Status Password Setup Description Adjust the Parental Lock status Setup the Parental Lock password Rating Setup Setup the film rating classification CC Setup To select Close caption the classification you want and press OK. ►or◄ to select Text1~4, CC1~4, or OFF. ViewSonic N4200w 34 - ViewSonic N4200W | N4200w User Guide, English - Page 37
Other Information Specifications LCD Type Color Filter Glass surface 42.02" view able 0.681 mm (H) x 0.227 (V) mm pixel pitch RGB vertical stripe Anti-Glare Input signal RGB Video Audio RGB analog (0.7/1.0 Vp-p, 75 ohms) Separate Sync, fh:30-80 kHz, fv:50-75 Hz D-sub x 1 ,HDMI x 2, YPbPr/ - ViewSonic N4200W | N4200w User Guide, English - Page 38
the power of the LCD Display and the AVC System, or unplug the AC cord for 1 to 2 minutes, then replug again. Power is cut off suddenly y Is the sleep timer set? y The internal temperature of the unit has increased. Remove any objects blocking the vent or clean as necessary. ViewSonic N4200w 36 - ViewSonic N4200W | N4200w User Guide, English - Page 39
Picture is cut off/with sidebar screen y Is the image positioned correctly? y Are screen mode adjustments such as picture size set correctly? 37 ViewSonic N4200w - ViewSonic N4200W | N4200w User Guide, English - Page 40
the product serial number. Contry/ Region Web site T = Telephone F = FAX Email United States www.viewsonic.com T = (800) 688 6688 /support/ F = (909) 468 1202 [email protected] Canada www.viewsonic.com /support/ T = (866) 463 4775 [email protected] ViewSonic N4200w 38 - ViewSonic N4200W | N4200w User Guide, English - Page 41
or attempted repair by anyone not authorized by ViewSonic. c. Any damage of the product due to shipment. d. Removal or installation of the product. e. Causes external to the product, such as electric power fluctuations or failure. f. Use of supplies or parts not meeting ViewSonic's specifications - ViewSonic N4200W | N4200w User Guide, English - Page 42
-
 1
1 -
 2
2 -
 3
3 -
 4
4 -
 5
5 -
 6
6 -
 7
7 -
8
-
9
-
10
-
11
-
12
-
13
-
14
-
15
-
16
-
17
-
18
-
19
-
20
-
21
-
22
-
23
-
24
-
25
-
26
-
27
-
28
-
29
-
30
-
31
-
32
-
33
-
34
-
35
-
36
-
37
-
38
-
39
-
40
-
41
-
42
 |
 |

ViewSonic
®
N4200w
LCD Display
- User Guide
-
Guide de l’utilisateur
- Guida dell’utente
-
Model No. : VS10945-1M