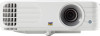
ViewSonic PG706HD User Guide
ViewSonic PG706HD Manual
 |
View all ViewSonic PG706HD manuals
Add to My Manuals
Save this manual to your list of manuals |
ViewSonic PG706HD manual content summary:
- ViewSonic PG706HD | User Guide - Page 1
important information on installing and using your product in a safe manner, as well as registering your product for future service. Warranty information contained in this User Guide will describe your limited coverage from ViewSonic Corporation, which is also found on our web site at http://www - ViewSonic PG706HD | User Guide - Page 2
exceeding the world's expectations for technological evolution, innovation, and simplicity. At ViewSonic®, we believe that our products have the potential to make a positive impact in the world, and we are confident that the ViewSonic® product you have chosen will serve you well. Once again, thank - ViewSonic PG706HD | User Guide - Page 3
- General Please read the following Safety Precautions before you start using the projector. • Keep this user guide in a safe place for later reference. • Read all warnings and follow all instructions. • Allow at least 20" (50 cm) clearance around the projector to ensure proper ventilation. • Place - ViewSonic PG706HD | User Guide - Page 4
present, immediately switch the projector off and call your dealer or ViewSonic®. It is dangerous to continue using the projector. • Use only being used for a long period of time. • Refer all servicing to qualified service personnel. CAUTION: Possibly hazardous optical radiation is emitted from this - ViewSonic PG706HD | User Guide - Page 5
Safety Precautions - Ceiling Mounting Please read the following Safety Precautions before you start using the projector. If you intend to mount the projector on the ceiling, we strongly recommend that you use a proper fitting projector ceiling mount kit and that you ensure it is securely and safely - ViewSonic PG706HD | User Guide - Page 6
16 Choosing a Location 16 Projection Dimensions 17 PG701WU/PG706WU 17 16:10 Image on a 16:10 Screen 17 16:10 Image on a 4:3 Screen 18 PG706HD...19 16:9 Image on a 16:9 Screen 19 16:9 Image on a 4:3 Screen 20 Mounting the Projector 21 Preventing Unauthorized Use 22 Using the Security Slot - ViewSonic PG706HD | User Guide - Page 7
Environment 39 Configuring the LAN Control Settings 39 Controlling the Projector through a Web Browser 41 About Crestron e-Control 45 PJLink™, SNMP, AMX and Xpanel Formats Supported 48 7 - ViewSonic PG706HD | User Guide - Page 8
Table...80 Address Code...81 RS-232 Command Table 82 Pin Assignment...82 Interface...82 Command Table...82 Glossary...89 Troubleshooting...92 Common Problems 92 LED Indicators...93 Maintenance...94 General Precautions 94 Cleaning the Lens 94 Cleaning the Case 94 Storing the Projector 94 - ViewSonic PG706HD | User Guide - Page 9
Lamp Information 95 Lamp Hour...95 Extending Lamp Life 95 Lamp Replacement Timing 96 Replacing the Lamp 96 Regulatory and Service Information 97 Compliance Information 97 FCC Compliance Statement 97 Industry Canada Statement 97 CE Conformity for European Countries 97 Declaration of RoHS2 - ViewSonic PG706HD | User Guide - Page 10
status from a remote computer (PG706WU/PG706HD). • Vertical Lens Shift by remote control (PG706HD). • 3D display supported. • Less than 0.5W power • Projector • Remote Control & Batteries • Power Cord • Quick Start Guide • Video Cable NOTE: The power cord and video cables included in your - ViewSonic PG706HD | User Guide - Page 11
Menu/Exit Source Blank Enter [ ] Volume Up [ ] Volume Down Color Mode Description Toggles the projector between standby mode and Power On. Manually corrects distorted images resulting from an angled projection. Selects the desired menu items and makes adjustments when the On-Screen Display (OSD - ViewSonic PG706HD | User Guide - Page 12
Connection Ports 12 3 4 5 6 7 8 9 10 11 PG706WU/PG706HD 12 3 4 5 6 7 8 PG701WU AC Power Cord Inlet Security Slot Ceiling Mount Holes Adjuster Foot Security Bar Port [1] AUDIO OUT [2] AUDIO IN [3] HDMI 1 [4] HDMI 2 [5] USB 5V/1.5A OUT (Service) [6] COMPUTER IN [7] MONITOR OUT [8] RS-232 - ViewSonic PG706HD | User Guide - Page 13
Button [/] Keystone Keys Enter Left/ Right Up/ Down Description Manually corrects distorted images resulting from an angled projection. Enacts the selected the aspect ratio selection bar. Freezes the projected image. Displays embedded test pattern. Hides the screen picture. PgUp (Page Up)/ PgDn ( - ViewSonic PG706HD | User Guide - Page 14
PG706WU/PG706HD Button On/ for the displayed image. Displays the source selection bar. Manually corrects distorted images resulting from an angled projection. Enacts ratio selection bar. Freezes the projected image. Displays embedded test pattern. Hides the screen picture. PgUp (Page Up)/ Operates - ViewSonic PG706HD | User Guide - Page 15
. • Replace only with the same or equivalent type recommended by the battery manufacturer. • Dispose of the used batteries according to the manufacturer's instructions and local environment regulations for your region. • If the batteries are drained or if you will not be using the remote control for - ViewSonic PG706HD | User Guide - Page 16
Initial Setup This section provides detailed instructions for setting up your projector. Choosing a Location Personal preference and room layout will decide the installation location. Consider the following: • Size and Position of your - ViewSonic PG706HD | User Guide - Page 17
Projection Dimensions NOTE: See "Specifications" on page 75 for the native display resolution of this projector. PG701WU/PG706WU • 16:10 Image on a 16:10 Screen • 16:10 Image on a 4:3 Screen (a) (e) (f) (c) (d) (b) NOTE: (e) = Screen / (f) = Center of Lens 16:10 Image on a 16:10 Screen (a) - ViewSonic PG706HD | User Guide - Page 18
0000 0000 0000 0000 0000 0000 0000 0000 NOTE: There is a 3% tolerance among these numbers due to optical component variations. It is recommended to physically test the projection size and distance before permanently installing the projector. 18 - ViewSonic PG706HD | User Guide - Page 19
PG706HD • 16:9 Image on a 16:9 Screen (b) (a) (d) (c) (f) (e) • 16:9 Image on a 4:3 Screen (b) (a) (d) (c) (f) (e) (a) (e) (f) (c) (d) (b) (a) (e) (f) (c) (d) (b) NOTE: (e) = Screen / (f) = Center of Lens 16:9 Image on a 16:9 Screen (a) Screen Size in. mm 60 1524 - ViewSonic PG706HD | User Guide - Page 20
3.8 97 3.8 97 4.1 103 4.1 103 4.3 109 4.3 109 4.5 114 4.5 114 NOTE: There is a 3% tolerance among these numbers due to optical component variations. It is recommended to physically test the projection size and distance before permanently installing the projector. 20 - ViewSonic PG706HD | User Guide - Page 21
screw size. Screw size can vary depending on the thickness of the mounting plate. 1. To ensure the most secure installation, please use a ViewSonic® wall or ceiling mount. 2. Ensure the screws used to attach a mount to the projector meet the following specifications: • Screw type: M4 x 8 • Maximum - ViewSonic PG706HD | User Guide - Page 22
Preventing Unauthorized Use The projector has several built-in security features to prevent theft, access, or accidental setting changes. Using the Security Slot To help prevent the projector from being stolen, use a security slot locking device to secure the projector to a fixed object. Below is an - ViewSonic PG706HD | User Guide - Page 23
Using the Password Function To help prevent unauthorized access or use, the projector offers a password security option. The password can be set through the On-Screen Display (OSD) Menu. NOTE: Make note of your password, and keep it in a safe place. Setting a Password 1. Press Menu to open the OSD - ViewSonic PG706HD | User Guide - Page 24
Changing the Password 1. Press Menu to open the OSD Menu and go to: SYSTEM > Security Settings > Change Password. 2. Press Enter, the message, 'INPUT CURRENT PASSWORD' will appear. 3. Enter the old password. ͫͫ If the password is correct, the message, 'INPUT NEW PASSWORD' will appear. ͫͫ If the - ViewSonic PG706HD | User Guide - Page 25
3 seconds. The projector will display a coded number on the screen. 2. Write down the number and turn off your projector. 3. Seek help from the local service center to decode the number. You may be required to provide proof of purchase documentation to verify that you are an authorized user of the - ViewSonic PG706HD | User Guide - Page 26
Locking the Control Keys With the control keys on the projector locked, you can prevent your settings from being changed accidentally (by children, for example). NOTE: When the Panel Key Lock is On, no control keys on the projector will operate except Power. 1. Press Menu to open the OSD Menu and - ViewSonic PG706HD | User Guide - Page 27
Making Connections This section guides you on how to connect the projector with other equipment. Connecting to Power 1. Connect the power cord to the AC IN jack at the rear - ViewSonic PG706HD | User Guide - Page 28
Connecting to Video Sources HDMI Connection Connect one end of an HDMI cable to the HDMI port of your video device. Then connect the other end of the cable to the HDMI 1 or HDMI 2 port of your projector. PG706WU/PG706HD PG701WU 28 ® Hi:Jml HIGH-DEFINITION MULTIMEDIA INTERFACE - ViewSonic PG706HD | User Guide - Page 29
S-Video Connection Connect one end of an S-Video cable to the S-Video port of your video device. Then connect the other end of the cable to the S-VIDEO port of your projector. PG706WU/PG706HD 29 - ViewSonic PG706HD | User Guide - Page 30
Composite Video Connection Connect one end of a Video cable to the Video port of your video device. Then connect the other end of the cable to the VIDEO port of your projector. PG706WU/PG706HD 30 - ViewSonic PG706HD | User Guide - Page 31
cable to the VGA port of your monitor. Then connect the other end of the cable to the MONITOR OUT port of your projector. PG706WU/PG706HD PG701WU 31 - ViewSonic PG706HD | User Guide - Page 32
Connecting to Audio The projector is equipped with speakers, however, you can also connect external speakers to the AUDIO OUT port of the projector. NOTE: The audio output is controlled by the projector's Volume and Mute settings. 32 - ViewSonic PG706HD | User Guide - Page 33
message, 'No Signal' will appear. First Time Activation If the projector is activated for the first time, select your OSD language following the on-screen instructions. 33 - ViewSonic PG706HD | User Guide - Page 34
Shutting Down the Projector 1. Press the Power or Off button and a confirmation message will appear to prompt you to press the Power or Off button a second time. Additionally you can press any other button to cancel. NOTE: If you do not respond in a few seconds after the first press, the message - ViewSonic PG706HD | User Guide - Page 35
selected by pressing one of the source selection buttons on the remote control, or by cycling through the available input sources. To manually select the input source do the following: 1. Press Source, and a source selection menu will appear. 2. Press / until your desired signal is selected and - ViewSonic PG706HD | User Guide - Page 36
Adjusting the Projected Image Adjusting the Projector's Height and Projection Angle The projector is equipped with one (1) adjuster foot. Adjusting the foot will change the projector's height and the vertical projection angle. Carefully adjust the feet to fine tune the projected image's position. - ViewSonic PG706HD | User Guide - Page 37
Correcting Keystone Keystoning refers to the situation where the projected image becomes a trapezoid due to angled projection. To correct this, besides adjusting the height of the projector, you may also: 1. Use the keystone keys on the projector or remote control to display the keystone page. 2. - ViewSonic PG706HD | User Guide - Page 38
Hiding the Image In order to draw the audience's full attention to the presenter, you can press Blank on the projector or remote control to hide the screen image. Press any key on the projector or remote control to restore the image. CAUTION: Do not block the projection lens as this could cause the - ViewSonic PG706HD | User Guide - Page 39
Controlling the Projector through a LAN Environment NOTE: This function is only available on the PG706WU/PG706HD. The projector supports Crestron® software. With correct settings for the LAN Control Settings menu, you can manage the projector from a computer using a web browser when the computer - ViewSonic PG706HD | User Guide - Page 40
NOTE: • If the Projector IP Address still does not appear, contact your network administrator. • If the RJ45 cables are not properly connected, the Projector IP Address, Subnet Mask, Default Gateway and DNS Server settings will display 0.0.0.0. Make sure the cables are properly connected and perform - ViewSonic PG706HD | User Guide - Page 41
make sure it is version 7.0 or higher. • The screen shots in this manual are for reference only, and may differ from the actual design. • Please Subject From Server User Name Password Fan Error Lamp Error Over Temperature Submit Issue Test Mail (N/A) XXX.XXX.XXX.XXX XXX.XXX.XXX.XXX XXX.XXX.XXX.XXX - ViewSonic PG706HD | User Guide - Page 42
1. Enter the address of the projector in the address bar of your browser and press Enter. 1 The main page of the Network Control will appear. 2 3 4 5 6 NOTE: Accessing the Network Settings, Email Alert page, or Projector/LAN Firmware Update page requires the Administrator's password. The default - ViewSonic PG706HD | User Guide - Page 43
connected to a network which supports Simple Mail Transfer Protocol (SMTP), you can configure it to alert you via email on significant events. 4. The Crestron (e-Control)® page displays the Crestron e-Control user interface. 5. Projector Firmware Update i. Visit ViewSonic's website to download the - ViewSonic PG706HD | User Guide - Page 44
update has finished. CAUTION: Do not turn off the projector or computer while updating. 6. LAN Firmware Update i. Visit ViewSonic's website to download the LAN Firmware: https://www.viewsonic.com. ii. Upload the LAN Firmware file to the Network Control website. iii. After finishing the LAN Firmware - ViewSonic PG706HD | User Guide - Page 45
About Crestron e-Control® 1. The Crestron e-Control® page provides a variety of virtual keys to control the projector or adjust the projected pictures. i You can press / to reveal more buttons. ii i i i. These buttons function the same as the ones on the OSD menus or remote control. ii. To - ViewSonic PG706HD | User Guide - Page 46
i. This section is only used with the Crestron Control System. Please contact Creston or refer to its user manual for setup information. ii. You can name the projector, keep track of its location and the person in charge of it. iii. You can adjust - ViewSonic PG706HD | User Guide - Page 47
3. The Info page displays the information and status of the projector. Press "Exit" to go back to the Remote Network Operation page. 4. After selecting the "Contact IT Help", the HELP DESK window will appear in the upper right corner of the screen. You will be able to deliver messages to RoomView™ - ViewSonic PG706HD | User Guide - Page 48
port. Please go to the below website to get the RoomView™ User Guide and more information: http://www.crestron.com/products/roomview_connected_embedded_ projectors_devices/resources.asp PJLink™, SNMP, AMX and Xpanel Formats Supported This projector is PJLink™, SNMP V.1, AMX or Xpanel V1.10 compliant - ViewSonic PG706HD | User Guide - Page 49
section will introduce the On-Screen Display (OSD) Menu and its options. General On-Screen Display (OSD) Menu Operation NOTE: The OSD screenshots in this manual are for reference only and may differ from the actual design. Some of the following OSD settings may not be available. Please refer to the - ViewSonic PG706HD | User Guide - Page 50
Movie User 1 User 2 Brightness 0~100 Contrast -50~50 Color Temp. 8000K/6500K/5500K Red Gain Green Gain Blue Gain Red Offset Green Offset Blue Offset (PG706HD only) 0~100 0~100 0~100 -50~+50 -50~+50 -50~+50 50 - ViewSonic PG706HD | User Guide - Page 51
Main Menu IMAGE Sub-menu Advanced Menu Option Color Tint (PG706WU/ PG706HD only) Sharpness Gamma Brilliantcolor Noise Reduction Color Management Reset Color Settings Auto Power On Reset Cancel Signal Smart Energy CEC Direct Power On Auto Power - ViewSonic PG706HD | User Guide - Page 52
/Bottom-Right Timer Counting Direction Count Down/Count Up Sound Reminder Off/On Start Counting/Off Off Test Card Disable/5 min/10 min/15 min/20 min/25 min/30 min Off On Black Blue ViewSonic 3D Sync Auto Off Frame Sequential Frame Packing Top-Bottom Side-by-Side 3D Sync Invert - ViewSonic PG706HD | User Guide - Page 53
Lamp Hours Reset/Cancel Lamp Hours Information Lamp Usage Time Normal Eco Dynamic Eco SuperEco+ Equivalent Lamp Hour Closed Caption (PG706WU/ PG706HD only) Closed Caption Enable Caption Version Off/On CC1/CC2/CC3/CC4 Reset Settings Reset Cancel Language Multi-Language OSD Selection - ViewSonic PG706HD | User Guide - Page 54
1/2/3/4/5/6/7/8 Control Method RS-232 USB Baud Rate 2400/4800/9600/14400/19200/38400/57600/115 200 Source Color Mode Resolution Color System IP address (PG706WU/PG706HD only) MAC address Firmware Version 3X Fast Input S/N 54 - ViewSonic PG706HD | User Guide - Page 55
DISPLAY Menu 1. Press the Menu button to display the On-Screen Display (OSD) Menu. 2. Press / to select the DISPLAY menu. Then press Enter or use / to access the DISPLAY menu. 3. Press / to select the menu option. Then press Enter to display its sub-menu, or press / to adjust/select the setting. - ViewSonic PG706HD | User Guide - Page 56
Menu Option Aspect Ratio Keystone Lens Shift (PG706HD only) Position Description Auto Scales an image proportionally to fit the projector's native resolution in its horizontal width. This is suitable for the incoming image - ViewSonic PG706HD | User Guide - Page 57
Menu Option Phase H. Size Zoom OverScan 3X Fast Input Description Adjusts the clock phase to reduce image distortion. NOTE: This function is only available when a PC input signal is selected. Adjusts the horizontal width of the image. NOTE: This function is only available when a PC input signal - ViewSonic PG706HD | User Guide - Page 58
IMAGE Menu 1. Press the Menu button to display the On-Screen Display (OSD) Menu. 2. Press / to select the IMAGE menu. Then press Enter or use / to access the IMAGE menu. 3. Press / to select the menu option. Then press Enter to display its sub-menu, or press / to adjust/select the setting. NOTE: - ViewSonic PG706HD | User Guide - Page 59
Menu Option Color Mode Brightness Contrast Description Brightest Maximizes the brightness of the projected image. This mode is suitable for environments where extra-high brightness is required, such as using the projector in well lit rooms. Presentation Designed for presentations under daylight - ViewSonic PG706HD | User Guide - Page 60
A lower setting produces less saturated colors. If the setting is too high, colors will be overpowering and may appear unrealistic. Tint (PG706WU/PG706HD only) A higher value will make the picture more greenish while a lower value will make the picture more reddish. Sharpness A higher value will - ViewSonic PG706HD | User Guide - Page 61
Menu Option Advanced Reset Color Settings Description Noise Reduction This function reduces electrical image noise caused by different media players. The higher the setting, the less the noise. (Not available when input signal is HDMI.) Color Management Only in permanent installations with - ViewSonic PG706HD | User Guide - Page 62
POWER MANAGEMENT Menu 1. Press the Menu button to display the On-Screen Display (OSD) Menu. 2. Press / to select the POWER MANAGEMENT menu. Then press Enter or use / to access the POWER MANAGEMENT menu. 3. Press / to select the menu option. Then press Enter to display its sub-menu, or press / to - ViewSonic PG706HD | User Guide - Page 63
VGA/HDMI cable. You can also select All and the projector will turn on automatically upon receiving either a VGA or HDMI signal. CEC This projector supports CEC (Consumer Electronics Control) function for synchronized power on/off operation via HDMI connection. That is, if a device that also - ViewSonic PG706HD | User Guide - Page 64
Menu Option Standby Settings Quick Power Off USB A Power Description The functions below are available in standby mode (plugged in, but not turned on). VGA Loop Through When selecting On, the projector outputs the signal received only from COMPUTER IN. Audio Pass Through When selecting On, the - ViewSonic PG706HD | User Guide - Page 65
BASIC Menu 1. Press the Menu button to display the On-Screen Display (OSD) Menu. 2. Press / to select the BASIC menu. Then press Enter or use / to access the BASIC menu. 3. Press / to select the menu option. Then press Enter to display its sub-menu, or press / to adjust/select the setting. NOTE: - ViewSonic PG706HD | User Guide - Page 66
Menu Option Presentation Timer Pattern Blank Timer Message Splash Screen Description Presentation timer can indicate the presentation time on the screen to help you achieve better time management when giving presentations. Timer Period Sets the time period. If the timer is already on, the timer - ViewSonic PG706HD | User Guide - Page 67
ADVANCED Menu 1. Press the Menu button to display the On-Screen Display (OSD) Menu. 2. Press / to select the ADVANCED menu. Then press Enter or use / to access the ADVANCED menu. 3. Press / to select the menu option. Then press Enter to display its sub-menu, or press / to adjust/select the setting. - ViewSonic PG706HD | User Guide - Page 68
the 3D format, choose a 3D mode. 3D Sync Invert When you discover the inversion of the image depth, enable this function to correct the problem. Save 3D Settings Saves current 3D settings. 3D settings will automatically be applied if the same resolution and input source are selected. NOTE: When - ViewSonic PG706HD | User Guide - Page 69
Menu Option Description LAN Control Settings LAN Settings (PG706WU/PG706HD ͫͫ DHCP ON: Select this if you are in a DHCP environment only) and Projector IP Address, Subnet Mask, Default Gateway, DNS Server settings will be automatically - ViewSonic PG706HD | User Guide - Page 70
Reduces lamp power consumption by up to 30% (PG701WU)/65% (PG706WU/PG706HD) depending on the content brightness level. ͫͫ SuperEco+: Reduces lamp power lamp is installed. For changing the lamp, please contact qualified service personnel. Lamp Hours Information ͫͫ Lamp Usage Time: Displays the number - ViewSonic PG706HD | User Guide - Page 71
Menu Option Description Closed Caption Closed Caption Enable (PG706WU/PG706HD Activates the function when the selected input signal carries only) closed captions. NOTE: • Captions: An on-screen display of the dialogue, narration, and sound effects - ViewSonic PG706HD | User Guide - Page 72
SYSTEM Menu 1. Press the Menu button to display the On-Screen Display (OSD) Menu. 2. Press / to select the SYSTEM menu. Then press Enter or use / to access the SYSTEM menu. 3. Press / to select the menu option. Then press Enter to display its sub-menu, or press / to adjust/select the setting. NOTE - ViewSonic PG706HD | User Guide - Page 73
Menu Option Description High Altitude Mode We recommend you use the High Altitude Mode when your environment is between 1,500 m to 3,000 m above sea level, and ambient temperature is between 5°C-25°C. NOTE: • Do not use High Altitude Mode if your environment is between 0 to 1,499 m, and the - ViewSonic PG706HD | User Guide - Page 74
/ to select the INFORMATION menu and display its contents. Menu Option Source Color Mode Resolution Color System IP address (PG706WU/PG706HD only) MAC address (PG706WU/PG706HD only) Firmware Version 3X Fast Input S/N Description Shows the current input source. Shows the selected mode in the IMAGE - ViewSonic PG706HD | User Guide - Page 75
Item Projector Category Type Display Size Brightness (Lumens) Throw Ratio PG701WU PG706WU PG706HD DLP Lamp 60" ~ 200" (W:1.94~6.64 T:2.13~7.11 with E (Standby) 1 Please use the power adapter from ViewSonic® or an authorized source only. 2 The test condition follows EEI standards. 75 - ViewSonic PG706HD | User Guide - Page 76
Bottom Side-by-Side 28.3221 25.175 31.5 31.5 36 40 50 49.5 56.25 83 Supported Supported Supported Supported Supported Supported Supported 65 75 78.75 94.5 115.5 Supported Supported Supported Supported 108 46.966 51.419 74.25 79.5 Supported Supported Supported Supported Supported Supported 76 - ViewSonic PG706HD | User Guide - Page 77
146.25 Supported Supported Supported Supported 108 135 157.5 108 148.5 85.5 106.5 121.75 162 146.25 30.24 57.28 80 100 148.5 154.000 Supported Supported Supported Supported Supported Supported Supported Supported Supported Supported Supported Supported Supported Supported Supported Supported 77 - ViewSonic PG706HD | User Guide - Page 78
83.5 106.5 122.5 146.25 Supported Supported Supported Supported Supported Supported Supported Supported Supported Supported 108 135 157.5 108 148.5 85.5 106.5 121.75 162 Supported Supported Supported Supported Supported Supported Supported Supported Supported Supported Supported Supported 78 - ViewSonic PG706HD | User Guide - Page 79
3D Sync (MHz) Frame Sequential Top-Bottom Side-by-Side 146.25 30.24 57.28 80 100 148.5 154.000 Supported Supported Supported Supported HDMI (Video) Video mode Resolution Horizontal Vertical Dot Clock 3D Sync frequency (KHz) frequency (Hz) frequency (MHz) Frame Sequential Frame Packing - ViewSonic PG706HD | User Guide - Page 80
IR Control Table Key Format On Off COMP HDMI/HDMI 1 HDMI 2 Auto Sync Source Up/ Left Enter Right NEC-F2 NEC-F2 NEC-F2 NEC-F2 NEC-F2 NEC-F2 NEC-F2 NEC-F2 NEC-F2 NEC-F2 NEC-F2 Down/ Menu NEC-F2 NEC-F2 NEC-F2 (INFORMATION) Exit Aspect Freeze Pattern Blank PgUp PgDn (Mute) (Volume Down) (Volume - ViewSonic PG706HD | User Guide - Page 81
Key (Presentation Timer) VIDEO Format NEC NEC Address Code Code 1 Code 2 Code 3 Code 4 Code 5 Code 6 Code 7 Code 8 Byte 1 X3 83 Byte 2 F4 F4 Byte 3 27 52 83F4 93F4 A3F4 B3F4 C3F4 D3F4 E3F4 F3F4 Byte 4 D8 AD 81 - ViewSonic PG706HD | User Guide - Page 82
0x00 0x04 0x00 0x34 0x11 0x0A 0x00 0x67 Splash Screen Write Blue 0x06 0x14 0x00 0x04 0x00 0x34 0x11 0x0A 0x01 0x68 Splash Screen Write ViewSonic 0x06 0x14 0x00 0x04 0x00 0x34 0x11 0x0A 0x02 0x69 Splash Screen Read Status 0x07 0x14 0x00 0x05 0x00 0x34 0x00 0x00 0x11 0x0A 0x68 - ViewSonic PG706HD | User Guide - Page 83
Function Type Action Command Light source Mode Write SuperEco+ 0x06 0x14 0x00 0x04 0x00 0x34 0x11 0x10 0x03 0x70 Light source Mode Read Status 0x07 0x14 0x00 0x05 0x00 0x34 0x00 0x00 0x11 0x10 0x6E Message Write OFF 0x06 0x14 0x00 0x04 0x00 0x34 0x11 0x27 0x00 0x84 Message Write ON 0x06 - ViewSonic PG706HD | User Guide - Page 84
Function Type Action Vertical position Write Shift Down Vertical position Read Get Value Color temperature Write 5500K Color temperature Write 6500K Color temperature Write 8000K Color temperature Read Get Value Color temperature- Write Decrease Red gain Color temperature- Write Increase Red gain - ViewSonic PG706HD | User Guide - Page 85
Function Type Action Blank Write ON Blank Write OFF Blank Read Status Keystone-Vertical Write Decrease Keystone-Vertical Write Increase Keystone-Vertical Read Get value Color mode Write Brightest Color mode Write Movie Color mode Write Standard Color mode Write Photo Color mode - ViewSonic PG706HD | User Guide - Page 86
Function Type Action Command Source input Write D-Sub/Comp. 1 0x06 0x14 0x00 0x04 0x00 0x34 0x13 0x01 0x00 0x60 Source input Write D-Sub/Comp. 2 0x06 0x14 0x00 0x04 0x00 0x34 0x13 0x01 0x08 0x68 Source input Write HDMI 1 0x06 0x14 0x00 0x04 0x00 0x34 0x13 0x01 0x03 0x63 Source input Write - ViewSonic PG706HD | User Guide - Page 87
Function Type Action Command Language Write Greek 0x06 0x14 0x00 0x04 0x00 0x34 0x15 0x00 0x16 0x77 Language Read Status 0x07 0x14 0x00 0x05 0x00 0x34 0x00 0x00 0x15 0x00 0x62 Light Source Usage Write Reset to ZERO 0x06 0x14 0x00 0x04 0x00 0x34 0x15 0x01 0x00 0x62 Time Light Source Usage - ViewSonic PG706HD | User Guide - Page 88
Function Remote Control Code Remote Control Code Remote Control Code Remote Control Code Over Scan Over Scan Over Scan Over Scan Over Scan Over Scan Over Scan Remote Key Remote Key Remote Key Remote Key Remote Key Remote Key Remote Key Remote Key Remote Key AMX Operating temperature Lamp mode cycle - ViewSonic PG706HD | User Guide - Page 89
levels of the screen image. C CEC (Consumer Electronics Control) Synchronizes power on/off operation via HDMI connection. That is, if a device that also supports CEC function is connected to the HDMI input of the projector, when the projector's power is turned off, the power of the connected device - ViewSonic PG706HD | User Guide - Page 90
(white level). F Focus Ring Manually improve the clarity of the projected image. G Gamma Allows the user to manually select the greyscale curve of the input), the projector model number, the serial number, and the ViewSonic® website URL. Input Select Toggles between the various input options that - ViewSonic PG706HD | User Guide - Page 91
K Keystone The distortion of an image caused by projecting it onto an angled surface. It can be adjusted vertically via the [ / ] Keystone Keys. L Lamp Settings The projector's lamp information and settings can be viewed and adjusted by viewing the "Lamp Hours Information" or adjusting the "Lamp - ViewSonic PG706HD | User Guide - Page 92
Z Zoom Ring Manually adjust the size of the projected image. Troubleshooting Common Problems This section describes some common problems that you may experience when using the projector. Problem The projector does not turn on There is no picture The image is blurred The remote control does not - ViewSonic PG706HD | User Guide - Page 93
LED Indicators Light Status and Description Green Flashing Green Green Green Flashing Red Green Green Flashing Off Green Off Off Off Off Red Flashing Red Flashing Red Red Green Off Orange Orange Off Off Off Off Off Off Green Off Off Off Red Red Red Red Red Red Flashing Red Red Red Red Red Red - ViewSonic PG706HD | User Guide - Page 94
sure the Projector is turned off and the power cable is unplugged from the power outlet. • Never remove any parts from the Projector. Contact ViewSonic® or a reseller when any part of the Projector needs replacing. • Never spray or pour any liquid directly onto the case. • Handle the Projector with - ViewSonic PG706HD | User Guide - Page 95
the lamps operational life. Lamp Mode Normal Eco Dynamic Eco SuperEco+ Description Provides full lamp brightness. Reduces lamp power consumption by 20% (PG701WU)/30% (PG706WU/PG706HD) and lowers brightness, and decreases fan noise. Reduces lamp power consumption by up to 30% (PG701WU)/65% (PG706WU - ViewSonic PG706HD | User Guide - Page 96
lamp may explode. Replacing the Lamp It is recommended to turn the power off and disconnect the projector from the power outlet, and contact a qualified service personnel for lamp replacement. 96 - ViewSonic PG706HD | User Guide - Page 97
and Service Information including interference that may cause undesired operation. This equipment has been tested and found to comply with the limits for a Class B digital if not installed and used in accordance with the instructions, may cause harmful interference to radio communications. However, - ViewSonic PG706HD | User Guide - Page 98
The following information is only for EU-member states: The mark shown to the right is in compliance with the Waste Electrical and Electronic Equipment Directive 2012/19/EU (WEEE). The mark indicates the requirement NOT to dispose of the equipment as unsorted municipal waste, but use the return and - ViewSonic PG706HD | User Guide - Page 99
and is committed to working and living green. Thank you for being part of Smarter, Greener Computing. Please visit the ViewSonic® website to learn more. USA & Canada: http://www.viewsonic.com/company/green/recycle-program/ Europe: http://www.viewsoniceurope.com/uk/support/recycling-information/ 99 - ViewSonic PG706HD | User Guide - Page 100
damages resulting from furnishing this material, or the performance or use of this product. In the interest of continuing product improvement, ViewSonic® Corporation reserves the right to change product specifications without notice. Information in this document may change without notice. No part of - ViewSonic PG706HD | User Guide - Page 101
Customer Service For technical support or product service, see the table below or contact your reseller. NOTE: You will need the product's serial number. Country/ Region Website Country/ Region Website Asia Pacific & Africa Australia www.viewsonic.com/au/ Bangladesh www.viewsonic.com/bd/ - ViewSonic PG706HD | User Guide - Page 102
original lamp from the date of the first consumer purchase. Other regions or countries: Please check with your local dealer or local ViewSonic office for the warranty information. Lamp warranty subject to terms and conditions, verification and approval. Applies to manufacturer's installed lamp only - ViewSonic PG706HD | User Guide - Page 103
, contact ViewSonic Customer Support (please refer to "Customer Support" page). You will need to provide your product's serial number. 2. To obtain warranted service, you will be required to provide (a) the original dated sales slip, (b) your name, (c) your address, (d) a description of the problem - ViewSonic PG706HD | User Guide - Page 104
Canada: For warranty information and service on ViewSonic products sold outside of the U.S.A. and Canada, contact ViewSonic or your local ViewSonic dealer. The warranty period for in www.viewsoniceurope.com under Support/Warranty Information. Projector Warranty Term Template In UG VSC_TEMP_2005 104 - ViewSonic PG706HD | User Guide - Page 105
be defective in material or workmanship during the warranty period, ViewSonic will, at its sole option, repair or replace the product modification, unauthorized attempted repair, or failure to follow instructions supplied with the product. b. Any damage of the product set-up service charges. 105 - ViewSonic PG706HD | User Guide - Page 106
use. Please retain your receipt of proof of purchase to support your warranty claim. For Your Records Product Name Model Number of the problem, and (e) the serial number of the product. 2. Take or ship the product in the original container packaging to an authorized ViewSonic service center. - ViewSonic PG706HD | User Guide - Page 107
01(52)33-36-15-15-43 E-Mail: [email protected] Monterrey: Global Product Services Mar Caribe # 1987, Esquina con Golfo Pérsico Fracc. Bernardo Reyes, CP 64280 Monterrey .com FOR USA SUPPORT: ViewSonic Corporation 14035 Pipeline Ave. Chino, CA 91710, USA Tel: 800-688-6688 E-Mail: http://www - ViewSonic PG706HD | User Guide - Page 108
Process Color C0 M91 Y72 K24 Process Color C0 M0 Y0 K100 Process Color C0 M91 Y72 K24 Spot Color Spot Color Pantone Black C Pantone 187 C
-
 1
1 -
 2
2 -
 3
3 -
 4
4 -
 5
5 -
 6
6 -
 7
7 -
8
-
9
-
10
-
11
-
12
-
13
-
14
-
15
-
16
-
17
-
18
-
19
-
20
-
21
-
22
-
23
-
24
-
25
-
26
-
27
-
28
-
29
-
30
-
31
-
32
-
33
-
34
-
35
-
36
-
37
-
38
-
39
-
40
-
41
-
42
-
43
-
44
-
45
-
46
-
47
-
48
-
49
-
50
-
51
-
52
-
53
-
54
-
55
-
56
-
57
-
58
-
59
-
60
-
61
-
62
-
63
-
64
-
65
-
66
-
67
-
68
-
69
-
70
-
71
-
72
-
73
-
74
-
75
-
76
-
77
-
78
-
79
-
80
-
81
-
82
-
83
-
84
-
85
-
86
-
87
-
88
-
89
-
90
-
91
-
92
-
93
-
94
-
95
-
96
-
97
-
98
-
99
-
100
-
101
-
102
-
103
-
104
-
105
-
106
-
107
-
108
 |
 |

PG701WU/PG706WU/PG706HD
Projector
User Guide
Model No. VS17687/VS17693/VS17692
Model Name: PG701WU/PG706WU/PG706HD
IMPORTANT:
Please read this User Guide to obtain important information on installing and using your product
in a safe manner, as well as registering your product for future service.
Warranty information contained in this
User Guide will describe your limited coverage from ViewSonic Corporation, which is also found on our web site at
http://www.viewsonic.com in English, or in specific languages using the Regional selection box in the upper right
corner of our website. “Antes de operar su equipo lea cu idadosamente las instrucciones en este manual”