ViewSonic PJ550 User Guide
ViewSonic PJ550 - LCD Projector XGA Manual
 |
View all ViewSonic PJ550 manuals
Add to My Manuals
Save this manual to your list of manuals |
ViewSonic PJ550 manual content summary:
- ViewSonic PJ550 | User Guide - Page 1
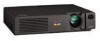
PJ500/PJ550 PJ501/PJ551 User Guide Image Size 30" - 300" High Brightness Light Weight LCD Projector - ViewSonic PJ550 | User Guide - Page 2
Menu ...15 SCREEN Menu 16 OPTION Menu 17 Maintenance 18 Lamp ...18 Lamp Life ...18 Replacing the Lamp 19 Resetting the Lamp Timer 19 Air-Filter ...20 Maintenance Inside the Equipment 20 Cleaning the Lens 20 Cleaning the Cabinet and Remote Control 20 ViewSonic PJ500/PJ550/PJ501/PJ551 i - ViewSonic PJ550 | User Guide - Page 3
Troubleshooting 21 OSD Messages 21 Indicator Messages 21 Symptom ...22 Specifications 24 PJ500/PJ501 Technical Specifications 24 PJ550/PJ551 Technical Specifications 25 Customer Support 26 LIMITED WARRANTY 27 VIEWSONIC Projector 27 Appendix 28 Power Cord Safety Guidelines 28 Compliance - ViewSonic PJ550 | User Guide - Page 4
may change without notice. No part of this document may be copied, reproduced, or transmitted by any means, for any purpose without prior written permission from ViewSonic Corporation. This document is applicable for both projector models PJ500/PJ550/PJ501/PJ551. Electronic Warranty Registration - ViewSonic PJ550 | User Guide - Page 5
Product Features • SVGA (PJ500/501) • XGA (PJ550/551) • High performance scalers for viewing high resolution contact ViewSonic. Projector Carrying Case Remote Con- Power Cord trol with battery (US type) Power Cord (Europe type) Power Cord (China type) Quick Start Guide ViewSonic Wizard - ViewSonic PJ550 | User Guide - Page 6
knob Focus ring Remote control sensor Lens (with lens cap) Lamp indicator Temp indicator Power indicator Menu Exhaust ventilation Interface panel RGB (In) Control (RS232) Audio (In, 3.5 mm) R Audio (In) L Audio (In) Video (In) Figure 2: Projector Components 3 ViewSonic PJ500/PJ550/PJ501/PJ551 - ViewSonic PJ550 | User Guide - Page 7
[Left] Arrow Button ENTER Button [Down] Arrow Button ESC (Escape) Button STANDBY/ON Button AUTO Button BLANK Button VOLUME Button MUTE Button KEYSTONE Button MENU Button [Up] Arrow Button [Right] Arrow Button RESET Button Figure 3: Remote Control Components ViewSonic PJ500/PJ550/PJ501/PJ551 4 - ViewSonic PJ550 | User Guide - Page 8
local laws and regulations. • Keep the battery away from children and pets. • When the remote control will not to be used for an extended period, remove the batteries. NOTE: Replace the batteries if the operation of the remote control becomes irregular or weak. 5 ViewSonic PJ500/PJ550/PJ501/PJ551 - ViewSonic PJ550 | User Guide - Page 9
cause buildup on critical parts (i.e. LCD panel, lens assembly, etc.) Angle Adjustment Use the foot adjusters on the bottom of the projector to adjust the projection angle. The angle is variable within approximately 0° to 9°. Foot Adjuster Press the foot adjuster button Rear Foot Adjuster Figure - ViewSonic PJ550 | User Guide - Page 10
. Refer to page 27. • See "Power Cord Safety Guidelines" on page 28. NOTE: • Before connecting, read the instruction manuals of the devices to be connected, and make sure that the projector is compatible with the device(s). • Securely tighten the screws on the connectors. • For some RGB input modes - ViewSonic PJ550 | User Guide - Page 11
DDC (Display Data Channel) compatible. Please use this function by connecting the accessory RGB cable to RGB (In) of the projector; other connection set the proper RGB external image output. Please read the instruction manual of the notebook computer for more information. ViewSonic PJ500/PJ550 - ViewSonic PJ550 | User Guide - Page 12
the lamp. CAUTION • To turn OFF the projector press the Standby/ON button and hold for 2 seconds . • The POWER LED on the control pad flashes orange during cool-down. • Wait until the POWER LED changes to a steady orange before you set the Power Switch to [O] OFF. 9 ViewSonic PJ500/PJ550/PJ501 - ViewSonic PJ550 | User Guide - Page 13
sound. buttons on the remote control to increase/decrease the loudness of the After the desired volume is selected, press the VOLUME button again to exit the Volume mode. Set/Clear Mute Mode: Press the MUTE button. The sound is silenced in this mode. (remote control) ViewSonic PJ500/PJ550/PJ501 - ViewSonic PJ550 | User Guide - Page 14
the ESC button on the remote control to return to the previous menu from a selected sub-menu. Escape: Press the ENTER button on the remote control activate the adjustment screen for a selected menu option. NOTE: Pressing the button performs the same function. 11 ViewSonic PJ500/PJ550/PJ501/PJ551 - ViewSonic PJ550 | User Guide - Page 15
MAIN Menu To access the MAIN Menu, press the MENU button on the remote control. This projector has 6 menus: MAIN, PICTURE-1, PICTURE-2, INPUT, SCREEN and OPTION. To select a menu use the / buttons, then press the button or the ENTER button to select a menu item. The MAIN Menu has seven (7) items as - ViewSonic PJ550 | User Guide - Page 16
as shown in Table 5. Select the item you want to adjust with the / buttons and press the button or the ENTER button. Item COLOR BAL R COLOR BAL B SHARPNESS COLOR TINT Table 5: PICTURE-1Menu Adjust Tint (for VIDEO/S-VIDEO): More Green More Red Lighter 13 ViewSonic PJ500/PJ550/PJ501/PJ551 - ViewSonic PJ550 | User Guide - Page 17
in Table 6. Please select the item you want to operate with the / buttons and press the button or the ENTER button to start operating. Then you can operate according to the following table. Item such cases, please initialize the H SIZE with the RESET button. ViewSonic PJ500/PJ550/PJ501/PJ551 14 - ViewSonic PJ550 | User Guide - Page 18
. For HDTV signal, refer to the item HDTV below. Select Mode of Signal Type (for VIDEO/S-VIDEO): Press the / button to select one of these options: • AUTO • NTSC • PAL • SECAM • NTSC 4.43 • M-PAL • N-PAL and turn the SYNC ON G off, and then reconnect the signal. 15 ViewSonic PJ500/PJ550/PJ501/PJ551 - ViewSonic PJ550 | User Guide - Page 19
shown in Table 8. Please select the item you want to operate with the / buttons and press the button or the ENTER button to start operating. Then you can operate according to the following table. Item Blue blank screen displays when is no signal is detected. ViewSonic PJ500/PJ550/PJ501/PJ551 16 - ViewSonic PJ550 | User Guide - Page 20
. Reset the filter time always when replacing the filter. The message functions will not operate properly if the filter time is not reset correctly. • Before replacing the air filter, carefully read the descriptions of "Air-Filter" and "Replacing the Filter" on page 20. 17 ViewSonic PJ500/PJ550 - ViewSonic PJ550 | User Guide - Page 21
" on page 21. NOTE: The LAMP indicator is also red when the lamp unit reaches high temperature. Before replacing the lamp switch the POWER OFF, wait approximately 20 minutes, and switch the POWER ON again. If the LAMP indicator is still red replace the lamp. ViewSonic PJ500/PJ550/PJ501/PJ551 18 - ViewSonic PJ550 | User Guide - Page 22
. 4 Press the Up arrow button to select the DEFAULT. The remaining lamp life is now reset to 2000 hours. IMPORTANT: Do not reset the lamp timer without replacing the lamp. The message functions will not operate properly if the lamp timer is not reset correctly. 19 ViewSonic PJ500/PJ550/PJ501/PJ551 - ViewSonic PJ550 | User Guide - Page 23
air filter see page 26 for contact information. 1 Switch the projector power OFF, and remove the power cord from the power outlet. 2 Remove the filter cover and the filter. 3 Replace the new air-filter and the filter cover. 4 Reset the Filter and Remote Control ViewSonic PJ500/PJ550/PJ501/PJ551 20 - ViewSonic PJ550 | User Guide - Page 24
LAMP, RESET THE LAMP TIME. 1 CHANGE THE LAMP. AFTER REPLACING LAMP, RESET THE LAMP TIME. THE POWER WILL TURN OFF AFTER ** HR. 1 CHANGE THE LAMP. AFTER REPLACING LAMP, RESET THE LAMP TIME. THE POWER WILL TURN OFF AFTER 0 HR. NO INPUT IS DETECTED ON *** SYNC IS OUT OF RANGE ON *** CHECK THE AIR - ViewSonic PJ550 | User Guide - Page 25
correctly set. No signal input. Table 12: Symptom Remedy Turn on the main POWER switch. Page page 9 Plug the power cord into an AC power outlet. page 7 Use INPUT button on projector control pad or remote control to select input source. Connect correctly. page 10 page 7,8 ViewSonic PJ500/PJ550 - ViewSonic PJ550 | User Guide - Page 26
is present but no audio Table 12: Symptom (Continued) Possible cause Remedy The projector is not correctly connected. Connect correctly. The volume is set to minimum. Mute is turned on. Press VOLUME button on the remote control or display the menu screen and adjust the volume. Press the MUTE - ViewSonic PJ550 | User Guide - Page 27
Display Size Keystone Correction Lamp Speaker Power Supply Power 600 vertical, 8 bit color, 16.7 Million colors Manual Zoom F=2.0 - 2.3 f=17.7 -21.2 mm Zoom 1.2 : 1, manual focus 0.9 - 9.0 Meters 30 - 300 inches 6:1 RCA jack D-sub 15-pin shrink plug (RS232) ViewSonic PJ500/PJ550/PJ501/PJ551 24 - ViewSonic PJ550 | User Guide - Page 28
PJ550/PJ551 Specifications Specification 0.7 inch P-Si TFT with microlens 1024 horizontal x 768 vertical, 8 bit color, 16.7 Million colors Manual Zoom F=2.0 - 2.3 f=17.7 -21.2 mm Zoom 1.2 : 1, manual (max. 3.0 Vp-p) R RCA jack D-sub 15-pin shrink plug (RS232) 25 ViewSonic PJ500/PJ550/PJ501/PJ551 - ViewSonic PJ550 | User Guide - Page 29
3668 Email service.us@ viewsonic.com service.ca@ viewsonic.com service.eu@ viewsoniceurope.com service.eu@ viewsoniceurope.com service.au@ viewsonic.com service.sg@ viewsonic.com service.ap@ viewsonic.com service.ap@ viewsonic.com Part Lamp Replacement Air Filter Replacement Slot for Kensington - ViewSonic PJ550 | User Guide - Page 30
sole option repair or replace the product with a like product. Replacement product or parts may include remanufactured or refurbished parts or components. How long the warranty is effective: ViewSonic projectors are warranted for three (3) years for all parts excluding the lamp and three (3) years - ViewSonic PJ550 | User Guide - Page 31
set is HAR-Certified, and a special mark that will appear on the outer sheath, or on the insulation of one of the inner conductors. If you have any questions concerning which proper power cord to use, please consult with the dealer from whom you have purchased the product. ViewSonic PJ500/PJ550 - ViewSonic PJ550 | User Guide - Page 32
Class B digital device, pursuant to part 15 of the FCC Rules. These and used in accordance with the instructions, may cause harmful interference to User Information for all Countries NOTICE: Use the cables which are included with the projector or specified. 29 ViewSonic PJ500/PJ550/PJ501/PJ551
-
 1
1 -
 2
2 -
 3
3 -
 4
4 -
 5
5 -
 6
6 -
 7
7 -
8
-
9
-
10
-
11
-
12
-
13
-
14
-
15
-
16
-
17
-
18
-
19
-
20
-
21
-
22
-
23
-
24
-
25
-
26
-
27
-
28
-
29
-
30
-
31
-
32
 |
 |

PJ500/PJ550
PJ501/PJ551
User Guide
Image
Size 30” - 300”
High Brightness Light Weight
LCD Projector