ViewSonic UPC300-2.2 User Manual - Page 9
Setting Up Your gTablet - reviews
 |
View all ViewSonic UPC300-2.2 manuals
Add to My Manuals
Save this manual to your list of manuals |
Page 9 highlights
2-2 Setting Up Your gTablet Turning the gTablet ON for the first time You must fully charge your gTablet before using for the first time. gTablet Key Map section). When fully charged, a green indicator light will display on the gTablet (shown in gTablet Key Map section). Once green indicator light is on, turn system on by pressing the power button (shown in Welcome Screen When the gTablet powers on, the Welcome Screen below will appear. There are 4 easy steps to follow for initial setup. End User License Agreement 1. After the welcome screen finishes loading, the End-User License Agreement screen will appear. Review this and tap the "Accept" button. After tapping on the box "I have read and agree..." (1), tap on the "Next" button (2). 9
-
 1
1 -
2
-
3
-
 4
4 -
 5
5 -
 6
6 -
 7
7 -
 8
8 -
 9
9 -
 10
10 -
 11
11 -
 12
12 -
 13
13 -
 14
14 -
15
-
16
-
17
-
18
-
19
-
20
-
21
-
22
-
23
-
24
-
25
-
26
-
27
-
28
-
29
-
30
-
31
-
32
-
33
-
34
-
35
-
36
-
37
-
38
-
39
-
40
-
41
-
42
-
43
-
44
-
45
-
46
-
47
-
48
-
49
-
50
-
51
-
52
-
53
-
54
-
55
-
56
-
57
-
58
-
59
-
60
-
61
-
62
-
63
-
64
-
65
-
66
-
67
-
68
-
69
 |
 |
9
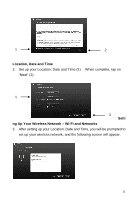
2-2
Setting Up Your gTablet
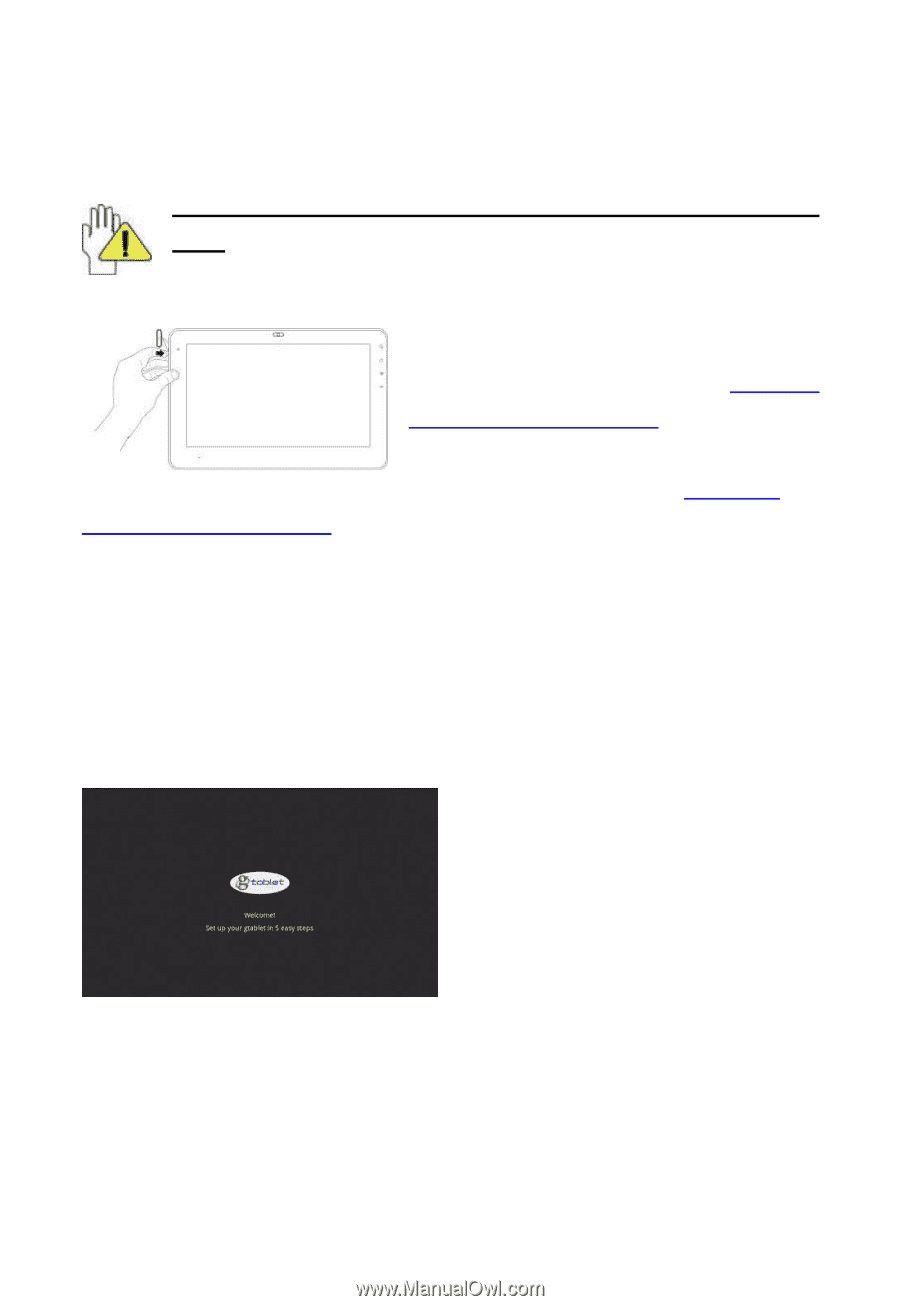
Turning the gTablet ON for the first time
You must fully charge your gTablet before using for the first
time.
When fully charged, a green indicator
light will display on the gTablet (
shown in
gTablet Key Map section
).
Once green
indicator light is on, turn system on by
pressing the power button (
shown in
gTablet Key Map section
).
Welcome Screen
When the gTablet powers on, the Welcome Screen below will appear.
There are 4 easy steps to follow for initial setup.
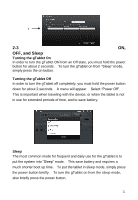
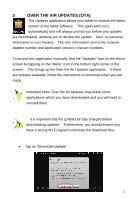
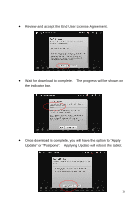
End User License Agreement
1.
After the welcome screen finishes loading, the End-User License
Agreement screen will appear.
Review this and
tap the “Accept”
button.
After tapping
on the box “I have read and agree…” (1),
tap
on the “Next” button (2).