ViewSonic V1250s User Guide
ViewSonic V1250s - Tablet PC - Pentium M 1 GHz Manual
 |
UPC - 766907040616
View all ViewSonic V1250s manuals
Add to My Manuals
Save this manual to your list of manuals |
ViewSonic V1250s manual content summary:
- ViewSonic V1250s | User Guide - Page 1
, or if anything is missing as listed under Package Contents in this user guide, please contact ViewSonic before returning the product. See the Customer Support table in this guide for contact information. ViewSonic® Convertible Tablet PC V1250 User Guide Microsoft® Windows XP Tablet PC Edition - ViewSonic V1250s | User Guide - Page 2
Your V1250 V1250 Tour 4 Front View 4 Back View 5 Left View 6 Bottom View 7 Converting to a Tablet 8 Performance Features 10 High Performance Processor 10 Convert to PC 10 Input 10 Memory 10 Rotation 17 XP Control Panels 18 Audio 19 Adjusting the Audio 19 ViewSonic Tablet PC V1250 i - ViewSonic V1250s | User Guide - Page 3
25 Bridge Battery Feature 25 Using your V1250 Initial Setup PC Card 33 Multicard Slot 33 Upgrading the System Memory 34 Installing a New Memory Module 34 Security 36 Using the Security Lock 36 Using Passwords 36 Using Accessories Docking Station 38 Troubleshooting ViewSonic Tablet PC V1250 - ViewSonic V1250s | User Guide - Page 4
and Maintenance 56 DISCLAIMER 56 Limited Warranty 57 Safety Guidelines 58 Compliance and Safety Notices 59 Radio Frequency Interference (RFI) Compliance 59 Safety Notices 61 Battery Safety Notice 61 Lithium Battery Warning 61 Power Supply Safety Notice 61 ViewSonic Tablet PC V1250 iii - ViewSonic V1250s | User Guide - Page 5
of Apple Computer, Inc. ViewSonic Corporation reserves the right to change product specifications without notice. Information in this document may change without notice. No part ViewSonic Tablet PC V1250 VSMW27922-1W A-CD-TPCV1250-1 10-17-03 Product Disposal at End of Product Life ViewSonic - ViewSonic V1250s | User Guide - Page 6
ViewSonic before returning the product. See the Customer Support table in this guide. • Tablet PC V1250 • Stylus and tip remover with 5 replacement stylus tips • AC Adapter and Power Cord(s) • Carrying Case • Battery Pack • Recovery CD Package • Quick Start Guide • User Guide on C:\V1250\UG - ViewSonic V1250s | User Guide - Page 7
. • Do not place heavy objects on the screen, video cable, or power cord. • If smoke, abnormal noise, or strange odor is present, immediately switch the V1250 off and call your dealer or ViewSonic. • Use only the AC/DC power adapter supplied with your V1250. ViewSonic Tablet PC V1250 3 - ViewSonic V1250s | User Guide - Page 8
Tour This section shows the following views of visible ports and buttons: Front View Back View Left View Bottom View Front View Open latch LCD Display Microphone Security Key (Ctrl-Alt-Del) Rotate Wireless ON/OFF Journal ViewSonic Tablet PC V1250 Wireless On/Off Charging status HD access - ViewSonic V1250s | User Guide - Page 9
Back View DC IN VGA port Modem Ethernet USB USB Mic IN Audio OUT ViewSonic Tablet PC V1250 5 - ViewSonic V1250s | User Guide - Page 10
Left View Stylus slot PC card slot SD Secure Disk, or MS Memory Stick slot, or MMC Multi Media Card IEEE 1394 Firewire Power ON latch ViewSonic Tablet PC V1250 6 - ViewSonic V1250s | User Guide - Page 11
Bottom View Battery Pack Latch Battery Pack Compartment Memory Expansion Slot Screw Hard Drive Expansion Slot Docking Station Port Connection ViewSonic Tablet PC V1250 7 - ViewSonic V1250s | User Guide - Page 12
to a tablet, do the following. 1. Push in and slide the latch to the left while gently opening the display screen. Open the display to a vertical position as shown below. 2. Turn the display screen clockwise around in a half circle until you see the back of the display. ViewSonic Tablet PC V1250 8 - ViewSonic V1250s | User Guide - Page 13
3. Press and slide the latch to the right. 4. Align the two white marks shown below as you close the display flat against the keyboard and the tablet clicks into place. 5. Now you have a Tablet PC. For more information on using the Tablet PC, see the V1250 User Guide. ViewSonic Tablet PC V1250 9 - ViewSonic V1250s | User Guide - Page 14
and EM type digitizer. Convert to PC Innovative and patented convertible notebook-to-tablet PC design. Input Supports inking and pen input for easy note-taking, form-filling, and e-book application. BIOS-level signature verification (written password) for security. Memory The V1250 is equipped with - ViewSonic V1250s | User Guide - Page 15
LCD brightness to save battery life. Wireless LAN, Fast Ethernet and Modem Connectivity For network access capability, the V1250 provides a built-in Tablet PC Docking Station. The V1250 also includes a Type II PC Card slot and a multi-card slot for additional expansion. ViewSonic Tablet PC V1250 - ViewSonic V1250s | User Guide - Page 16
that the V1250 is charging. • Off - indicates that the battery is charged. The Standby Indicator LED • Green - indicates that the V1250 is charging. The Wireless Indicator LED • Green - indicates that Wireless LAN is on. • Off - indicates that Wireless LAN is off. ViewSonic Tablet PC V1250 12 - ViewSonic V1250s | User Guide - Page 17
Using the Keyboard For more information, see the Special Keys - Function Table below. Function Help Sleep Display Toggle Display On/Off Speaker On/Off Num Lock Scroll Fn+Right Cursor Fn+Left Cursor Fn+Up Cursor Fn+Down Cursor Beep No Yes No No No No No No No No No ViewSonic Tablet PC V1250 13 - ViewSonic V1250s | User Guide - Page 18
Using the Touch Pad The Touch pad shown below acts like a mouse with special control keys. Switch between applications Escape Scroll up/down, & push to Enter Open Internet Right click - context menu ViewSonic Tablet PC V1250 14 - ViewSonic V1250s | User Guide - Page 19
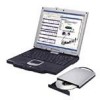
. Optical Disk Drive Your V1250 offers an Optical Disk Drive (Optional - see additional Accessories) which you can use to load and run files from a Compact Disc. For more functionality, you can opt for the DVD/CDRW Combo ODD which supports CD Burning and DVD media. ViewSonic Tablet PC V1250 15 - ViewSonic V1250s | User Guide - Page 20
you do not see the Display Icon, click Switch to Classic View located on the top left corner of the Control Panel window. 2 Click on Settings then click the Advanced Tab. 3 Click on the Screen Rotation tab and select Auto Change by Light Sensor. See screen shot below. ViewSonic Tablet PC V1250 16 - ViewSonic V1250s | User Guide - Page 21
4 Click Apply or OK. Screen Rotation To rotate the screen from Portrait to Landscape mode or vice versa, press the Rotate button ( ) on the Tablet PC. See the Front View shown earlier in this user guide. ViewSonic Tablet PC V1250 17 - ViewSonic V1250s | User Guide - Page 22
XP Control Panels Your V1250 running on XP has two ways to view the Control Panel as shown below: the Category View and the Classic View. Click here to switch to Classic View Click here to switch to Category View ViewSonic Tablet PC V1250 18 - ViewSonic V1250s | User Guide - Page 23
[ ]. Or, from the speaker symbol in the task bar or the control panel. For more information on keyboard shortcuts including Mute audio, see the Special Function Key table. Audio mute [F5] key [Fn] Function key Audio up [ ] key Audio down [ ] key Built-in Speakers ViewSonic Tablet PC V1250 19 - ViewSonic V1250s | User Guide - Page 24
in the Quick Start Guide. The battery continues to charge while you use the V1250 if the unit is plugged into an AC outlet. When the battery is fully charged, the battery charge indicator is off. IMPORTANT: Be sure to reserve adequate charge time before traveling. ViewSonic Tablet PC V1250 20 - ViewSonic V1250s | User Guide - Page 25
shown on the right. The Battery Status icon only appears in the task tray while the unit is running on battery power but not while the PC Card from the card slot when not in use. Even when an inserted PC Card is not in operation, it still draws a small amount of power. ViewSonic Tablet PC V1250 - ViewSonic V1250s | User Guide - Page 26
, save your current work immediately or plug in the supplied AC Adapter. IMPORTANT: In Standby or Suspend Mode, a fully charged battery loses its power in roughly 72 hours. When kept in Storage unattached to the unit, the Battery Power will deplete in about 30~60 days. ViewSonic Tablet PC V1250 22 - ViewSonic V1250s | User Guide - Page 27
down on a soft flat surface such as a towel on a table top. CAUTION: Do not scratch the LCD display screen. 2 Slide the Battery Latch to the left as shown below. Put your thumb in the Battery thumb hole and pull the Battery Pack out. Battery latch Battery thumb hole ViewSonic Tablet PC V1250 23 - ViewSonic V1250s | User Guide - Page 28
on-line help. Note: The V1250's BIOS supports Windows APM and ACPI modes. This illustration shows the Windows ACPI dialogue box. Consult a Windows manual on how to use Windows ACPI settings or for more information on how to use the Windows power management functions. ViewSonic Tablet PC V1250 24 - ViewSonic V1250s | User Guide - Page 29
off to conserve energy. Click Start > select Turn Off Computer > click Stand By. To use the V1250 again, press the Power On button. Save To Disk now replace the battery pack without losing any data. IMPORTANT: You only have five (5) minutes to change the battery pack. ViewSonic Tablet PC V1250 25 - ViewSonic V1250s | User Guide - Page 30
is not fully charged before using the V1250. (1) Align the notches in the battery compartment as shown below. (2) Gently press the battery down into the battery compartment until it clicks into place. Then slide the battery latch into the lock position. Battery latch ViewSonic Tablet PC V1250 26 - ViewSonic V1250s | User Guide - Page 31
into the power jack on the V1250. The LED light on the top of the adapter appears green when the V1250 is plugged into an AC power source. The adapter converts alternating current (AC) into direct current (DC) for the V1250. The AC plug plugs into an AC wall outlet. ViewSonic Tablet PC V1250 27 - ViewSonic V1250s | User Guide - Page 32
on, then sliding the button powers the unit off. When the V1250 is plugged into an AC power outlet, the battery charges as you use the V1250. For more information, see the Battery Power and Management section and Connecting the Battery section in the user guide. ViewSonic Tablet PC V1250 28 - ViewSonic V1250s | User Guide - Page 33
click on Start > All Programs > Tablet PC > Tablet PC Tutorials, or 3 Go to Microsoft Help. 4 To see the User Guide, go to your hard drive on C:\V1250\UG. 5 The first time you use the V1250, the screen guides you through the Microsoft Windows XP Tablet PC Edition setup ViewSonic Tablet PC V1250 29 - ViewSonic V1250s | User Guide - Page 34
stylus in the middle of the crosshairs again. Repeat this exercise several times until the screen returns to the Calibration Applet. 4 Click OK, OK, and close the control panel. The recalibration takes place immediately upon exiting the application. No need to restart the V1250. ViewSonic Tablet PC - ViewSonic V1250s | User Guide - Page 35
View in this user guide. 2 Plug the other end of the line into an analog phone wall outlet. Warning: The internal modem is intended for use on an analog phone line, also called a POTS (Plain Old Telephone Service V1250) until the connector snaps securely into the port. ViewSonic Tablet PC V1250 31 - ViewSonic V1250s | User Guide - Page 36
Okay. 6 If you do not see your network, click Add and enter the necessary information including the Network Name and Keys, and then click Okay. ViewSonic Tablet PC V1250 32 - ViewSonic V1250s | User Guide - Page 37
), Memory Stick (MS), and Multimedia Card (MMC) memory cards. To use the slot, remove the dummy card first by pressing it and pulling it out slowly. Then insert the SD/MS/MMC card until it locks into place. To remove, press the card again to eject, and then pull to remove. ViewSonic Tablet PC V1250 - ViewSonic V1250s | User Guide - Page 38
more information, see the section Removing the Battery Pack. 2 Place your hand on a large metal object momentarily to discharge any static electricity. 3 Place the V1250 face-down on a soft flat surface. CAUTION: do not scratch the LCD display screen or the lid cover. ViewSonic Tablet PC V1250 34 - ViewSonic V1250s | User Guide - Page 39
receiving socket. Pivot the module until the latches on both sides of the socket snap into place. (You will feel it solidly click into place.) Replace the Memory Slot Cover and the Screw. You have now completed the memory upgrade. ViewSonic Tablet PC V1250 35 - ViewSonic V1250s | User Guide - Page 40
stylus when the ViewSonic Bird Logo comes up. b. On the drop down menu, select Change Password. c. Select Numeric Password. d. Using your stylus, tap the numeric key pad on the screen to enter your desired Password on the NEW field. Do the same thing on the Confirm Field. ViewSonic Tablet PC V1250 - ViewSonic V1250s | User Guide - Page 41
on the screen using the stylus when the ViewSonic Bird Logo comes up. b. On the drop down menu, select Change Password. c. Select Written Password. d. Using your Stylus, enter your signature and click Learn. Do this 5 times. e. Your Signature Authentication is now set. ViewSonic Tablet PC V1250 37 - ViewSonic V1250s | User Guide - Page 42
Power Adapter with power cord(s) (depends on region where purchased) 1 Connect the AC Power Adapter The Docking Station allows you to run your Tablet PC from a standard AC power outlet. Connect the AC adapter and power cord as shown below. Docking Station - Back View ViewSonic Tablet PC V1250 38 - ViewSonic V1250s | User Guide - Page 43
to common computer peripherals, network connectivity, integrated CDROM and AC adapter. For more information see the User Guide that came with your Tablet PC. Kensington Slot AC Power DC-IN VGA 15-pin Ethernet Audio OUT (green) Mic IN (blue) IEEE1394 USB USB USB ViewSonic Tablet PC V1250 39 - ViewSonic V1250s | User Guide - Page 44
4 Dock the Tablet PC Set the Tablet PC down on the Docking Station aligning with the four guides shown below. Press the Tablet down onto the docking station until it clicks into place. ViewSonic Tablet PC V1250 40 - ViewSonic V1250s | User Guide - Page 45
to full then switch to the Ext. Battery Notes: The System Battery has priority over the External Battery 6 Press the release button with your thumb To un-dock the Tablet PC from the Docking Station, press your thumb on the release button until the unit disengages. ViewSonic Tablet PC V1250 41 - ViewSonic V1250s | User Guide - Page 46
a problem with the device. Consult the device's manufacturer first. Some software issues may be resolved by contacting the software vendor directly. Not all peripherals are plug-andplay. You may need to restart the system with these devices powered up and connected beforehand. ViewSonic Tablet PC - ViewSonic V1250s | User Guide - Page 47
up momentarily as a file is accessed. If the file does not open and the light LED does not light, there may be a hard disk spin problem. • Recall if your V1250 has been subjected to static electricity or physical shock. If so, you may have damaged the disk drive. ViewSonic Tablet PC V1250 43 - ViewSonic V1250s | User Guide - Page 48
the hard drive as a cache to speed up the performance. Check the program's Online Help for instructions on decreasing the cache size or on removing temporary Internet files. • Empty the Recycle Bin frequently the desktop Recycle Bin icon > File > Empty Recycle Bin. ViewSonic Tablet PC V1250 44 - ViewSonic V1250s | User Guide - Page 49
drive as a cache to speed up the performance. Check the program's Online Help for instructions on decreasing the cache size or on removing temporary Internet files. • Empty the Recycle Bin Accessories > System Tools > Disk Defragmenter to perform a disk defragmentation. ViewSonic Tablet PC V1250 45 - ViewSonic V1250s | User Guide - Page 50
Display Problems If the display panel remains blank (black) when the system is turned on: Make sure the V1250 is not in the power saving mode (Stand By). In these modes, the display power button. For more information, see The Power On/Power Management Button section. ViewSonic Tablet PC V1250 46 - ViewSonic V1250s | User Guide - Page 51
down operations. If a message, CMOS Checksum Failure, displays during the booting process: • Contact ViewSonic Customer Support. See the Customer Support section in the manual. • The life of the CMOS battery varies from between three to five years depending on usage. ViewSonic Tablet PC V1250 47 - ViewSonic V1250s | User Guide - Page 52
operation: • This is often a software or Windows®-related problem. • Close any application programs you're not using. This may free up some allocated memory. • You may need to install an additional memory module. For instructions, go to the section on upgrading memory. ViewSonic Tablet PC V1250 48 - ViewSonic V1250s | User Guide - Page 53
connection with a different line or contact your local telephone company for service. • Make sure the RJ-11 cable (the one that goes telephone line socket. • Try a different phone line to see if the problem persists. • Be sure the line has a dial tone. If the Ethernet ViewSonic Tablet PC V1250 49 - ViewSonic V1250s | User Guide - Page 54
the PC Card again. • Make sure there is no IRQ (interrupt request) conflict with the card. See Windows® on-line help for solving IRQ conflicts. • Reboot the V1250 to see if the problem persists. • The card may be defective. Try the card on another system, if possible. ViewSonic Tablet PC V1250 50 - ViewSonic V1250s | User Guide - Page 55
Problems If Windows Crashes or Freezes after removing the PC Card: Make sure the PC Card is not in use before removing it. Click on the PC Card V1250's temperature to the point that the V1250 automatically slows down its CPU clock to protect itself from thermal damage. ViewSonic Tablet PC V1250 - ViewSonic V1250s | User Guide - Page 56
. The battery life gets shorter and shorter: • The battery has a finite life of about 500 charge cycles. If your battery is over one or two years old, it may be time to have it replaced. • Try a higher power saving setting in the BIOS or in Windows® Power Management. ViewSonic Tablet PC V1250 52 - ViewSonic V1250s | User Guide - Page 57
of garbage in the printer memory buffer cache. Call off all the printer tasks then toggle off the printer power switch to clear up the memory buffer. Turn the printer back online and attempt to print again. • Make sure you have installed the correct printer driver. ViewSonic Tablet PC V1250 53 - ViewSonic V1250s | User Guide - Page 58
Type II Slot • One Expansion multi-card Slot • 28W-Hr Standard Li-Lon Battery Pack • 1.5 hour Rapid Charge (unit off); 2.5 hour charge in- use • 50W Slim AC Adapter 278mm x 229mm x 25.7 /29.7mm (10.9" x 9.3" x 1" ~ 1.17") 4.0 lbs with Standard Battery Pack installed ViewSonic Tablet PC V1250 54 - ViewSonic V1250s | User Guide - Page 59
T: 65 273 4018 F: 65 273 1566 service.sg@ viewsonic.com Other Asia/Pacific viewsonic.com.tw countries T: 886 2 2246 3456 service.ap@ F: 886 2 8242 3668 viewsonic.com.tw South Africa viewsonic.com/asia T: 886 2 2246 3456 service.ap@ F: 886 2 8242 3668 viewsonic.com ViewSonic Tablet PC V1250 55 - ViewSonic V1250s | User Guide - Page 60
the use of any ammonia or alcohol-based cleaners on the V1250 screen or case. Some chemical cleaners have been reported to damage the screen and/or case of the V1250. ViewSonic will not be liable for damage resulting from use of any ammonia or alcohol-based cleaners. ViewSonic Tablet PC V1250 56 - ViewSonic V1250s | User Guide - Page 61
may not apply to you. Sales outside the U.S.A. and Canada: For warranty information and service on ViewSonic products sold outside of the U.S.A. and Canada, contact ViewSonic or your local ViewSonic dealer. ViewSonic Tablet PC Warranty (V2.0) Release Date: 10-15-01 ViewSonic Tablet PC V1250 57 - ViewSonic V1250s | User Guide - Page 62
IS INSERTED INTO AN APPROPRIATE SOCKET. If a new plug is to be fitted, please observe the wiring code as shown below. If in any doubt, please consult a qualified electrician. WARNING: THIS APPLIANCE MUST BE with the dealer from whom you have purchased the product. ViewSonic Tablet PC V1250 58 - ViewSonic V1250s | User Guide - Page 63
if not installed and used in accordance with the instructions, may cause harmful interference to radio communications. However, or television technician for help. This device complies with Part 15 (B), Part 15(C) and Part 68 of the FCC Rules. Operation is subject to . ViewSonic Tablet PC V1250 59 - ViewSonic V1250s | User Guide - Page 64
environment, it might cause radio interference. Install and use the equipment according to the instruction manual. This device complies with JATE (Japan Approvals Institute for Telecommunications Equipment) requirement under authority of Ministry of Telecommunications. ViewSonic Tablet PC V1250 60 - ViewSonic V1250s | User Guide - Page 65
used batteries according to the manufacturer's instructions or local laws. Power Supply Safety Notice The power supply provided with this device is for use with this device only. Replace only with the same or equivalent type power supply as recommended by the manufacturer. ViewSonic Tablet PC V1250 - ViewSonic V1250s | User Guide - Page 66
ViewSonic Corporation
-
 1
1 -
 2
2 -
 3
3 -
 4
4 -
 5
5 -
 6
6 -
 7
7 -
8
-
9
-
10
-
11
-
12
-
13
-
14
-
15
-
16
-
17
-
18
-
19
-
20
-
21
-
22
-
23
-
24
-
25
-
26
-
27
-
28
-
29
-
30
-
31
-
32
-
33
-
34
-
35
-
36
-
37
-
38
-
39
-
40
-
41
-
42
-
43
-
44
-
45
-
46
-
47
-
48
-
49
-
50
-
51
-
52
-
53
-
54
-
55
-
56
-
57
-
58
-
59
-
60
-
61
-
62
-
63
-
64
-
65
-
66
 |
 |

User Guide
Microsoft
®
Windows XP
Tablet PC Edition
IMPORTANT!
For all technical support issues, or if
anything is missing as listed under
Package Contents in this user guide, please
contact ViewSonic before returning the
product. See the Customer Support table in
this guide for contact information.
ViewSonic
®
Convertible Tablet PC V1250