ViewSonic VA1912W User Manual
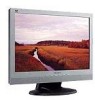
ViewSonic VA1912W - 19" LCD Monitor Manual
 |
UPC - 766907167313
View all ViewSonic VA1912W manuals
Add to My Manuals
Save this manual to your list of manuals |
ViewSonic VA1912W manual content summary:
- ViewSonic VA1912W | User Manual - Page 1
ViewSonic® VA1912w/VA1912wb LCD Display Model No. : VS10866 - ViewSonic VA1912W | User Manual - Page 2
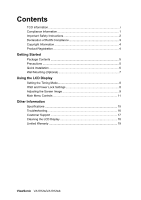
(Optional 7 Using the LCD Display Setting the Timing Mode 8 OSD and Power Lock Settings 8 Adjusting the Screen Image 9 Main Menu Controls 11 Other Information Specifications 15 Troubleshooting 16 Customer Support 17 Cleaning the LCD Display 18 Limited Warranty 19 ViewSonic VA1912w/VA1912wb - ViewSonic VA1912W | User Manual - Page 3
in influencing the development of IT equipment in a more user-friendly direction. Our labelling system started with displays in 1992 and is now requested by users and IT-manufacturers all over the world. For more information, please visit www.tcodevelopment.com ViewSonic VA1912w/VA1912wb i - ViewSonic VA1912W | User Manual - Page 4
, pursuant to part 15 of the the instructions, may turning the equipment off and on, the user circuit different from that to which the receiver is connected. • Consult the dealer or an experienced radio/TV technician for help. Warning: You are cautioned that changes ViewSonic VA1912w/VA1912wb 1 - ViewSonic VA1912W | User Manual - Page 5
"Cleaning the Display" in this guide for further instructions. 7. Do power-supply cord or plug is damaged, if liquid is spilled onto or objects fall into the unit, if the unit is exposed to rain or moisture, or if the unit does not operate normally or has been dropped. ViewSonic VA1912w/VA1912wb - ViewSonic VA1912W | User Manual - Page 6
type solders (i.e. lead-based alloys containing 85% by weight or more lead). 4. Lead as an allotting element in steel containing up to 0.35% lead by weight, aluminium containing up to 0.4% lead by weight and as a cooper alloy containing up to 4% lead by weight. ViewSonic VA1912w/VA1912wb 3 - ViewSonic VA1912W | User Manual - Page 7
for you to print the registration form, which you may mail or fax to ViewSonic. For Your Records Product Name: Model Number: Document Number: Serial Number: Purchase Date: VA1912w/wb ViewSonic 19" LCD Display VS10866 VA1912w/wb-2_UG_ENG Rev. 1C 03-06-07 Product disposal at end of product life - ViewSonic VA1912W | User Manual - Page 8
Windows 2000, Windows Me (Millennium), Windows XP, and Windows Vista. Package Contents Your LCD display package includes: • LCD display • Power cord • Audio cable (stereo mini jack) • Video cable • ViewSonic Wizard CD-ROM • Quick Start Guide NOTE: The CD includes the User Guide PDF files and INF/ICM - ViewSonic VA1912W | User Manual - Page 9
Follow the on-screen instructions. 5. Windows users: Set the timing mode (resolution and refresh rate) Example: 1440 x 900 @ 60 Hz. For instructions on changing the resolution and refresh rate, see the graphics card's user guide. Installation is complete. Enjoy your new ViewSonic LCD display. To be - ViewSonic VA1912W | User Manual - Page 10
the base. 5. Remove the Rubber Plugs from inside the four VESA screw holes. 6. Attach the mounting bracket from the VESA compatible wall mounting kit (75 mm x 75 mm distance). 7. Attach the LCD display to the wall, following the instructions in the wall-mounting kit. ViewSonic VA1912w/VA1912wb 7 - ViewSonic VA1912W | User Manual - Page 11
picture quality set your LCD display timing mode to: VESA 1440 x 900 @ 60Hz. To set the Timing Mode: 1. Set the resolution: Right-click on the Windows desktop > Properties > Settings > set the resolution. 2. Set the refresh rate: See your graphic card's user guide for instructions. WARNING: Do not - ViewSonic VA1912W | User Manual - Page 12
are defined in "Main Menu Controls" on page 11. Main Menu with OSD controls Front Control Panel shown below in detail Displays the Main Menu or exits the control screen and saves adjustments. Audio Mute button turns the sound off Scrolls through menu options and adjusts the displayed control. Also - ViewSonic VA1912W | User Manual - Page 13
1440 x 900 @ 60Hz video signal to the LCD display. (Look for instructions on "changing the refresh rate" in the graphics card's user guide.) • If necessary, make small adjustments using H. POSITION and V. POSITION until the screen image is completely visible. (The black border around the edge of the - ViewSonic VA1912W | User Manual - Page 14
Main Menu Controls Adjust the menu items shown below by using the up S and down T buttons. Control Explanation Auto Image Adjust sizes and centers the screen image automatically. Contrast adjusts the difference between the image background (black level) and the foreground (white level). Brightness - ViewSonic VA1912W | User Manual - Page 15
's user guide for instructions on changing the resolution and refresh rate (vertical frequency). NOTE: VESA 1440 x 900 @ 60Hz (recommended) means that the resolution is 1440 x 900 and the refresh rate is 60 Hertz. Manual Image Adjust Sub-menu H. Size (Horizontal Size) adjusts the width of the screen - ViewSonic VA1912W | User Manual - Page 16
Adjust first. Sharpness adjusts the clarity and focus of the screen image. Setup Menu displays the menu shown below: Language Select allows the user to choose the language used in the menus and control screens. Resolution Notice allows the user to enable or disable this notice. If you enable the - ViewSonic VA1912W | User Manual - Page 17
the display screen disappears. OSD Background allows the user to turn the OSD background On or Off. Memory Recall returns the adjustments back to factory settings if the display is operating in a factory Preset Timing Mode listed in the Specifications of this manual. ViewSonic VA1912w/VA1912wb 14 - ViewSonic VA1912W | User Manual - Page 18
Hz) Warning: Do not set the graphics card in your computer to exceed these refresh rates; doing so may result in permanent damage to the LCD display. 1 Macintosh computers older than G3 require a ViewSonic® Macintosh adapter. To order an adapter, contact ViewSonic. ViewSonic VA1912w/VA1912wb 15 - ViewSonic VA1912W | User Manual - Page 19
Troubleshooting No power • Make sure power button (or switch) is ON. • Make sure A/C power cord is securely connected to the LCD display. • Plug another electrical device (like a radio) into the power outlet to verify that the outlet is supplying proper voltage. Power is ON but no screen image • - ViewSonic VA1912W | User Manual - Page 20
.com T= 1800 11 9999 [email protected] Hong Kong www.hk.viewsonic.com T= 852 3102 2900 [email protected] Macau www.hk.viewsonic.com T= 853 700 303 [email protected] Korea www.kr.viewsonic.com T= 080 333 2131 [email protected] ViewSonic VA1912w/VA1912wb 17 - ViewSonic VA1912W | User Manual - Page 21
ammonia or alcohol-based cleaners on the LCD display screen or case. Some chemical cleaners have been reported to damage the screen and/or case of the LCD display. • ViewSonic will not be liable for damage resulting from use of any ammonia or alcoholbased cleaners. ViewSonic VA1912w/VA1912wb 18 - ViewSonic VA1912W | User Manual - Page 22
or attempted repair by anyone not authorized by ViewSonic. c. Any damage of the product due to shipment. d. Removal or installation of the product. e. Causes external to the product, such as electrical power fluctuations or failure. f. Use of supplies or parts not meeting ViewSonic's specifications - ViewSonic VA1912W | User Manual - Page 23
-
 1
1 -
 2
2 -
 3
3 -
 4
4 -
 5
5 -
 6
6 -
 7
7 -
8
-
9
-
10
-
11
-
12
-
13
-
14
-
15
-
16
-
17
-
18
-
19
-
20
-
21
-
22
-
23
 |
 |
ViewSonic
®
VA1912w/VA1912wb
LCD Display
Model No. : VS10866