ViewSonic VG2756a-2K User Guide English
ViewSonic VG2756a-2K Manual
 |
View all ViewSonic VG2756a-2K manuals
Add to My Manuals
Save this manual to your list of manuals |
ViewSonic VG2756a-2K manual content summary:
- ViewSonic VG2756a-2K | User Guide English - Page 1
important information on installing and using your product in a safe manner, as well as registering your product for future service. Warranty information contained in this User Guide will describe your limited coverage from ViewSonic® Corporation, which is also found on our web site at http://www - ViewSonic VG2756a-2K | User Guide English - Page 2
Thank you for choosing ViewSonic® As a world-leading provider of visual solutions, ViewSonic® is dedicated to exceeding the world's expectations for technological evolution, innovation, and simplicity. At ViewSonic®, we believe that our products have the potential to make a positive impact in the - ViewSonic VG2756a-2K | User Guide English - Page 3
cloth. If further cleaning is required, see the "Maintenance" section in this guide for further instructions. • Avoid touching the screen. Skin oils are difficult to remove. • both the furniture and the monitor to a suitable support. • Do not place the monitor on cloth or other materials that - ViewSonic VG2756a-2K | User Guide English - Page 4
combination to avoid injury from tipping over. • Unplug this equipment when it will be unused for long periods of time. • Refer all servicing to qualified service personnel. Service will be required when the unit has been damaged in any way, such as: if the power-supply cord or plug is damaged, if - ViewSonic VG2756a-2K | User Guide English - Page 5
this display must be securely attached to the floor/wall in accordance with the installation instructions. • Fastening the monitor to a wall or fixed object using cordage or other restraining devices can help support the weight of the monitor in order to prevent the monitor from falling over. Hole - ViewSonic VG2756a-2K | User Guide English - Page 6
Contents Safety Precautions 3 Introduction 8 Package Contents...8 Product Overview...9 Initial Setup 10 Installing the Stand 10 Wall Mounting...13 Using the Security Slot 15 Making Connections 16 Connecting to Power 16 Connecting External Devices 17 HDMI Connection 17 DisplayPort Connection - ViewSonic VG2756a-2K | User Guide English - Page 7
Appendix 48 Specifications...48 Glossary...51 Troubleshooting...56 Maintenance...58 General Precautions 58 Cleaning the Screen 58 Cleaning the Case 58 Disclaimer...58 Product Upgradeability and Repairability 59 Regulatory and Service Information 60 Compliance Information 60 FCC Compliance - ViewSonic VG2756a-2K | User Guide English - Page 8
Introduction Package Contents • Monitor • Power cord • Video cable • USB cable • Quick start guide NOTE: The power cord and video cables included in your package may vary depending on your country. Please contact your local reseller for more information. 8 - ViewSonic VG2756a-2K | User Guide English - Page 9
Product Overview Front View Display screen 1 35 (ViewMode) 2 4 Power button NOTE: For more information about the 1(ViewMode)/2/3/4/5 key and its functions, refer to "Hot Keys" on page 30. Rear View 8 Security Slot 1 1. AC IN 5. DisplayPort Out Type-C in out 2 3 4 5 6 7 2. HDMI 6. USB - ViewSonic VG2756a-2K | User Guide English - Page 10
Initial Setup This section provides detailed instructions for setting up your monitor. NOTE: The monitor comes packaged in a user-friendly box to make installation easy. Installing the Stand 1. Place the box on a - ViewSonic VG2756a-2K | User Guide English - Page 11
4. Align and slide the upper hooks of the monitor stand into the stand mounting slots as shown in the illustration below: NOTE: Ensure the stand is secure and the quick release tab positively clicks into place. 11 - ViewSonic VG2756a-2K | User Guide English - Page 12
5. Using the stand's handle, lift the device out of the box and into its upright position on a flat, stable surface. NOTE: Always place the device on a flat, stable surface. Failure to do so may cause the device to fall and damage the device and/or result in personal injury. 12 - ViewSonic VG2756a-2K | User Guide English - Page 13
Wall Mounting Refer to the table below for the standard dimensions for wall mount kits. Maximum Hole pattern Interface Pad Loading (W x H) (W x H x D) Pad Hole Screw Specification Quantity 14 kg 100 x 100 mm 115 x 115 x 2.6 mm Ø 5 mm M4 x 10 mm 4 pieces NOTE: Wall mount kits are sold - ViewSonic VG2756a-2K | User Guide English - Page 14
100 mm 5. Attach the mounting bracket to the VESA mounting holes at the rear of the device. Then secure it with four (4) screws (M4 x 10 mm). 100 mm 6. Follow the instructions that come with the wall mounting kit to mount the monitor onto the wall. 14 - ViewSonic VG2756a-2K | User Guide English - Page 15
slot locking device to secure the device to a fixed object. Additionally, fastening the monitor to a wall or fixed object using a security cable can help support the weight of the monitor in order to prevent the monitor from falling over. Below is an example of setting up a security slot locking - ViewSonic VG2756a-2K | User Guide English - Page 16
Making Connections This section guides you on how to connect the monitor with other equipment. Connecting to Power 1. Connect the power cord to the AC IN jack at the rear of the device. 2. Connect the power cord plug to a power outlet. 1 2 16 - ViewSonic VG2756a-2K | User Guide English - Page 17
Connecting External Devices HDMI Connection Connect one end of an HDMI cable to the HDMI port of your monitor. Then connect the other end of the cable to the HDMI port of your computer. NOTE: The monitor is equipped with one HDMI 1.4 port. 17 - ViewSonic VG2756a-2K | User Guide English - Page 18
DisplayPort Connection Connect one end of a DisplayPort cable to the DisplayPort port. Then connect the other end of the cable to the DisplayPort or mini DP port of your computer. NOTE: To connect the monitor to the Thunderbolt port (v. 1&2) on you Mac, connect the mini DP end of the "mini DP to - ViewSonic VG2756a-2K | User Guide English - Page 19
DisplayPort/USB Type-C MST Daisy Chain Connection With DisplayPort/USB Type-C Multi-Stream Transport (MST) support, you can daisy chain up to four (4) monitors. 1. Connect one end of a DisplayPort/USB Type-C cable to the DisplayPort/USB Type-C Out port of your - ViewSonic VG2756a-2K | User Guide English - Page 20
. • If High Data Speed is selected, it will prioritize high speed data transfer and Ethernet. MST will only support 2560 x 1440 @30Hz (maximum). • If High Resolution is selected, MST can support 2560 x 1440 @60Hz, but data transfer and Ethernet speed will be limited to USB 2.0 standards due to - ViewSonic VG2756a-2K | User Guide English - Page 21
to a USB port of the monitor. Then connect the other end of the cable to a USB port of your computer. NOTE: The monitor supports three (3) types of USB ports. When making the connection(s), observe the following guidelines: • Two (2) USB Type-A ports: Connection for your Type A peripheral device - ViewSonic VG2756a-2K | User Guide English - Page 22
Ethernet Connection Connect one end of your LAN (RJ45) cable to the LAN (RJ45) port of the monitor. Then connect the other end to your network. Network Next, you must connect your computer to the monitor by either: • Type-C connection: Type-C Type-C Or, by: or • HDMI and USB Upstream • - ViewSonic VG2756a-2K | User Guide English - Page 23
Using the Monitor Adjusting the Viewing Angle For optimal viewing, you can adjust the viewing angle using any of the following methods: Height Adjustment Lower or raise the monitor to the desired height (0 to 130 mm). NOTE: When adjusting, press down firmly along the adjustment track. 23 - ViewSonic VG2756a-2K | User Guide English - Page 24
Screen Orientation Adjustment (Monitor Pivot) 1. Adjust the monitor height to the highest position. Then tilt the monitor backwards to the full tilt position. 24 - ViewSonic VG2756a-2K | User Guide English - Page 25
2. Rotate the monitor 90° clockwise or counterclockwise from landscape to portrait orientation. NOTE: • To rotate the screen image, manually change the system's display orientation settings. • When adjusting, make sure to hold both sides of your monitor firmly with both hands. 25 - ViewSonic VG2756a-2K | User Guide English - Page 26
desired viewing angle (60°). Tilt Angle Adjustment Tilt the monitor forwards or backwards to the desired viewing angle (-5° to 40°). NOTE: • When adjusting, support the stand firmly with one hand while tilting the monitor forwards or backwards with the other hand. • The monitor must be lifted to the - ViewSonic VG2756a-2K | User Guide English - Page 27
Turning the Device On/Off 1. Plug the power cord into a power outlet. 2. Press the Power button to turn on the monitor. 3. To turn the monitor off, press the Power button again. NOTE: The monitor will still consume some power as long as the power cord is connected to the power outlet. If the monitor - ViewSonic VG2756a-2K | User Guide English - Page 28
Press the 2/3/4/5 key to activate the Quick Menu. Viewmode Contrast/Brightness Input Select Main Menu Exit Viewmode Contrast/Brightness NIOnpuTtESe:lectFollow the key guide that appears on the bottom of the screen to select Main Menu the option or make adjustments. Exit ViewMode Select one of the - ViewSonic VG2756a-2K | User Guide English - Page 29
Input Select Select the input source. HDMI DisplayPort s Type C Main Menu Enter the On-Screen Display (OSD) Menu. Input Select Audio Adjust ViewMode Color Adjust Manual Image Setup Menu Adjust HDMI DisplayPort Type C Exit Exit the Quick Menu. 2560 X 1440 @ 60HZ 29 - ViewSonic VG2756a-2K | User Guide English - Page 30
Hot Keys When the On-Screen Display (OSD) Menu is off, you can quickly access special functions by using the control panel keys. Key 2 + 3 Description Press and hold the keys to lock/unlock the OSD Menu. When the menu appears on the screen, continue holding both keys for 10 seconds to lock/unlock - ViewSonic VG2756a-2K | User Guide English - Page 31
Key 2 + 4 Description Press and hold the keys to lock/unlock the Power button. When the menu appears on the screen, continue holding both keys for 10 seconds to lock/unlock the Power button. Power Lock/Unlock Locking Power Button 3 Press and hold for 10s to lock power If the Power button is - ViewSonic VG2756a-2K | User Guide English - Page 32
General Operations 2560 X 1440 @ 60Hz 2560 X 1440 @ 60Hz Key Guide 1. Press the 2/3/4/5 key to display the Quick Menu. Then press the 4 key to display the OSD Menu. Input Select Audio Adjust ViewMode Color Adjust Manual Image Setup Menu Adjust HDMI DisplayPort Type C 2560 X 1440 @ 60HZ - ViewSonic VG2756a-2K | User Guide English - Page 33
) or 2 key to select the desired menu option. Then press the 3 key to enter the sub-menu. Input Select Audio Adjust ViewMode Color Adjust Manual Image Setup Menu Adjust Volume On Mute Off 2560 X 1440 @ 60Hz 4. Press the 1(ViewMode) or 2 key to adjust/select the setting. Then press the - ViewSonic VG2756a-2K | User Guide English - Page 34
Image Setup Menu Adjust Volume On Mute Off Input Select Audio Adjust ViewMode Color Adjust Manual Image Setup Menu Adjust Volume 50 Mute 2560 X 1440 @ 60Hz 2560 X 1440 @ 60Hz Key Guide Key Guide 5. Press the 4 key to return to the previous menu. NOTE: To exit the OSD Menu, press - ViewSonic VG2756a-2K | User Guide English - Page 35
On-Screen Display (OSD) Menu Tree Main Menu Sub-menu HDMI Input Select DisplayPort Type C Volume (-/+, 0~100) Audio Adjust On Mute Off Off Web Text ViewMode Office CUSTOM 1/2/3 Movie MAC Mono Game FPS 1 FPS 2 RTS MOBA Menu Option Low Input Lag Black Stabilization Advanced DCR - ViewSonic VG2756a-2K | User Guide English - Page 36
/ Brightness Color Temperature Contrast Brightness Bluish Cool Native Warm User Color Color Adjust Color Space Color Range Gamma Sharpness Manual Image Adjust Aspect Ratio Overscan Blue Light Filter Auto RGB YUV Auto Full Range Limited Range 1.8 2.0 2.2 2.4 2.6 2.8 (-/+, 0~100) 4:3 Full - ViewSonic VG2756a-2K | User Guide English - Page 37
Main Menu Sub-menu Language Resolution Notice Information Setup Menu OSD Timeout OSD Background OSD Pivot Power Indicator Auto Power Off Sleep ECO Mode English Français Deutsch Español Italiano Suomi Türkçe eská Svenska On Off (-/+, 5/15/30/60) On Off 0˚ +90˚ -90˚ On Off On Off 30 Minutes - ViewSonic VG2756a-2K | User Guide English - Page 38
Main Menu Sub-menu DisplayPort 1.2 MST Setup Menu DDC/CI Auto Detect All Recall On Off Type C Prioritization On Off On Off Menu Option High Data Speed High Resolution 38 - ViewSonic VG2756a-2K | User Guide English - Page 39
) or 2 key to select Input Select. Then press the 3 key to enter the Input Select menu. Input Select Audio Adjust ViewMode Color Adjust Manual Image Setup Menu Adjust HDMI DisplayPort Type C 2560 X 1440 @ 60HZ 3. Press the 1(ViewMode) or 2 key to select the desired input source. Then press - ViewSonic VG2756a-2K | User Guide English - Page 40
1(ViewMode) or 2 key to select Audio Adjust. Then press the 3 key to enter the Audio Adjust menu. Input Select Audio Adjust ViewMode Color Adjust Manual Image Setup Menu Adjust Volume Mute 2560 X 1440 @ 60Hz 3. Press the 1(ViewMode) or 2 key to select the menu option. Then press the 3 key to - ViewSonic VG2756a-2K | User Guide English - Page 41
3 key to enter the ViewMode menu. Input Select Audio Adjust ViewMode Color Adjust Manual Image Setup Menu Adjust Off Office Movie MAC Mono Game 2560 X 1440 @ enter the respective sub-menu, press the 3 key. Follow the key guide that appears on the bottom of the screen to select the option or - ViewSonic VG2756a-2K | User Guide English - Page 42
enter the Color Adjust menu. Input Select Audio Adjust ViewMode Color Adjust Manual Image Setup Menu Adjust Contrast/Brightness Color Temperature Color Space Color Range the respective sub-menu, press the 3 key. Follow the key guide that appears on the bottom of the screen to select the option - ViewSonic VG2756a-2K | User Guide English - Page 43
is RGB. • YUV: The input signal color format is YUV. Color Range The monitor can detect the input signal color range automatically. You can manually change the color range options to fit the correct color range if the colors are not displayed correctly. • Auto: Automatically recognizes the color - ViewSonic VG2756a-2K | User Guide English - Page 44
key to display the OSD Menu. 2. Press the 1(ViewMode) or 2 key to select Manual Image Adjust. Then press the 3 key to enter the Manual Image Adjust menu. Input Select Audio Adjust ViewMode Color Adjust Manual Image Setup Menu Adjust Sharpness Aspect Ratio Overscan Blue Light Filter 2560 X 1440 - ViewSonic VG2756a-2K | User Guide English - Page 45
to enter the Setup Menu menu. Input Select Audio Adjust ViewMode Color Adjust Manual Image Setup Menu Adjust Language Select Resolution Notice Information OSD Timeout OSD Background 3 key. Follow the key guide that appears on the bottom of the screen to select the option or make adjustments. 45 - ViewSonic VG2756a-2K | User Guide English - Page 46
Menu Option Language Description Select an available language for the OSD Menu. Enable this option to allow the system to inform users that the current viewing resolution is not the correct native resolution. Resolution Notice Resolution Notice For best picture quality, change resolution to - ViewSonic VG2756a-2K | User Guide English - Page 47
1.2 MST DDC/CI Auto Detect All Recall Description Choose between various modes, based on power consumption. Enable/Disable DisplayPort 1.2 MST support and select USB Type C prioritization. Enable this option to allow the monitor control via the graphics card. Automatically detect the input - ViewSonic VG2756a-2K | User Guide English - Page 48
Appendix Specifications Item LCD Category Type Display Size Color Filter Glass Surface Specifications a-Si TFT active matrix 2560 x 1440 LCD 0.233 (H)mm x 0.233 (V)mm pixel pitch 68.6 cm (27" viewable) RGB vertical stripe Anti-Glare (Haze 25%), Hard Coating (3H) Input Signal Compatibility - ViewSonic VG2756a-2K | User Guide English - Page 49
Item Resolution1 Power2 Display area Operating conditions Storage conditions Dimensions Category Specifications Supported 2560 x 1440 @ 60Hz 2048 x 1152 @ 60Hz 1920 x 1440 @ 60Hz 1920 x 1200 @ 60Hz 1920 x 1080 @ 50, 60Hz 1680 x 1050 @ 60Hz 1600 x 1200 @ 60Hz 1600 x 900 @ 60Hz - ViewSonic VG2756a-2K | User Guide English - Page 50
Item Category Specifications Wall Mount Dimensions 100 x 100 mm Weight Physical 6.9 kg (15.21 lbs) Power Consumption On 26.35W (Typical) (Blue LED) 67.03W (Max3) (Blue LED) Off < 0.3W 1 Do not set the graphics card in your computer to exceed these timing modes; doing so may result in - ViewSonic VG2756a-2K | User Guide English - Page 51
Returns the adjustments back to factory settings if the display is operating in a factory Preset Timing Mode listed in the Specifications of this manual. NOTE: (Exception) This control does not affect changes made with the "Language Select" or "Power Lock setting". Audio Adjust Adjusts the volume - ViewSonic VG2756a-2K | User Guide English - Page 52
C Color Range The monitor can detect the input signal color range automatically. You can manually change the color range options to fit the correct color range if the colors are not displayed correctly. Options Description Auto The monitor automatically recognizes - ViewSonic VG2756a-2K | User Guide English - Page 53
and 2.8. H H./V. Position Manually adjust the screen image horizontally and/or vertically. Horizontal Size Manually stretch or shorten the and the ViewSonic® website URL. See your graphics card's user guide for instructions on changing the resolution and refresh rate (vertical frequency). NOTE: - ViewSonic VG2756a-2K | User Guide English - Page 54
Returns the adjustments back to factory settings if the display is operating in a factory preset timing mode listed in the "Specifications" of this manual. NOTE: • (Exception) This control does not affect changes made in the "Language Select" or "Power Lock" setting. • Memory Recall is the default - ViewSonic VG2756a-2K | User Guide English - Page 55
R Recall Resets the ViewMode monitor settings. Resolution Notice The notice tells users that the current viewing resolution is not the correct native resolution. This notice will appear in the display settings window when setting up the display resolution. Response Time Adjusts the response time, - ViewSonic VG2756a-2K | User Guide English - Page 56
Troubleshooting This section describes some common problems that you may experience when using the monitor. Problem or Issue Possible Solutions No power Power is On, but no image appears on the screen • Make sure you have turned on the monitor. Otherwise, - ViewSonic VG2756a-2K | User Guide English - Page 57
Problem or Issue The OSD Menu does not appear on the screen The Quick Menu doesn't appear Some menus are not selectable in the OSD Control - ViewSonic VG2756a-2K | User Guide English - Page 58
Maintenance General Precautions • Make sure the monitor is turned off and the power cable is unplugged from the power outlet. • Never spray or pour any liquid directly onto the screen or case. • Handle the monitor with care, as a darker-colored monitor, if scuffed, may show marks more clearly than a - ViewSonic VG2756a-2K | User Guide English - Page 59
Product Upgradeability and Repairability The following is a list of hardware features available for at least 5 years after the sale of the product. Main Processor(s) or SOC Memory HDD Wireless Networking Capability Graphics Card Rechargeable Battery Fan Assembly Camera Fingerprint Reader Display - ViewSonic VG2756a-2K | User Guide English - Page 60
Regulatory and Service Information Compliance Information This section addresses all connected requirements radiate radio frequency energy, and if not installed and used in accordance with the instructions, may cause harmful interference to radio communications. However, there is no guarantee that - ViewSonic VG2756a-2K | User Guide English - Page 61
Declaration of RoHS2 Compliance This product has been designed and manufactured in compliance with Directive 2011/65/EU of the European Parliament and the Council on restriction of the use of certain hazardous substances in electrical and electronic equipment (RoHS2 Directive) and is deemed to - ViewSonic VG2756a-2K | User Guide English - Page 62
Indian Restriction of Hazardous Substances Restriction on Hazardous Substances statement (India). This product complies with the "India E-waste Rule 2011" and prohibits use of lead, mercury, hexavalent chromium, polybrominated biphenyls or polybrominated diphenyl ethers in concentrations exceeding - ViewSonic VG2756a-2K | User Guide English - Page 63
Copyright Information Copyright© ViewSonic® Corporation, 2023. All rights reserved. Macintosh and Power Macintosh are registered trademarks of Apple Inc. Microsoft, Windows, and the Windows logo are registered trademarks of Microsoft Corporation in the United States and other countries. ViewSonic®, - ViewSonic VG2756a-2K | User Guide English - Page 64
Customer Service For technical support or product service, see the table below or contact your reseller. NOTE: You will need the product's serial number. Country/ Region Website Country/ Region Website Asia Pacific & Africa - ViewSonic VG2756a-2K | User Guide English - Page 65
resulting from: ͫ Accident, misuse, neglect, fire, water, lightning, or other acts of nature, unauthorized product modification, or failure to follow instructions supplied with the product. ͫ Repair or attempted repair by anyone not authorized by ViewSonic®. ͫ Damage to or loss of any programs, data - ViewSonic VG2756a-2K | User Guide English - Page 66
in the product User Guide. • Removal, installation, and set-up service charges, including wall-mounting of the product. How to get service: • For information about receiving service under warranty, contact ViewSonic® Customer Support (Please refer to the "Customer Service" page). You will need - ViewSonic VG2756a-2K | User Guide English - Page 67
not apply to you. Sales outside the U.S.A. and Canada: For warranty information and service on ViewSonic® products sold outside of the U.S.A. and Canada, contact ViewSonic® or at: http://www.viewsonic.com/eu/ under "Support/Warranty Information". Display Warranty Term Template In UG VSC_TEMP_2007 67 - ViewSonic VG2756a-2K | User Guide English - Page 68
other acts of nature, unauthorized product modification, unauthorized attempted repair, or failure to follow instructions supplied with the product. ͫ Causes external to the product, such as electrical power extended period of time. • Removal, installation, insurance, and set-up service charges. 68 - ViewSonic VG2756a-2K | User Guide English - Page 69
service: For information about receiving service under warranty, contact ViewSonic® Customer Support (Please refer to the attached "Customer Service warranty service, you will be required to provide (a) the original dated sales slip, (b) your name, (c) your address, (d) a description of the problem, - ViewSonic VG2756a-2K | User Guide English - Page 70
39300 Acapulco, Guerrero Tel: 744-48-32627 Monterrey: Global Product Services Mar Caribe # 1987, Esquina con Golfo Pérsico Fracc. Bernardo Av Ferrocarril Sonora #3780 L-C Col 20 de Noviembr Tijuana, Mexico FOR USA SUPPORT: ViewSonic® Corporation 381 Brea Canyon Road, Walnut, CA. 91789 USA Tel: - ViewSonic VG2756a-2K | User Guide English - Page 71
-
 1
1 -
 2
2 -
 3
3 -
 4
4 -
 5
5 -
 6
6 -
 7
7 -
8
-
9
-
10
-
11
-
12
-
13
-
14
-
15
-
16
-
17
-
18
-
19
-
20
-
21
-
22
-
23
-
24
-
25
-
26
-
27
-
28
-
29
-
30
-
31
-
32
-
33
-
34
-
35
-
36
-
37
-
38
-
39
-
40
-
41
-
42
-
43
-
44
-
45
-
46
-
47
-
48
-
49
-
50
-
51
-
52
-
53
-
54
-
55
-
56
-
57
-
58
-
59
-
60
-
61
-
62
-
63
-
64
-
65
-
66
-
67
-
68
-
69
-
70
-
71
 |
 |

IMPORTANT:
Please read this User Guide to obtain important information on installing and using your product in
a safe manner, as well as registering your product for future service. Warranty information contained in this User
Guide will describe your limited coverage from ViewSonic® Corporation, which is also found on our web site at
http://www.viewsonic.com in English, or in specific languages using the Regional selection box of our website.
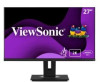
VG2756a-2K
Display
User Guide
Model No. VS18302
P/N: VG2756a-2K