ViewSonic VOT125 VOT125 User Guide (English)
ViewSonic VOT125 Manual
 |
View all ViewSonic VOT125 manuals
Add to My Manuals
Save this manual to your list of manuals |
ViewSonic VOT125 manual content summary:
- ViewSonic VOT125 | VOT125 User Guide (English) - Page 1
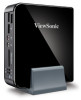
ViewSonic® VOT125 PC Mini - User Guide - Guide de l'utilisateur - Guía del usuario Model No. : VS13172 - ViewSonic VOT125 | VOT125 User Guide (English) - Page 2
not installed and used in accordance with the instructions, may cause harmful interference to radio communications. However compliance could void your authority to operate the equipment. For Canada This Class B digital apparatus complies with Canadian ICES-003. operation. ViewSonic VOT125 i - ViewSonic VOT125 | VOT125 User Guide (English) - Page 3
Industry Canada Notice This wireless module device complies with Canadian RSS-210.To prevent radio interference to the licensed service, this device is intended to be operated indoors and away from windows to click any button on the keyboard to wake the computer from Sleep mode. ViewSonic VOT125 ii - ViewSonic VOT125 | VOT125 User Guide (English) - Page 4
openings. Install the equipment in accordance with the manufacturer's instructions. 7. Do not install near any heat sources such unused for long periods of time. 13. Refer all servicing to qualified service personnel. Service is required when the unit has been damaged in any way ViewSonic VOT125 iii - ViewSonic VOT125 | VOT125 User Guide (English) - Page 5
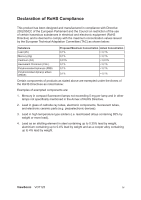
diphenyl ethers (PBDE) Proposed Maximum Concentration Actual Concentration 0,1% < 0,1% 0,1% < 0,1% 0,01% < 0,01% 0,1% < 0,1% 0,1% < 0,1% 0,1% < 0,1% Certain components of products as stated lead by weight and as a cooper alloy containing up to 4% lead by weight. ViewSonic VOT125 iv - ViewSonic VOT125 | VOT125 User Guide (English) - Page 6
. Thank you for being part of Smarter, Greener Computing. Please visit ViewSonic website to learn more. USA: http://www.viewsonic.com/company/green/ Europe: http://www.viewsoniceurope.com/uk/support/recycling-information/ Taiwan: http://recycle.epa.gov.tw/recycle/index2.aspx ViewSonic VOT125 v - ViewSonic VOT125 | VOT125 User Guide (English) - Page 7
Started 7 Setting up your PC 7 Mounting your PC to a monitor 10 Anti-theft protection with a Kensington Lock 11 Computer Stand 12 AMI BIOS Setup 13 Overview 13 Main Menu Running Recovery Manager 23 FAQ & Troubleshooting 26 Frequently asked questions 26 Troubleshooting 27 ViewSonic VOT125 - ViewSonic VOT125 | VOT125 User Guide (English) - Page 8
a Kensington lock 11 Figure 11 Computer Stand 12 Figure 12 Stand Dimension 12 Table 1 VOT125 product specifications 2 Table 2 BIOS Main Menu 14 Table 3 IDE Device Setting Menu 14 Table 4 System Information 15 Table Menu 20 Table 12 Security Menu 21 Table 13 Exit Menu 21 ViewSonic VOT125 - ViewSonic VOT125 | VOT125 User Guide (English) - Page 9
Cache, 1.20 GHz, 800 MHz FSB) (Optional : 743, SU4100, SU7300) „ Intel® GS40 + ICH9M (Intel GS45 for SU7300) „ Support DDR2 667/800 SODIMM up to 2GB „ 1x DVI-I, 1x HDMI, 1x GbE and HD Audio „ 6.35cm (2.5") SATA HDD, 3-in-1 card reader and 4x USB „ 802.11 b/g/n Wireless Ethernet ViewSonic VOT125 1 - ViewSonic VOT125 | VOT125 User Guide (English) - Page 10
Intel® Celeron Processor SU2300 743, SU4100, SU7300) GS40 / ICH9M (GS45 for SU7300) , Wireless 1x WLAN mini PCIe card Power Supply Input: 100-240 VAC, 50-60 Hz g/1.4 lbs Desktop, VESA-mount Kensington Lock support Table 1 VOT125 product specifications ViewSonic VOT125 2 - ViewSonic VOT125 | VOT125 User Guide (English) - Page 11
-in sites or hubs. MIC-IN The microphone jack is designed to connect the microphone used for video conferencing, voice narrations, or simple audio recordings. ViewSonic VOT125 3 - ViewSonic VOT125 | VOT125 User Guide (English) - Page 12
amplified speakers or headphones. Memory Card Reader The built-in memory card reader supports MMC/MS/SD cards used in devices such as digital cameras, MP3 phones, and PDAs. Power LED The power LED will light when the PC is powered-on. HDD LED The hard disk LED blinks when data ViewSonic VOT125 4 - ViewSonic VOT125 | VOT125 User Guide (English) - Page 13
CMOS, use the tip of a pen to press the Reset button briefly (for less than three seconds). DVI Port The Digital Visual Interface (DVI-I) port supports a high quality VGA-compatible device such as a monitor or LCD TV to allow viewing on a larger external display. ViewSonic VOT125 5 - ViewSonic VOT125 | VOT125 User Guide (English) - Page 14
port supports a standard PC. To prevent damage to the PC, always use the supplied power adapter. Kensington Lock Slot The slot is used for attaching a lock-and-cable apparatus. Locks are generally secured in place with a key or combination lock attached to a rubberized metal cable. ViewSonic VOT125 - ViewSonic VOT125 | VOT125 User Guide (English) - Page 15
Chapter 2 Getting Started „ Setting up your PC „ Connecting the monitor Connect the HDMI cable from your display to the HDMI port. Figure 3 Connect the HDMI cable ViewSonic VOT125 7 - ViewSonic VOT125 | VOT125 User Guide (English) - Page 16
VGA display, you need the DVI to VGA adapter to connect a display with a VGA connector. „ Connecting USB mouse & keyboard Your VOT125 does not come with a keyboard and mouse, but you can use any USB keyboard or mouse with your computer. Figure 5 Connecting USB mouse & keyboard ViewSonic VOT125 8 - ViewSonic VOT125 | VOT125 User Guide (English) - Page 17
on the system 1. Connect the power adapter cable to the DC jack (DC IN) of the VOT125 2. Connect the power cable to the power adapter 3. Connect the power cable to a power outlet 4. Press the power switch on the front panel to turn on the system Figure 7 Turning on the system ViewSonic VOT125 9 - ViewSonic VOT125 | VOT125 User Guide (English) - Page 18
monitor must have VESA75 or VESA100 standard holes. The VESA mounting kit is optional.. 2. Place the VOT125 on the VESA mounting bracket. 3. Make sure the air vents are hooked by the VESA mounting bracket and VOT125 is solidly secured to the display. Figure 9 VESA mounting (2) ViewSonic VOT125 10 - ViewSonic VOT125 | VOT125 User Guide (English) - Page 19
Lock The VOT125 has a Kensington lock slot for use with the the Kensington MicroSaver anti-theft device. With the MicroSaver, which has a sturdy steel cable, you can attach your VOT125 to a stationary object and protect your PC from theft. Figure 10 Using a Kensington lock ViewSonic VOT125 11 - ViewSonic VOT125 | VOT125 User Guide (English) - Page 20
and be sure to leave sufficient space around the unit for ventilation. Figure 11 Computer Stand Computer Stand Dimension (Unit: mm) Figure 12 Stand Dimension ViewSonic VOT125 12 - ViewSonic VOT125 | VOT125 User Guide (English) - Page 21
your product may vary from those in this chapter. For the BIOS manual specific to your product, please contact ViewSonic AMI's ROM BIOS provides a built-in Setup program, which allows the user to the CMOS only. If this happens you will need to reconfigure your BIOS settings. ViewSonic VOT125 13 - ViewSonic VOT125 | VOT125 User Guide (English) - Page 22
test begins and before the operating system boot begins. Once you enter the BIOS Setup Utility, the Main Menu will appear on the screen. The Main if the device supports this mode, and if the device was not previously formatted with LBA mode disabled. Options: Disabled, Auto ViewSonic VOT125 14 - ViewSonic VOT125 | VOT125 User Guide (English) - Page 23
system information over a network. Options: Auto, Disabled, Enabled Table 4 System Information BIOS SETUP UTILITY Main Advanced Boot Chipset Power Security Exit AMIBIOS Version : 0.07 Build Date Inc. Press to select a sub-menu for detailed options. Exit ViewSonic VOT125 15 - ViewSonic VOT125 | VOT125 User Guide (English) - Page 24
OnBoard Peripherals Configuration Settings BIOS SETUP UTILITY Main Support [Enabled] Onboard LAN Controller [Enabled] Onboard LAN OPTROM [Disabled] Onboard Mini Support [Enabled] Options: Enabled, Disabled, Auto Onboard LAN Controller [Enabled] Options: Enabled, Disabled ViewSonic VOT125 - ViewSonic VOT125 | VOT125 User Guide (English) - Page 25
Disabled] Options: Enabled, Disabled Onboard Mini PCIE Controller [Enabled] Options: Table 8 Hardware Health Configuration Advanced BIOS SETUP UTILITY Boot Chipset Power ] Options: Smart Fan Mode, Manual Mode If the value is [Manual Mode] FAN1 PWM Value: Min 0, Max: 255 ViewSonic VOT125 17 - ViewSonic VOT125 | VOT125 User Guide (English) - Page 26
allow you to specify the Boot Device Priority sequence. Quick Boot [Enabled] Enabling this item allows BIOS to skip some Power On Self Tests (POST) while booting to decrease the time needed to boot message 'Press DEL to run Setup' during POST. Options: Disabled, Enabled ViewSonic VOT125 18 - ViewSonic VOT125 | VOT125 User Guide (English) - Page 27
„ Chipset Menu Table 10 Chipset Menu BIOS SETUP UTILITY Main Advanced Boot Chipset Power Security Exit Chipset Settings Internal Graphics Mode Select [Enabled, , Enabled 128MB DVMT Mode Select [DVMT Mode] DVMT/FIXED Memory [256MB] Options: 128MB, 256MB, Maximum DVMT ViewSonic VOT125 19 - ViewSonic VOT125 | VOT125 User Guide (English) - Page 28
: If OS supports ACPI, DISABLE: IF OS Does not support ACPI. Suspend mode [S3 (STR)] Options: S1 (POS), S3 (STR) Repost Video on S3 Resume [No] Determines whether to invoke VGA BIOS post on S3 : Disabled, Enabled Resume On RTC Alarm [Disabled] Options: Disabled, Enabled ViewSonic VOT125 20 - ViewSonic VOT125 | VOT125 User Guide (English) - Page 29
Exit Setting Save Changes and Exit Discard Changes and Exit Discard Changes Table 13 Exit Menu BIOS SETUP UTILITY Boot Chipset Power Security Exit Exit System Setup after saving the changes. F10 key Exit ESC Exit V02.61 (C)Copyright 1985-2006, American Megatrends, Inc. ViewSonic VOT125 21 - ViewSonic VOT125 | VOT125 User Guide (English) - Page 30
sustained by an onboard backup battery and stays on even when the PC is turned off. When you select this option, a confirmation window fields other than system date, system time, and password, the BIOS asks for a confirmation before exiting. Discard Changes Discards changes done ViewSonic VOT125 22 - ViewSonic VOT125 | VOT125 User Guide (English) - Page 31
the steps below: 1. Turn on the PC Mini. The system boots up and the ViewSonic® logo appears. 2. Recovery source 2.1 Recovery from DVD Press F9 to select boot device and select the optical drive with the recovery DVD and press enter Press any key to start booting from DVD ViewSonic VOT125 23 - ViewSonic VOT125 | VOT125 User Guide (English) - Page 32
operating system starts up before you press F3 and you still wish to run System Recovery, restart the PC Mini then follow the same procedures above. 3. Another confirmation message appears as below. Click OK. 4. System recovery is initiated and the following screen appears. ViewSonic VOT125 24 - ViewSonic VOT125 | VOT125 User Guide (English) - Page 33
restart. NOTE Restarting may take several seconds to finish. 6. After restarting, Windows Setup Wizard appears to help you configure basic settings. Follow the on screen instructions to complete setup and start using your PC Mini. ViewSonic VOT125 25 - ViewSonic VOT125 | VOT125 User Guide (English) - Page 34
extra power input for the HDD. Q3: How to set the WOL (Wake on LAN) function? A3: The WOL function is the default support for the VOT125 so you do not have to do any modification setting in VOT125 BIOS. Q4: How much current is provided from the VOT125 USB ports? A4: 500mA ViewSonic VOT125 26 - ViewSonic VOT125 | VOT125 User Guide (English) - Page 35
Troubleshooting Check that you have connected the VOT125 to the display with the correct connector 2.3. Check that the connection between the VOT125 and the display is connected happens and there is no beep, please call ViewSonic® for technical support. 4. No sound from headphones. „ Check the - ViewSonic VOT125 | VOT125 User Guide (English) - Page 36
@ap.viewsonic.com United Kingdom United States www.viewsoniceurope.com/uk/ www.viewsoniceurope.com/uk/ support/call-desk/ T (Toll-Free)= 1-800-688-6688 www.viewsonic.com T (Toll)= 1-424-233-2530 F= 1-909-468-3757 [email protected] [email protected] ViewSonic VOT125 28 - ViewSonic VOT125 | VOT125 User Guide (English) - Page 37
freight prepaid in the original container to an authorized ViewSonic service center or ViewSonic. 4. For additional information or the name of the nearest ViewSonic service center, contact ViewSonic. 4.3: ViewSonic PC Mini Warranty Page 1 of 2 PC Mini_LW01 Rev. 1a 07-02-09 ViewSonic VOT125 29 - ViewSonic VOT125 | VOT125 User Guide (English) - Page 38
and Canada: For warranty information and service on ViewSonic products sold outside of the U.S.A. and Canada, contact ViewSonic or your local ViewSonic dealer. .com under Support/Warranty Information. 4.3: ViewSonic PC Mini Warranty ViewSonic VOT125 Page 2 of 2 PC Mini_LW01 Rev. 1a 07-02-09 30 - ViewSonic VOT125 | VOT125 User Guide (English) - Page 39
-
 1
1 -
 2
2 -
 3
3 -
 4
4 -
 5
5 -
 6
6 -
 7
7 -
8
-
9
-
10
-
11
-
12
-
13
-
14
-
15
-
16
-
17
-
18
-
19
-
20
-
21
-
22
-
23
-
24
-
25
-
26
-
27
-
28
-
29
-
30
-
31
-
32
-
33
-
34
-
35
-
36
-
37
-
38
-
39
 |
 |

- User Guide
- Guide de l’utilisateur
- Guía del usuario
VOT125
PC Mini
ViewSonic
®
Model No. : VS13172