Viper 3303 Owner Manual
Viper 3303 Manual
 |
View all Viper 3303 manuals
Add to My Manuals
Save this manual to your list of manuals |
Viper 3303 manual content summary:
- Viper 3303 | Owner Manual - Page 1
Vista, CA 92081 www.viper.com The company behind Viper® Auto Security Systems is Directed Electronics. Since its inception, Directed Electronics has had one purpose, to provide consumers with the finest vehicle security and car stereo products and accessories available. The recipient of nearly 100 - Viper 3303 | Owner Manual - Page 2
website: http://www.viper.com - For general and additional guide information. For any additional questions please contact your authorized Directed dealer or contact Directed at 1-800-753-0600. What you get Welcome to the best generation of vehicle security. Your system contains everything you need - Viper 3303 | Owner Manual - Page 3
your system's many features. Replacement Remote Controls If additional remote controls are desired, please see your authorized dealer or visit us at www.directedstore.com to order. Part numbers are: 7351V for Responder LC 2-way remote control and 7153V for the 1-way companion remote control - Viper 3303 | Owner Manual - Page 4
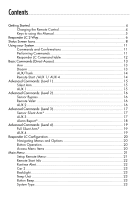
Control 4 Keys to using this Manual 5 Responder LC 2-Way 6 Status Screen Icons 8 Using your System 11 Commands and Confirmations 11 Performing Commands 11 Responder LC Command table 12 Basic Commands (Direct Access 13 Arm 13 Disarm 13 AUX/Trunk 14 Remote Start /AUX 1/ AUX 4 14 Advanced - Viper 3303 | Owner Manual - Page 5
Clock Set 24 Review 24 Exit 24 Sensor Adjust 24 Pair a Responder LC remote control 24 Demo Mode 25 Power Off 26 Exit 26 Alarm Features 27 Normal Arm Protection 27 Sensor Silent Arm Protection 27 Full Silent Arm Protection 28 Sensor Warn-away Messages 28 Full Trigger Messages 28 - Viper 3303 | Owner Manual - Page 6
Glossary of Terms 44 Government Regulations 46 Additional information 47 Interference 47 Upgrades and Batteries 47 Water/Heat Resistance 47 Limited lifetime consumer warranty 48 - Viper 3303 | Owner Manual - Page 7
mini-USB port located on the side of the remote control (see diagram under Responder LC 2-way). The text field will display CHARGE to indicate the remote control is charging (The remote remains operational while charging and can command the system). 2. Once fully charged the text field will display - Viper 3303 | Owner Manual - Page 8
Keys to using this Manual Specific actions (in bold type) and style conventions are used consistently throughout this manual, they are as follows: s - Viper 3303 | Owner Manual - Page 9
Responder LC 2-Way Internal Antenna Display Command Buttons Function Button Mini-USB Port Feature Internal Antenna Display Description Used for transmitting and receiving information Status screen - the upper portion of the display contains status icons for the system, siren, alarm zones, and - Viper 3303 | Owner Manual - Page 10
Control Center Control Center Button Control Center LED The control center, typically located on the upper part of the front windshield sends and receives commands or messages to and from your system. It consists of: s - Viper 3303 | Owner Manual - Page 11
, the alarm is enabled System Status Locked: The system is locked in valet, the alarm is disabled Disarmed: The system is disarmed, the alarm is disabled Unlocked: The system is unlocked in valet, the alarm is disabled Siren Status + ALL Siren is disabled for sensor triggers; remote is paged - Viper 3303 | Owner Manual - Page 12
zone full trigger output On during fault report to indicate the hood is open and bypassed when arming On when remote is set to command the system programmed as car 1* On when remote is set to command the system programmed as car 2* Bars indicate battery level is full, ¾,½,¼ or empty On while the - Viper 3303 | Owner Manual - Page 13
, the engine is running (with optional remote start module only) * This icon not present until the car 2 is turned on in the Setup Remote configuration menu. ** This icon not present until the remote is paired with an optional garage door opener. 10 © 2009 Directed Electronics. All rights reserved. - Viper 3303 | Owner Manual - Page 14
system features and are performed by pressing one of the command buttons. Basic commands control the most often used security arm command. 3. The Responder LC remote will display SILENT ARMED in the text field and update the status screen icons. © 2009 Directed Electronics. All rights reserved. - Viper 3303 | Owner Manual - Page 15
Responder LC Command table Level Button Direct Access Arm/Lock (Panic) x 1 LEVEL 1 Silent Arm x 2 LEVEL 2 Sensor Bypass x 3 x 4 LEVEL 3 LEVEL 4 Sensor Silent Full Silent Arm Arm Disarm/Unlock Silent Disarm Remote Valet Car Finder Remote Start*/ Aux 1/4** A U X Aux/Trunk AUX 1 AUX - Viper 3303 | Owner Manual - Page 16
to confirm and the system status icons update. If valet mode* is on, the doors unlock and the VALET text and tone play. More than 2 siren chirps and remote beeps indicate a trigger has occurred. The DISARM text is replaced by the alarm report.** © 2009 Directed Electronics. All rights reserved. 13 - Viper 3303 | Owner Manual - Page 17
confirm, (See System Expansion Options). * See Remote and System Operations for details. ** See Alarm Features for details. *** Available only with optional Remote Start module installation. **** This feature must be turned on by an authorized Directed dealer. 14 © 2009 Directed Electronics. All - Viper 3303 | Owner Manual - Page 18
. Valet mode* or trigger zone fault report** messages may be received. Silent Disarm Press and release The alarm disarms, doors unlock (if connected), and the parking lights flash twice. The SILENT DISARM text plays to confirm and the system status icons update. The alarm report** may replace the - Viper 3303 | Owner Manual - Page 19
Advanced Commands: (Level 2) Press and release the button 2 times. Sensor Bypass Press and release level 2 Performing the sensor bypass command will incrementally bypass sensor operations and be confirmed as follows: s - Viper 3303 | Owner Manual - Page 20
Press and release the button 3 times. Sensor Silent Arm* Press and release level 3 The alarm arms, doors lock, the siren chirps and parking lights flash 3 times. The SENSOR SILENT ARM text and beeps play to confirm and the system and siren status icons update. Car finder Press and release The siren - Viper 3303 | Owner Manual - Page 21
Alarm Report* Press and hold the button Requests a report of the most recent triggers and temporarily displays it in the text field. The report clears when the ignition is turned on. * See Alarm Features for more details. 18 © 2009 Directed Electronics. All rights reserved. - Viper 3303 | Owner Manual - Page 22
firm and the system and siren icons update. AUX 4 Press and release AUX Activates (or if on, deactivates) the aux 4 output. The programmed text and on tones or off tones play to confirm (See System Expansion Options). * See Alarm Features for more details. © 2009 Directed Electronics. All rights - Viper 3303 | Owner Manual - Page 23
guration Operations of the Responder LC and how it communicates messages are set in the configuration main menu. Navigating Menus and Options Navigating menus and features, changing options, and exiting are performed using the remote control buttons. The following instructions discuss how to access - Viper 3303 | Owner Manual - Page 24
pressed when locked a fault tone plays as an alert followed by unlock instructions in the text field. To unlock the buttons, press the button an authorized Directed dealer. Page Mode Options: POWER SAVE , OFF , ON Paging is how the Responder LC remote control monitors your system's messages. POWER - Viper 3303 | Owner Manual - Page 25
and the Responder LC will silently alert you with a gentle vibration, or select SCREEN ONLY when you don't want to be interrupted. Remote Start Info Options: RUNTIME , TEMP , CLOCK These options are only available when paired to a Directed Electronics remote start or remote start and security system - Viper 3303 | Owner Manual - Page 26
operations. Temp Unit Options: F , C These options are only available when paired to a Directed Electronics remote start or remote start and security system. Button Beep Options: ON , OFF When set to ON , the remote will emit a beep as confirmation of a button press. When set to OFF , beeps are - Viper 3303 | Owner Manual - Page 27
highly recommended that you contact your authorized Directed dealer/professional and have the sensor adjusted for optimized security detection performance. Pair a Responder LC remote control: Pairing is a process where the Responder LC and the system in the vehicle learn each others encrypted identi - Viper 3303 | Owner Manual - Page 28
system will exit (indicated by a long siren chirp) and will need to be prepared again. Prepare the remote control Select the desired Car 1 (Default) or Car displayed, make sure the system is still pre- pared and repeat step 5 until successful. © 2009 Directed Electronics. All rights reserved. 25 - Viper 3303 | Owner Manual - Page 29
Demo Mode: Demo mode plays a pre-selected group of animations as a demonstration tool to show friends or family. Running demo mode shortens the battery life over time if used excessively s - Viper 3303 | Owner Manual - Page 30
Alarm Features Normal Arm Protection Control center LED: The control center LED flashes as a visual indicator that your vehicle's security system is active. Starter Kill: The failsafe starter kill relay prevents the engine from starting Note May require additional parts and installation Sensor - Viper 3303 | Owner Manual - Page 31
default is 1 press). 3. After a few seconds the siren output ceases and the system is disarmed. Note As a precaution, if programmed for passive arming or auto re-arming the system should be placed into valet mode until a remote is available . 28 © 2009 Directed Electronics. All rights reserved. - Viper 3303 | Owner Manual - Page 32
remote command the system runs a status check of the alarm trigger zones. Faulty zones (usually caused by dome light delay or open trunk) are bypassed and reported via the control center LED and remote Table of Zones). The DISARM text is replaced by ALARM REPORT and text identifying the triggers. The - Viper 3303 | Owner Manual - Page 33
Zone # (led flashes) 1 2 3 4 5 6 7 Table of Zones Zone Name Trunk Shock Sensor Door Sensor 2 Ignition Hood Sensor 3 Alarm Report when Requested The alarm report displays the two most recent alarm triggers depending on the system state when requested. When disarmed, the report will display text to - Viper 3303 | Owner Manual - Page 34
, if a door is not opened within 30 seconds the system re-arms itself and locks the doors. Auto Re-arming* Auto re-arm ensures the vehicle stays protected if it is not entered after disarming by remote control. After disarming by remote, the alarm automatically re-arms itself (and locks the doors if - Viper 3303 | Owner Manual - Page 35
Valet Mode Valet mode can be entered and exited by performing the remote valet command or manually using the vehicle key and the control center button. When entered, the alarm functions are defeated while the convenience features still operate normally. Arm and disarm commands lock and unlock the - Viper 3303 | Owner Manual - Page 36
). These are temporary normal functions of the system and remote, perform the command again within 10 seconds to return to normal operation. Car Select Car 2 must first be turned on (See Responder LC Configuration and Main Menu sections to turn on). Two Way Remote 1. Press and hold the button for - Viper 3303 | Owner Manual - Page 37
The ARMED text and beeps play, and the system status icons update to confirm arming. If valet mode is on, the NOT AVAILABLE text and tone plays, exit valet mode before arming VRS. Once armed, VRS triggers if procedure must be used to disarm VRS. 34 © 2009 Directed Electronics. All rights reserved. - Viper 3303 | Owner Manual - Page 38
Disarm Remote Valet Car Finder AUX 1 AUX 2 AUX 3 AUX 4 Not Used Used to access function levels for advanced commands ( with multiplier in top row implies button presses) * Available only with optional remote start module installation ** This feature must be turned on by an authorized Directed - Viper 3303 | Owner Manual - Page 39
way Companion remote The 1-way companion remote commands the system features as shown in the previous table, but only transmits and does not provide feedback as with the 2-way remote Similar to the Responder LC remote, basic commands are performed when a command button is pressed directly. To perform - Viper 3303 | Owner Manual - Page 40
. The transmit LED turns off when programming is exited. Sensor Adjust The button is used for sensor adjustment, to avoid unintended alarm triggers, it is recommended that an authorized Directed dealer perform all sensor adjustments. Remote Features Menu Press and release the button, 2 transmit LED - Viper 3303 | Owner Manual - Page 41
Battery Alerts When disarming the system using a remote with a low battery the siren will emit one additional chirp as an alert. If confirmation chirps are programmed off, the system will still emit one chirp as an alert when disarming. Battery Replacement 1. Using a small flathead screwdriver, insert - Viper 3303 | Owner Manual - Page 42
the siren sounds can be adjusted from 1 to 180 seconds at the time of installation. Arming and Warn-away Chirp Control The system arm, disarm and sensor warn-away chirps can be configured for those that prefer a custom silent alarm operation. © 2009 Directed Electronics. All rights reserved. 39 - Viper 3303 | Owner Manual - Page 43
can activate many of the convenience features found in today's vehicles. Once a command is performed to activate a convenience feature the Responder LC displays text that matches the feature. The system installer can clarify if any of the below listed features are compatible with your vehicle. s - Viper 3303 | Owner Manual - Page 44
rechargeable battery that can be serviced only through an authorized Directed Electronics dealer. The information and precautions in this section can help maximize your battery's life and usage in providing your Responder LC remote control with many years of trouble free operation. The battery - Viper 3303 | Owner Manual - Page 45
To preserve power at critically low battery levels the Responder LC turns the pager off and stops receiving messages from the system. It will continue to command the system until the battery can be charged. Battery Life The Responder LC remote control has many features that make it one of - Viper 3303 | Owner Manual - Page 46
Battery Disposal Directed Electronics cares about the environment. If you need to dispose of the battery, please do so in accordance with your municipal requirements for battery disposal. © 2009 Directed Electronics. All rights reserved. 43 - Viper 3303 | Owner Manual - Page 47
status of your system. It is located on your system's control center. Control Center Button A small push button located on your system's control center. It is used to override (disarm) the alarm when a remote is not available or to enter or exit valet mode. 44 © 2009 Directed Electronics. All - Viper 3303 | Owner Manual - Page 48
© 2009 Directed Electronics. All rights reserved. 45 - Viper 3303 | Owner Manual - Page 49
to provide reasonable protection against harmful interference in a residential installation. This equipment generates and can radiate radio frequency energy and, if not installed and used in accordance with the instruction manual, may cause harmful interference to radio communications. However - Viper 3303 | Owner Manual - Page 50
could affect proper performance. Upgrades and Batteries Any upgrades to this product and/or installation of batteries must be performed by an authorized dealer. Do not attempt to perform any Any damage from water or heat will void the warranty. © 2009 Directed Electronics. All rights reserved. 47 - Viper 3303 | Owner Manual - Page 51
") promises to the original purchaser to repair or replace (at Directed's election) with a comparable reconditioned model any Directed unit (hereafter the "unit"), excluding without limitation the siren, the remote transmitters, the associated sensors and accessories, which proves to be defective in - Viper 3303 | Owner Manual - Page 52
ANY CLAIM AGAINST DIRECTED SHALL BE STRICTLY LIMITED TO THE AUTHORIZED DIRECTED DEALER'S PURCHASE PRICE OF THE UNIT. DIRECTED SHALL NOT BE Guaranteed Protection Plan ("GPP"). See your authorized Directed dealer for details of the plan or call Directed Customer Service at 1-800-876-0800. Make sure - Viper 3303 | Owner Manual - Page 53
The company behind this system is Directed Electronics Since its inception, Directed Electronics has had one purpose, to provide consumers with the finest vehicle security and car stereo products and accessories available. The recipient of nearly 100 patents and Innovations Awards in the field of
-
 1
1 -
 2
2 -
 3
3 -
 4
4 -
 5
5 -
 6
6 -
 7
7 -
8
-
9
-
10
-
11
-
12
-
13
-
14
-
15
-
16
-
17
-
18
-
19
-
20
-
21
-
22
-
23
-
24
-
25
-
26
-
27
-
28
-
29
-
30
-
31
-
32
-
33
-
34
-
35
-
36
-
37
-
38
-
39
-
40
-
41
-
42
-
43
-
44
-
45
-
46
-
47
-
48
-
49
-
50
-
51
-
52
-
53
 |
 |

O W N E R’ S G U I D E
M
O
D
E
L
3303
©
2009 Directed Electronics,
All rights reserved.
G3303V 2009 11
The company behind Viper
®
Auto Security Systems
is Directed Electronics.
Since its inception, Directed Electronics has had one
purpose, to provide consumers with the finest vehicle
security and car stereo products and accessories
available. The recipient of nearly 100 patents
and
Innovations Awards in the field of advanced electronic
technology, Directed Electronics is ISO 9001 registered.
Quality Directed Electronics products are sold and serviced
throughout North America and around the world.
Call
(800) 876-0800
for more information about our
products and services.
Vista, CA 92081
www.viper.com
Directed Electronics is an
ISO 9001 registered company.
Directed Electronics is committed to delivering
world class quality products and services that
excite and delight our customers.
NO ONE DARES COME CLOSE