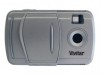
Vivitar 46 Camera Manual
Vivitar 46 Manual
 |
View all Vivitar 46 manuals
Add to My Manuals
Save this manual to your list of manuals |
Vivitar 46 manual content summary:
- Vivitar 46 | Camera Manual - Page 1
ViviCam 46 Digital Camera User Manual © 2009-2012 Sakar International, Inc. All rights reserved. Windows and the Windows logo are registered trademarks of Microsoft Corporation. All other trademarks are the property of their respective companies. - Vivitar 46 | Camera Manual - Page 2
the Software ...20 Connecting the Camera to the Computer 21 Getting Photos and Videos from your Camera to Your Computer 22 Get Started! ...23 Transferring Images from my Camera to my Computer Manually 23 Camera Maintenance ...25 Sakar Warranty Card...25 Technical Support...26 Troubleshooting...26 - Vivitar 46 | Camera Manual - Page 3
: Your camera needs an SD Memory card (up to 32GB) for normal use. SD Memory cards are not included and need to be purchased separately. What's Included 1. Digital Camera 2. USB cable 3. Vivitar Experience Image Manager Software Installation CD 4. Wrist Strap Note: SD Memory Card and batteries not - Vivitar 46 | Camera Manual - Page 4
Parts of the Camera 1. Power Button 2. Shutter Button 3. LCD Screen 4. LED 5. W / Zoom Out 6. T / Zoom In 7. MENU Button 8. Down / Playback Button 9. Up Button 10. SD Memory Card Slot 11. Wrist Strap Connector 12. USB Port 13. Tripod Socket 14. Digital Lens Note: The battery compartment is - Vivitar 46 | Camera Manual - Page 5
Initial Camera Setup Installing the Batteries Installing the Memory Card Slide off the front cover and insert 2 x AAA (1.5V) batteries. Alkaline batteries recommended (not included). Turning On the Camera SD Memory card (up to 32GB) needed for normal use. Using the Camera 4 - Vivitar 46 | Camera Manual - Page 6
Medium battery power Low battery power 2) SD Card Make sure an SD card has been properly inserted into your camera. (SD card not included.) To properly insert the SD Card: Push the SD card into the slot in the direction shown on the camera (see SD icon by the SD card slot). Push the SD card until - Vivitar 46 | Camera Manual - Page 7
on the display, please check if the card was inserted properly. Make sure the SD card is not locked (check the lock switch on the side of the SD card). If the SD card is locked this will prevent the camera from saving captured photos to the SD card. 3) Power On Press the POWER button to turn - Vivitar 46 | Camera Manual - Page 8
the LCD screen while record is in progress. To stop the record, press the Shutter button again. The video will be automatically saved to your camera's memory card. To access the various menus for the Video Capture Mode, press the MENU button. Playback Mode (Photos & Videos) Use this mode to view and - Vivitar 46 | Camera Manual - Page 9
ISO Scene Auto Power Off Self-Timer Interface System Requirements Battery Working Temperature CMOS 2304X1728(4 M) / 2048x1536(3M) / 1920x1080(2M-HD) / 640x480(VGA) 640x480 VGA, 320x240 QVGA JPEG (Photo) /AVI (Video) 1 Test Photo Use Only SD Card (up to 32GB) 1.5"TFT f=7.7 mm F3.0 4X Digital Zoom - Vivitar 46 | Camera Manual - Page 10
Requirements WINDOWS OS To be able to download photos and videos to your PC using the Vivitar Experience Image Manager Software, you will need the following minimum configuration: Microsoft® Windows XP with Service Pack 3, Windows Vista with Service Pack 1 or Windows 7 Pentium® 4 processor (or - Vivitar 46 | Camera Manual - Page 11
properly into your digital camera. If your camera comes with a rechargeable lithium battery, make sure it is fully charged before the first use. Make sure an SD card has been inserted into your camera. (SD card up to 32GB - SD Card not included) Please see Initial Camera Setup for more information - Vivitar 46 | Camera Manual - Page 12
Full! Insert a SD Memory Card to Transfer and Take More Photos!" If you attempt to take photos or videos when the camera's internal memory is full, the camera will beep continuously. Please download the test images to your computer using the Vivitar Experience Image Manager software as described - Vivitar 46 | Camera Manual - Page 13
again to confirm. An icon will appear on the top left corner of the LCD. 6) Press the Shutter button to begin taking the photo. Your camera will emit beeps and after a count-down of 10 seconds the photo will be taken. Change Image Resolution The Image Resolution menu allows you to - Vivitar 46 | Camera Manual - Page 14
photos will be of better picture quality and therefore will take up more camera memory capacity than lower resolution photos. In order to change the image resolution setting to take high resolution photos, an SD memory card needs to be inserted. Frequency Settings The options in the Frequency menu - Vivitar 46 | Camera Manual - Page 15
, Spanish, Portuguese, German Dutch, Italian, Russian, Turkish 5) Press the Shutter button to confirm. Default Setting Use this menu to reset your camera settings to the original Factory Default Settings. 1) Press the Menu button. 2) Press the Up/Down button and select DEFAULT. 3) Press the Shutter - Vivitar 46 | Camera Manual - Page 16
press the Shutter button without having inserting the SD memory card into your camera. To capture your videos, insert the SD memory card into your camera. Change Image Resolution 1) Select the Video (AVI) Mode option (see steps above for instructions). 2) Press the Menu button. 3) Press the Up/Down - Vivitar 46 | Camera Manual - Page 17
. Note: Different image resolutions will affect the video quality. High resolution videos will be of better picture quality and therefore will take up more camera memory capacity than lower resolution videos. In order to change the image resolution setting to take high resolution photos, an - Vivitar 46 | Camera Manual - Page 18
allows you to review and delete photos and videos that you've already taken with your camera. When you first turn on the camera, the camera will be in button to enter Playback Mode. 2) Select an AVI file in your SD memory card by pressing the Up/Down button. 3) Press the Menu button. 4) Press the - Vivitar 46 | Camera Manual - Page 19
Photos and/or Videos You may delete images directly from the memory card on your camera. The images can only be deleted while in the Playback mode. Delete All" to delete all the files (photos and videos) saved to your SD memory card. 1) Press the Shutter button. 2) Press the Up/Down button to select - Vivitar 46 | Camera Manual - Page 20
your camera's memory card. Keep in mind that formatting the memory card will permanently delete all of the content on your camera's memory card. Print your photos Your camera supports the PictBridge printing function that allows you to print photos any time directly from the camera's memory to a - Vivitar 46 | Camera Manual - Page 21
the internet and then click the "Install Vivitar Experience Image Manager" button to begin the installation. Note: If you do not have internet access, you can still download media from the camera. Click the "How to transfer photos and videos from my camera to my computer" button for instructions. 20 - Vivitar 46 | Camera Manual - Page 22
your camera model selection and to install the application. 8) Please wait while the application is being installed on your computer. 9) Please review the license " button when the installation is complete. Click the "Launch Vivitar Experience Image Manager" to open the application. 13) On Macintosh - Vivitar 46 | Camera Manual - Page 23
Getting Photos and Videos from your Camera to Your Computer An SD card needs to be inserted. Do not device" window opens. 3) You can select to download photos, videos or both. 4) Select your camera (removable disk) from the device window. If your camera is the only USB device connected then it will - Vivitar 46 | Camera Manual - Page 24
Maps For more details on how to use the Vivitar Experience Image Manager open the "Help" from the menu option or click the "Take a Tour" button on the application's Home screen. Transferring Images from my Camera to my Computer Manually Transferring Photos and Videos: WINDOWS 1) Use the USB cable - Vivitar 46 | Camera Manual - Page 25
item may be purchased separately. 2) Using an iPad SD Card Reader: Connect the SD Card Reader to your iPad, then insert your digital camera's SD Memory card into the slot to import photos and videos directly from your camera's SD card. NOTE: The iPad SD Card Reader is not included. This item may be - Vivitar 46 | Camera Manual - Page 26
Do not expose your camera to heat sources. Do not use you camera in wet or moist conditions. Sakar Warranty Card This warranty covers for the the problem. 3) Your return address and telephone number (Daytime). MAIL TO ADDRESS BELOW: Sakar US Sakar International Attention: Service Department 195 - Vivitar 46 | Camera Manual - Page 27
? This camera requires an SD card for normal use. If the camera's power is off, nothing will happen to the images stored on the SD memory card. We recommend always downloading your photos to your computer as soon as possible to prevent unintentional data loss. Q: I deleted images using the Vivitar
-
 1
1 -
 2
2 -
 3
3 -
 4
4 -
 5
5 -
 6
6 -
 7
7 -
8
-
9
-
10
-
11
-
12
-
13
-
14
-
15
-
16
-
17
-
18
-
19
-
20
-
21
-
22
-
23
-
24
-
25
-
26
-
27
 |
 |

ViviCam 46 Digital Camera
User Manual
© 2009-2012 Sakar International, Inc. All rights reserved.
Windows and the Windows logo are registered trademarks of Microsoft Corporation.
All other trademarks are the property of their respective companies.