Vivitar DVR 480 Camera Manual
Vivitar DVR 480 Manual
 |
View all Vivitar DVR 480 manuals
Add to My Manuals
Save this manual to your list of manuals |
Vivitar DVR 480 manual content summary:
- Vivitar DVR 480 | Camera Manual - Page 1
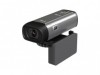
DVR 480 Digital Helmet Camcorder User Manual © 2009-2011 Sakar International, Inc. All rights reserved. Windows and the Windows logo are registered trademarks of Microsoft Corporation. All other trademarks are the property of their respective companies. - Vivitar DVR 480 | Camera Manual - Page 2
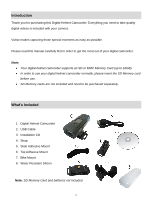
of the Camera ...3 Initial Camera Setup...4 Camcorder Mounts and Accessories 7 Main Camera Mode...10 Using your Helmet Camcorder ...11 Technical Specifications ...13 Computer System Requirements 14 Installing the Software ...15 Connecting the Camcorder to the Computer 16 Getting Videos from your - Vivitar DVR 480 | Camera Manual - Page 3
you need to take quality digital videos is included with your camera. Vivitar makes capturing those special moments as easy as possible. Please read this manual carefully first in order to get the most out of your digital camcorder. Note: Your digital helmet camcorder supports an SD or MMC Memory - Vivitar DVR 480 | Camera Manual - Page 4
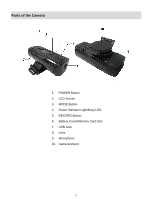
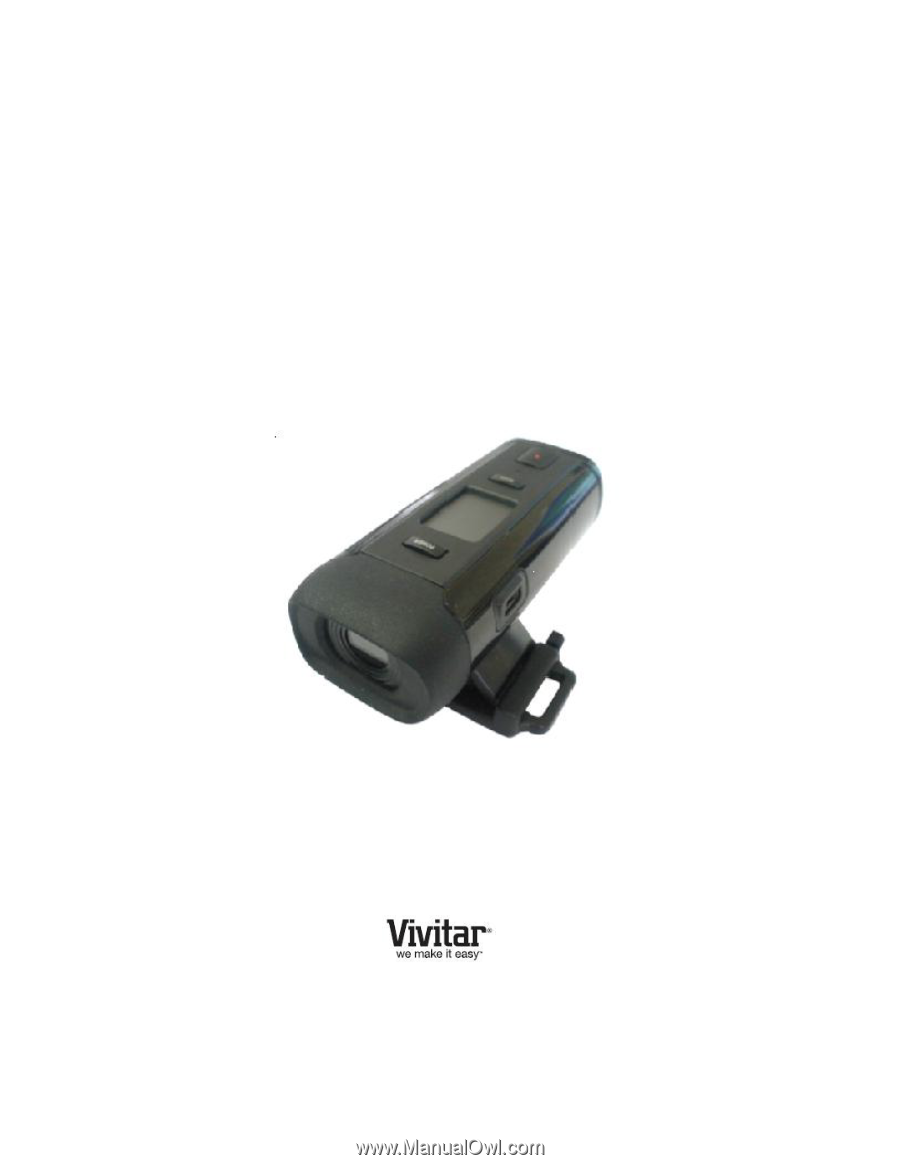
Parts of the Camera 1. POWER Button 2. LCD Screen 3. MODE Button 4. Power Indicator Light/Busy LED 5. RECORD Button 6. Battery Cover/Memory Card Slot 7. USB Jack 8. Lens 9. Microphone 10. Camera Mount 3 - Vivitar DVR 480 | Camera Manual - Page 5
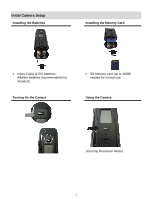
Initial Camera Setup Installing the Batteries Installing the Memory Card Insert 2 AAA (1.5V) batteries. Alkaline batteries recommended (not included). Turning On the Camera SD Memory card (up to 16GB) needed for normal use. Using the Camera Selecting Resolution Modes 4 - Vivitar DVR 480 | Camera Manual - Page 6
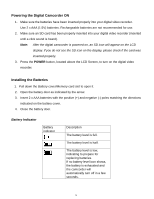
the digital camcorder is powered on, an SD icon will appear on the LCD display. If you do not see the SD icon on the display, please check if the card was inserted properly. 3. Press the POWER button, located above the LCD Screen, to turn on the digital video recorder. Installing the Batteries - Vivitar DVR 480 | Camera Manual - Page 7
. This is normal. Installing the Memory Card In order to use your camcorder, please insert an SD Card or MMC Card into the camcorder. 1. Turn off the camcorder. 2. Pull down the Battery cover/Memory card slot to open it. 3. Slide battery cover and insert the SD card with the front piece of the card - Vivitar DVR 480 | Camera Manual - Page 8
and Accessories Installing the Helmet Camcorder Mounts The digital camcorder comes with three different kinds of mounts. Insert the cylinder screw of the chosen mount into the tripod hole at the bottom of the camera, making sure that the nearby black knob is aligned with the parallel hole. Turn the - Vivitar DVR 480 | Camera Manual - Page 9
and attach it to the bike's handlebars by tightening the accompanying screw (2). Attaching the Camcorder to your Helmet Attach the helmet mount to the camera. Insert the strap into the two ends of the mount, adjusting length according to the helmet's size. Thread the strap through the holes of the - Vivitar DVR 480 | Camera Manual - Page 10
Using the Sticker Fix with your Helmet a) b) a) Attach the camera mount to the helmet. b) Stick double ended sticky pad to the mount and then to the helmet. See above for the 2 ways to mount your camcorder with the sticker fix. 9 - Vivitar DVR 480 | Camera Manual - Page 11
Main Camera Mode Video Capture Mode Use this mode to capture videos with your digital camcorder. To take a video, aim your camcorder as desired and press the "Record" (REC) button to start the recording. The LCD monitor displays the recorded time while the recording is in progress. - Vivitar DVR 480 | Camera Manual - Page 12
60 seconds after the last control accessed. Press the POWER button to turn on the camcorder. Display on the LCD screen When the Helmet camcorder is power on, the following icons display on the LCD screen: Recording Movie Clips 1. Turn the power on. 2. Start recording: Press the REC button to start - Vivitar DVR 480 | Camera Manual - Page 13
VGA: The video clip size is higher and the quality is better when the resolution is VGA than that is QVGA. QVGA: The length of recording is longer when the resolution is QVGA than when the resolution is VGA. 12 - Vivitar DVR 480 | Camera Manual - Page 14
Technical Specifications Image Sensor Video Resolution File Format External Memory LCD Display Lens Shutter Speed Focus Range Interface System Requirements Battery CMOS Sensor VGA (640X480) / QVGA (320X240) AVI External - SD and MMC card compatible (up to 16GB) Illumination: 100-16000 (lux) F=3.0 - Vivitar DVR 480 | Camera Manual - Page 15
WINDOWS To be able to download videos to your PC, you will need the following minimum configuration: Microsoft® Windows XP with Service Pack 3, Windows Vista with Service Pack 1 or Windows 7 Pentium® 4 processor (or above) 512 MB of RAM, with 250 MB of free hard disk space 16-bit - Vivitar DVR 480 | Camera Manual - Page 16
then click the "Install Vivitar Experience Image Manager" button to begin the installation. Note: If you do not have internet access, you can still download media from the camcorder. Click the "How to transfer photos and videos from my camera to my computer" button for instructions. 5. If you have - Vivitar DVR 480 | Camera Manual - Page 17
you can run the Vivitar Experience Image Manager from the Programs (PC) or Applications (Mac) menu on your computer. Connecting the Camcorder to the Computer 1. Use the USB cable that came with your camcorder to connect your digital camcorder to your computer. 2. Power the camera ON. 3. The first - Vivitar DVR 480 | Camera Manual - Page 18
Getting Videos from your Camcorder to Your Computer An SD card needs to be Get Images from device" window opens. 3. You can select to download videos. 4. Select your camera (removable disk) from the device window. If your camera is the only USB device connected then it will be selected automatically - Vivitar DVR 480 | Camera Manual - Page 19
a Tour" button on the application's Home page. Transferring Videos from my Camcorder to my Computer Manually WINDOWS 1. Use the USB cable that came with your camcorder to connect your camcorder to your computer's USB port. 2. Turn on the camcorder. If the connection is successful an icon will - Vivitar DVR 480 | Camera Manual - Page 20
the Edit menu. 7. We recommend that you copy the videos into the Movies folder. 8. Do not disconnect the cable Camcorder Maintenance The digital camera is a delicate device. Please handle your camera with care to avoid damaging it. Do not expose your camera to heat sources. Do not use you camera - Vivitar DVR 480 | Camera Manual - Page 21
description of the problem. 3. Your return address and telephone number (Daytime) MAIL TO ADDRESS BELOW: Sakar US Sakar International Attention: Service Department 195 Carter Drive Edison, NJ 08817 Sakar UK/Europe Sakar Australia Attention: Service Department Return faulty camera to 2D, Siskin - Vivitar DVR 480 | Camera Manual - Page 22
support in the US please call 1-800-592-9541, in the UK call 0800 917 4831, in Australia call 1800-006-614. If you would like to call from anywhere else, please visit www.vivitar.com for your local toll free number. Troubleshooting Q: How do I make sure I don't lose important pictures? This camera
-
 1
1 -
 2
2 -
 3
3 -
 4
4 -
 5
5 -
 6
6 -
 7
7 -
8
-
9
-
10
-
11
-
12
-
13
-
14
-
15
-
16
-
17
-
18
-
19
-
20
-
21
-
22
 |
 |
DVR 480
Digital Helmet Camcorder
User Manual
© 2009-2011 Sakar International, Inc. All rights reserved.
Windows and the Windows logo are registered trademarks of Microsoft Corporation.
All other trademarks are the property of their respective companies.