Vivitar DVR 550 DVR-550
Vivitar DVR 550 Manual
 |
View all Vivitar DVR 550 manuals
Add to My Manuals
Save this manual to your list of manuals |
Vivitar DVR 550 manual content summary:
- Vivitar DVR 550 | DVR-550 - Page 1
Digital Video Camera User Manual - Vivitar DVR 550 | DVR-550 - Page 2
to Know Your Camera 2 Section 2 Getting Up and Running 5 Section 3 Record Mode 7 Section 4 Playback Mode 34 Section 5 Listening to MP3 Music 47 Section 6 Reading eBook 49 Section 7 Viewing MPEG4 Movie on PC 51 Section 8 Viewing Pictures and Movies on a TV 52 Section 9 Video File Converter - Vivitar DVR 550 | DVR-550 - Page 3
64MB memory is used for Firmware code ‹ Standard Accessories Unpack the package and make sure all standard accessories listed are included: z Camera z USB Cable z Power Adaptor z AV Cable z Lithium-ion Rechargeable Battery z Quick Guide z CD-ROM ( Driver, Arcsoft Software and User Manual) z Remote - Vivitar DVR 550 | DVR-550 - Page 4
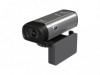
‹ Front View Lens Flash Self-Timer LED ‹ KeyPad illustration LCD Panel TV Out Port Mini USB 2.0 port Power Button SD card slot Direction Buttons Enter Button Picture Shutter Button Movie Shutter Button Tele-Wide Button RECORD/PLAY Button 3 - Vivitar DVR 550 | DVR-550 - Page 5
‹ Side View Strap Hole Speaker Battery Cover Macro Switch Microphone 4 - Vivitar DVR 550 | DVR-550 - Page 6
Up and Running ‹ Loading the Battery Before using the camera, end users must load NP60 rechargeable Li-ion Battery. 1. Follow the arrow direction and slide to eject the battery cover. 2. Insert the batteries according to the correct polarity marks ( + or -) 3. Close the battery cover firmly. Eject - Vivitar DVR 550 | DVR-550 - Page 7
recordings, or read eBook, press RECORD/PLAY Button once to switch to Playback Mode. Press a second time to return to Record Mode. ‹ Turning the Camera Off To turn off the Camera, you can either press the Power Button for one second, or you can place the LCD panel back to its original position. 6 - Vivitar DVR 550 | DVR-550 - Page 8
ON/OFF Enter Button : Menu ON Power Button: Press down for one second to turn on or turn off the camera. RECORD/PLAY Button functions: 1. Switch between Record /Playback Mode. 2. Return to the previous page. Tele-Wide Button: Digital Zoom in and out. Movie Shutter Button: 1. Start to take movie, or - Vivitar DVR 550 | DVR-550 - Page 9
/ Low Number of images or recording time of movie that can still be taken at current (3) resolution. (4) SD card inserted (5) Macro Position Focusing (6) White Balance (7) Battery indicator: full power / medium power / low power / (8) Auto Flash Flash Off power empty 8 - Vivitar DVR 550 | DVR-550 - Page 10
(9) Self-timer enabled (10) 8X digital zoom (11) Date/Time : YYYY/MM/DD HH: MM (12) Motion Detection ‹ MPEG4 Movie Recording Press Movie Shutter button ( ) to start recording. When a movie is - Vivitar DVR 550 | DVR-550 - Page 11
to view the recorded voice. ‹ Taking Close up Pictures The camera has two close-up picture modes to allow you to take pictures at close Note Remember to turn the macro switch back to Normal ( ) when you are not taking close-up pictures. ‹ Using Digital Zoom The digital zoom magnifies images - Vivitar DVR 550 | DVR-550 - Page 12
z Exit ‹ Operations for Record Mode Operation 1. Press Enter Button when in Movie/Picture Record Mode. Screen 2. Use Right/Left Buttons to move between main menu options, which are Movie Mode, Camera Mode, Voice Mode, Effect, and Set. Submenu will pop out while move to each main option. 3. Press - Vivitar DVR 550 | DVR-550 - Page 13
as well as its validation. 1.Always: The setting always keeps valid. 2.One Time: The setting is only valid either once or till camera power off. Resolution Validation Always Exposure Sharpness White Balance Motion Stabilization Motion Detect Two in One Photo Frame Flash Self-Timer Multi-Snap - Vivitar DVR 550 | DVR-550 - Page 14
menu includes camera setting and other advanced setting. You can use Right/Left Use Right/Left Buttons to select Movie Mode. Submenu of Movie Mode will pop out on the screen. 3. Use Up/Down Buttons to select Resolution then press Enter Button to switch to Resolution submenu. 4. Use Up/Down - Vivitar DVR 550 | DVR-550 - Page 15
‹ Exposure The camera adjusts image exposure automatically. In certain circumstances you may wish to adjust the exposure compensation setting. To change Exposure setting: 1. In Movie/Picture Record Mode, press Enter Button to switch to record menu screen. 2. Use Right/Left Buttons to select Movie - Vivitar DVR 550 | DVR-550 - Page 16
Right/Left Buttons to select Movie Mode. Submenu of Movie Mode will pop out on the screen. 3. Use Up/Down Buttons to select Sharpness then press Enter Button to switch to Sharpness submenu. 4. Use Up/Down Buttons to move between nine levels. The change can be previewed immediately. 5. Press Enter - Vivitar DVR 550 | DVR-550 - Page 17
of images automatically. Three manual white balance settings are available: 1. Auto (Default): The camera automatically adjusts white balance to record menu screen. 2. Use Right/Left Buttons to select Movie Mode. Submenu of Movie Mode will pop out on the screen. 3. Use Up/Down Buttons to select White - Vivitar DVR 550 | DVR-550 - Page 18
Stabilization submenu. 4. Use Up/Down Buttons to choose ON or OFF. 5. Press Enter Button to validate the setting and exit. Motion Stabiization Motion Stabilization Option Enter Button Note 1. The captured screen will be smaller when motion stabilization is enabled. 2. Digital Zoom is disabled - Vivitar DVR 550 | DVR-550 - Page 19
select Motion Detect then press Enter Buttons to switch to Motion Detect submenu. 4. Use Up/Down Buttons to choose ON or OFF. 5. Press Enter Button to validate the setting and exit. 6. Camera will start to record video once if there is a movement for 3 consecutive seconds. Stop recording if there is - Vivitar DVR 550 | DVR-550 - Page 20
Camera Mode. Submenu of Camera Mode will pop out on the screen. 3. Use Up/Down Buttons to select Resolution then press Enter Button to switch to Resolution submenu. 4. Use Up/Down Buttons to move between three settings. 5. Press Enter Button to validate the setting and exit. Display Screen Video - Vivitar DVR 550 | DVR-550 - Page 21
setting: 1. In Movie/Picture Record Mode, press Enter Button to switch to record menu screen. 2. Use Right/Left Buttons to select Camera Mode. Submenu of Camera Mode will pop out on the screen 3. Use Up/Down Buttons to move to Exposure Option. Press the Enter Button and then Exposure Submenu will - Vivitar DVR 550 | DVR-550 - Page 22
Two in One: 1. In Movie/Picture Record Mode, press Enter Button to switch to record menu screen. 2. Use Right/Left Buttons to select Camera Mode. Submenu of Camera Mode will pop out on the screen. 3. Use Up/Down Buttons to select Two in One then press Enter Button to switch to Two in One - Vivitar DVR 550 | DVR-550 - Page 23
take your picture with preferred electronic photo frame. To enable Photo Frame: 1. When in Camera Mode, use Up/Down Buttons to select Photo Frame option, then press Enter Button to switch to Photo Frame submenu. 2. Use Up/Down Buttons to locate preferred photo frame. Then select Set option and press - Vivitar DVR 550 | DVR-550 - Page 24
in Camera Mode, use Up/Down Buttons to select Flash Option, then press Enter Button to switch to Flash submenu. 2. Use Up/Down Buttons to move between 2 settings. 3. Press Enter Button to validate the setting and exit. Display Screen Note z The flash will be disabled automatically when battery - Vivitar DVR 550 | DVR-550 - Page 25
of blinking will increase just before the picture is taken. To enable Self-timer: 1. When in Camera Mode, use Up/Down Buttons to select Self-timer, then press Enter Button to switch to Self-timer submenu. 2. Use Up/Down Buttons to choose On or Off. 3. Press Enter Button to validate the setting and - Vivitar DVR 550 | DVR-550 - Page 26
images automatically. Three manual white balance settings are available: 1. Auto (Default): The camera automatically adjusts white balance to record menu screen. 2. Use Right/Left Buttons to select Camera Mode. Submenu of Camera Mode will pop out on the screen. 3. Use Up/Down Buttons to select White - Vivitar DVR 550 | DVR-550 - Page 27
to Multi-Snap Mode, you can take five continuous pictures. To enable Multi-Snap: 1. When in Camera Mode, use Up/Down Buttons to select Multi-Snap, then press Enter Button to switch to Multi-Snap submenu. 2. Use Up/Down Buttons to choose On or Off. 3. Press Enter Button to validate the setting and - Vivitar DVR 550 | DVR-550 - Page 28
‹ Date Printing To enable Date Printing: 1. When in Camera Mode, use Up/Down Buttons to select Date Printing, then press Enter Buttons to switch to Date Printing submenu. 2. Use Up/Down Buttons to choose On or Off. 3. Press Enter Button to validate the setting and exit. Display Screen Date - Vivitar DVR 550 | DVR-550 - Page 29
voice recording: 1. In Movie/Picture Record Mode, press Enter Button to switch to record menu screen. 2. Use Right/Left Buttons to move to Voice Option. Then Voice Submenu will pop out on the screen. 3. Use Up/Down Button to move between Enter and Exit Option. 4. Choose Enter option to enable voice - Vivitar DVR 550 | DVR-550 - Page 30
setting: 1. In Movie/Picture Record Mode, press Enter Button to switch to record menu screen. 2. Use Right/Left Buttons to move to Effect Option. Then Effect Submenu will pop out on the screen. 3. Use Up/Down Buttons to move between four settings. The change can be previewed immediately. 4. Press - Vivitar DVR 550 | DVR-550 - Page 31
camera set up. To change advanced setting: 1. In Movie/Picture Record Mode, press Enter Button to switch to record menu screen. 2. Use Right Setting z Sound Setting Enable or disable KeyPad tone and operation sound by using Up/Down Buttons, the press Enter Button to validate the setting. Submenu - Vivitar DVR 550 | DVR-550 - Page 32
Buttons and select No Start-Up Screen. No Start-Up Screen z Time Setting z Move between Date, Time, Set and Exit by using Left/Right Buttons. z Adjust date and time by using Up/Down Buttons, then select Set to validate each change. z Select Exit to leave Time Setting without any change. Submenu - Vivitar DVR 550 | DVR-550 - Page 33
z Format Card Submenu Format Card Display Screen Format Card Options Yes:Format the SD Card / built-in memory No (Default):Do not format SD Card / built in memory Note z All the data will be erased if the SD card is formatted. Make sure all the data are duplicated to PC before formatting SD card. - Vivitar DVR 550 | DVR-550 - Page 34
z TV System Ensure that the appropriate TV standard of your area is selected - either NTSC or PAL. Wrong TV system setting may cause image flicker. NTSC standard: USA, Canada, Japan, South Korea and Taiwan etc. PAL standard: UK, Europe, China, Australia, Singapore and Hong Kong etc. Submenu TV - Vivitar DVR 550 | DVR-550 - Page 35
Mode to Playback Mode Main Menu. z There are five options in the Playback Mode, movie, picture, voice, music, and eBook. z Direction Buttons can be used to select the specific option. z Press Enter Button to view movies/pictures, listen to voice/music, or read eBook. Display Screen Note When any - Vivitar DVR 550 | DVR-550 - Page 36
, picture, voice, music or e-Book option menu. RECORD/PLAY Button functions: 1. Switch between Record and Playback modes. 2. Return to the previous page. Tele-Wide Button: Digital Zoom in and out. Movie Shutter Button: Start playing the recorded movie or voice 35 - Vivitar DVR 550 | DVR-550 - Page 37
‹ LCD Monitor Information Indicators on the LCD screen while in Playback Mode: (1) Mode Indicator Movie Playback Mode Picture Playback Mode Voice Playback Mode Music Playback Mode eBook Playback Mode (2) Resolution Indicator High Resolution Standard Resolution Low Resolution (3) Indicate the - Vivitar DVR 550 | DVR-550 - Page 38
Direction Buttons to select the Movie option. 2. Press Enter Button to go to Movie Playback Mode. Display Screen 3. Use Right/Left Buttons to go to the next or last movie. 4. Press Movie Shutter Button to play and press it again to pause. 5. While playing - Vivitar DVR 550 | DVR-550 - Page 39
Direction Buttons to select the Delete option ( ). Display Screen 2. Press Enter Button to go to the Delete menu. 3. Use Right/Left Buttons to select the movie. 4. Use Up Button to delete all movies and Down Button to delete single movie. 5. Before a movie is deleted, a confirmation screen will - Vivitar DVR 550 | DVR-550 - Page 40
Direction Buttons to select the Lock option ( ). 2. Press Enter Button to go to the Lock menu. Display Screen 3. Use Right/Left Buttons to select the movie. 4. Use Up Button to lock/unlock all movies and Down Button to lock/unlock single movie. 5. Before a movie is locked/unlocked, a confirmation - Vivitar DVR 550 | DVR-550 - Page 41
‹ Repeat Movies This function automatically repeats playing single movie or all movies in order. Operation 1. Use Direction Buttons to select the Repeat One option ( ) or Repeat All option ( ). 2. Press Enter Button to start repeating. Display Screen 40 - Vivitar DVR 550 | DVR-550 - Page 42
option. 2. Press Enter Button to go to Picture Playback Mode. Display Screen 3. Use Right/Left Buttons to go to the next or last picture. 4. While the picture is selected, use Tele/Wide Buttons to magnify. 5. Use Direction Buttons to navigate the magnified picture. 6. Press Enter Button to go to - Vivitar DVR 550 | DVR-550 - Page 43
Direction Buttons to select the Delete option ( ). Display Screen 2. Press Enter Button to go to the Delete menu. 3. Use Right/Left Buttons to select the picture. 4. Use Up Button to delete all pictures and Down Button to delete single picture. 5. Before a picture is deleted, a confirmation screen - Vivitar DVR 550 | DVR-550 - Page 44
the Thumbnail option ( ). Display Screen 2. While selecting Thumbnail option, press Enter Button to view nine thumbnail pictures. 3. To view a picture, use Direction Buttons to select the picture. 4. Press Enter Button to view the selected picture. ‹ Lock Pictures Single or all pictures can be - Vivitar DVR 550 | DVR-550 - Page 45
‹ Make Slide Show This function automatically repeats all pictures in order. Operation 1. Use Direction Buttons to select the Slide option ( ). 2. Press Enter Button to start the slide show; Press it again to stop. Display Screen 44 - Vivitar DVR 550 | DVR-550 - Page 46
: Right/ Left Buttons:Select the last or next voice. Up/Down Buttons : Adjust the voice playback volume. Enter Button:Switch to voice option menu. Operation 1. Use Direction Buttons to select the Voice option. 2. Press Enter Button to go to Voice Playback Mode. Display Screen - Vivitar DVR 550 | DVR-550 - Page 47
. 10. The repeat icons will be different while selecting Repeat One option and Repeat All option. 11. To delete a voice, use Right/Left Buttons to select the voice. 12. Use Up Button to delete all voice recordings and Down Button to delete single voice recording. 13. Before a voice is deleted - Vivitar DVR 550 | DVR-550 - Page 48
can be downloaded from some MP3 web sites. This DV includes the feature of MP3 play with lyrics display. To enable this function, make sure both .mp3 and .lrc files with the same file name are copied to the memory. ‹ Transfer MP3 Music to the camera 1. Install the camera driver on your computer - Vivitar DVR 550 | DVR-550 - Page 49
( ). 9. Press Enter Button to exit. submenu. 10. Press Record / Play Button to exit Music mode. ‹ Listen to MP3 Music with earphone MP3 stored in the camera can be played either by built-in speaker, or Earphone, or TV. When the earphone cable is plugged in the - Vivitar DVR 550 | DVR-550 - Page 50
camera. ‹ Transfer eBooks to the camera 1. Install the camera driver on your computer. 2. Connect your camera to the computer USB port. 3. The Red LED will light when the camera 1. In Playback Mode, use Direction Buttons to select the eBook option Display Screen 2. Use Up/Down Buttons to select - Vivitar DVR 550 | DVR-550 - Page 51
3. Press Enter Button to read the eBook. 4. Press Up/Down Buttons to scroll up/down the text 5. Select to jump to the first page 6. Select to jump to the last page 7. Select to change the color of text and background. 8. Select to auto scroll down the text. 9. Select to add a bookmark. 50 - Vivitar DVR 550 | DVR-550 - Page 52
camera. ‹ View MPEG4 Movie on PC When playing an MPEG4 movie for the first time, MPEG4 Video Codec Xvid should be installed in PC. To do this: (1) Insert the CD-ROM into the computer's CD-ROM drive. Click "Install Device Driver" ( Install MPEG4 Video Codec Xivd) and follow the on-screen instructions - Vivitar DVR 550 | DVR-550 - Page 53
television. To connect to a television: 1. Connect one end of the AV cable to your camera's AV Out port. 2. Connect the other end of the cable to a television. 3. when the camera is connected to a television. Taking picture with high resolution is not supported while the camera connects to a TV. 52 - Vivitar DVR 550 | DVR-550 - Page 54
Video File Converter Bundled software CD contains Acrsoft Media Converter that features video file converter to convert multiple video formats into MPEG4 Xvid compatible format with your camera. In this way, you can convert various video files formats and playback your favorite movies on your camera - Vivitar DVR 550 | DVR-550 - Page 55
(5) Click "Add Media" (6) Select Video file you want to convert - Vivitar DVR 550 | DVR-550 - Page 56
(7) You can preview your media files before converting. To preview media files, use the following control functions. * Click to start previewing *Click to stop previewing Make sure your media files can be previewed before converting (8) Click on to begin converting files 1 - Vivitar DVR 550 | DVR-550 - Page 57
.avi". (Please note: if Clip0001.avi exists in the camera, then the converted file has to be renamed to clip0002.avi) (10) Connect your camera to PC and transfer the converted video to "My Computer\Removable Disk\DCIM\200Movie" in your camera. (Refer to Section 11Transferring Data to a Computer) (11 - Vivitar DVR 550 | DVR-550 - Page 58
9.2 Media Converter 1 To convert a video file: (1) Install Arcsoft Media Converter ( Refer to section 11) (2) Click StartÆ Select ProgramsÆ Acrsoft Media ConverterÆ Media Converter (3) Media Converter main Screen will appear on your desktop. (4) Click "Select Media" 3 - Vivitar DVR 550 | DVR-550 - Page 59
(5) Select the video file you want to convert. (6) Click "Select Destination" to choose the location you want to store the converted video file. 4 - Vivitar DVR 550 | DVR-550 - Page 60
(7) Click " Convert" to start video converting. 5 - Vivitar DVR 550 | DVR-550 - Page 61
avi". (Please note: if Clip0001.avi exists in the camera, then the converted file has to be renamed to clip0002.avi) (10) Connect your camera to PC and transfer the converted video to "My Computer\Removable Disk\DCIM\200Movie" in your camera. (Refer to Section 10 Transferring Data to a Computer) (11 - Vivitar DVR 550 | DVR-550 - Page 62
Section 10 Burning the Recorded Clip into DVD Bundled software CD contains ArcSoft Showbiz DVD also feathers burning the movie clip into DVD. Æ Acrsoft Showbiz DVDÆ Showbiz DVD (3) Showbiz DVD main Screen will appear on your desktop. (4) Drag Video File to " Drag Video Here" (5) Click " Create " 7 - Vivitar DVR 550 | DVR-550 - Page 63
(6) Click " Start " to start DVD burning 8 - Vivitar DVR 550 | DVR-550 - Page 64
Transferring Data to a Computer ‹ Installing the Digital Camera Driver Before connecting this camera to a computer for the first time, you should install a driver on the computer. The driver is on the CD-ROM disc provided in the package. To install the driver: 1. Insert the CD-ROM into the computer - Vivitar DVR 550 | DVR-550 - Page 65
easy to use. Ö Arcsoft Media Converter can convert multiple video formats into MPEG4 Xvid compatible format with your camera Ö Adobe Reader is a popular program that you need to have installed to read the User's Manual. Many computer users will find they already have this software installed on - Vivitar DVR 550 | DVR-550 - Page 66
QVGA 320X240 pixels 30 fps Auto/Manual (Daylight, Fluorescent, Tungsten) Auto/Manual 10 second delay Auto/Off Picture: JPEG Movie : AVI (Xvid) Voice : WAV Music : MP3 Single Image/Thumbnails/Slideshow Mini USB 2.0 Port NTSC/PAL Selectable Lithium-ion Rechargeable Battery 95mm×71mm×34mm 142g(without - Vivitar DVR 550 | DVR-550 - Page 67
‹ System Requirement Windows 98SE/2000/ME/XP/Vista Pentium III 800MHz or higher 256 MB RAM CD ROM 1GB free HDD space Available USB port 12
-
 1
1 -
 2
2 -
 3
3 -
 4
4 -
 5
5 -
 6
6 -
 7
7 -
8
-
9
-
10
-
11
-
12
-
13
-
14
-
15
-
16
-
17
-
18
-
19
-
20
-
21
-
22
-
23
-
24
-
25
-
26
-
27
-
28
-
29
-
30
-
31
-
32
-
33
-
34
-
35
-
36
-
37
-
38
-
39
-
40
-
41
-
42
-
43
-
44
-
45
-
46
-
47
-
48
-
49
-
50
-
51
-
52
-
53
-
54
-
55
-
56
-
57
-
58
-
59
-
60
-
61
-
62
-
63
-
64
-
65
-
66
-
67
 |
 |

Digital Video Camera
User Manual