Vivitar DVR 620 v3 Camera Manual
Vivitar DVR 620 Manual
 |
View all Vivitar DVR 620 manuals
Add to My Manuals
Save this manual to your list of manuals |
Vivitar DVR 620 manual content summary:
- Vivitar DVR 620 | v3 Camera Manual - Page 1
DVR 620v3 Digital Video Camera User Manual © 2009-2011 Sakar International, Inc. All rights reserved. Windows and the Windows logo are registered trademarks of Microsoft Corporation. All other trademarks are the property of their respective companies. - Vivitar DVR 620 | v3 Camera Manual - Page 2
Software ...29 Connecting the Camera to the Computer 30 Getting Photos and Videos from your Camera to Your Computer 31 Get started!...32 Transferring Images from my Camera to my Computer Manually 33 Camera Maintenance ...34 Sakar Warranty Card...34 Technical Support...35 Troubleshooting...35 1 - Vivitar DVR 620 | v3 Camera Manual - Page 3
this manual carefully first in order to get the most out of your digital video camera. What Your Camera Includes 1. Digital Video Camera 2. AV Cable 3. Vivitar Experience Image Manager software Installation CD 4. Wrist Strap 5. Built-in USB Connector (not shown) Note: SD memory card and batteries - Vivitar DVR 620 | v3 Camera Manual - Page 4
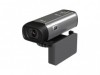
Parts of the Camera 1. Power Button 2. Delete Button 3. MENU Button 4. MODE Button 5. Shutter/OK Button 6. Up/Zoom In/Vol + 7. Down/Zoom Out/Vol 8. Left 9. Right 10. LCD Screen 11. SD Card Slot 12. USB Connector 13. TV Out Port 14. Wrist Strap Connector 15. Tripod Socket 16. USB ejector 17. LED - Vivitar DVR 620 | v3 Camera Manual - Page 5
Initial Camera Setup Installing the Batteries Installing the Memory Card Turning On the Camera Insert SD Memory card (up to 16GB) before use. Using the Camera 4 - Vivitar DVR 620 | v3 Camera Manual - Page 6
displayed on LCD as shown below: Full battery power Medium battery power Low battery power 2) SD Memory Card Make sure an SD card has been inserted into your digital video camera. (SD Memory card not included.) To properly insert the SD Card: Push the SD card into the slot in the direction shown - Vivitar DVR 620 | v3 Camera Manual - Page 7
setup. A message will appear: "Continue with Camera Setup?" Select "Yes" to continue or "No" to exit the setup. Note: If you select "No" and decide to leave the camera setup, the camera will be set to its default settings. These settings can be adjusted at any time manually through the menus in the - Vivitar DVR 620 | v3 Camera Manual - Page 8
as desired and press the Shutter button to start the record. A red record indicator will appear on the LCD screen while record is in progress. To stop the record, press the Shutter button again. The video will be automatically saved to your camera‟s memory card. To access the various menus for the - Vivitar DVR 620 | v3 Camera Manual - Page 9
Camera Technical Specifications Image Sensor Image Resolution Video Resolution File Format External Memory LCD Display Lens Zoom Scene Image Quality White Balance Color Effect Light Exposure ISO Frequency Auto Power Off Metering Language Microphone Speaker Interface System Requirements Battery - Vivitar DVR 620 | v3 Camera Manual - Page 10
Computer System Requirements - Windows To be able to download photos and videos to your PC, you will need the following minimum configuration: Microsoft® Windows XP with Service Pack 3, Windows Vista with Service Pack 1 or Windows 7 Pentium® 4 processor (or above) 512 MB of RAM, with 250 MB - Vivitar DVR 620 | v3 Camera Manual - Page 11
/OFF Your Digital Video Camera Make sure the batteries have been inserted properly into your digital video camera. If your camera comes with a rechargeable lithium battery, make sure it is fully charged before the first use. Make sure an SD card has been inserted into your camera. (SD card up - Vivitar DVR 620 | v3 Camera Manual - Page 12
the best default settings so that you can begin to capture and enjoy clear quality videos and photos. To change the active camera mode, make sure the camera is powered ON and press the MODE button. When in Video Capture Mode, this icon will display on the top-left corner of the LCD display - Vivitar DVR 620 | v3 Camera Manual - Page 13
Navigating the Menus Each camera mode has a set of menus specific to that mode. 1) Press the MENU button to open at a later time. 6) Some menu options are single-use functions that are not remembered by the camera and do not display this icon when selected. 7) At any time you can press the MODE - Vivitar DVR 620 | v3 Camera Manual - Page 14
screen and a red indicator will appear in place of the video icon on the screen. 5) To stop the video record, press the Shutter button again. 6) The video will automatically be saved to the camera‟s SD card. 7) You can also capture your videos using the Flip Screen. The LCD screen opens 180 degrees - Vivitar DVR 620 | v3 Camera Manual - Page 15
Mode Quick Function Buttons Your digital video camera has a four-directional pad and additional buttons that functions as Quick Function buttons. Button Function LEFT - UP Zooms in RIGHT - DOWN Zooms out Other Shutter/OK Delete MENU MODE Starts and stops your video capture Allows you to - Vivitar DVR 620 | v3 Camera Manual - Page 16
are deleted they are permanently removed from your SD memory card. Please make sure that you only use this feature once you have downloaded and saved all the images you wish to your computer. Video Capture Mode Menus The following are the menus that appear in your camera‟s Video Capture Mode: 15 - Vivitar DVR 620 | v3 Camera Manual - Page 17
the images taken by your camera. Keep in mind that images with a larger size will also take up more of your camera‟s memory. 1) Press the MENU button your camera until you manually change the setting or restore the camera‟s default factory settings. Language Menu You can select your camera‟s - Vivitar DVR 620 | v3 Camera Manual - Page 18
on the top left corner of Playing Videos on Your Digital Video Camera 1) Select your Video: Once in Playback mode, press the LEFT or RIGHT direction buttons to scroll through the images on your digital video camera‟s memory card until you find the video you would like to view. Each captured - Vivitar DVR 620 | v3 Camera Manual - Page 19
Playback Mode Quick Function Buttons Your digital video camera has a four-directional pad and additional buttons that functions as Quick Function buttons. Button Function LEFT - Displays the PREVIOUS image - Scrolls through your Thumbnail images - - Vivitar DVR 620 | v3 Camera Manual - Page 20
you wish to view by using the Thumbnail View. The images on your camera will be displayed in a 3 X 3 matrix where you can use the direction control buttons to navigate the thumbnails and select the image you wish to view. Videos appear with a „V‟ icon. 3) Press the Shutter/OK button for the selected - Vivitar DVR 620 | v3 Camera Manual - Page 21
appears in your digital video camera‟s Video Playback Mode: Delete Menu While in the Playback mode, you can delete videos from your camera through the all the images are deleted they are permanently removed from your SD memory card. Please make sure that you only use this feature once you have downloaded - Vivitar DVR 620 | v3 Camera Manual - Page 22
you to capture pictures with your digital video camera. When the camera is first powered ON, the camera will be in Video Capture Mode by default. Press the MODE button once to enter the Photo Capture mode. Taking a Picture 1) Turn on your digital video camera. 2) Press the MODE button once to - Vivitar DVR 620 | v3 Camera Manual - Page 23
Photo Capture Mode Quick Function Buttons Your digital video camera has a four-directional pad and additional buttons that functions as Quick Left, Up, Right, and Down directions control buttons. Toggles between the Video Capture Mode, Photo Capture Mode, and Playback Mode Exits the menu screen 22 - Vivitar DVR 620 | v3 Camera Manual - Page 24
on the LCD screen. 9) Remember that this setting will be saved by your digital video camera until you manually change the setting or restore the camera‟s default factory settings. Language Menu You can select your camera‟s language setting by selecting the desired language from the Language menu - Vivitar DVR 620 | v3 Camera Manual - Page 25
review photos and videos that you‟ve already taken with your digital video camera. When you first turn on the digital video camera, the camera will be in Video on your digital video camera‟s memory card until you find the image you would like to view. Each captured image (both videos and photos) - Vivitar DVR 620 | v3 Camera Manual - Page 26
Photo Playback Mode Quick Function Buttons Your digital video camera has a four-directional pad and additional buttons that functions as Quick Function buttons. Button LEFT UP RIGHT DOWN Function - Displays the PREVIOUS image. - Scrolls through - Vivitar DVR 620 | v3 Camera Manual - Page 27
Thumbnail View Easily navigate and select the image you wish to view by using the Thumbnail View. The images on your camera will be displayed in a 3 X 3 matrix where you can use the direction buttons to scroll and select images from the thumbnails. 1) Press the DOWN button for - Vivitar DVR 620 | v3 Camera Manual - Page 28
appears in your digital video camera‟s Photo Playback Mode: Delete Menu While in the Playback mode, you can delete photos from your camera through the all the images are deleted they are permanently removed from your SD memory card. Please make sure that you only use this feature once you have downloaded - Vivitar DVR 620 | v3 Camera Manual - Page 29
When the digital video camera is set to record, capture or playback mode, you can preview the images you want to record on the TV screen. 5) When the digital video camera is set to Playback mode, you can review all the pictures and videos stored on the SD card inserted in the digital video camera on - Vivitar DVR 620 | v3 Camera Manual - Page 30
the internet and then click the "Install Vivitar Experience Image Manager" button to begin the installation. Note: If you do not have internet access, you can still download media from the camera. Click the "How to transfer photos and videos from my camera to my computer" button for instructions. 29 - Vivitar DVR 620 | v3 Camera Manual - Page 31
you close the application you can run the Vivitar Experience Image Manager from the Programs (PC) or Applications (Mac) menu on your computer. Connecting the Camera to the Computer 1) Push in and slide up the USB lever on the side of the digital video camera to reveal the retractable built -in USB - Vivitar DVR 620 | v3 Camera Manual - Page 32
Getting Photos and Videos from your Camera to Your Computer NOTE: An SD card needs to be inserted. Do not disconnect the cable during transfer. Doing so will cancel the transfer of any files on their way to your - Vivitar DVR 620 | v3 Camera Manual - Page 33
transfer photos and videos from one social network to another Organize your images by creating offline and online albums Edit images using automatic and manual tools Use automatic "Geotagging" with built in Google Maps For more details on how to use the Vivitar Experience Image Manager - Vivitar DVR 620 | v3 Camera Manual - Page 34
Paste from the Edit menu. 6) We recommend that you copy the images into the Pictures/My Pictures folder and the videos into the Videos/My Videos folder. 7) Do not disconnect the camera from the computer during transfer. Doing so will cancel the transfer of any files on their way to your computer - Vivitar DVR 620 | v3 Camera Manual - Page 35
Maintenance The digital video camera is a delicate device. Please handle your camera with care to avoid damaging it. Do not expose your digital video camera to heat sources. Do not use you digital video camera in wet or moist conditions. Sakar Warranty Card This warranty covers for the original - Vivitar DVR 620 | v3 Camera Manual - Page 36
for normal use. If the camera powers off nothing will happen to the images stored on the SD memory card. We recommend always downloading your photos to your computer as soon as possible to prevent unintentional data loss. Q: I deleted images using the Vivitar Experience Image Manager. The images
-
 1
1 -
 2
2 -
 3
3 -
 4
4 -
 5
5 -
 6
6 -
 7
7 -
8
-
9
-
10
-
11
-
12
-
13
-
14
-
15
-
16
-
17
-
18
-
19
-
20
-
21
-
22
-
23
-
24
-
25
-
26
-
27
-
28
-
29
-
30
-
31
-
32
-
33
-
34
-
35
-
36
 |
 |

DVR 620v3 Digital Video Camera
User Manual
© 2009-2011 Sakar International, Inc. All rights reserved.
Windows and the Windows logo are registered trademarks of Microsoft Corporation.
All other trademarks are the property of their respective companies.