Vivitar DVR 850W DVR850W User Manual
Vivitar DVR 850W Manual
 |
View all Vivitar DVR 850W manuals
Add to My Manuals
Save this manual to your list of manuals |
Vivitar DVR 850W manual content summary:
- Vivitar DVR 850W | DVR850W User Manual - Page 1
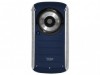
DVR 850W Underwater Digital Video Camcorder Owner's Manual © 2009 Sakar International, Inc. All rights reserved. Windows and the Windows logo are registered trademarks of Microsoft Corporation. All other trademarks are the property of their respective companies. - Vivitar DVR 850W | DVR850W User Manual - Page 2
DVR with printer using USB cable provided 36 Transferring Images to your PC using the software 37 Manually transfer images and videos to your Digital Camcorder........... 42 Transferring photos and videos to your MAC manually 43 Everything you need to get the most of your media and MORE 43 Video - Vivitar DVR 850W | DVR850W User Manual - Page 3
movies to upload, copy to CD/DVD and much more with Video Express software. What your digital video camcorder includes • Digital Video Camcorder • USB and AV Dual Cable • Snap n Share Pro Software installation CD • Quick Start Guide • Hand strap • Lithium battery • AC charger 2 - Vivitar DVR 850W | DVR850W User Manual - Page 4
),150 MB free disk space y 1024 x 768 or higher-resolution monitor displaying millions of colors. Note: The Snap `n Share Pro software as well as the Video Express software are not compatible on Macintosh computers. You may however use the camcorder as a regular MSDC USB removable device. 3 - Vivitar DVR 850W | DVR850W User Manual - Page 5
A Quick Look at your Digital Video Camcorder 1. DC mode/Shutter 2. DV mode/Shutter 3. Up/Zoom in 4. Left 5. Right/Flashlight mode 6. OK/Menu 7. Down/Zoom out 8. DC/DV mode LED 9. Li-ion battery charging LED 10. LCD Color display 11. Battery/SD card/USB slot compartment 12. Playback 13. Power on/off - Vivitar DVR 850W | DVR850W User Manual - Page 6
: 1. In order to charge your lithium battery, make sure the battery is inserted correctly and then connect your camcorder to a running PC with the USB cable provided, or use the AC charger provided in the package. The red LED will light up indicating that your camcorder is in charging mode. The 5 - Vivitar DVR 850W | DVR850W User Manual - Page 7
off. 3. Please remove your battery when you don't intend to use your camcorder for a long time. 4. 64 MB of internal memory is provided in order to take photos and videos. 5. Use a SD Memory card to expand the memory in order to capture and record many more media items. All the media in the built-in - Vivitar DVR 850W | DVR850W User Manual - Page 8
(see the Setup section further on the manual for instruction on how to format the card). Maintenance and Care Before using the video camcorder, please ensure that you read and understand the safety precautions described below: • This camcorder can be used underwater to 10 feet, when there is the - Vivitar DVR 850W | DVR850W User Manual - Page 9
attempt to modify this video camcorder in any way. Maintenance and repairs should be carried out only by authorized service providers. • Opening the cover of the Camcorder may cause electrical shock and will void your warranty. • Use only the recommended power accessories. Use of power sources not - Vivitar DVR 850W | DVR850W User Manual - Page 10
5. The Setup wizard will start to install the Snap 'n Share Pro application on your computer. Click "Next" to continue. 9 - Vivitar DVR 850W | DVR850W User Manual - Page 11
6. Please review the license terms and click the "I Agree" button to continue. 7. In the Installation options you can choose where to install this to let the Snap 'n Share Pro installer create the folder to where the program will be installed. Click "Install" and follow the instructions. 10 - Vivitar DVR 850W | DVR850W User Manual - Page 12
8. Click "Finish" to let the Snap 'n Share Pro installer finish the installation program. 9. The Setup will now begin to silently install the Video Express software. This might take a few seconds to install depending on the operating system you are running. 11 - Vivitar DVR 850W | DVR850W User Manual - Page 13
. Congratulations!! You have successfully installed the Snap 'n Share Pro and Video Express software on your PC. Powering on and setting DVR Function Control To power on the camcorder, flip open the LCD Screen. The camcorder automatically powers on. The Power button is situated on the inside of - Vivitar DVR 850W | DVR850W User Manual - Page 14
) it will automatically switch off. When there is insufficient battery power, a red battery icon will appear on the LCD screen. The camcorder will automatically power off a few moments later. Setting the Language When using the video camcorder for the first time after purchasing it, be sure to - Vivitar DVR 850W | DVR850W User Manual - Page 15
8. Press the Up/Down button to change the digits for each of the date or time options you DVR camcorder. 1. Press the Power button to turn on the camcorder. 2. The DV (Video) default capture mode appears on the LCD. 3. Press the DC (Camera) mode button to change from the video to the camera - Vivitar DVR 850W | DVR850W User Manual - Page 16
to capture videos (with audio) using your camcorder you need to select the DV video mode. On turning on your camcorder the first mode to appear is the DV mode. To change between the function modes on your DVR, press the DV/DC buttons. The camcorder has 64MB of built in memory. Use a compatible SD - Vivitar DVR 850W | DVR850W User Manual - Page 17
4. Once they are downloaded to the PC view them using QuickTime and Windows Media Player. 5. As the internal memory of the camcorder is limited to 64MB the size of videos are limited. 6. Please insert a SD memory card of up to 8 GB to capture longer videos. 7. When the internal memory is full, a "F" - Vivitar DVR 850W | DVR850W User Manual - Page 18
your resolution, the corresponding icon (VGA/QVGA) will appear on the top right of the LCD. White Balance This setting is used to adjust the color of your videos as per your light source. 1. Press the Right/Left/Up/Down button to select the White Balance menu icon. 2. Press the OK button to - Vivitar DVR 850W | DVR850W User Manual - Page 19
capturing videos with the new white balance setting selected. Note: After selecting your White Balance choice, the corresponding icon will appear on the top of the LCD screen. Exposure This setting allows you to manually compensate for unusual lighting conditions such as indirect indoor lighting, - Vivitar DVR 850W | DVR850W User Manual - Page 20
mode to start capturing videos with the new color effect setting selected. Note: The color effect selected now appears on the LCD screen. Setup Mode In Setup mode you can adjust the way the camcorder is setup. 1. Press the Right/Left/Up/Down button to select the Setup Mode menu icon. 2. Press - Vivitar DVR 850W | DVR850W User Manual - Page 21
the icons: Enable/ Disable • Press the OK button to confirm, save your choice and exit to the Setup mode submenu. • If Disable is selected the camcorder will be silent and not emit beeps when buttons are pressed. Brightness - adjust the brightness of the LCD screen • Press the OK button. • Press the - Vivitar DVR 850W | DVR850W User Manual - Page 22
use your bigger TV screen to playback and view the images and videos on the camcorder instead of using the LCD screen. Before connecting the cable Using this option you can format the built-in memory and SD Card if inserted. Caution: Formatting the memory will erase all the images. Please download - Vivitar DVR 850W | DVR850W User Manual - Page 23
MINUTE • Press the Up/Down button to adjust the digits per each date and time option selected. • Press the OK button videos. The anti-flicker frequency can be changed when taking pictures in fluorescent light to correspond with the frequency of the mains supply. 50Hz is used in USA. 60Hz is used - Vivitar DVR 850W | DVR850W User Manual - Page 24
screens will now appear in the language option selected. The DVR setup mode is independent of the video and photo modes and can be accessed from either the DV video menu or the DC camera menu. Capturing Still Photos In order to capture still photos using your camcorder you need to select the 23 - Vivitar DVR 850W | DVR850W User Manual - Page 25
DC camera mode. On turning on your camcorder the first mode to appear is the DV mode. To change between the function modes on your DVR, press the DV or DC button. The camcorder has 64MB of built in memory. Use a compatible SD card of up to 8 GB to expand the memory capacity to capture even - Vivitar DVR 850W | DVR850W User Manual - Page 26
of up to 8 GB to capture more photos without having to download them to the computer to free up internal memory. 6. When the main menu that appears. Flash Setup This setting is used to adjust the flash that can be activated in poor light conditions. The flash is affective when taking photos where - Vivitar DVR 850W | DVR850W User Manual - Page 27
on the top of the LCD screen. Selecting the Auto choice will let the camcorder decide when to use the flash in the present lighting conditions. Flash Short-cut button To activate and toggle between the flash options without going in the Setting menu, press the Right button. On each consecutive - Vivitar DVR 850W | DVR850W User Manual - Page 28
Setting menu. 5. Press the DC button to revert back to the Photo capture mode. 6. Press the DC Shutter button to capture photos using the quality option that you selected. Resolution You can select different Photo resolutions - VGA 640x480 pixels / 3 Mega Pixels 2048x1536 / 5 Mega Pixels 2592x1944 - Vivitar DVR 850W | DVR850W User Manual - Page 29
This setting is used to adjust the color of your photos as per your light source. 1. Press the Right/Left/Up/ LCD screen. Exposre This setting allows you to manually compensate for unusual lighting conditions such as indirect indoor lighting, dark backgrounds, and strong backlighting. The exposure - Vivitar DVR 850W | DVR850W User Manual - Page 30
the DC camera mode, press the Left button. 2. The Selftimer icon on the top of the LCD will appear. 3. Press the Left button until you see the Selftimer option you wish to use appear: 5 Seconds, snapshot) 10 Seconds, Burst (continuous 4. Press the DC Shutter button. 5. The camcorder emits loud - Vivitar DVR 850W | DVR850W User Manual - Page 31
will be taken. Burst Take 3 consecutive photos automatically. You will need enough memory in the camcorder to use this option. The Burst option is found together with the Selftimer options when using the Left button Selftimer method 1 short cut option as explained above. 1. The Burst icon will - Vivitar DVR 850W | DVR850W User Manual - Page 32
to the Setting menu. 5. Press the DC button to revert back to the Video capture mode to start capturing videos with the new color effect setting selected. Note: The image that appears on 6. Press the Up/Down button to change the digits for each of the date or time options you desire to update. 31 - Vivitar DVR 850W | DVR850W User Manual - Page 33
can be accessed from either the DV video menu or the DC camera menu. See the description of the Setup mode as explained at the end of the Video Setting options section of this manual. Playback mode You can playback the videos on your camcorder or attach the TV In cable to watch them on your TV - Vivitar DVR 850W | DVR850W User Manual - Page 34
in full screen. 10. Press the OK button to activate and use the Left/Right/Up/Down buttons to navigate around in the image. the OK button again to cancel the navigation feature. Playback videos: 1. Toggle through the images and videos. 2. Videos in full screen appear with a red square on the - Vivitar DVR 850W | DVR850W User Manual - Page 35
the selected image is deleted. 10. To Delete ALL the images on the camcorder`s memory, press the Left/Right button to select the Delete All icon and then if they are not firstly downloaded to the computer before deletion. Setup Mode The Setup mode for the camcorder can also be access from the - Vivitar DVR 850W | DVR850W User Manual - Page 36
(NTSC or PAL) you are using. 3. Turn you TV on and turn to Video In (AV mode) 4. Connect the yellow terminal (Video) of the USB cable to VIDEO IN and connect the white terminal (Audio) of the USB cable to AUDIO IN on the TV 5. Insert the USB into the camcorder and turn the camcorder on. 6. Set the - Vivitar DVR 850W | DVR850W User Manual - Page 37
power off the camcorder and change to battery charging mode. Connect DVR with printer using USB cable provided 1. Be sure you have taken some photos in your camcorder before using this function. 2. Plug one end of the provided USB cable into the USB slot on the back of the camcorder, plug the other - Vivitar DVR 850W | DVR850W User Manual - Page 38
enter into the other three modes, pull out the USB cable from camcorder USB slot, and repeat the steps to print photos. Transferring Images to your PC using the software Once you have taken photos and videos with your camcorder you now need to download or transfer them to your computer. This allows - Vivitar DVR 850W | DVR850W User Manual - Page 39
USB cable into a USB port on your computer. 3. Turn your camcorder on. 4. Make sure your camcorder is in MSDC (Mass Storage) mode 5. Be sure to wait until the camcorder is recognized by your computer. Important: We recommend not opening the software Free Customer Support. 2. You will not be requested - Vivitar DVR 850W | DVR850W User Manual - Page 40
and use the Snap 'n Share Pro application. If you choose to register at a later time click the "Continue" button. a. The "Snap 'n Share Pro" Main Menu screen appears. Click on the "Get Media" button to open the Get Media Wizard to begin transferring the photos and videos captured with your camcorder - Vivitar DVR 850W | DVR850W User Manual - Page 41
. Select the "Custom" copy method option to preview and choose the photos and videos you wish to download from the camcorder to your PC. Note: Selecting the "Express" copy option will automatically download all media from the selected device drive to the computer without the option of selecting the - Vivitar DVR 850W | DVR850W User Manual - Page 42
"Delete the media from the camcorder after the files have been transferred". This will automatically delete the images on your camcorder and free up memory to continue capturing photos and videos. • On clicking the "Finish" button your media will begin to download from the camcorder to the selected - Vivitar DVR 850W | DVR850W User Manual - Page 43
Me How Tour tutorial from within the "Snap 'n Share Pro" application. Manually transfer images and videos to your Digital Camcorder Your camcorder is a Mass Storage device 1. Connect your DV camcorder to your computer using the USB cable. 2. A icon will appear on top left of the LCD, indicating - Vivitar DVR 850W | DVR850W User Manual - Page 44
Transferring photos and videos to your MAC manually The Snap n Share Pro software is not compatible and will not install on a Mac. In order to transfer photos, videos from your camcorder to your Macintosh computer: 1. Plug the camcorder into an available USB port 2. A new drive should mount on the - Vivitar DVR 850W | DVR850W User Manual - Page 45
. • Play your videos - double click on the video that appears in the thumbnail screen in the Select Photos mode, or right click on the video and select the . • Enhance your photos - Auto Enhance, Crop, Correct Red Eye, Manually Adjust and add Special Effects. • Add Active Captions and Sounds - Add - Vivitar DVR 850W | DVR850W User Manual - Page 46
Category, Keyword or Date directly from the operating system use all these features please refer to the Quick Start Help Guide and/or the Show Me How Tour tutorial from within the "Snap 'n Share Pro" application. Video Express application The Snap 'n Share Pro software installs a custom built Video - Vivitar DVR 850W | DVR850W User Manual - Page 47
wish. Using all the media that you have on your computer as well as the videos that you capture with your camcorder you can edit, save, upload and burn your movies to CD or DVD to share with family and friends. The movie is saved in highly compressed wmv format with excellent picture quality. To - Vivitar DVR 850W | DVR850W User Manual - Page 48
creating a movie. Find the media files on your PC or camcorder that you would like to use in your movie project. • A movie is made up of video and photo files that are places sequentially with accompanying audio and special effects. • Media on your PC can either be inserted directly from the "Folder - Vivitar DVR 850W | DVR850W User Manual - Page 49
are unique compilations of video, picture and audio files that are saved on your PC that you think you might want to use in your movie project " Open Media" button to import media from your Computer to the Video Express • Click on the "Get Media" button to download videos from the camcorder inserted. - Vivitar DVR 850W | DVR850W User Manual - Page 50
• Files that have been placed in the 'Timeline/Storyboard' can be easily moved, arranged and added to or removed. • Use the "Effects" mode to add various special effects and transitions between files can also be inserted to give your movie a smooth, professional look and feel. • - Vivitar DVR 850W | DVR850W User Manual - Page 51
via email, uploaded to the web, copied to a CD or burn to a DVD. Congratulations!! You have created you very own movie using Video Express. For more detailed information of how to use all these features please refer to the Quick Start Help Guide and/or the Show Me How Tour tutorial from within the - Vivitar DVR 850W | DVR850W User Manual - Page 52
For all installation and software related technical support you can email your enquiries to [email protected]. For all hardware and warranty related issue with the camcorder see the next section. Your DVR camcorder is a delicate instrument- please handle it with care. Sakar Warranty Card This - Vivitar DVR 850W | DVR850W User Manual - Page 53
find manuals, software, drivers, and FAQ's at the website. Can't find what you are looking for? Fill out an online ticket and one of our technical support team members will answer your questions or call our tech support department toll free at (877) 397-8200 Technical Specifications Image Sensor - Vivitar DVR 850W | DVR850W User Manual - Page 54
correct direction. ★Replace or recharge the battery. The camcorder does not take pictures. 1. The Memory is full. ★Insert a new memory card. 2. The Memory card is not formatted correctly. ★Format the memory card again or use a new card. Image is blurry or out of focus. 1. The video camcorder - Vivitar DVR 850W | DVR850W User Manual - Page 55
Note: Using Camcorder Underwater The DVR 850W can also be used to capture photos and videos underwater up to a depth of 10 feet/ 3 meters. • Before using the camcorder underwater make sure you know how the camcorder works. Reading through the User Manual will help you get to know your camcorder
-
 1
1 -
 2
2 -
 3
3 -
 4
4 -
 5
5 -
 6
6 -
 7
7 -
8
-
9
-
10
-
11
-
12
-
13
-
14
-
15
-
16
-
17
-
18
-
19
-
20
-
21
-
22
-
23
-
24
-
25
-
26
-
27
-
28
-
29
-
30
-
31
-
32
-
33
-
34
-
35
-
36
-
37
-
38
-
39
-
40
-
41
-
42
-
43
-
44
-
45
-
46
-
47
-
48
-
49
-
50
-
51
-
52
-
53
-
54
-
55
 |
 |

DVR 850W
Underwater Digital
Video Camcorder
Owner’s Manual
© 2009 Sakar International, Inc. All rights reserved.
Windows and the Windows logo are registered trademarks of Microsoft
Corporation.
All other trademarks are the property of their respective companies.