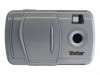
Vivitar V15 V15
Vivitar V15 Manual
 |
View all Vivitar V15 manuals
Add to My Manuals
Save this manual to your list of manuals |
Vivitar V15 manual content summary:
- Vivitar V15 | V15 - Page 1
V15 Freelance Digital Camera Owner's Manual © 2009 Sakar International, Inc. All rights reserved. Windows and the Windows logo are registered trademarks of Microsoft Corporation. All other trademarks are the property of their respective companies. - Vivitar V15 | V15 - Page 2
21 Webcam Mode 22 Everything you need to get the most from your photos 23 Download photos to your PC 26 Viewing Videos 30 Using your Camera as a Webcam 31 Maintenance of Your Digital Camera 35 Sakar Warranty Card 36 Appendix A: Technical Specifications 37 Appendix B: Troubleshooting 38 1 - Vivitar V15 | V15 - Page 3
Introduction Thank you for purchasing the V15 Freelance Vivitar Digital Camera. Everything you need to take quality digital photos and videos is included with your device. Please read this manual carefully FIRST in order to get the most out of your digital camera. Important Notice: Please do not - Vivitar V15 | V15 - Page 4
What your camera includes • Digital Camera • PhoTags Express, WebCam Express and driver installation CD • USB cable • User's Manual in CD • Neck strap • Warranty card • Quick User Guide Computer System Requirements for Windows To be able to download photos and videos to your PC you will need the - Vivitar V15 | V15 - Page 5
A Quick Look at Your Camera 4 - Vivitar V15 | V15 - Page 6
Power/Menu button to power on the camera. After powered on, if you want to make changes to the camera's default settings, please read the instructions of this manual. Warning: Do not remove the batteries before downloading the photos and videos from the camera. Doing so will erase everything in the - Vivitar V15 | V15 - Page 7
the camera software and drivers. In order to install the Software and drivers to download and edit the photos and videos captured using this camera, you need to install the CD installation disk. Insert the installation CD into your CD-ROM drive. A Menu screen will automatically appear. Warning: DO - Vivitar V15 | V15 - Page 8
button. Please review the license terms and click the "I Agree" button to continue. Let the "PhoTags Express" installer create the folder where the program will be installed to, and then click "Install". 7 - Vivitar V15 | V15 - Page 9
Please wait while the application is being installed on your computer. Once the application has been installed on your computer, click the "Finish" button to let the "PhoTags Express" installer finish the installation program. 8 - Vivitar V15 | V15 - Page 10
This will automatically launch the Install shield for the camera driver. Click "Next" to continue. Follow the Setup screens that appear to install the driver for this camera. Once the program has finished installing you will be asked to restart your computer. Please do so. 9 - Vivitar V15 | V15 - Page 11
installed the "PhoTags Express", "WebCam Express" software and the Camera Driver. Camera Modes Note: In order to download the photos and videos captured with this camera you need to install the PhoTags Express, WebCam Express and camera specific driver for this device as described in the previous - Vivitar V15 | V15 - Page 12
button to save your choice. Below is an explanation for each of the Submenus on the Main Menu. Camera Submenu Press the Power/Menu button to enter the Main Menu. By default the camera icon is automatically selected. Press the Shutter button to toggle through the following various options within the - Vivitar V15 | V15 - Page 13
Self-Timer AVI(Video) Continuous Capture Press the Power/Menu button to select and save the mode of your choice. The LCD screen will show your choice with a symbol in the upper left corner. 12 - Vivitar V15 | V15 - Page 14
follows: SXGA (1280x1024) VGA (640x480) QVGA (320x240) Note: At higher resolutions the pictures captured will be clearer but will take up more of the camera`s memory. You will therefore be able to take less photos at higher resolution than at lower resolution. An indication of the number of photos - Vivitar V15 | V15 - Page 15
Compression Rate Submenu Press the Power/Menu button to enter the Main Menu, press the Up button until the Compression Rate icon is selected and then press the Shutter button to toggle between the different compression rate options, and then press the Power/Menu button again to select and save the - Vivitar V15 | V15 - Page 16
the following screen, asking if you wish to Delete All of the photos in the camera. Press the Up button to move between options, select Yes to Delete All, or Please use this feature only after you have downloaded all the images to your computer. Once deleted the images are lost forever and cannot - Vivitar V15 | V15 - Page 17
the battery indicator falls below 35% it is advisable to download the images to your computer as quickly as possible so as not to the camera turns off, the images may be erased from the camera`s memory. Removing the batteries and replacing them with new ones also erases the images from the camera`s - Vivitar V15 | V15 - Page 18
button. A beep will sound and the red LED indicator on the front of the camera will light up, indicating that the photo has been taken. Do not move the camera until you hear the beep. Moving the camera while taking the picture will cause the photo to blur. After each photo is taken - Vivitar V15 | V15 - Page 19
, indicating that photos cannot be taken. In order to continue taking photos you will need to download the photos on the camera to the computer and then delete them from the camera. CONTINUOUS SHOT Your camera can be set up to take 3 photos in one continuous shot. Select the Continuous shot mode - Vivitar V15 | V15 - Page 20
up with the timer mode to take a photo after 10 seconds. Select the Timer shot mode from the camera menu options on the LCD screen. Press the Power/Menu button. Toggle between the camera modes by pressing the Shutter button until the Timer icon appears in the top left corner. Press the - Vivitar V15 | V15 - Page 21
's memory. Note: If you delete photos from your camera before downloading them to your computer the photo is completely erased from your camera's memory and will be lost with no recovery. SLEEP MODE (Automatic Power-Saving) The digital device will go into Sleep Mode automatically after approximately - Vivitar V15 | V15 - Page 22
information on how to work with your photos, please see the Software Installation section in this manual. Capturing Video In order to capture Videos with this Camera the camera has to be set to the Video mode. Select the Video mode from the camera menu options on the LCD screen. Press the Power/Menu - Vivitar V15 | V15 - Page 23
the "Get Photos" section of the software installation for using your Photags Express software application to download photos in JPEG format and videos in AVI format from your camera to your PC. Webcam Mode Photags WebCam Express software allows you to use your camera as a webcam. This application is - Vivitar V15 | V15 - Page 24
on in this guide. Everything you need to get the most from your photos The "PhoTags Express" software that is installed on your computer allows you to edit existing photos that you have on your computer as well as the photos that you have captured and downloaded with your camera. Plug one end - Vivitar V15 | V15 - Page 25
If the Camera is off it will automatically be turned on when the USB cable is properly connected. Click the "PhoTags Express" icon that appears on your desktop to open the "PhoTags Express" Software. From the Main Menu screen that appears, select the "Select Photos", "Enhance Photos" or "Add - Vivitar V15 | V15 - Page 26
Manage your photos by creating countless unique photo collections without duplicating any photos. Burn CD's of any folders for backup and storage. Enhance your photos; Auto Enhance, Crop, Correct Red Eye, Manually Adjust and add Special Effects. Add Active Captions- add Text Captions, Frames, Shapes - Vivitar V15 | V15 - Page 27
, you have the ability to purchase two additional Workshop projects: "Albums" and "Video CD" online, at anytime. 1. To purchase the "Workshop Project" simply click the one you explaining how to easily activate them in the software. Download photos to your PC Transfer Photo and Video images from your - Vivitar V15 | V15 - Page 28
. Select the "Get Photos" button from the top of the PhoTags Express Main Menu screen. The Get Photos Wizard opens. Step 1 - Select the "Dual Mode Camera" option in the Active Devices window on the left and then select either the "Custom" or "Express" copy radial button in the Copy methods box - Vivitar V15 | V15 - Page 29
Add Active Captions to your pictures. You can add a date, keywords, categories and more. Click "Next" to continue. Step 3 - Choose where to place your photos and videos. The default is to place all photos and videos into a folder under the C:\My Documents\ My Pictures folder with the date when the - Vivitar V15 | V15 - Page 30
the media - Photos and Videos on your camera are now downloaded to your computer. Open the "Select Photos" mode of Photags Express to view the thumbnails for all the media. You may now use PhoTags Express to edit your photos, create collections and Burn CD`s. To learn more of how to get the - Vivitar V15 | V15 - Page 31
please refer to the Help Guide in PhoTags Express. Viewing Videos Make sure that your camera is connected to your computer with the USB cable. Open any application that will enable you to view video files (for example Windows Media Player). Videos created and downloaded - Vivitar V15 | V15 - Page 32
. Capturing AVI with WebCam Express Now that you have WebCam Express software installed, you can use it to capture short movies called AVI video files or take JPEG snapshots. The length of time you can record an AVI while the camera is connected to your computer will vary, depending on how much - Vivitar V15 | V15 - Page 33
5. Click the "Capture" button to start recording the video. The recording elapse time will appear under the video. 6. Click the "Pause" button to hold the recording. To continue recording click the "Capture" button again. 7. To finish recording click the "Stop" button. 8. The videos will be - Vivitar V15 | V15 - Page 34
at all times to the computer in order to capture the photos. There are 2 methods to capture and save photos taken with your WebCam Express software. Method 1 - Capture Mode: 1. Position the Webcam so that it is pointing in the direction of the object you wish to photograph. 2. The "image" appears in - Vivitar V15 | V15 - Page 35
picture in the My Documents/ My Pictures/ My WebCam folder on your computer. 6. You may now edit your photos with the "Photags Express" software application by selecting the Photags Express icon on the desktop, and from Main Menu that appears select the "Select Photos" mode. 7. From the directory - Vivitar V15 | V15 - Page 36
the User Settings, go to the "Set User Preferences" section in the Help Guide. PC Webcam: You can use this Webcam to chat with friends and family, sending live video feeds straight to them. Maintenance of Your Digital Camera Digital Camera is a delicate instrument- please handle it with care. 35 - Vivitar V15 | V15 - Page 37
of the problem. Your return address and telephone number (Daytime) MAIL TO ADDRESS BELOW: Sakar International Attention: Service Department 195 Carter Drive Edison, NJ 08817 You may also visit www.sakarhelp.com for further assistance if necessary or call our tech support - Vivitar V15 | V15 - Page 38
(1280x1024) Storage capability (640x480) 15 30 46 70 Interface Power Supply Operating Systems (320x240) 100 138 USB 1.1 2 AAA Battery or USB cable Windows XP and Vista 37 - Vivitar V15 | V15 - Page 39
Information section. If you have determined that you have pictures in your camera and you meet the system requirements, follow the steps below to reinstall the software. Software Re-installation First install the software. Click on Start, Settings, Control Panel and Add/Remove programs. You will - Vivitar V15 | V15 - Page 40
software. Insert the CD that came with your camera. It should automatically run the installation. Restart the computer. Once your computer is back up, plug the camera the "+" next to it should reveal your camera. If not, you will likely see "Digital Still Camera" under "Other Devices" with a brightly - Vivitar V15 | V15 - Page 41
, will the device work? Unfortunately, the system requirements for our digital cameras and webcams require a Windows operating system. There is no Mac driver available and no current plan to develop. Q: If the webcam does not work: Make sure you have connected the webcam correctly into an available
-
 1
1 -
 2
2 -
 3
3 -
 4
4 -
 5
5 -
 6
6 -
 7
7 -
8
-
9
-
10
-
11
-
12
-
13
-
14
-
15
-
16
-
17
-
18
-
19
-
20
-
21
-
22
-
23
-
24
-
25
-
26
-
27
-
28
-
29
-
30
-
31
-
32
-
33
-
34
-
35
-
36
-
37
-
38
-
39
-
40
-
41
 |
 |

V15
Freelance
Digital Camera
Owner’s Manual
© 2009 Sakar International, Inc. All rights reserved.
Windows and the Windows logo are registered
trademarks of Microsoft Corporation.
All other trademarks are the property of their
respective companies.