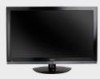
Vizio E320VP E320VP User Manual
Vizio E320VP Manual
 |
UPC - 845226003684
View all Vizio E320VP manuals
Add to My Manuals
Save this manual to your list of manuals |
Vizio E320VP manual content summary:
- Vizio E320VP | E320VP User Manual - Page 1
VIZIO E320VP User Manual Dear VIZIO Customer, Congratulations on your new VIZIO E320VP television purchase. To get the most out of your new VIZIO HDTV, read these instructions before making any adjustments, and retain them for future reference. We hope you will experience many years of enjoyment - Vizio E320VP | E320VP User Manual - Page 2
VIZIO E320VP User Manual Important Safety Instructions Your HDTV is designed and manufactured to operate within defined design limits. Misuse may result in electric shock or fire. To prevent your HDTV from being damaged, the following rules should be observed for the installation, use, and - Vizio E320VP | E320VP User Manual - Page 3
or electric shock. 26. Follow instructions for moving your HDTV. Ensure that the power cord and any other cables are unplugged before moving your HDTV. 27. When unplugging your HDTV, hold the power plug, not the cord. Pulling on the power cord may damage the wires inside the cord and cause fire or - Vizio E320VP | E320VP User Manual - Page 4
VIZIO E320VP User Manual Television Antenna Connection Protection External Television Antenna Grounding If an outside antenna/satellite dish or cable system is to be connected to the TV, make sure that the antenna or cable system is electrically grounded to provide some protection against voltage - Vizio E320VP | E320VP User Manual - Page 5
VIZIO E320VP User Manual Advisory of the DTV Transition The nationwide switch to digital television broadcasting will be complete on June 12, 2009, but your local television stations may switch sooner. After the switch, analog-only television sets that receive TV programming through an antenna will - Vizio E320VP | E320VP User Manual - Page 6
VIZIO E320VP User Manual Table of Contents Important Safety Instructions...2 Television Antenna Connection Protection 4 Advisory of the DTV Transition...5 CHAPTER 1 SETTING UP YOUR HDTV 10 Finding a Location for Your HDTV ...10 Attaching the TV Stand...10 Wall Mounting your HDTV...11 CHAPTER 2 - Vizio E320VP | E320VP User Manual - Page 7
VIZIO E320VP User Manual Slideshow Mode...28 Repeat...28 Sort By ...28 Duration ...28 Slideshow Effect ...28 Thumbnail Size ...28 Info ...28 CHAPTER 8 ADJUSTING YOUR HDTV SETTINGS 29 Using the On-screen Display (OSD) ...29 Input Menu...29 Wide Menu ...30 Normal...30 Wide ...30 Panoramic...30 - Vizio E320VP | E320VP User Manual - Page 8
VIZIO E320VP User Manual CHAPTER 9 MAINTENANCE AND TROUBLESHOOTING 40 Cleaning the TV and Remote Control ...40 Troubleshooting Guide ...41 TV/Display Troubleshooting...41 Audio Troubleshooting ...43 Remote Control Troubleshooting...44 Telephone & Technical Support ...44 CHAPTER 10 SPECIFICATIONS - Vizio E320VP | E320VP User Manual - Page 9
material for future shipping. Package Contents VIZIO E320VP VIZIO remote control VR15 AA batteries for the remote control (2) AC/DC power adapter Detachable base This user manual Quick Setup Guide Registration Card HDTV Accessories and Services Additional certified accessories - Vizio E320VP | E320VP User Manual - Page 10
VIZIO E320VP User Manual Chapter 1 Setting Up Your HDTV Finding a Location for Your HDTV The power consumption of your HDTV is about - Vizio E320VP | E320VP User Manual - Page 11
below. 1. Write down the serial number located on the back of your HDTV in the space provided on page 1 to have it handy if you need to call for support. 2. Remove the stand base and neck: a. Disconnect the cables from your HDTV. b. Place your HDTV face down on a soft, flat surface to prevent damage - Vizio E320VP | E320VP User Manual - Page 12
VIZIO E320VP User Manual Chapter 2 Basic Controls and Connections Front Panel Remote Control Sensor-Point the remote control directly at this window on the lower left corner of your HDTV for the best response to the remote signal. Side Button Controls POWER ( )-Turn your HDTV on by pressing the - Vizio E320VP | E320VP User Manual - Page 13
VIZIO E320VP User Manual Rear Panel Connection 1. USB-Service port for use by a professional service technician. Register your HDTV to receive future product updates including upgrades for these ports. 2. RGB PC-Connect the video and audio from a computer here. Connect a 1/8" mini plug stereo - Vizio E320VP | E320VP User Manual - Page 14
VIZIO E320VP User Manual Chapter 3 VIZIO Remote Control Installing the Batteries 1. Remove the battery cover. 2. Insert two AA batteries into the remote control. Make sure that you match the (+) and (-) symbols on the batteries with the (+) and (-) symbols inside the battery compartment 3. Replace - Vizio E320VP | E320VP User Manual - Page 15
VIZIO E320VP User Manual Remote Control Buttons POWER ( )-Press to turn the TV on from the Standby mode. Press it again to return to the Standby mode. CEC-Supported Buttons: CEC needs to be set up and enabled for these buttons to work. See CEC on page 39 for more information. ● (Record)-Press to - Vizio E320VP | E320VP User Manual - Page 16
that runs when you turn on your TV for the first time. Follow the onscreen directions to easily setup your new HDTV. 1. Insert the batteries into the remote control. 2. Connect the power cord to the power cord connector on the back of your HDTV, and then plug the power cord into an AC wall socket - Vizio E320VP | E320VP User Manual - Page 17
that the AC/DC power adapter is plugged into a correctly grounded electrical outlet or surge protector. 1. Press the power button on the remote control. The VIZIO logo on the front will light up white. 2. Select the input to which your device is connected that provides TV programming (i.e. TV, HDMI - Vizio E320VP | E320VP User Manual - Page 18
VIZIO E320VP User Manual Viewing Digital TV Program Information When the channel is changed or when you press GUIDE, an information header is shown over the picture for a few seconds. Press GUIDE again to display more information about the program and schedule. 18 www.VIZIO.com - Vizio E320VP | E320VP User Manual - Page 19
Description Best (digital) Best (digital Good (analog) HDMI delivers the best image quality of any of the cable types available and it's all done over one cable. You get a great picture and cut down on your cable clutter. HDMI provides digital quality and amazing sound so if your TV has HDMI - Vizio E320VP | E320VP User Manual - Page 20
VIZIO E320VP User Manual Connecting Your Cable/Satellite Box Using HDMI (Best) Cable and Satellite Boxes that have a HDMI digital interface should be connected using HDMI for optimal results. To maintain image quality, use a VIZIO certified HDMI cable. This cable is available in 6, 15, and 30 foot - Vizio E320VP | E320VP User Manual - Page 21
VIZIO E320VP User Manual Using Component Video (Better) Using Component Video (Better) 1. Turn off your HDTV and Cable/Satellite box. 2. Connect the Component cables (green, blue, and red) from your Cable/Satellite box to the COMPONENT jacks on your HDTV. 3. Connect the audio cables (white and red) - Vizio E320VP | E320VP User Manual - Page 22
VIZIO E320VP User Manual Using Coaxial (Antenna) (Good) 1. Turn off the power to your HDTV. 2. Connect the coaxial (RF) connector from your antenna or digital cable to the DTV/TV CABLE/ANTENNA connector on your HDTV. 3. Turn on the power to your HDTV. 4. Select TV using the INPUT button on the - Vizio E320VP | E320VP User Manual - Page 23
Players with DVI VIZIO E320VP User Manual 1. Turn off your HDTV and DVD player. 2. Using a HDMI-DVI cable, connect the DVI end to your DVD player and the HDMI end to the HDMI 1 or 2 jack on your HDTV. 3. Turn on the power to your HDTV and your DVD player. 4. Select HDMI-1 or HDMI-2 using the INPUT - Vizio E320VP | E320VP User Manual - Page 24
VIZIO E320VP User Manual Using Composite (AV) Video (Good) 1. Turn off the power to your HDTV and DVD player. 2. Connect the yellow video cable connector from your DVD player to the green Component Y jack on the side of your HDTV. 3. Connect the audio cables (white and red) from your DVD player to - Vizio E320VP | E320VP User Manual - Page 25
Your VCR or Video Camera VIZIO E320VP User Manual Note: Refer to your VCR or Video Camera user manual for more information about the video output requirements of the product. 1. Turn off the power to your HDTV and VCR or video camera. 2. Connect the yellow video cable connector from your VCR or - Vizio E320VP | E320VP User Manual - Page 26
VIZIO E320VP User Manual Connecting a Computer RGB (VGA) COMPUTER 1. Set computer to a resolution supported by your HDTV (see Preset PC Resolutions on page 46). If your computer supports it, we recommend 1366x768. 2. Turn off the power to your HDTV and computer. 3. Connect the RGB (VGA) cable from - Vizio E320VP | E320VP User Manual - Page 27
VIZIO E320VP User Manual Chapter 7 Viewing Pictures Connect a USB flash drive to the USB port on your HDTV to view pictures. USB drives that are USB 2.0 and FAT or FAT32 are supported. The USB port does not support external hard drives or USB hubs. If your USB drive is oversized and does not - Vizio E320VP | E320VP User Manual - Page 28
VIZIO E320VP User Manual Adjusting Photo Settings When viewing pictures you can adjust various settings, including slideshow, picture duration, etc. 1. Insert a USB device containing pictures and select the folder or files that you want to play. 2. Press MENU. The Picture menu will be displayed. 3. - Vizio E320VP | E320VP User Manual - Page 29
VIZIO E320VP User Manual Chapter 8 Adjusting Your HDTV Settings Using the On-screen Display (OSD) The remote control or the control buttons on the side of the TV can control all the function settings. The OSD allows you to adjust contrast, brightness and other settings. The TV will save changes made - Vizio E320VP | E320VP User Manual - Page 30
VIZIO E320VP User Manual Wide Menu Select how the picture displays on the screen. As you select an option, you will see the screen adjusting to the different sizes. The options vary depending on the selected input and the TV program: Normal The original 4:3 aspect ratio (1.33:1 source) is preserved, - Vizio E320VP | E320VP User Manual - Page 31
HDMI, COMP, etc) remembers the custom setting you created. Select Custom to manually adjust Backlight, Brightness, Contrast, Color, Tint, Sharpness, and to access the More menu where further adjustments can be made. Backlight Adjust the LED brightness to affect the overall brilliance of the picture - Vizio E320VP | E320VP User Manual - Page 32
VIZIO E320VP User Manual Tint Adjust the hue of the picture. The easiest way to set tint is to look at picture. Auto Phase (for Component input only) The TV will automatically look for the phase of the signal to fine tune the picture. Note: The Size & Position function is only available in HDMI - Vizio E320VP | E320VP User Manual - Page 33
VIZIO E320VP User Manual Advanced Picture To select the options in the Advanced Picture sub-menu, press ►. A new menu will be displayed showing the advanced functions available for fine tuning of the picture. Noise Reduction This feature diminishes picture artifacts caused by the digitizing of - Vizio E320VP | E320VP User Manual - Page 34
VIZIO E320VP User Manual TV Speakers Turn the internal speakers On or Off. You may want to turn the internal speakers off when listening to the audio through your Home Theater System. Advanced Audio To select the options in the Advanced Audio sub-menu, press ►. A new menu will be displayed showing - Vizio E320VP | E320VP User Manual - Page 35
VIZIO E320VP User Manual Settings Menu Adjust TV options including the tuner, parental controls, menu language, and date and time. Tuner Note: The tuner option can only be selected when your HDTV is in TV input mode. Tuner Mode Select Cable is transmitting the audio with the program you are - Vizio E320VP | E320VP User Manual - Page 36
VIZIO E320VP User Manual Name Input This feature makes it easier for you to recognize the devices you have connected to your HDTV when you press INPUT. For example, if you have a Blu-Ray DVD player connected to the HDMI-1 input, you can have the input label read HDMI-1 BluRay instead of just HDMI-1. - Vizio E320VP | E320VP User Manual - Page 37
VIZIO E320VP User Manual USA-TV Note: When Rating Enable is OFF, the USA-TV Rating adjustments are not available. Press OK to block (locked) or allow (unlocked) channels by the following US TV ratings: TV-Y - All children TV-Y7 - Older children TV-G - General audience TV-PG - Guidance suggested TV- - Vizio E320VP | E320VP User Manual - Page 38
VIZIO E320VP User Manual CAN-French Note: When Rating Enable is OFF, Canadian French Rating use in the event the parental control system is ever updated. Your HDTV will be able to receive and update the new rating system to it. Block Unrated TV Block programming that does not have a rating. Change - Vizio E320VP | E320VP User Manual - Page 39
VIZIO E320VP User Manual CEC Consumer Electronics Control allows you to control other devices using your HDTV remote control when those devices are connected via HDMI. For example, if a CEC-supported Blu-ray DVD player is connected to your HDTV through HDMI-2 and that player is powered on, your HDTV - Vizio E320VP | E320VP User Manual - Page 40
. Choose from Small, Medium, or Large. Info When set to On, information about the picture briefly appears on your HDTV. Chapter 9 Maintenance and Troubleshooting Cleaning the TV and Remote Control 1. Remove the power adapter cable from your HDTV. 2. Use a soft cloth moistened with diluted neutral - Vizio E320VP | E320VP User Manual - Page 41
VIZIO E320VP User Manual Troubleshooting Guide If your HDTV fails or the performance changes dramatically, check the display in accordance with the following instructions. Remember to check the peripherals to pinpoint the source of the failure. If the display still fails to perform as expected, - Vizio E320VP | E320VP User Manual - Page 42
HDTV and move the antenna to an alternate location in the room or close to a window. Reset Picture settings to default in the Picture Menu. Check video/device cable integrity. Try another cable (HDMI, AV/Composite, Coax etc.) Perform a power cycle by removing the AC power cable from the back - Vizio E320VP | E320VP User Manual - Page 43
input. Perform a power cycle by removing the AC power cable from the back of your television for 30 seconds. Reinsert the power cable and power on the television. Your HDTV retains the viewing mode from the last time you used a particular input (Comp/AV, HDMI and TV). Your HDTV is an ideal - Vizio E320VP | E320VP User Manual - Page 44
VIZIO E320VP User Manual Remote Control Troubleshooting Issue Solution The remote control will not work Point the remote control directly at the remote sensor on your TV. Remove any obstacles between the remote control and the remote sensor. Replace dead batteries with new ones. The - Vizio E320VP | E320VP User Manual - Page 45
1x USB Outputs 1x 5.1 S/PDIF Optical Digital Audio, 1x Headphone Features 60 Hz E-LED panel, 1080i HDTV, HDMI v1.3, 3D Comb Filter, Digital Audio Amplifier, Dolby Digital for ATSC/QAM, Signal Compatibility: 480I(SDTV), 480P(EDTV), 720P(HDTV), 1080i(HDTV),Channel Skip/Add, VIDEO/INPUT Naming - Vizio E320VP | E320VP User Manual - Page 46
VIZIO E320VP User Manual E320VP Specifications Gross Weight Certifications Compliances 18.74 lbs; 8.5 kg CSA, CSA-US, FCC Class B Energy Star 4.1. ATSC Spec A/65, EIA/CEA-766-A Compliance Caution: Always use a power cable that is properly grounded. Use the AC cords listed below for each area. - Vizio E320VP | E320VP User Manual - Page 47
VIZIO E320VP User Manual Preset PC Resolutions If connecting to a PC through the RGB PC input, set the TV timing mode to VESA 1366 x 768 at 60Hz for best picture quality (refer to the graphic card's user guide for questions on how to set this timing mode). See the table below for the factory preset - Vizio E320VP | E320VP User Manual - Page 48
utilize either the original carton box and shipping material or a replacement box and material provided by VIZIO. VIZIO technical support will provide instructions for packing and shipping the unit to the VIZIO service center. Limitations and Exclusions VIZIO's one-year limited warranty only covers - Vizio E320VP | E320VP User Manual - Page 49
26 Connecting Equipment Cable Box 20 DVD Player 22 Satellite Box 20 Contents 9 Contrast 31 Controls Front Panel 12 Jag Wheel 12 Daylight Savings setting 38 DTV Transition 5 DVD Player Connecting 22 EPG 18 Getting Started 16 Grounding 4 GUIDE Button 18 HDMI 19 HDTV Location 10 Home - Vizio E320VP | E320VP User Manual - Page 50
28, 39 Specifications 45 Technical Support 44 Time Zone setting 38 Tint 32 Troubleshooting 41 Tuner Menu Analog MTS 35 Auto Search 35 Skip Channel 35 Tuner Mode 35 TV Menu 29 Partial Channel Search 35 TV Stand Attaching 10 USB Port 27 Video Adapter cable 19 Wall mounting 11 Warranty
-
 1
1 -
 2
2 -
 3
3 -
 4
4 -
 5
5 -
 6
6 -
 7
7 -
8
-
9
-
10
-
11
-
12
-
13
-
14
-
15
-
16
-
17
-
18
-
19
-
20
-
21
-
22
-
23
-
24
-
25
-
26
-
27
-
28
-
29
-
30
-
31
-
32
-
33
-
34
-
35
-
36
-
37
-
38
-
39
-
40
-
41
-
42
-
43
-
44
-
45
-
46
-
47
-
48
-
49
-
50
 |
 |
VIZIO E320VP User Manual
Version 6/15/2010
1
www.VIZIO.com
Dear VIZIO Customer,
Congratulations on your new VIZIO E320VP television purchase. To get
the most out of your new VIZIO HDTV, read these instructions before
making any adjustments, and retain them for future reference. We hope
you will experience many years of enjoyment from your new VIZIO High
Definition Television.
For assistance, call 877-MYVIZIO (877-698-4946) or e-mail us at
www.VIZIO.com.
To purchase or inquire about accessories and installation services for your
VIZIO HDTV, visit our website at www.VIZIO.com or call toll free at 888-
849-4623.
We recommend you register your VIZIO HDTV either at our website
www.VIZIO.com or fill out and mail your registration card.
For peace of
mind and to protect your investment beyond the standard warranty, VIZIO
offers on-site extended warranty service plans. These plans give additional
coverage during the standard warranty period. Visit our website or call us
to purchase a plan.
Write down the serial number located on the back of your HDTV for easy
reference when obtaining warranty support:
Serial #: _____________________
Purchase Date _____________________
VIZIO is a registered trademark of VIZIO, Inc. dba V, Inc.
HDMI logo and “High Definition Multimedia Interface” are registered trademarks of HDMI Licensing LLC.
Manufactured under license from Dolby Laboratories.
Dolby and the double-D symbol are trademarks of Dolby Laboratories.
and
are trademarks of SRS Labs, Inc.
TruSurround HD and TruVolume technologies are incorporated under license from SRS Labs, Inc.
This product qualifies for ENERGY STAR in the “factory default (Home Use)” setting and this is the setting in which
power savings will be achieved. Changing the factory default picture setting or enabling other features will increase
power consumption that could exceed the limits necessary to qualify for Energy Star rating.
THE TRADEMARKS SHOWN HEREIN ARE THE PROPERTY OF THEIR RESPECTIVE OWNERS; IMAGES USED
ARE FOR ILLUSTRATION PURPOSES ONLY. VIZIO, THE V LOGO, WHERE VISION MEETS VALUE AND OTHER
VIZIO TRADEMARKS ARE THE INTELLECTUAL PROPERTY OF VIZIO INC.
PRODUCT SPECIFICATIONS ARE SUBJECT TO
CHANGE WITHOUT NOTICE. © 2010 VIZIO INC. ALL RIGHTS RESERVED.