Vizio E322AR E322AR User Manual
Vizio E322AR Manual
 |
View all Vizio E322AR manuals
Add to My Manuals
Save this manual to your list of manuals |
Vizio E322AR manual content summary:
- Vizio E322AR | E322AR User Manual - Page 1
USER GUIDE MOMDODEELLSS // E3D320VX // E3DE43202VX2AR // E3DE44702VX2AR INSTALLING YOUR new TV CONTROLS & CONNECTIONS CONNECTING YOUR DEVICES USING THE ON-SCREEN MENU USING THE USB MEDIA PLAYER USING VIZIO INTERNET APPS TROUBLESHOOTING & SUPPORT Help, SPECs, warranty & LEGAL - Vizio E322AR | E322AR User Manual - Page 2
and this is the setting in which power savings will be achieved. Changing the factory default picture settings or enabling other features will increase power consumption that could exceed the limits necessary to qualify for ENERGY STAR rating. SRS StudioSound HD and SRS TruVolume are trademarks - Vizio E322AR | E322AR User Manual - Page 3
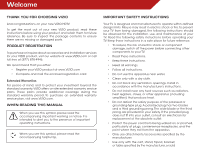
period. To purchase an extended warranty service plan, visit www.VIZIO.com. When Reading this Manual When you see this symbol, please read the accompanying important warning or notice. It is intended to alert you to the presence of important operating instructions. When you see this symbol, please - Vizio E322AR | E322AR User Manual - Page 4
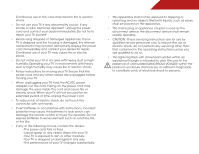
of power supplied to your home, consult your dealer or local power company. • Do not apply pressure or throw objects at your TV. This may compromise the integrity of the display. The manufacturer's warranty does not cover user abuse or improper installations. • The power cord must be replaced when - Vizio E322AR | E322AR User Manual - Page 5
your TV will not be used for an extended period of time, unplug the power cord. • To reduce risk of electric shock, do not touch the connector with wet hands. • Insert batteries in accordance with instructions. Incorrect polarities may cause the batteries to leak which can damage the remote control - Vizio E322AR | E322AR User Manual - Page 6
turn off their analog signal and switch to digital-only broadcasting. Analog-only TVs should continue to work as before to receive low power, Class A or translator television stations and with cable and satellite TV services .htm Your TV comes with a built-in tuner capable of processing digital broadcasts. - Vizio E322AR | E322AR User Manual - Page 7
for long periods of time, unplug the TV from the wall outlet and disconnect the antenna or cable system. Power Lines Do not locate the antenna near overhead light or power circuits, or where it could fall into such power lines or circuits. Remember, the screen of the coaxial cable is intended to be - Vizio E322AR | E322AR User Manual - Page 8
the Package Contents 3 Installing the TV 3 Installing the TV Stand 3 Installing the TV on a Wall 4 Controls and Connections 5 Rear Panel 5 Side Panel 6 Front Panel 7 Remote Control 8 Replacing the Batteries 9 Connecting Your Devices 10 Connecting A Device 10 Connecting A PC 11 - Vizio E322AR | E322AR User Manual - Page 9
the CEC Settings 32 Turning the VIZIO Logo On or Off 33 Using the Help Menu 33 Displaying System Information 34 Resetting the TV Settings 34 Restoring the TV to Factory Default Settings 34 Using Guided Setup 35 Using the Info Window 36 Using the USB Media Player 37 Using the USB Media - Vizio E322AR | E322AR User Manual - Page 10
improperly moved • If an earthquake occurs and the TV is not properly secured VIZIO LCD HDTV MODELS n E322AR n E422AR VIZIO QUICK START GUIDE SMART TV FULL USER MANUAL AVAILABLE AT VIZIO.COM Quick Start Guide Remote Control with Batteries 3 x M4 14mm Screws Package Contents 3 TV on Stand - Vizio E322AR | E322AR User Manual - Page 11
screws. 4. Attach your TV and wall mount to the wall, carefully following the instructions that came with your mount. Use only with a UL-listed wall mount bracket rated for the weight/load of this TV. See Appendix B - Specifications for the weight of this TV. For some wall mounts, you may want to - Vizio E322AR | E322AR User Manual - Page 12
Controls and Connections Rear Panel 2 Coaxial - Connect coaxial cable from cable, satellite, or antenna. Ethernet - Connect ethernet cable from home network. Stereo Audio Out - Connect 3.5mm audio device, such as sound bar. Optical Audio Out - Connect optical/SPDIF audio device, such as home audio - Vizio E322AR | E322AR User Manual - Page 13
Side Panel POWER - Turn TV off or on. MENU - Open the on-screen menu. CHANNEL UP/DOWN - Change the channel. MENU CH + CH - VOLUME UP/DOWN - Increase or decrease volume level INPUT - Change input source. INPUT 6 2 Side Panel - Vizio E322AR | E322AR User Manual - Page 14
2 Front Panel REMOTE SENSOR When using the remote, aim it directly at this sensor. Front Panel 7 - Vizio E322AR | E322AR User Manual - Page 15
on. Number Pad Manually enter a channel. Wide Switch the display mode. App launcher Quickly launch the pictured app. Power Turn TV on or off. Info Display the info window. Menu Display the on-screen menu. Arrow Navigate the on-screen menu. Guide Display the info window. V Button Open the VIA dock - Vizio E322AR | E322AR User Manual - Page 16
the Batteries 1. Remove the battery cover. 2. Insert two batteries into the remote control. Make sure that the (+) and (-) symbols on the batteries match the (+) and (-) symbols inside the battery compartment. 3. Replace the battery cover. • Use only good quality batteries. • Inserting the batteries - Vizio E322AR | E322AR User Manual - Page 17
has a video port that matches an available port on the TV (HDMI, Component, etc). 2. Turn the TV and your device off. 3. Connect the appropriate cable (not included) to the TV and the device. 4. Turn the TV and your device on. Set the TV's input to match the connection you used (HDMI-1, HDM1-2, etc - Vizio E322AR | E322AR User Manual - Page 18
3.5mm cable (not included) to your PC and the PC Audio In port on the back of the TV. This cable transmits audio. 3. Set your PC's resolution to match the resolution of your TV. See Appendix B - Specifications. 3 Personal Computer RGB Cable (For Video) 3.5mm Cable (For Audio) CONNECTING A PC 11 - Vizio E322AR | E322AR User Manual - Page 19
port that matches an available port on the TV (Optical, 3.5mm, etc). 2. Turn the TV and your audio device off. 3. Connect the appropriate cable (not included) to the TV and the device. 4. Turn the TV and your device on. 3 Home Audio Receiver VIZIO Sound Bar GOOD 3.5mm Cable BETTER Optical/SPDIF - Vizio E322AR | E322AR User Manual - Page 20
Wired or Wireless connection. Connecting to a Wired Network (Best) 1. Connect an ethernet cable to your router and to the ethernet port on the back of the TV. See below. 2. Use the Guided Network Setup to configure the TV. See Using Guided Setup on page 35 Connecting to a Wireless Network 1. Ensure - Vizio E322AR | E322AR User Manual - Page 21
on the remote. The TV powers on and the Setup App starts. Use the Up/Down Arrow buttons on the remote to highlight Home Use and press OK. 4. Select the name of your wireless network from the list of available networks and press OK. Enter the network key using the on-screen keyboard, then highlight - Vizio E322AR | E322AR User Manual - Page 22
the sleep timer • Adjust the picture settings • Adjust the audio settings • Change network settings • Change TV settings • Access the help menu Navigating the On-Screen Menu To open the on-screen menu, press the MENU button on the remote. Use the Arrow buttons to highlight a menu option, and - Vizio E322AR | E322AR User Manual - Page 23
first change the input source in the on-screen menu. To change the input device: 1. Press the MENU button on the remote. The on-screen menu is displayed. 2. Use the Arrow buttons on the remote to highlight the Settings icon and press OK. The TV Settings menu is displayed. 3. Use the Up/Down Arrow - Vizio E322AR | E322AR User Manual - Page 24
you are viewing is not being broadcast with closed captions, the TV will not display them. To activate or deactivate closed captions: 1. Press the MENU button on the remote. The on-screen menu is displayed. 2. Use the Arrow buttons on the remote to highlight the CC icon and press OK. The Closed - Vizio E322AR | E322AR User Manual - Page 25
OK. The Auto Power-Off menu is displayed. 2. Highlight Off or 10 min and press OK. Press Exit. Adjusting the Picture Settings Your TV display can be adjusted to suit your preferences and viewing conditions. To adjust the picture settings: 1. Press the MENU button on the remote. The on-screen menu is - Vizio E322AR | E322AR User Manual - Page 26
you to manually change each of the picture settings: Backlight - Adjusts the brightness to affect the overall brilliance of the picture. This option is not available unless Ambient Light Sensor is set to OFF. See on page 19. Brightness - Adjusts the black level of the picture. When this setting is - Vizio E322AR | E322AR User Manual - Page 27
5 backlight for the best picture. Select Off, Low, Medium, or High. 4. When you have finished adjusting the Advanced Picture Settings, press the EXIT button on the remote. Adjusting the Color Temperature Adjusting the color temperature will change the "warmness" or "coolness" of the white areas of - Vizio E322AR | E322AR User Manual - Page 28
on the remote. Resetting the Picture Settings To reset the picture settings to the factory default settings: 1. From the Picture menu, use the Arrow buttons to highlight More, then press OK. 2. Use the Arrow buttons on the remote to highlight Reset Picture Mode, then press OK. The TV displays, "Are - Vizio E322AR | E322AR User Manual - Page 29
settings. (This setting is only available when SRS StudioSound HD is set to Standard) • Reset Audio Mode - Restores the audio settings to the factory defaults. See Resetting the Audio Settings on page 23. 4. When you have finished adjusting the audio settings, press the EXIT button on the remote - Vizio E322AR | E322AR User Manual - Page 30
home theater system controls. 3. When you have finished adjusting the advanced audio settings, press the EXIT button on the remote. 5 Resetting the Audio Settings To reset the audio settings to the factory default settings: 1. Press the MENU button on the remote. The on-screen menu is displayed - Vizio E322AR | E322AR User Manual - Page 31
is being broadcast: If your TV is connected to a network with an Ethernet cable, you will not see the wireless network connection menu. You must disconnect the Ethernet cable to set up a wireless network connection. 1. Press the MENU button on the remote. The on-screen menu is displayed. 2. Use the - Vizio E322AR | E322AR User Manual - Page 32
menu, highlight Manual Setup and press OK. The IP Setting menu is displayed. 2. Use the Arrow and OK buttons to adjust each setting: • DHCP - (Dynamic Host Configuration Protocol) This setting must be turned Off to change any of the other settings. • IP Address - The IP address assigned to the TV - Vizio E322AR | E322AR User Manual - Page 33
source • Set up the TV tuner • Name the TV inputs • Set up parental controls • Change the on-screen menu language • Set the time • Adjust the CEC settings • Adjust the VIZIO logo settings Changing the Input Source To quickly access the Input Source menu, press the INPUT button on the remote. To - Vizio E322AR | E322AR User Manual - Page 34
button on the remote. To add a single new analog channel: 1. From the Tuner Settings remote to enter the number of the channel you are adding. 3. Highlight Add Channel and press OK. The TV scans for the channel. 4. When the TV is done scanning for the channel, press the EXIT button on the remote - Vizio E322AR | E322AR User Manual - Page 35
, use the parental controls. See Using the Parental Controls on page 29. To remove a channel: 1. From the Tuner Settings menu, highlight Skip Channel and press OK. The Skip Channel menu is displayed. 2. For each channel you wish to remove, use the Up/Down Arrow buttons on the remote to highlight the - Vizio E322AR | E322AR User Manual - Page 36
the TV from displaying certain channels or programs without a password. Accessing the Parental Controls Menu To access the Parental Controls menu: 1. Press the MENU button on the remote. The on-screen menu is displayed. 2. Use the Arrow buttons on the remote to highlight the Settings icon and - Vizio E322AR | E322AR User Manual - Page 37
. 5. Press the EXIT button on the remote. Resetting the Content Locks To reset the content locks to the factory-default settings: 1. From the Parental Controls menu, highlight RESET LOCKS and press OK. The TV displays, "Are you sure you want to RESET ALL LOCKS SETTINGS to the factory defaults - Vizio E322AR | E322AR User Manual - Page 38
button on the remote. Changing the On-Screen Menu Language Your TV can display the on-screen menu in different languages. To change the on-screen menu language: 1. Press the MENU button on the remote. The on-screen menu is displayed. 2. Use the Arrow buttons on the remote to highlight the Settings - Vizio E322AR | E322AR User Manual - Page 39
the CEC Settings The CEC function on your TV enables you to control HDMI-connected devices with the included remote without any additional programming. Not all HDMI devices support CEC. See your device's user manual for details. 1. Press the MENU button on the remote. The on-screen menu is - Vizio E322AR | E322AR User Manual - Page 40
VIZIO Logo and press OK. 4. Use the Up/Down Arrow buttons to select On or Off, then press OK. Using the Help Menu You can use the TV's Help menu to: • Read the user manual • Display system information • Reset the TV settings • Restore the TV to its factory default settings • Get guided setup - Vizio E322AR | E322AR User Manual - Page 41
When you are finished reviewing the system information, press the EXIT button on the remote. Resetting the TV Settings To reset the TV's picture and audio settings: 1. Press the MENU button on the remote. The on-screen menu is displayed. 2. Use the Arrow buttons on the remote to highlight the Help - Vizio E322AR | E322AR User Manual - Page 42
is displayed. 3. Highlight Guided Setup and press OK. 4. Highlight the guided setup you want to access and press OK: • Tuner Setup - Set up the TV tuner. • Network Setup - Connect the TV to your network. 5. Follow the on-screen instructions. When finished, press the EXIT button on the remote. 35 - Vizio E322AR | E322AR User Manual - Page 43
Info Window The Info Window can be displayed by pressing the INFO or GUIDE button on the remote: • Press the INFO or GUIDE button one time to display channel and input information. • Press the INFO or GUIDE button two times to display the program title and closed captioning information. • Press the - Vizio E322AR | E322AR User Manual - Page 44
and play music, video, or photos. USB PORT Connecting a USB Thumb Drive to the TV 1. Turn the TV off. Connect your USB thumb drive to the USB port on the back of the TV. 2. Press the Power/Standby button on the remote or touch the Power control on the side of the TV to turn it on. Do not remove the - Vizio E322AR | E322AR User Manual - Page 45
Back Button Highlight this button and press OK if you would like to return to the previous screen. Connected Source Displays connected USB device. Current Folder Playback Controls Use to control audio playback. Highlight Play/ Pause, Previous, or Next and press OK. Toggle Music/ Photos Sort by Album - Vizio E322AR | E322AR User Manual - Page 46
connected USB device. Back Button Highlight this button and press OK if you would like to return to the previous screen. Back Button Highlight OK buttons on the remote. Current Folder Start Fullscreen Slideshow Sort by Name or Date View Thumbnails/ Folders Adjust Slideshow Settings Toggle - Vizio E322AR | E322AR User Manual - Page 47
Apps that allow you to watch movies and TV shows, listen to music, get weather and news information, and more-all on demand! A high-speed internet connection is required to receive product updates and to access online content. Using the VIA Shortcut Buttons Use the four colored buttons on the remote - Vizio E322AR | E322AR User Manual - Page 48
of the screen.) 3. Press the Yellow VIA Shortcut button. 4. Highlight Delete App and press OK. The TV displays, "Are you sure you want to delete this bookmark?" 5. Highlight Yes, delete and press OK. Creating and Managing User Profiles User profiles allow you to keep a customized set of Apps in the - Vizio E322AR | E322AR User Manual - Page 49
security answer using the on-screen keyboard then highlight OK and press OK. The Create Profile menu is displayed. 12. Highlight Done and press OK. Creating a New User Profile To create a new user profile: 1. Press the V Button on the remote. 2. Highlight the My Profile App by scrolling left and - Vizio E322AR | E322AR User Manual - Page 50
remote. (The highlighted App is in the lower left corner of the screen.) 3. Select the App by pressing the OK button. The Profile App is displayed. 4. Highlight System Settings and press OK. The System Settings menu is displayed. 5. Highlight Restore Factory Settings and press OK. The TV displays - Vizio E322AR | E322AR User Manual - Page 51
United States. We can help with: • New Product Setup • Connecting Your Devices • Technical Problems • And More Phone: (877) 878-4946 (TOLL-FREE) Email: [email protected] Web: www.VIZIO.com/support Hours of operation: Monday - Friday: 5 am to 9 pm (PST) Saturday - Sunday: 8 am to 4 pm (PST) We - Vizio E322AR | E322AR User Manual - Page 52
to turn the TV on. The power is on, but there is no image on the screen. • Ensure all cables are securely attached to the TV. • Ensure all devices are connected correctly. Devices differ; see your device's user manual for details. • Adjust Brightness, Contrast, or Backlight. • Press the INPUT button - Vizio E322AR | E322AR User Manual - Page 53
H-Size and V-Position in the on-screen menu are set correctly. • If you are using TV, AV, or Component with 480i input, press the WIDE button on the remote to change the screen mode. The TV has pixels (dots) that are always dark or always lit. • Your HDTV is precision-manufactured using an extremely - Vizio E322AR | E322AR User Manual - Page 54
Stand: Weight w/ Stand: w/o Stand: TV Type: Refresh Rate: Maximum Resolution: Pixel Pitch: Dynamic Contrast Ratio: Response Time: Brightness: Viewing Angle: HDMI Inputs: Component Video Inputs: Composite Inputs: RF Antenna Input: USB 2.0 Ports: RGB Inputs: Ethernet: Wireless: E322AR 32" Class 32 - Vizio E322AR | E322AR User Manual - Page 55
Outputs: OSD Language: Ambient Light Sensor: Remote Control Model: Certifications: Compliance: Voltage Range: Power Consumption: Standby Power: Zero Bright Pixel Guarantee: E322AR 3.5mm Stereo Optical Digital English, Spanish, French Yes XRT110 FCC Class B, HDMI 1.4, UL, CUL, Dolby Digital Energy - Vizio E322AR | E322AR User Manual - Page 56
operation, improper voltage supply or power surges, signal issues, damages from shipping, acts of God, any type of customer misuse, modifications or adjustments, as well as installation and set-up issues or any repairs attempted by anyone other than by aVIZIO authorized service center.Products with - Vizio E322AR | E322AR User Manual - Page 57
void the user's authority to operate this equipment. Caution Always use an AC/DC power adapter that is properly grounded. Use the AC cords listed below for each area. USA: UL Canada: CSA Germany: VDE UK: BASE/BS Japan: Electric Appliance Control Act Open Source Software Notice Your VIA device may - Vizio E322AR | E322AR User Manual - Page 58
VIZIO HD TV, including all its component parts, original media, printed materials and this License Agreement; (b) you do not retain any copies of the VIZIO Software, full or partial,including copies stored on a computer or other storage device; and (c) the party receiving the VIZIO HD TV and VIZIO - Vizio E322AR | E322AR User Manual - Page 59
software updates, product support and other services to you, including additional or different VIA Services related to the VIZIO Software and to verify compliance with the terms of this License Agreement. VIZIO MAY NOT APPLY TO YOU.THE LIMITED WARRANTY SET FORTH HEREIN IS THE ONLY WARRANTY MADE TO - Vizio E322AR | E322AR User Manual - Page 60
SET FORTH ABOVE AND TO THE MAXIMUM EXTENT PERMITTED BY APPLICABLE LAW, THE VIZIO SOFTWARE AND VIA SERVICES ARE nuclear, chemical or biological weapons. 14. Controlling Law and Severability. This License Agreement Convention on Contracts for the International Sale of Goods, the application of which - Vizio E322AR | E322AR User Manual - Page 61
MODELS // E3D320VX // E3D420VX // E3D470VX © 2012 VIZIO INC. All rights reserved. 120514OC-A
-
 1
1 -
 2
2 -
 3
3 -
 4
4 -
 5
5 -
 6
6 -
 7
7 -
8
-
9
-
10
-
11
-
12
-
13
-
14
-
15
-
16
-
17
-
18
-
19
-
20
-
21
-
22
-
23
-
24
-
25
-
26
-
27
-
28
-
29
-
30
-
31
-
32
-
33
-
34
-
35
-
36
-
37
-
38
-
39
-
40
-
41
-
42
-
43
-
44
-
45
-
46
-
47
-
48
-
49
-
50
-
51
-
52
-
53
-
54
-
55
-
56
-
57
-
58
-
59
-
60
-
61
 |
 |

USER
GUIDE
INSTALLING YOUR NEW TV
CONTROLS & CONNECTIONS
CONNECTING YOUR DEVICES
USING THE ON-SCREEN MENU
USING THE USB MEDIA PLAYER
USING VIZIO INTERNET APPS
TROUBLESHOOTING & SUPPORT
HELP, SPECS, WARRANTY & LEGAL
MODELS
//
E3D320VX
//
E3D420VX
//
E3D470VX
MODELS
E322AR
E422AR