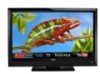
Vizio E422VLE User Manual
Vizio E422VLE Manual
 |
View all Vizio E422VLE manuals
Add to My Manuals
Save this manual to your list of manuals |
Vizio E422VLE manual content summary:
- Vizio E422VLE | User Manual - Page 1
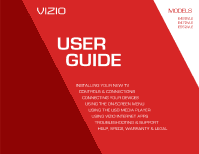
MODELS MODELS // E3D320VX // E3D420VX // E3D470VX E422VLE E472VLE E552VLE USER GUIDE INSTALLING YOUR NEW TV CONTROLS & CONNECTIONS CONNECTING YOUR DEVICES USING THE ON-SCREEN MENU USING THE USB MEDIA PLAYER USING VIZIO INTERNET APPS TROUBLESHOOTING & SUPPORT HELP, SPECS, WARRANTY & LEGAL - Vizio E422VLE | User Manual - Page 2
This product qualifies for ENERGY STAR in the "factory default" setting and this is the setting in which power savings will be achieved. Changing the factory default picture settings or enabling other features will increase power consumption that could exceed the limits necessary to qualify for - Vizio E422VLE | User Manual - Page 3
on your new VIZIO HDTV. To get the most out of your new VIZIO product, read these instructions before using your product and retain them for future reference. Be sure to inspect the package contents to ensure there are no missing or damaged parts. IMPORTANT SAFETY INSTRUCTIONS Your TV is designed - Vizio E422VLE | User Manual - Page 4
with the apparatus. When a cart is used, use caution when moving the cart/apparatus combination to avoid injury from tip-over. - Vizio E422VLE | User Manual - Page 5
TV will not be used for an extended period of time, unplug the power cord. • To reduce risk of electric shock, do not touch the connector with wet hands. • Insert batteries in accordance with instructions. Incorrect polarities may cause the batteries to leak which can damage the remote control - Vizio E422VLE | User Manual - Page 6
to find out when they will turn off their analog signal and switch to digital-only broadcasting. Analog-only TVs should continue to work as before to receive low power, Class A or translator television stations and with cable and satellite TV services, gaming consoles, VCRs, DVD players, and - Vizio E422VLE | User Manual - Page 7
and static charges. Article 810 of the National Electrical Code, ANSI/NFPSA 70, provides information with regard to proper grounding of the mast and supporting structure, grounding of the lead-in wire to an antenna discharge unit, size of the grounding conductors, location of antenna discharge unit - Vizio E422VLE | User Manual - Page 8
the TV...3 Installing the TV Stand...3 Installing the TV on a Wall...4 Adjusting the Picture Settings...18 Adjusting the Advanced Picture Settings...19 Adjusting the Color Temperature...20 Adjusting the Picture Size and Position...21 Resetting the Picture Settings ...21 Adjusting the Audio Settings - Vizio E422VLE | User Manual - Page 9
...41 Creating and Managing User Profiles...41 Creating an Owner PIN...41 Creating a New User Profile...42 Removing a User Profile...43 Restoring the VIA Dock to the Factory Default Settings...43 Troubleshooting & Technical Support...44 Specifications...47 Limited Warranty...49 Legal & Compliance - Vizio E422VLE | User Manual - Page 10
: • It is placed on an uneven, unstable, or non-level surface • It is pushed, pulled, or otherwise improperly moved • If an earthquake occurs and the TV is not properly secured VIZIO LCD HDTV Quick Start Guide Remote Control with Batteries Power Cord Package Contents 3 TV on Stand - Vizio E422VLE | User Manual - Page 11
the base by loosening and removing the screws. 4. Attach your TV and wall mount to the wall, carefully following the instructions that came with your mount. Use only with a UL-listed wall mount bracket rated for the weight/load of this TV. See Appendix A - Specifications for the weight of this TV - Vizio E422VLE | User Manual - Page 12
Controls and Connections REAR PANEL Ethernet - Connect ethernet cable from home network. Coaxial - Connect coaxial cable from cable, satellite, or antenna. 2 Optical Audio Out - Connect optical/SPDIF audio device, such as home audio receiver. Stereo Audio Out - Connect 3.5mm audio device, such as - Vizio E422VLE | User Manual - Page 13
2 SIDE PANEL POWER - Turn TV off or on. MENU - Open the on-screen menu. CHANNEL UP/DOWN - Change the channel. VOLUME UP/DOWN - Increase or decrease volume level INPUT - Change input source. USB - Connect USB thumb drive for photo or music playback. HDMI Side - Connect HDMI device. Side Panel 6 - Vizio E422VLE | User Manual - Page 14
2 FRONT PANEL REMOTE SENSOR When using the remote, aim it directly at this sensor. Front Panel 7 - Vizio E422VLE | User Manual - Page 15
2 REMOTE CONTROL APP LAUNCHER Quickly launch the pictured app. INPUT Change the currently-displayed input. A/V CONTROLS Control USB media player. CLOSED CAPTIONS Open the closed caption menu. EXIT Close the on-screen menu. OK Select the highlighted menu option. BACK Go to the - Vizio E422VLE | User Manual - Page 16
Batteries 1. Remove the battery cover. 2. Insert two batteries into the remote control. Make sure that the (+) and (-) symbols on the batteries match cause a fire or result in injury. • Dispose of old or dead batteries in accordance with local hazardous waste regulations. • Keep batteries away - Vizio E422VLE | User Manual - Page 17
(not included) to the TV and the device. 4. Turn the TV and your device on. Set the TV's input to match the connection you used (HDMI-1, HDM1-2, etc). DVD/Blu-ray Player Game Console Cable/Satellite Box 3 HDMI CABLE BEST BETTER • DIGITAL • HD VIDEO (1080p)* • HD AUDIO COMPONENT CABLE • ANALOG - Vizio E422VLE | User Manual - Page 18
a 3.5mm cable (not included) to your PC and the PC Audio In port on the back of the TV. This cable transmits audio. 3. Set your PC's resolution to match the resolution of your TV. See Appendix B - Specifications. Personal Computer 3.5mm Cable (For Audio) RGB Cable (For Video) CONNECTING A PC 11 - Vizio E422VLE | User Manual - Page 19
port that matches an available port on the TV (Optical, 3.5mm, etc). 2. Turn the TV and your audio device off. 3. Connect the appropriate cable (not included) to the TV and the device. 4. Turn the TV and your device on. VIZIO Sound Bar Home Audio Receiver BETTER Optical/SPDIF Cable GOOD 3.5mm - Vizio E422VLE | User Manual - Page 20
TO YOUR NETWORK Your TV is internet-ready. It can be connected to your home network with a Wired or Wireless connection. Connecting to a Wired Network (Best) 1. Connect an ethernet cable to your router and to the ethernet port on the back of the TV. See below. 2. Use the Guided Network Setup to - Vizio E422VLE | User Manual - Page 21
the remote. The TV powers on and the Setup App starts. 4. Select the name of your wireless network from the list of available networks and press OK. Enter the network key using the on-screen keyboard, then highlight Connect and press OK. 5. Enter your First Name, Last Name, Phone Number, ZIP Code - Vizio E422VLE | User Manual - Page 22
• Activate the sleep timer • Adjust the picture settings • Adjust the audio settings • Change network settings • Change TV settings • Access the help menu 5 NAVIGATING THE ON-SCREEN MENU To open the on-screen menu, press the MENU/OK button on the remote. Use the Arrow buttons to highlight - Vizio E422VLE | User Manual - Page 23
on the remote to highlight the Settings icon and press OK. The TV Settings menu is displayed. 3. Use the Up/Down Arrow buttons on the remote to highlight aspect ratio picture to the edges of the screen. Since the picture is being stretched, the display image may appear distorted. If the program is - Vizio E422VLE | User Manual - Page 24
Down Arrow buttons on the remote to highlight the setting you wish to change, then use the Left/ Right Arrow buttons to change the setting: • Caption Style - Choose Auto to keep default settings or Custom to manually change each setting. • Text Size - Adjust the size of the text. • Color - Change - Vizio E422VLE | User Manual - Page 25
Press OK, then press EXIT. Setting the Auto Power Off Feature To help save energy, your TV is set by default to turn off after 10 minutes if no signal is being displayed on the screen. This feature can be deactivated. 18 ADJUSTING THE PICTURE SETTINGS Your TV display can be adjusted to suit your - Vizio E422VLE | User Manual - Page 26
) content; however, it will not produce detail that does not otherwise exist. 19 Adjusting the Advanced Picture Settings To adjust the advanced picture settings: 1. From the Picture Settings menu, use the Arrow buttons on the remote to highlight More, then press OK. 2. Use the Arrow buttons on the - Vizio E422VLE | User Manual - Page 27
or Extend. • Film Mode - Optimizes the picture for watching film. Select Auto or Off. • Backlight Control - Select Off, DCR (Dynamic Contrast Ratio best picture. Select Off, Low, Medium, or High. 4. When you have finished adjusting the Advanced Picture Settings, press the EXIT button on the remote - Vizio E422VLE | User Manual - Page 28
an image from the HDMI or RGB input, the size and position of the display image can be adjusted. To adjust the picture size and position: 1. Ensure the input is set to HDMI or RGB. 2. From the Picture Settings menu, use the Arrow buttons on the remote to highlight More, then press OK. 3. Use the - Vizio E422VLE | User Manual - Page 29
the synchronization between the display image and the accompanying audio track. • TV Speakers - Turns the built-in speakers on or off. • Advanced Audio - See Adjusting the Advanced Audio Settings on page 23. • Equalizer Settings - Adjusts the boost or attenuation of different frequencies. (This - Vizio E422VLE | User Manual - Page 30
audio system. Select Variable to control the external speakers' volume from the TV's volume controls, or select Fixed to control the external speakers' volume from your home theater system controls. 3. When you have finished adjusting the advanced audio settings, press the EXIT button on the remote - Vizio E422VLE | User Manual - Page 31
to RESET Audio Settings to the factory defaults?" 4. Highlight Yes and press OK. 5. Press the EXIT button on the remote. USING THE NETWORK CONNECTION MENU Your TV is internet-ready, featuring both an ethernet port and built-in high-speed wireless-N. Connecting to a Wireless Network To connect - Vizio E422VLE | User Manual - Page 32
and press OK. 6. Press the EXIT button on the remote. Changing the Advanced Network Settings Advanced users can fine-tune the network settings using the Manual Setup feature. To change advanced network settings: 1. From the Network Connection menu, highlight Manual Setup and press OK. The Change - Vizio E422VLE | User Manual - Page 33
on the remote. CHANGING THE TV SETTINGS Using the settings menu, you can: • Change the input source • Set up the TV tuner • Name the TV inputs • Set up parental controls • Change the on-screen menu language • Set the time • Adjust the CEC settings • Adjust the VIZIO logo settings Changing - Vizio E422VLE | User Manual - Page 34
, such as an external antenna or cable TV connection, you must set the tuner mode. 1. Press the MENU button on the remote. The on-screen menu is displayed. 2. Use the Arrow buttons on the remote to highlight the Settings icon and press OK. The Settings menu is displayed. 3. Highlight Tuner and - Vizio E422VLE | User Manual - Page 35
. See Using the Parental Controls on page 29. To remove a channel: 1. From the Tuner Settings menu, highlight Skip Channel. The Skip Channel menu is displayed. 2. For each channel you wish to remove, use the Up/Down Arrow buttons on the remote to highlight the channel and press OK. An X appears - Vizio E422VLE | User Manual - Page 36
channels or programs without a password. Accessing the Parental Controls Menu To access the Parental Controls menu: 1. Press the MENU button on the remote. The on-screen menu is displayed. 2. Use the Arrow buttons on the remote to highlight the Settings icon and press OK. The TV Settings menu is - Vizio E422VLE | User Manual - Page 37
block content based on its rating. For a list of content ratings and their definitions, visit www.tvguidelines.org. To block or unblock content by its rating: 1. From the Parental Controls menu, highlight the content type you want to adjust and press OK: USA - TV - USA television program broadcasts - Vizio E422VLE | User Manual - Page 38
down your new parental control passcode and save it in a secure location. 5. Press the EXIT button on the remote. Resetting the Content Locks To reset the content locks to the factory-default settings: 1. From the Parental Controls menu, highlight RESET LOCKS and press OK. The TV displays, "Are - Vizio E422VLE | User Manual - Page 39
the EXIT button on the remote. Setting the Time Zone To ensure the correct time is displayed when you press the INFO button, set the TV's time zone: To have the TV display the correct time, you must be connected to the internet via an Ethernet cable or a wireless network. 1. Press the MENU button - Vizio E422VLE | User Manual - Page 40
System Audio Control - When system audio control is on, you can control your device's audio using the TV's remote control. Device Discovery - Use this function to determine if your device is connected and supports CEC. Turning the VIZIO Logo On or Off The VIZIO logo on the front of your TV is set to - Vizio E422VLE | User Manual - Page 41
scroll through the system information. 5. When you are finished reviewing the system information, press the EXIT button on the remote. Resetting the TV Settings To reset the TV's picture and audio settings: 1. Press the MENU button on the remote. The on-screen menu is displayed. 2. Use the Arrow - Vizio E422VLE | User Manual - Page 42
Wait for the TV to turn off. The TV will turn back on shortly afterward and the Setup App will begin. Using Guided Setup The TV's Setup App can be used to easily set up the TV tuner or to connect the TV with your network. To access guided setup: 1. Press the MENU button on the remote. The on-screen - Vizio E422VLE | User Manual - Page 43
The Info Window can be displayed by pressing the INFO or GUIDE button on the remote: • Press the INFO or GUIDE button one time to display channel and input information. • Press the INFO or GUIDE button two times to display the program title and closed captioning information. • Press the INFO or - Vizio E422VLE | User Manual - Page 44
The Media App launches. 3. Highlight your USB device in the list and press OK. USB PORT Connecting a USB Thumb Drive to the TV 1. Turn the TV off. Connect your USB thumb drive to the USB port on the side of the TV. 2. Press the Power/Standby button on the remote or touch the Power control on the - Vizio E422VLE | User Manual - Page 45
Sources Displays connected USB devices. To change source, highlight it and press OK. Current Folder Playback Controls Use to control audio playback. Highlight using the Arrow and OK buttons on the remote. View All or View Folders Page Information If your USB thumb drive has more files than can be - Vizio E422VLE | User Manual - Page 46
using the Arrow and OK buttons on the remote. Connected Sources Displays connected USB devices. To change source, highlight it and press OK. Current Folder Start Fullscreen Slideshow Sort by Name or Date View Thumbnails/List View Folder Settings Toggle Music/Photos Photo Infomation Displays name - Vizio E422VLE | User Manual - Page 47
Once created, the snippet is available from the App Dock by highlighting the App and pressing Up/Down Arrow. • Blue - Change the size of the main display window when an App is open in the sidebar. • Red - Exit from an open App or to close the App Dock. • Green - View settings for an open App. 40 - Vizio E422VLE | User Manual - Page 48
set of Apps and App settings are saved. Creating an Owner PIN Creating an owner PIN allows you to restrict access to the Administrative Controls menu in the Profile App. You can also restrict other profiles from installing new Apps. To create an owner PIN: 1. Press the V Button on the remote - Vizio E422VLE | User Manual - Page 49
. Creating a New User Profile To create a new user profile: 1. Press the V Button on the remote. 2. Highlight the Profile App by scrolling left to prevent the user of this new profile from installing new Apps, turn Limit Profile to On. (You need an Owner PIN. Enter it after turning Limit Profile to - Vizio E422VLE | User Manual - Page 50
will be lost! To restore the VIA Dock to the factory default settings: 1. Press the V Button on the remote. 2. Highlight the Profile App by scrolling left and right using the Left/Right Arrow buttons on the remote. (The highlighted App is in the lower left corner of the screen.) 3. Select the - Vizio E422VLE | User Manual - Page 51
Troubleshooting & Technical Support A LET US HELP! YOUR PRODUCT INCLUDES FREE LIFETIME TECH SUPPORT The VIZIO support team is highly trained and is based in the United States. We can help with: DO YOU HAVE QUESTIONS? • New Product Setup • Connecting Your Devices • Technical Problems • And More - Vizio E422VLE | User Manual - Page 52
differ; see your device's user manual for details. • Adjust Brightness, Contrast, or Backlight. See Resetting the Picture Settings on page 21 • Press the INPUT button on the remote to select a different input source. There is no sound. • Press Volume Up on the remote control. • Press the MUTE - Vizio E422VLE | User Manual - Page 53
. • If you are in RGB mode (computer), ensure that H-Size and V-Position in the on-screen menu are set correctly. • If you are using TV, AV1, AV2, or Component with 480i input, press the WIDE button on the remote to change the screen mode. The TV has pixels (dots) that are always dark or always - Vizio E422VLE | User Manual - Page 54
Specifications E422VLE Screen Size: Viewable Area: Dimensions w/ Stand: w/o Stand: Weight w/ Stand: w/o Stand: TV Type: Refresh Rate: Maximum Resolution: Colors: Pixel Pitch: Smooth Motion: Dynamic Contrast Ratio: Response Time: Brightness: Viewing Angle: HDMI Inputs: Component Video Inputs: - Vizio E422VLE | User Manual - Page 55
: Wireless: Audio Outputs: OSD Language: Ambient Light Sensor: Remote Control Model: Certifications: Compliance: Voltage Range: Power Consumption: Standby Power: Zero Bright Pixel Guarantee: 1 802.11n 3.5mm Stereo Optical Digital English, Spanish, French Yes XRT110 CSA, CSA-US, FCC Class B, HDMI - Vizio E422VLE | User Manual - Page 56
material or packaging that affords an equal degree of protection. VIZIO Technical Support will provide instructions for packing and shipping the covered Product to the VIZIO service center. Limitations and Exclusions VIZIO's one-year limited warranty only covers defects in materials and workmanship - Vizio E422VLE | User Manual - Page 57
use an AC/DC power adapter that is properly grounded. Use the AC cords listed below for each area. Open Source Software Notice Your VIA device may contain GPL executables and LGPL libraries that are subject to the PL2.0/LGPL2.1 License Agreements. VIZIO offers to provide source code to you on CD - Vizio E422VLE | User Manual - Page 58
shall control. VIZIO INTERNET APPLICATIONS SOFTWARE LICENSE AGREEMENT THE FOLLOWING AGREEMENT EXPLAINS HOW YOU MAY USE THE VIZIO INTERNET APPLICATIONS ("VIA") TO ACCESS THIRD PARTY INTERNET PRODUCT OFFERINGS AND SERVICES ("VIA SERVICES") AND THE VIZIO SOFTWARE INSTALLED ON YOUR VIZIO HD TV. BY - Vizio E422VLE | User Manual - Page 59
gathered periodically to facilitate the provision of software updates, product support and other services to you, including additional or different VIA Services related to the VIZIO Software and to verify compliance with the terms of this License Agreement. VIZIO and its third party providers of VIA - Vizio E422VLE | User Manual - Page 60
THE LIMITED WARRANTY ON MEDIA SET FORTH ABOVE AND TO THE MAXIMUM EXTENT PERMITTED BY APPLICABLE LAW, THE VIZIO SOFTWARE AND VIA SERVICES ARE PROVIDED "AS IS", of missiles, or nuclear, chemical or biological weapons. 14. Controlling Law and Severability. This License Agreement will be governed by and - Vizio E422VLE | User Manual - Page 61
MODELS // E3D320VX // E3D420VX // E3D470VX © 2012 VIZIO INC. ALL RIGHTS RESERVED. 111212ST-A
-
 1
1 -
 2
2 -
 3
3 -
 4
4 -
 5
5 -
 6
6 -
 7
7 -
8
-
9
-
10
-
11
-
12
-
13
-
14
-
15
-
16
-
17
-
18
-
19
-
20
-
21
-
22
-
23
-
24
-
25
-
26
-
27
-
28
-
29
-
30
-
31
-
32
-
33
-
34
-
35
-
36
-
37
-
38
-
39
-
40
-
41
-
42
-
43
-
44
-
45
-
46
-
47
-
48
-
49
-
50
-
51
-
52
-
53
-
54
-
55
-
56
-
57
-
58
-
59
-
60
-
61
 |
 |
USER
GUIDE
INSTALLING YOUR NEW TV
CONTROLS & CONNECTIONS
CONNECTING YOUR DEVICES
USING THE ON-SCREEN MENU
USING THE USB MEDIA PLAYER
USING VIZIO INTERNET APPS
TROUBLESHOOTING & SUPPORT
HELP, SPECS, WARRANTY & LEGAL
MODELS
//
E3D320VX
//
E3D420VX
//
E3D470VX
MODELS
E422VLE
E472VLE
E552VLE