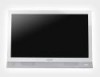
Vizio M260VA-W M260VA-W User Manuals
Vizio M260VA-W Manual
 |
UPC - 845226003509
View all Vizio M260VA-W manuals
Add to My Manuals
Save this manual to your list of manuals |
Vizio M260VA-W manual content summary:
- Vizio M260VA-W | M260VA-W User Manuals - Page 1
User Manual covers the following models: M190VA, M220VA and M260VA in black color and M190VA-W, M220VA-W and M260VA-W in white color; for specific difference between the models please refer to the specification sheets in Chapter 11. Thank you for your support. For maximum benefit of your set, please - Vizio M260VA-W | M260VA-W User Manuals - Page 2
on the top of your HDTV. Doing so could short circuit parts causing a fire or electric shock. Never spill liquids on your HDTV. • Your HDTV should be operated only from the type of power source indicated on the label. If you are not sure of the type of power supplied to your home, consult your - Vizio M260VA-W | M260VA-W User Manuals - Page 3
VIZIO VA SERIES User Manual • Do not overload power strips and extension cords. Overloading can result in fire or electric shock. • The wall socket should be installed near your HDTV and easily accessible. • Only power of the marked voltage can be used for your HDTV. Any other voltage than the - Vizio M260VA-W | M260VA-W User Manuals - Page 4
turn off their analog signal and switch to digitalonly broadcasting. Analog-only TVs should continue to work as before to receive low power, Class A or translator television stations and with cable and satellite TV services, gaming consoles, VCRs, DVD players, and similar products. For additional - Vizio M260VA-W | M260VA-W User Manuals - Page 5
VIZIO VA SERIES User Manual Table of Contents Important Safety Instructions...2 Television Antenna Connection Protection 4 FCC Bulletin for New TV Owners ...4 CHAPTER 1 SETTING UP YOUR HDTV ...8 Attaching the TV Stand...8 Unpack the TV and stand base: ...8 Attach the TV stand base: ...8 Detach the - Vizio M260VA-W | M260VA-W User Manuals - Page 6
AND TROUBLESHOOTING 39 Cleaning the TV and Remote Control ...39 Troubleshooting Guide ...39 Telephone & Technical Support ...42 Compliance...42 FCC Class B Radio Interference Statement 43 CHAPTER 10 SPECIFICATIONS ...44 Preset PC Resolutions ...47 CHAPTER 11 WARRANTY...49 Index ...51 6 www.VIZIO - Vizio M260VA-W | M260VA-W User Manuals - Page 7
M260VA • VIZIO remote control VR10 or VR10W (Depending on your TV color) • 2 AA batteries for the remote control • This user manual • Cleaning cloth • Quick Setup Guide • Registration Card Reminder: These models are either black or white. Caution: Do not apply pressure or throw objects at your HDTV - Vizio M260VA-W | M260VA-W User Manuals - Page 8
VIZIO VA SERIES User Manual Chapter 1 Setting Up Your HDTV • Read this user manual carefully before installing your HDTV. • The power consumption of your HDTV is 25W (M190VA), 28W (M220VA and 44W (M260VA) average. When an extension cord is required, use one with the correct power rating. The cord - Vizio M260VA-W | M260VA-W User Manuals - Page 9
, release it, and then slowly slide the base towards you. VIZIO VA SERIES User Manual Wall Mounting Your HDTV Your HDTV can be mounted on the wall for viewing. If you choose to mount your HDTV on the wall, follow the instructions below. 1. Write down the serial number located on the back of your - Vizio M260VA-W | M260VA-W User Manuals - Page 10
VIZIO VA SERIES User Manual Chapter 2 Basic Controls and Connections Front Panel Remote Control Sensor-Point the remote control directly at this window on the lower right corner of your HDTV for the best response to the remote signal. Side Control Panel 1. LIGHT SENSOR-Activate it through the OSD - Vizio M260VA-W | M260VA-W User Manuals - Page 11
connector for connection to a VIZIO Sound Bar or your Home Theater system. 3. RGB PC- Connect the video and audio from a computer here. Connect a 1/8" mini plug stereo connector from the computer to the TV if you want the sound to come from the HDTV speakers. 4. DTV/TV- Connect to an antenna or - Vizio M260VA-W | M260VA-W User Manuals - Page 12
devices, such as a VCR or game console. Use the white and red connectors to connect the external audio from the same source. 3. USB PORT-Insert a FAT/FAT32 formatted USB drive to view pictures. This port is also used for service. Below picture applies to black color models 12 www.VIZIO.com - Vizio M260VA-W | M260VA-W User Manuals - Page 13
User Manual Chapter 3 VIZIO Remote Point the remote control directly at this sensor for the best response to the remote signal. • Do not place any down. VIZIO Remote Control Precautions • The remote control should be kept dry and away from heat sources. Avoid humidity. • If the TV responds erratically - Vizio M260VA-W | M260VA-W User Manuals - Page 14
VIZIO VA SERIES User Manual Remote Control Buttons INPUT-Press to cycle through the various devices connected to your TV (called Inputs). The inputs cycle in the following sequence: DTV/TV, AV (Composite), COMPONENT, HDMI 1, HDMI 2, RGB and USB. Once you have stepped through the entire sequence, - Vizio M260VA-W | M260VA-W User Manuals - Page 15
. During the setup process you will: • Choose your Menu language • Select the TV to Home Mode for the best picture and most efficient energy usage. • Select the signal input (Antenna or Cable) • Scan your TV channels (unless you have a Cable/Satellite Set-Top Box) Version 2/3/2010 15 www.VIZIO.com - Vizio M260VA-W | M260VA-W User Manuals - Page 16
power button on the remote control. 2. Select the input to which your device is connected that provides TV programming (e.g. TV, HDMI, COMP). Note: You should be able to see a picture. If you do not, make sure that all of your HDTV connections are secure and you have selected the correct video input - Vizio M260VA-W | M260VA-W User Manuals - Page 17
VIZIO VA SERIES User Manual Viewing Digital TV Program Information INFO Button When you press the INFO button, an information header is shown over the picture for a few seconds. Each press of the INFO button will display more information about the program: Press a second time, you will see the - Vizio M260VA-W | M260VA-W User Manuals - Page 18
content is being received, this input delivers the best image quality. The RGB (VGA) port allows you to connect your computer so you can use the TV as your monitor. Better (analog) Component consists of three cables for transmitting video and two cables for transmitting audio: one red and one - Vizio M260VA-W | M260VA-W User Manuals - Page 19
The HDMI input on your HDTV supports High-bandwidth Digital Content Protection (HDCP). HDCP encrypts the transmission between the video source and the digital display for added security and protection. Refer to your Cable/Satellite Set-Top Box user manual for more information about the video output - Vizio M260VA-W | M260VA-W User Manuals - Page 20
User Manual HDMI Connections for Cable or Satellite Boxes with DVI 1. Turn off the power to your HDTV and HDTV Set-Top Box. 2. Using a HDMI-DVI cable, connect the DVI end to your HDTV Set-Top Box and the HDMI end to either HDMI 1 or HDMI 2 input on your HDTV. 3. Using a 1/8" stereo audio - Vizio M260VA-W | M260VA-W User Manuals - Page 21
on your HDTV. 3. Turn on the power to your HDTV. 4. Select TV using the INPUT button on the remote control, or directly by pressing the TV button on the remote control. 5. Perform an Auto Channel scan. See Adjusting Your HDTV/TV Settings for more information. Version 2/3/2010 21 www.VIZIO.com - Vizio M260VA-W | M260VA-W User Manuals - Page 22
to the 1/8" audio input jack on your HDTV. You may need to use a 1/8" Y stereo adapter. 4. Turn on the power to your HDTV and your DVD player. 5. Select HDMI 1 or HDMI 2 using the INPUT button on the remote control, or directly by pressing the HDMI button on the remote control. 22 www.VIZIO.com - Vizio M260VA-W | M260VA-W User Manuals - Page 23
Using Component Video (Better) VIZIO VA SERIES User Manual 1. Turn off the power to your HDTV and DVD player. 2. Connect the component cable (green, blue, and red) from your DVD player to the COMPONENT jacks on your HDTV. 3. Connect the audio cables (white and red) from your DVD player to the - Vizio M260VA-W | M260VA-W User Manuals - Page 24
AUDIO jacks on your HDTV. 4. Turn on the power to your HDTV and VCR or Video Camera. 5. Select AV using the INPUT button on the remote control or side of the TV. Note: Refer to your VCR or Video Camera user manual for more information about the video output requirements of the product. 24 www.VIZIO - Vizio M260VA-W | M260VA-W User Manuals - Page 25
needed to transmit audio from the computer through the TV. 5. Turn on the power to your HDTV and computer. 6. Select RGB using the INPUT button on the remote control or side of your HDTV. Note: Refer to your PC computer user manual for more information about the video output requirements. Version - Vizio M260VA-W | M260VA-W User Manuals - Page 26
menu options may vary depending on your selected input source. Note: Some of the main menu options may have additional submenus, for example, the TV settings submenu for PC Settings. 1. Press the MENU/OK button on the remote control. The HDTV Settings App opens. 2. Use the navigation keys around the - Vizio M260VA-W | M260VA-W User Manuals - Page 27
used, these options could be part of the box settings. Please refer to your cable/satellite settop box user manual for more information. Help Menu Under this menu you find the options to obtain the TV system information and the resetting of the TV settings to factory defaults. CC (Closed Caption - Vizio M260VA-W | M260VA-W User Manuals - Page 28
VIZIO VA SERIES User Manual Chapter 8 Adjusting Your HDTV Settings The following is a more detailed description of the different OSD (OnScreen Display) menu settings and adjustments regarding the options and features which are part of your HDTV. Starting with the default TV Menu and then in sequence - Vizio M260VA-W | M260VA-W User Manuals - Page 29
will allow the navigation buttons to be used to make the changes. PC Settings Select if you are connecting to your PC (computer). This option can only be selected when you are in the RGB input. 1. Auto Sync: The TV will automatically position and tune the display for optimum performance. 2. Horiz - Vizio M260VA-W | M260VA-W User Manuals - Page 30
VIZIO VA SERIES User Manual Timer Menu Select this option to have the HDTV turning off automatically using increments of 30 your folders and photos. 1. List: This option shows your photos in the folder based on their names. 2. Thumbnail: This option displays your photos as thumbnails, making it - Vizio M260VA-W | M260VA-W User Manuals - Page 31
VIZIO VA SERIES User Manual Wide Menu The following table shows the different screen modes and display sizes according to the content being sent to the HDTV. Note: The red lines show the video signal being overscanned. Version 2/3/2010 31 www.VIZIO.com - Vizio M260VA-W | M260VA-W User Manuals - Page 32
VIZIO VA SERIES User Manual The following paragraphs describe in detail the differences of the Aspect Ratio being processed by the TV: Normal Mode The original 4:3 aspect ratio (1.33:1 source) is preserved, so black bars are added to the left and right of the display image. Standard TV broadcasts - Vizio M260VA-W | M260VA-W User Manuals - Page 33
Mono, Stereo and SAP. Digital MTS This option has the choices of English, French and Spanish languages. Reset Audio Mode Use this option when if you do not want to keep any changes made to the audio settings. It will reset the HDTV back to the factory defaults. Version 2/3/2010 33 www.VIZIO.com - Vizio M260VA-W | M260VA-W User Manuals - Page 34
adjusted to your preferences: 1. Brightness: Use this option to adjust the black levels. If the brightness is too low you will not be able to see the detail in darker parts of the picture and if the brightness is too high the picture will look washed out. 2. Contrast: Use this option to adjust the - Vizio M260VA-W | M260VA-W User Manuals - Page 35
Response This feature is mainly used when the signal originates from a game or computer device. Ambient Light Sensor Choose On or Off. When set to On, your HDTV will automatically adjust to light changes in the room. Reset Picture Mode Use this option to return all Picture Settings which have been - Vizio M260VA-W | M260VA-W User Manuals - Page 36
VIZIO VA SERIES User Manual Parental Menu This menu has all the different options to restrict for the default password or PIN, which is 1234. Then the following options will appear: Rating Enable Select from ON or OFF. If set to OFF, you will not be able to set the US TV, US Movie, Canadian English, - Vizio M260VA-W | M260VA-W User Manuals - Page 37
not have a rating. User Control Lock Use this option to restrict the use of the HDTV by locking the mechanical control buttons on the side of the TV. Change PIN (Password) Enter a new, 4-digit password using the number buttons on the remote control. Enter it a second time to confirm you entered it - Vizio M260VA-W | M260VA-W User Manuals - Page 38
. Please refer to the Getting Started section for more information. This option will remove all previously scanned channels. 2. Reset All Settings: Return all Picture and Audio settings to factory default. A screen will come up to confirm your selection or to cancel it. Note: Both choices of System - Vizio M260VA-W | M260VA-W User Manuals - Page 39
VA SERIES User Manual Chapter 9 Maintenance and Troubleshooting Cleaning the TV and Remote Control 1. Remove the power adapter cable from the TV. 2. Use a soft cloth moistened with diluted neutral cleaner to clean the TV and remote control. VIZIO recommends using an HDTV cleaning solution which - Vizio M260VA-W | M260VA-W User Manuals - Page 40
VIZIO VA SERIES User Manual General TV Problems Power is ON but there is no • image on the screen. • • Wrong or abnormal colors • appear Control buttons do not work. • Remote control does not • work There appear to be image • quality issues. • • • You cannot see a picture • • You see a - Vizio M260VA-W | M260VA-W User Manuals - Page 41
VIZIO VA SERIES User Manual General TV Problems You can see a picture but you • cannot hear sound. • • • • The TV has pixels (dots) that • are always dark or colored. You see "noise" or "trash" on • the screen. • You switch to a different input • and the volume changes. You switch to a different - Vizio M260VA-W | M260VA-W User Manuals - Page 42
can often resolve the problem over the phone. For more information on warranty service or repair, after the warranty period, please contact our Support Department at the number below. Customer support and quality service are integral parts of VIZIO's commitment to service excellence. For technical - Vizio M260VA-W | M260VA-W User Manuals - Page 43
VIZIO VA SERIES User Manual FCC Class B Radio Interference Statement NOTE: This equipment has been tested and found to comply with the limits for a Class B digital device, pursuant to Part 15 of the FCC Rules. These limits are designed to provide reasonable protection against harmful interference - Vizio M260VA-W | M260VA-W User Manuals - Page 44
Ratio Response Time Viewing Angle Inputs 1366 x 768 pixels 0.300mm(H) x 0.300mm(V) HDTV (720p) 16.7 Million 250nits 20,000 : 1 5ms 170° x 160° (horizontal/vertical) 1x RF 1x Composite Video and stereo audio 1x Component and stereo audio 2x HDMI 1x RGB 1x USB Port (photo/service) Outputs Features - Vizio M260VA-W | M260VA-W User Manuals - Page 45
audio 1x Component and stereo audio 2x HDMI 1x RGB 1x USB Port (photo/service) 1x SPDIF Optical Digital Audio, 1x headphone Noise Reduction, CC, V-Chip 2.0. Supports 1080P (Full HDTV), 1080i (HDTV), 720P (HDTV), 480P (EDTV) and 480i (SDTV) video signals. 1080P FHDTV, HDMI V.1.3. USB supports - Vizio M260VA-W | M260VA-W User Manuals - Page 46
Specifications 26.01" Diagonal, 16:9 Aspect Ratio 1366 x 768 pixels 0.421mm(H) x 0.421mm(V) HDTV (720p) 16.7 Million 400nits 20,000 : 1 8ms 178° x 178° (horizontal/vertical) 1x RF 1x Composite Video and stereo audio 1x Component and stereo audio 2x HDMI 1x RGB 1x USB Port (photo/service - Vizio M260VA-W | M260VA-W User Manuals - Page 47
VIZIO VA SERIES User Manual Preset PC Resolutions M190VA/M190VA-W Preset PC Resolutions If connecting to a PC through the RGB PC input, set the TV timing mode to VESA 1360x768 at 60Hz for better picture quality (refer to the graphic card's user guide for questions on how to set this timing mode). - Vizio M260VA-W | M260VA-W User Manuals - Page 48
VIZIO VA SERIES User Manual M260VA/M260VA-W Preset PC Resolutions If connecting to a PC through the RGB PC input, set the TV timing mode to VESA 1360x768 at 60Hz for better picture quality (refer to the graphic card's user guide for questions on how to set this timing mode). See the table below for - Vizio M260VA-W | M260VA-W User Manuals - Page 49
and shipping material or a replacement box and material provided by VIZIO. VIZIO technical support will provide instructions for packing and shipping the unit to the VIZIO service center. Limitations and Exclusions VIZIO's one-year limited warranty only covers defects in materials and workmanship - Vizio M260VA-W | M260VA-W User Manuals - Page 50
SET FORTH ABOVE. VIZIO'S TOTAL LIABILITY FOR ANY AND ALL LOSSES AND DAMAGES RESULTING FROM ANY CAUSE WHATSOEVER SHALL IN NO EVENT EXCEED THE PURCHASE PRICE OF THE DISPLAY. VIZIO EXCLUSIONS MAY NOT APPLY TO YOU. THIS WARRANTY GIVES YOU SPECIFIC LEGAL RIGHTS, AND YOU MAY ALSO HAVE OTHER RIGHTS, WHICH - Vizio M260VA-W | M260VA-W User Manuals - Page 51
13 RGB 18 Safety Instructions 2 Satellite Box Connecting 19 Setting up 8 Specifications 44 S-Video 18 Technical Support 42 Troubleshooting 39 TV Menu 26 TV Settings App 26 Input Menu 26 Timer Menu 26, 30 Wide Menu 26 TV Settings Menu Input Source Menu 28 TV Stand Attaching 8 Wall
-
 1
1 -
 2
2 -
 3
3 -
 4
4 -
 5
5 -
 6
6 -
 7
7 -
8
-
9
-
10
-
11
-
12
-
13
-
14
-
15
-
16
-
17
-
18
-
19
-
20
-
21
-
22
-
23
-
24
-
25
-
26
-
27
-
28
-
29
-
30
-
31
-
32
-
33
-
34
-
35
-
36
-
37
-
38
-
39
-
40
-
41
-
42
-
43
-
44
-
45
-
46
-
47
-
48
-
49
-
50
-
51
 |
 |
VIZIO VA SERIES User Manual
Version 2/3/2010
1
www.VIZIO.com
Dear VIZIO Customer,
Congratulations on your new VIZIO High Definition LCD Television purchase. This User Manual
covers the following models: M190VA, M220VA and M260VA in black color and M190VA-W,
M220VA-W and M260VA-W in white color; for specific difference between the models please refer to
the specification sheets in Chapter 11. Thank you for your support.
For maximum benefit of your set,
please read these instructions before making any adjustments, and retain them for future reference.
We hope you will experience many years of enjoyment from your new VIZIO HDTV High Definition
Television.
For assistance, please call
877-MYVIZIO
(877-698-4946) or e-mail us at www.VIZIO.com.
To purchase or inquire about accessories and installation services for your VIZIO HDTV, please visit
our website at
www.VIZIO.com
or call toll free at
(888) 849-4623.
We recommend you register your VIZIO HDTV either at our website
www.VIZIO.com
or fill out and
mail your registration card.
For peace of mind and to protect your investment beyond the standard
warranty, VIZIO offers on-site extended warranty service plans. These plans give additional coverage
during the standard warranty period. Visit our website or call us to purchase a plan.
Write down the serial number located on the back of your HDTV for easy reference when obtaining
warranty support:
Serial #: _____________________
Purchase Date _____________________
VIZIO is a registered trademark of VIZIO, Inc. dba V, Inc.
HDMI logo and “High Definition Multimedia Interface” are registered trademarks of HDMI Licensing LLC.
Manufactured under license from Dolby Laboratories.
Dolby and the double-D symbol are trademarks of Dolby Laboratories.
and
are trademarks of SRS Labs, Inc.
TruSurround HD and TruVolume technologies are incorporated under license from SRS Labs, Inc.
This product qualifies for ENERGY STAR in the “factory default (Home Use)” setting and this is the setting in which
power savings will be achieved. Changing the factory default picture setting or enabling other features will increase
power consumption that could exceed the limits necessary to qualify for Energy Star rating.
THE TRADEMARKS SHOWN HEREIN ARE THE PROPERTY OF THEIR RESPECTIVE OWNERS; IMAGES
USED ARE FOR ILLUSTRATION PURPOSES ONLY. BRAVO, VIZIO AND THE V LOGO AND WHERE VISION
MEETS VALUE AND OTHER VIZIO TRADEMARKS ARE THE INTELLECTUAL PROPERTY OF VIZIO INC.
PRODUCT
SPECIFICATIONS ARE SUBJECT TO CHANGE WITHOUT NOTICE OR OBLIGATION. © 2008 VIZIO INC. ALL RIGHTS
RESERVED.