Vizio M75-C1 User Manual English
Vizio M75-C1 Manual
 |
View all Vizio M75-C1 manuals
Add to My Manuals
Save this manual to your list of manuals |
Vizio M75-C1 manual content summary:
- Vizio M75-C1 | User Manual English - Page 1
VIZIO USER MANUAL Model M43-C1, M49-C1, M50-C1, M65-C1, & M75-C1 - Vizio M75-C1 | User Manual English - Page 2
service plan, visit www.VIZIO.com. WHEN READING THIS MANUAL When you see this symbol, please read the accompanying important warning or notice. It is intended to alert you to the presence of important operating instructions electrician for replacement of the could short circuit parts causing a fire - Vizio M75-C1 | User Manual English - Page 3
installations. • The power cord must be replaced when using different voltage than the voltage specified mains plug or appliance coupler is used as the disconnect device, the disconnect device shall remain readily operable. • CAUTION - These servicing instructions are for use by qualified service - Vizio M75-C1 | User Manual English - Page 4
70, provides information with regard to proper grounding of the mast and supporting structure, grounding of the lead-in wire to an antenna discharge unit installation. Ground Clamp Antenna Lead In Wire Electric Service Equipment Antenna Discharge Unit (NEC Section 810-20) Grounding Conductors ( - Vizio M75-C1 | User Manual English - Page 5
For DTS patents, see http://patents.dts.com. Manufactured under license from DTS Licensing Limited. DTS, the Symbol, & DTS and the Symbol together are registered trademarks, and DTS Studio Sound is a trademark of DTS, Inc. © DTS, Inc. All Rights Reserved. Manufactured under license from Dolby - Vizio M75-C1 | User Manual English - Page 6
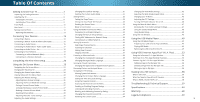
Wired Network (Best 19 Connecting to a Wireless Network 19 Changing the Manual Setup Settings 34 Finding the USB Drive from the TV 49 Using VIZIO Internet Apps Plus® (V.I.A. Plus 53 Using the Edit Settings 26 Accessing the Parental Controls Menu 43 Troubleshooting & Technical Support 59 - Vizio M75-C1 | User Manual English - Page 7
inspect the package contents. Use the images below to ensure nothing is missing or damaged. VIZIO LED UHDTV with Stand Power Cord INPUT LIST EXIT MENU INFO BACK VOL GUIDE CH 3D 1 2 3 4 5 6 7 8 9 ENTER 0 Two-Sided Remote with Keyboard (Batteries Included) TV Stands 2 x Quick Start - Vizio M75-C1 | User Manual English - Page 8
(not included) Installing the TV Stand Your TV includes a stand designed to support the weight of the TV and keep it from falling over. However, the TV can still secured To install the stands: It is recommended that two people take part in the base installation. Place the TV screen-down on a clean - Vizio M75-C1 | User Manual English - Page 9
-C1 M75-C1 Screw Size: M6 M6 M6 M6 M8 Hole Pattern: 200mm (V) x 200mm (H) 200mm (V) x 200mm (H) 200mm (V) x 200mm (H) 400mm (V) x 400mm (H) 400mm (V) x 400mm (H) Weight w/o Stand: 22.05 lbs 30.07 lbs 32.19 lbs 60.72 lbs 102.29 lbs Be sure the mount you choose is capable of supporting - Vizio M75-C1 | User Manual English - Page 10
1 REMOTE SENSOR & POWER INDICATOR When using the remote, aim it directly at this sensor. The power indicator flashes on when the TV turns on, then goes out after several seconds. To keep the power indicator on as long as the TV is on, see Turning the Power Indicator On or Off on page 46. FRONT - Vizio M75-C1 | User Manual English - Page 11
Note: The image shown here is for illustrative purposes only and may be subject to change. The actual number of ports and their locations may vary, depending on the model. 1 USB - Connect USB thumb drive to play photo, music, or video. HDMI - Connect HDMI device. Ethernet - Connect Ethernet cable - Vizio M75-C1 | User Manual English - Page 12
the audio off or on. WIDE Change the display mode. NUMBER PAD Manually enter a channel. ENTER Confirm channel or passcode entered using the Number Navigate the on-screen menu. GUIDE Display the info window. CHANNEL UP/DOWN Change the channel. V BUTTON Open the VIZIO Internet Apps Plus® (V.I.A. Plus - Vizio M75-C1 | User Manual English - Page 13
. 1 3. Insert two AAA batteries into the remote control. Make sure that the (+) and (-) symbols on the batteries match the (+) and (-) symbols inside the battery compartment. 4. Replace the battery cover. 13 - Vizio M75-C1 | User Manual English - Page 14
device on. Set the TV's input to match the connection you used (HDMI-1, HDMI-2, etc.). 1 Maximum Resolution 2 HDCP 2.2 supported on HDMI ports STEREO/HD AUDIO HDMI CABLE (HDMI 1-4)2 BEST • DIGITAL • ULTRA HD VIDEO (4K @ 30 Hz)1 • HD AUDIO HDMI CABLE (HDMI 5)* BEST • DIGITAL • ULTRA HD VIDEO (4K - Vizio M75-C1 | User Manual English - Page 15
Signals COMPONENT VIDEO Y L R COMPONENT VIDEO Coaxial COAXIAL CABLE R L Pr/Cr Pb/Cb Y HDMI HDMI GOOD * High-Speed HDMI cable required for UHD resolutions BETTER BETTER BEST 15 - Vizio M75-C1 | User Manual English - Page 16
purposes only and may be subject to change. The actual number of ports and their locations may vary, depending on the model. 2 VIZIO Sound Bar RCA CABLE GOOD • ANALOG STEREO CONNECTION • 2.0 CHANNEL OPTICAL/SPDIF CABLE BETTER • PCM STREAM • DOLBY DIGITAL 5.1 CHANNEL • DTS 5.1 CHANNEL HDMI - Vizio M75-C1 | User Manual English - Page 17
on page 18. • ARC 2-way Communication (Auto setup) • PCM, DTS, Dolby Digital • 2.0 - 5.1 Scaleable Lossless Digital Audio Connection • Audio and Video Signals HDMI HDMI GOOD BETTER BEST 17 - Vizio M75-C1 | User Manual English - Page 18
CONNECTING AN AUDIO DEVICE - ARC WITHOUT HDMI ARC Without an HDMI ARC setup, your TV will transmit audio signal from the built-in tuner and VIA apps to your home audio receiver through a separate audio connection. RCA (Audio) Your TV HDMI Cable Your Home Audio Receiver HDMI Cable Your Blu-Ray - Vizio M75-C1 | User Manual English - Page 19
with a Wired or Wireless connection. Connecting to a Wired Network (Best) 1. Connect an Ethernet cable to your router and to the Ethernet port on the back of the TV. See below. 2. Use the Guided Network Setup to configure the TV. See Using Guided Setup on page 48. Connecting to a Wireless Network - Vizio M75-C1 | User Manual English - Page 20
Completing The First-Time Setup The first time you turn on the TV, the Setup App will guide you through each of the steps necessary to get your TV ready for use. Before you begin the first-time setup: • Your TV should be - Vizio M75-C1 | User Manual English - Page 21
name of your wireless network from the list of available networks and press OK. Use the Arrow and OK buttons on the remote to review the Terms Of Service and Privacy Policy. When you are finished, highlight I Accept and press OK. 8 Enter the network password using the keyboard on the remote, then - Vizio M75-C1 | User Manual English - Page 22
9 10 Use the Arrow buttons on the remote to highlight your TV source and press OK. If the TV Signal channel scan screen appears, the TV will need to scan for channels, which takes several minutes. Use the arrow buttons on the remote to highlight Begin Scan and press OK. If you have cable TV, - Vizio M75-C1 | User Manual English - Page 23
: • Adjust the Picture settings • Adjust the Audio settings • Setting the Sleep Timers • Adjust the Network settings • Adjust the Channel settings • Set up Closed Captioning • Name Inputs • Adjust TV settings • Access the Guided Setup • Access the User Manual VIZIO TV SETTINGS Picture Audio Timers - Vizio M75-C1 | User Manual English - Page 24
If you are watching widescreen (1.85:1 or 2.35:1) content, black bars will still appear on the top and bottom of the Calibration Wide Zoom Normal Panoramic Exit 2D 3D ABC Input Wide CC Sleep Timer Picture Audio Network Settings Help FULL-SIZED AND CENTERED (OVERLAY) Wide Exit VIZIO - Vizio M75-C1 | User Manual English - Page 25
mode: • Standard mode sets the picture settings to the default settings. • Calibrated mode sets the picture settings to values ideal for watching TV in a brightly-lit room. • Calibrated Dark mode sets the picture settings to values ideal for watching TV in a dark room. VIZIO PICTURE Picture Mode - Vizio M75-C1 | User Manual English - Page 26
setting: • Color Temperature Adjusts the 'warmness' and 'coolness' of the white areas of the picture. Select Cool, Normal, or Computer. • Cool produces a blue-hued picture. VIZIO MORE PICTURE Color Temperature Black that custom picture mode will be set to Calibrated picture mode. (Available after a - Vizio M75-C1 | User Manual English - Page 27
be locked/unlocked with a unique PIN to prevent accidental changes to their settings. To lock all custom picture modes: 1. From the PICTURE MODE to enter a unique 4-digit PIN. 3. HiEgxiht light2SDave an3Dd press OK. VIZIO LOCK PICTURE MODE Create a picture control PIN to prevent changes to all - Vizio M75-C1 | User Manual English - Page 28
Inputs assigned to a deleted custom picture mode become assigned to the Calibrated picture mode. To delete a custom picture mode: 1. From the to exit the menu screens. Resetting Picture Mode Reset the picture mode settings (for a preset picture mode) to the factory default values. To reset - Vizio M75-C1 | User Manual English - Page 29
White Balance, and test patterns allow technicians to manually calibrate the TV. Calibration requires specialized training, an input with precisely set colors, and a specialized light meter. To adjust the HSB color settings: 1. From the COLOR CALIBRATION menu, use the Arrow buttons to highlight - Vizio M75-C1 | User Manual English - Page 30
4 To show or hide the SMPTE Test Pattern: 1. From the Color Tuner menu, use the Arrow buttons to highlight Color Tuner, and then press the Left/Right Arrow buttons until the SMPTE Test Pattern menu is displayed. SMPTE Test Pattern Off To show or hide the Flat Test Pattern: 1. From the Color Tuner - Vizio M75-C1 | User Manual English - Page 31
you wish to adjust, then press Left/ Right Arrow buttons to change the setting: • TV Speakers - Turns the built-in speakers on or off. VIZIO AUDIO TV Speakers Surround Sound Volume Leveling Balance - Lip Sync - Digital Audio Out Analog Audio Out Equalizer Delete Audio Mode On On - Vizio M75-C1 | User Manual English - Page 32
To create, modify, or replace the single custom equalizer setting: 1. Press the MENU button on the remote. . 3. Use the Arrow buttons to highlight Equalizer and press OK. The Audio Mode and equalizer settings screen appears. 4. Use the Left and Right Arrow buttons to select any audio mode as a - Vizio M75-C1 | User Manual English - Page 33
set period of time. 1. Press the MENU button on the remote. The on-screen menu is displayed. 2. Use the Arrow buttons on the remote to highlight Timers and press OK. The TIMERS menu is displayed. VIZIO backlight is turned off, saving energy. You can set the time before the screen saver begins. To - Vizio M75-C1 | User Manual English - Page 34
on the remote. Changing the Manual Setup Settings Advanced users can fine-tune the network settings using the Manual Setup feature. To change advanced network settings: 1. From the NETWORK menu, highlight Manual Setup and VIZIO press OK. The MANUAL SETUP MANUAL SETUP menu is displayed. DHCP - Vizio M75-C1 | User Manual English - Page 35
Using the keyboard on the remote, enter your network's name (SSID), then highlight Connect and press OK. VIZIO ENTER ACCESS POINT NAME Enter your access point name. This is used to connect to an access point with 2D 3D ABC Input Wide CC Sleep Timer Picture Audio Network Settings Help 4 35 - Vizio M75-C1 | User Manual English - Page 36
4 SETTING UP CHANNELS You can use the TV's Channels menu to: • Select a Channel Source • Perform an Auto Channel Scan (Find Channels) • Perform a Partial Channel Search • Manually Add Channels • Select channels to skip • Select Analog MTS modes • Select Digital Languages VIZIO CHANNELS Channel - Vizio M75-C1 | User Manual English - Page 37
channel. 4. When the TV is done scanning for the channel, press the EXIT button on the remote. VIZIO ADD ANALOG CHANNEL Enter Channel Add Channel Skipping Channels After a channel scan is completed, you may find that 3D ABC Input Wide CC Sleep Timer Picture Audio Network Settings Help 4 37 - Vizio M75-C1 | User Manual English - Page 38
or Mono. Press OK. 3. Press the EXIT button on the remote. VIZIO ANALOG AUDIO Stereo SAP Mono Changing the Digital Audio Language Some digital over-the çais . Press OK. 3. WPidreess Ztohome EXINTormbaul ttoPannooranmitche remote. VIZIO DIGITAL LANGUAGE English Español Français Exit 2D 3D ABC - Vizio M75-C1 | User Manual English - Page 39
preference. See the diagram on the next page for an explanation of the parts of the closed caption area. To change the appearance of digital closed captions: highlight the setting you wish to change, then use the Left/Right Arrow buttons to change the Esxeit tting2: D 3D VIZIO DIGITAL STYLE - Vizio M75-C1 | User Manual English - Page 40
color-When text appears, the entire line fills with color at once. In the example below, the closed caption text is green, the background is black, and the window is red. Text Background CLOSED CAPTION TEXT SAMPLE Window CLOSED CAPTIONS SCREEN LAYOUT 40 - Vizio M75-C1 | User Manual English - Page 41
the custom name that you created. 5. When you have finished naming your input, press the EXIT button on the remote. Input Port VIZIO NAME INPUT HDMI-1 DVD DVD_ abc def ghi j k l mn o p q r s t u v wx y z 0 2D 3D ABC Input Wide CC Sleep Timer Picture Audio Network Settings Help 4 41 - Vizio M75-C1 | User Manual English - Page 42
Change your TV Name • Adjust wide mode • Adjust the CEC settings • Adjust when the power indicator is illuminated • Reset the TV settings & set up administrative controls VIZIO SYSTEM System Information Menu Language Time & Local Settings Parental Controls View Mode Wide TV Name CEC Power Indicator - Vizio M75-C1 | User Manual English - Page 43
SYSTEM menu is displayed. 3. Use the Arrow buttons on the remote to highlight Time & Local Settings and press OK. The menu headed by the local date and time is displayed. VIZIO TIME ZONE Hawaii (-10) Alaska (-9) Pacific (-8) Mountain (-7) Arizona (-7) Central (-6) Indiana (-5) Eastern (-5) Atlantic - Vizio M75-C1 | User Manual English - Page 44
it in a secure location. 5. Press the EXIT button on the remote. Resetting the Content Locks To reset the content locks to the factory-default settings: 1. From the PARENTAL CONTROLS menu, highlight Reset Locks and press OK. The TV displays, "Select Reset to restore Parental Controls to factory - Vizio M75-C1 | User Manual English - Page 45
settings: 1. Press the MENU button on the remote. The on-screen menu is displayed. 2. Use the Arrow buttons on the remote to highlight System and press OK. The SYSTEM menu is displayed. VIZIO are watching widescreen (1.85:1 or 2.35:1) content, black bars will still appear on the top and bottom of - Vizio M75-C1 | User Manual English - Page 46
to control HDMI-connected devices with the included remote without any additional programming. Not all HDMI devices support CEC. See your device's user manual for details. To enable, disable, or adjust CEC settings: 1. Press the MENU button on the remote. The on-screen menu is displayed. 2. Use the - Vizio M75-C1 | User Manual English - Page 47
the Setup App will begin. To restore the TV to its factory default settings: 1. Press the MENU button on the remote. The on-screen menu is press OK. The SYSTEM menu is displayed. VIZIO RESET & ADMIN Reset TV to Factory Defaults VIZIO Privacy Policy Smart Interactivity On Store Demo 3. - Vizio M75-C1 | User Manual English - Page 48
Setup and press OK. VIZIO GUIDED SETUP Channel Setup Network Setup 3. Highlight the guided setup you want to use and press OK: • Channel Setup - Set up the TV channel. • Network Setup - Connect the TV to the Internet using your network. 4. Follow the on-screen instructions. When finished, press - Vizio M75-C1 | User Manual English - Page 49
save your files onto a USB thumb drive: • The USB thumb drive must be formatted as FAT32. • Files on the USB thumb drive must end in a supported file extension (.mp3, .jpg, etc.). • The player is not designed to play media from external hard drives, MP3 players, cameras, or smartphones Playing USB - Vizio M75-C1 | User Manual English - Page 50
to return to the previous screen. Progress Bar Displays the duration of the currently-playing song. The blue bar will lengthen as the song progresses. VIZIO Music USB1: MyFlashDrive Fab Apple Dream On January Mix Comp By Oliver 00:04:00 MyFlashDrive\Audio\root\My Music 00:04:46 Current Folder - Vizio M75-C1 | User Manual English - Page 51
the previous screen. Connected Sources Displays connected USB devices. VIZIO Video USB1: MyFlashDrive Current Folder My Videos MyFlashDrive\Video 2012 4 Greatest Trip Ever Date - Duration 00:23:43 00:38:18 00:41:08 00:05:32 Sort by Date or File Name Sort: Date New-Old View: Folders View - Vizio M75-C1 | User Manual English - Page 52
Highlight this button and press OK to return to the previous screen. VIZIO Photo USB1: Back Button Highlight and press OK to return to left column Date or File Name View Thumbnails/Folders root Start Slideshow Sort: Name A-Z View: Thumbnails Adjust Slideshow Settings View Music Files Settings - Vizio M75-C1 | User Manual English - Page 53
Apps Plus® (V.I.A. Plus) VIZIO Internet Apps Plus® (V.I.A. Plus) delivers popular online content to information, and more-all on demand. A high-speed Internet connection is required to receive product updates and to access online content. See Using the Network Connection Menu on page 34 if your TV - Vizio M75-C1 | User Manual English - Page 54
USING THE FULLSCREEN V.I.A. APPS WINDOW The Fullscreen V.I.A. Plus Apps window allows you to add and store Apps. The Apps on the first page are displayed in the Dock and Apps on additional pages can be moved to the Dock. To open the Fullscreen V.I.A. Plus Apps Window: 1. Press the V Button on the - Vizio M75-C1 | User Manual English - Page 55
Finance, Movies and TV, Photos and Video, Sports, Music, Social, Information, Fun and Games, Shopping, and Local TV. • Settings ( ): Displays App software information and development settings. You can also preview Apps without installing them. Simply highlight the App you wish to preview and press - Vizio M75-C1 | User Manual English - Page 56
6 CUSTOMIZING THE V.I.A. PLUS APPS WINDOW You can add, delete, and move apps around on your My Apps tab for a custom look and feel. Adding an App to the My Apps Tab To add an app to your TV: 1. Use the Arrow buttons on the remote to highlight one of the App Store tabs (Featured, Latest, All Apps, - Vizio M75-C1 | User Manual English - Page 57
3. Use the Arrow buttons to move the app to the desired location and press OK to place the app.When you can move the app, it appears as shown below. Note: App location, appearance, and availability subject to change without notice. Cursor showing the location that the app will move to 6 57 - Vizio M75-C1 | User Manual English - Page 58
And at least one of the following: • Netflix® or other streaming service account that offers Ultra HD content • Device with 4K Ultra HD output such as a high-performance PC WHAT IS HDMI 2.0 AND HDCP 2.2? Your M-Series TV supports the latest HDMI standards. This allows next-gen cable and satellite - Vizio M75-C1 | User Manual English - Page 59
Troubleshooting & Technical Support Do You Have Questions? Find Answers At SUPPORT.VIZIO.COM Find help with: • New Product Setup • Connecting Your Devices • Technical Problems • Product Updates • And More Live Chat Support Available You can also contact our award-winning support team at: Phone: (877 - Vizio M75-C1 | User Manual English - Page 60
Why Register? Customized Support Get assistance quickly with your information on-hand. News & Offers Take advantage of the latest news and special offers from VIZIO. Safety & Satisfaction Stay up to date with important product updates and notifications. REGISTER YOUR VIZIO PRODUCT NOW 60 - Vizio M75-C1 | User Manual English - Page 61
Settings on page 25. VIZIO recommends selecting Calibrated. • Check all cables to ensure they are securely attached. The buttons on the remote aren't working. • Ensure you are only pressing one button at a time. • Point the remote directly at the TV when pressing a button. • Replace the best signal. - Vizio M75-C1 | User Manual English - Page 62
may be low. Ensure your antenna is connected securely to the TV and move the antenna around the room or close to a window for the best signal. When I change input source, the display image changes size. • The TV remembers the viewing mode on each input source. If the viewing mode on - Vizio M75-C1 | User Manual English - Page 63
Specifications Screen Size: Viewable Area: Dimensions w/ Stand: w/o Stand: Weight w/ Stand: w/o Stand: LCD Backlight: Active LED : Composite Inputs: RF Antenna Input: USB Port: Ethernet: Audio Outputs: OSD Language: Ambient Light Sensor: M43-C1 43" 42.51" 37.93" x 23.97" x 8.27'' 37.93" x 21.82" x - Vizio M75-C1 | User Manual English - Page 64
Screen Size: Viewable Area: Dimensions w/ Stand: w/o Stand: Weight w/ Stand: w/o Stand: LCD Backlight: Active LED Zones Inputs: Composite Inputs: RF Antenna Input: USB Port: Ethernet: Audio Outputs: OSD Language: Ambient Light Sensor: M49-C1 49" 48.50" 43.12" x 27.11" x 9.94'' 43.12" x 24.74" x 2.46 - Vizio M75-C1 | User Manual English - Page 65
Screen Size: Viewable Area: Dimensions w/ Stand: w/o Stand: Weight w/ Stand: w/o Stand: LCD Backlight: Active LED Zones: Refresh RF Antenna Input: USB Port: Ethernet: Audio Outputs: OSD Language: Ambient Light Sensor: M50-C1 50" 49.50" 44.18" x 27.75" x 10.04'' 43.12" x 25.40" x 2.44" 33.07 lbs 32 - Vizio M75-C1 | User Manual English - Page 66
Screen Size: Viewable Area: Dimensions w/ Stand: w/o Stand: Weight w/ Stand: w/o Stand: LCD Backlight: Active LED Zones: Inputs: Composite Inputs: RF Antenna Input: USB Port: Ethernet: Audio Outputs: OSD Language: Ambient Light Sensor: M65-C1 65" 64.50" 57.39" x 35.37" x 11.16'' 57.39" x 32.87" x 2. - Vizio M75-C1 | User Manual English - Page 67
Screen Size: Viewable Area: Dimensions w/ Stand: w/o Stand: Weight w/ Stand: w/o Stand: LCD Backlight: Active LED Inputs: Composite Inputs: RF Antenna Input: USB Port: Ethernet: Audio Outputs: OSD Language: Ambient Light Sensor: M75-C1 75" 74.50" 66.23" x 40.52" x 13.58'' 66.23" x 37.84" x 2.50 - Vizio M75-C1 | User Manual English - Page 68
the warranty period, VIZIO will either repair or replace the Product at its sole option and discretion. To obtain warranty service, contact VIZIO Technical Support via e-mail: [email protected] or via phone at 877 MY VIZIO (877.698.4946) from 5:00AM to 9:00PM Monday through Friday and 8:00AM to - Vizio M75-C1 | User Manual English - Page 69
instructions device complies with Part 15 of the area. USA: UL Canada: CSA Germany: Services. Furthermore, we do not review, control, or endorse the content, products or services of VIA Services or their data servers. Your rights to use the widget links to access VIA Services is governed by the VIZIO - Vizio M75-C1 | User Manual English - Page 70
gathered periodically to facilitate the provision of software updates, product support and other services to you, including additional or different VIA Services related to the VIZIO Software and to verify compliance with the terms of this License Agreement. VIZIO and its third party providers of VIA - Vizio M75-C1 | User Manual English - Page 71
THE LIMITED WARRANTY ON MEDIA SET FORTH ABOVE AND TO THE MAXIMUM EXTENT PERMITTED BY APPLICABLE LAW, THE VIZIO SOFTWARE AND VIA SERVICES ARE PROVIDED "AS IS", governed by the United Nations Convention on Contracts for the International Sale of Goods, the application of which is expressly excluded. - Vizio M75-C1 | User Manual English - Page 72
© 2015 VIZIO INC. ALL RIGHTS RESERVED. 150528OC-US-A
-
 1
1 -
 2
2 -
 3
3 -
 4
4 -
 5
5 -
 6
6 -
 7
7 -
8
-
9
-
10
-
11
-
12
-
13
-
14
-
15
-
16
-
17
-
18
-
19
-
20
-
21
-
22
-
23
-
24
-
25
-
26
-
27
-
28
-
29
-
30
-
31
-
32
-
33
-
34
-
35
-
36
-
37
-
38
-
39
-
40
-
41
-
42
-
43
-
44
-
45
-
46
-
47
-
48
-
49
-
50
-
51
-
52
-
53
-
54
-
55
-
56
-
57
-
58
-
59
-
60
-
61
-
62
-
63
-
64
-
65
-
66
-
67
-
68
-
69
-
70
-
71
-
72
 |
 |
Model M43-C1, M49-C1, M50-C1, M65-C1, & M75-C1
USER MANUAL
VIZIO